
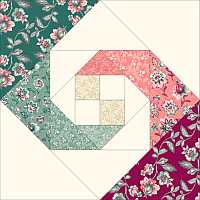
The snail trail quilt block swirls around a central four-patch to make a square-in-a-square design. Here is the tutorial on how to create the Snail Trail and the QST blocks that make up the Swing Your Partner pattern. I’ve included information on how to square up a block, too, and what to do when your block isn’t square.
The Snail Trail quilt block is a spiral block that starts small and continues growing as you add more parts to the block. It’s a little like a log cabin block in that respect, but you are using triangles. In the Swing Your Partner pattern, the two sides of the block have different colors. The alternate block is designed to swing the colors back in the other direction.
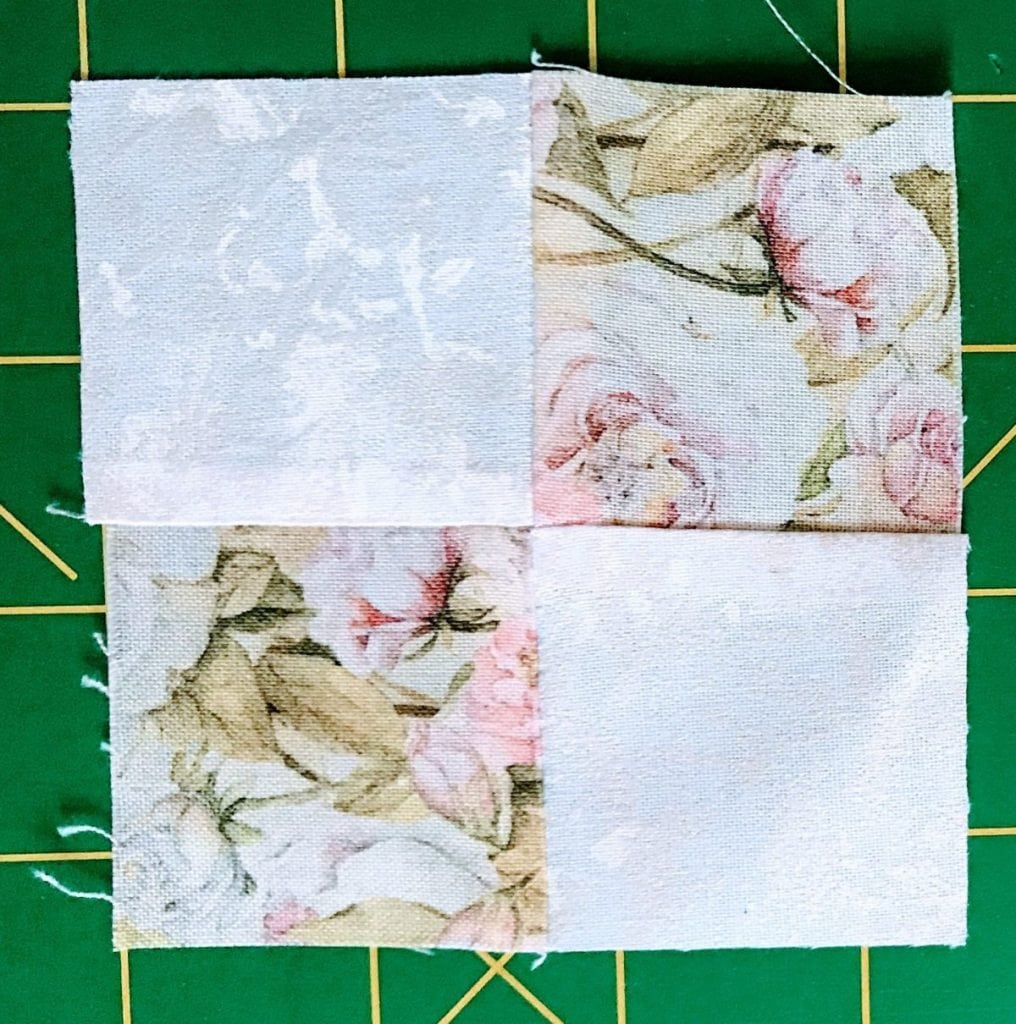
Making the Center
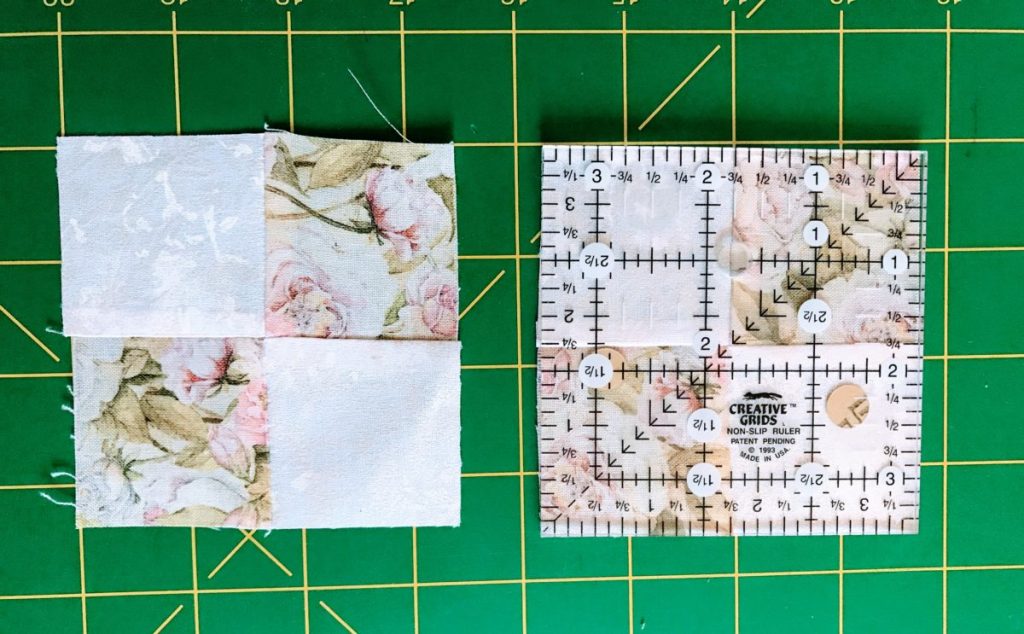
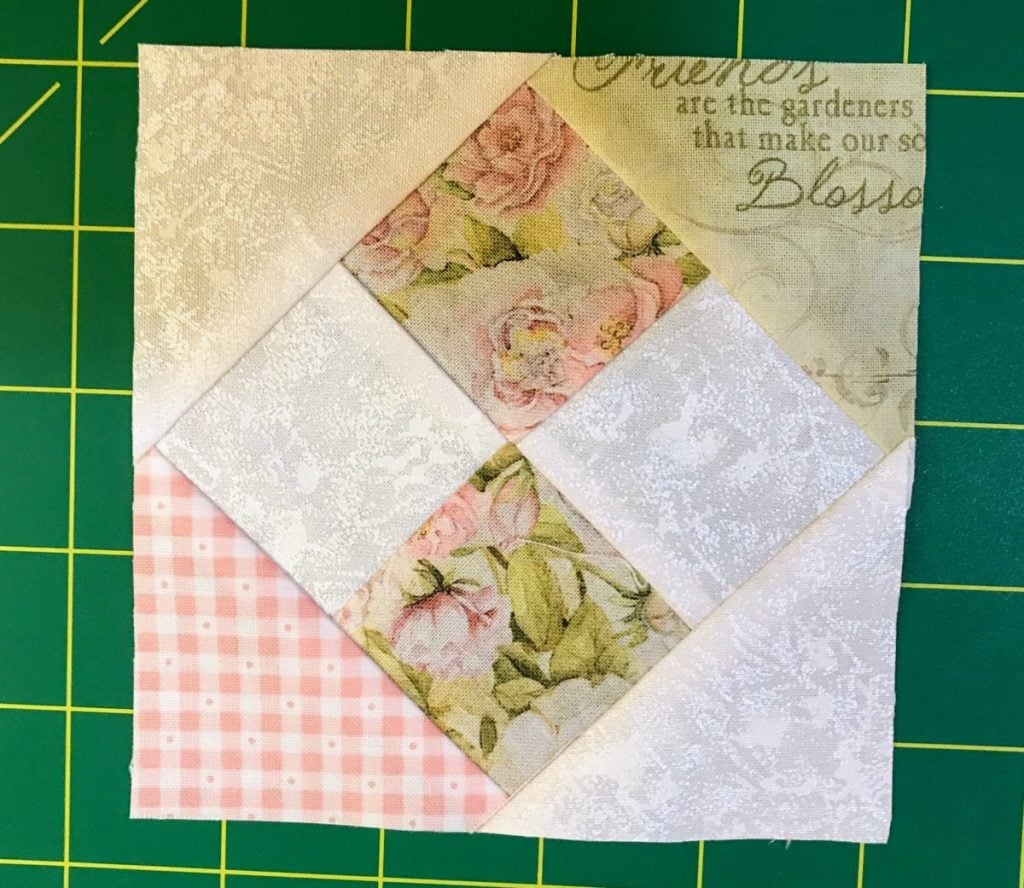
I started the block with a four patch that included both the background and a fabric that had the color for one side (pink) and the color for the other (green.)
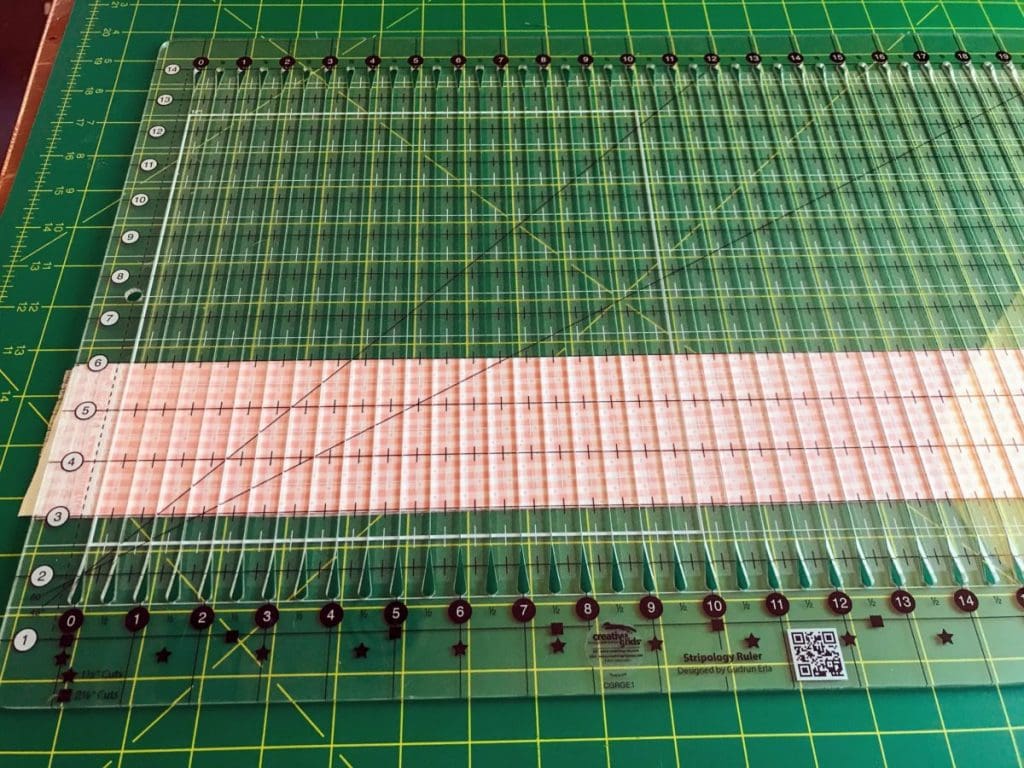
I like the stripology ruler for cutting strips and cross-cutting them into blocks. It’s a fairly large ruler so you can get quite a bit accomplished at one time. If you have carpal tunnel, or problems cutting, you might want to consider a Martelli cutter . It is shaped in such a way that you put your finger over the round part of the cutter, decreasing stress on your wrist.
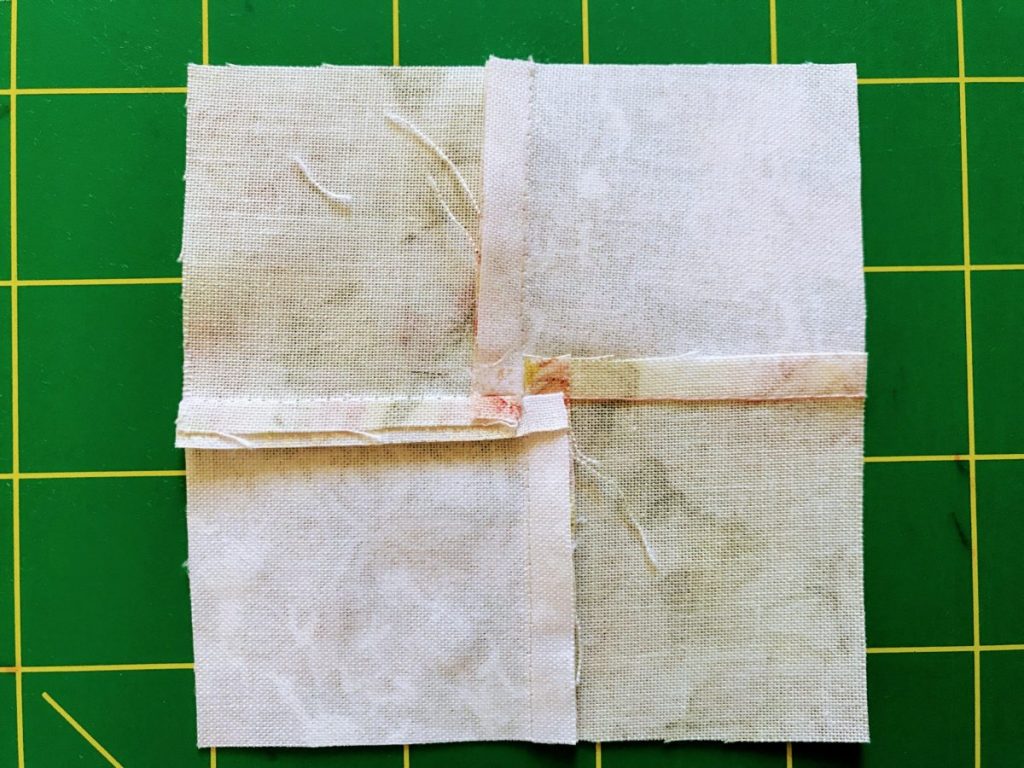
After you have made your four patch blocks, take the time to twirl the seam in the back. Unpick one or two stitches in the center and push the seams around in a circle. It will help reduce the bulk created when two seams overlap each other. Press.
You may need to square these up, but probably not. Use a small square to double-check a few.
After you have made your snail trail center, you will need to make the triangles for the first round of the snail trail quilt block.
The First Round
Centering the triangle on the four-patch, sew a pink to one side of the block and a green to the other AS SHOWN. It is very, very easy to put the triangles on the wrong side. If you do them all at once, you will cut down on errors. In the picture below, I have pinched the center of the triangle so I can line it up to the center of the four patch.
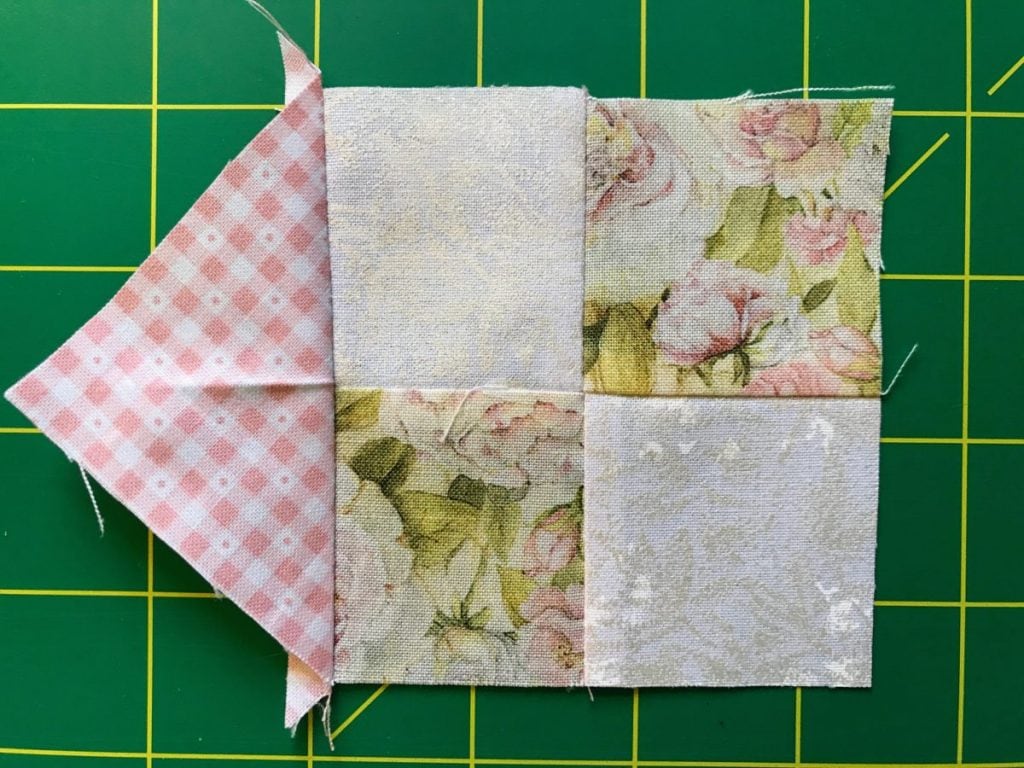
Tip: Sew from the back so you can make sure your seam goes through the point of the four patch. This will keep your points sharp on the right side.
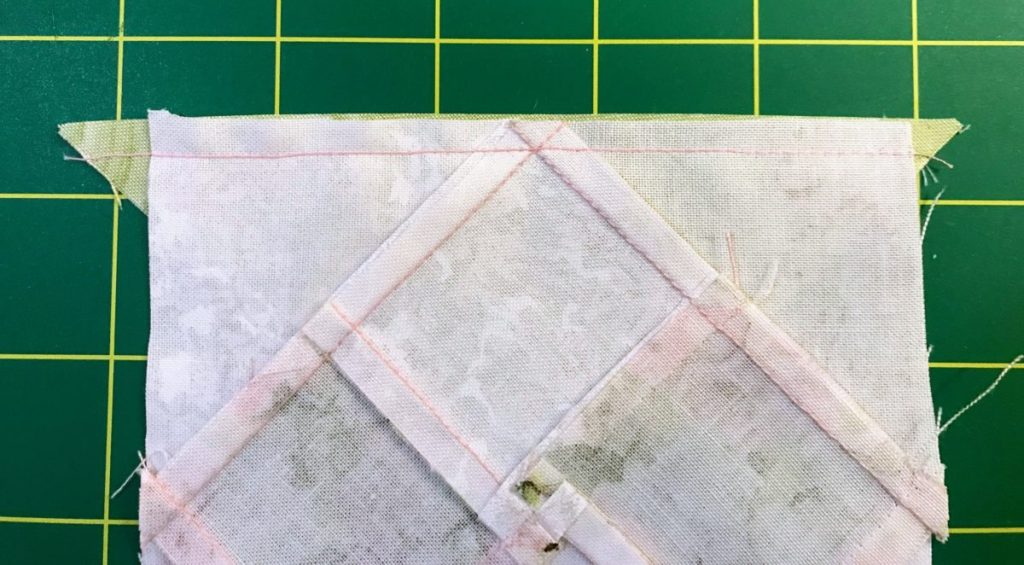
Press and square up your block. Here is the first-row block after you have squared it up.
The Second Round
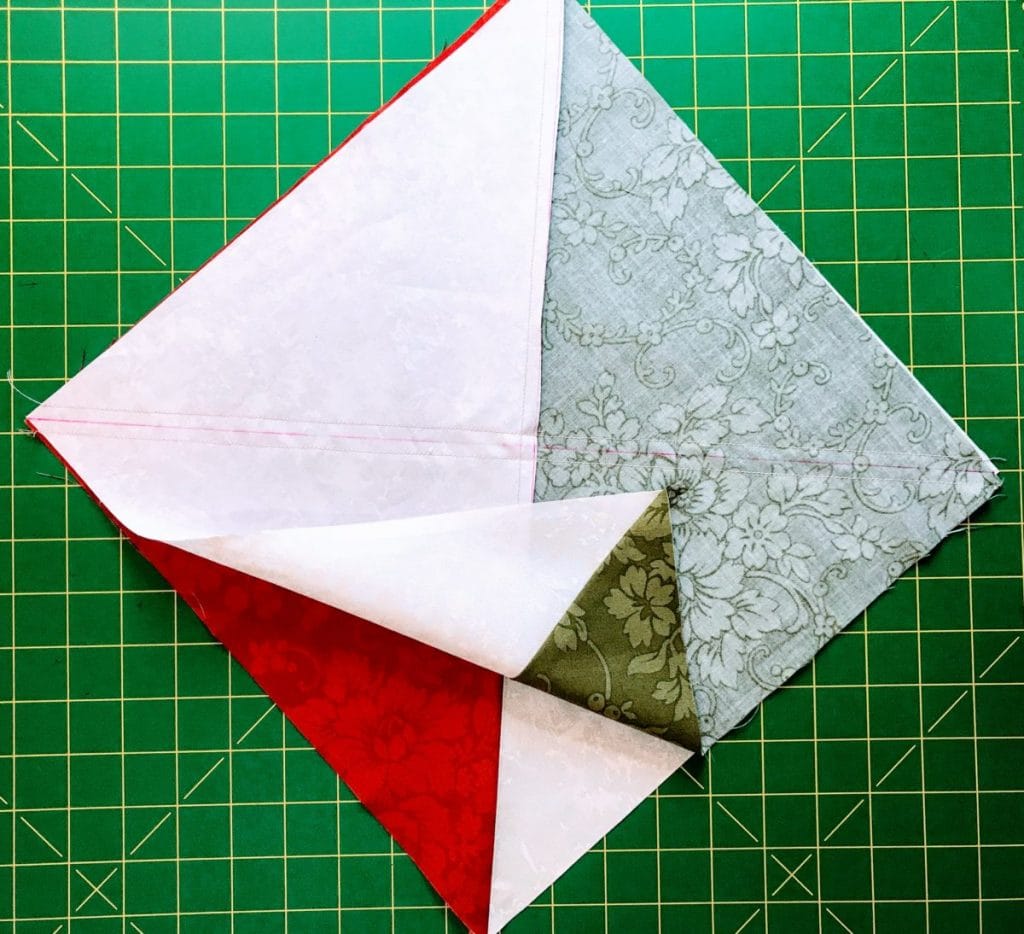
Add the second row of triangles, press, and square up the block. Notice how the center four patch has started the swirl.
If you have an assortment of square rulers and a rotating cutting mat, you will find them extremely useful when you work a block like this that has a lot of squaring up steps. Your tools are expensive, but they will save you time and aggravation. This hobby is supposed to be fun!

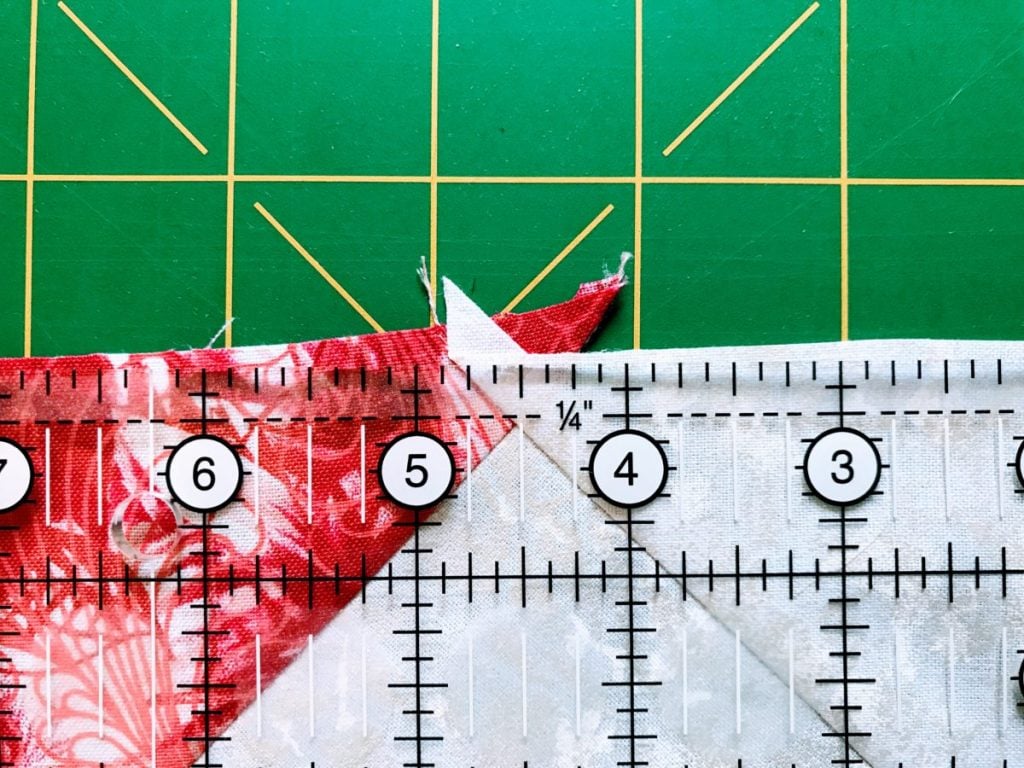
Here is the next row of the snail trail block. If you don’t have a ruler that exactly matches the size of the block you need, you can always use the corner of a larger ruler.
Just take care to maintain the 1/4″ seam allowance above the point.
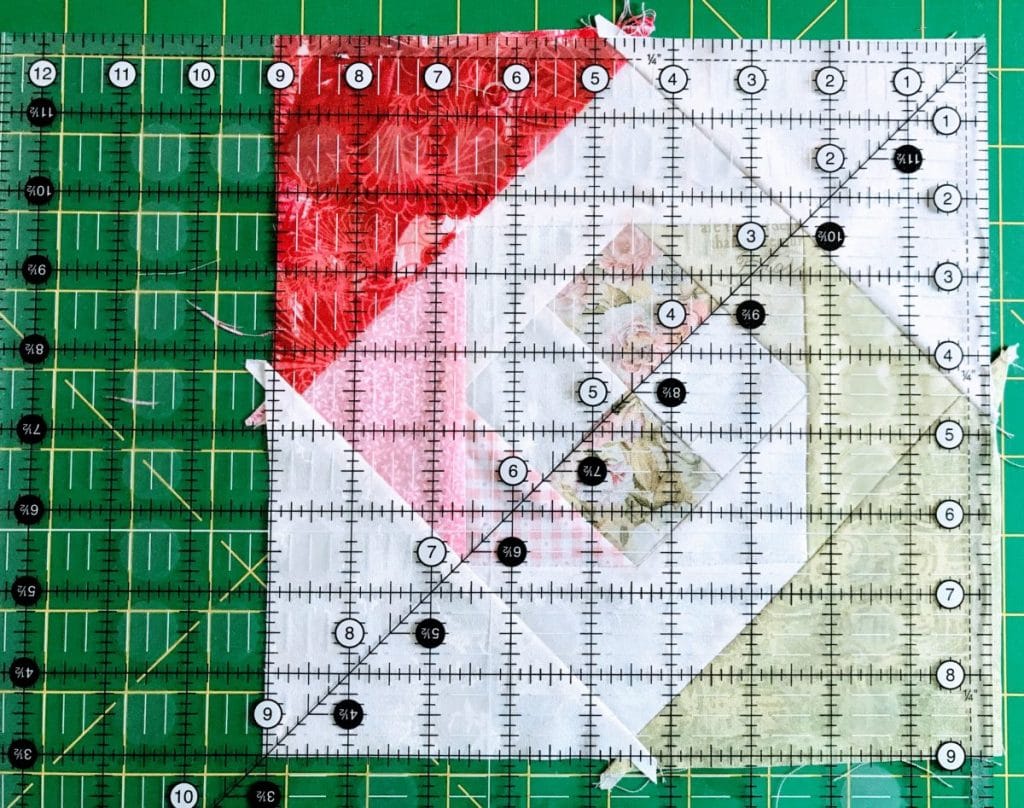
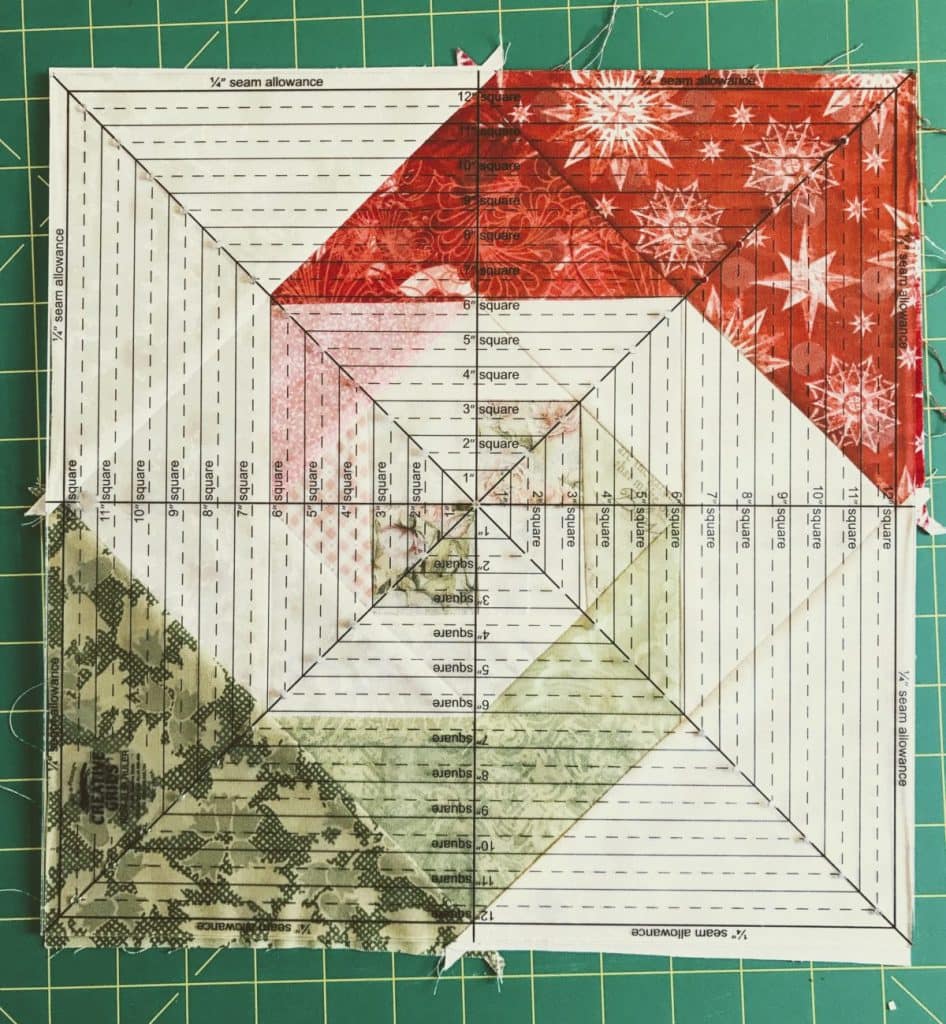
The Third Round
Add one more row of triangles, press, and square up your block one last time. You will notice that I have switched to a ruler specifically designed to square up a block. The Creative Grid square up and Fussy Cut rulers have a little hole at the corner of each measurement which allows you to mark the exact spot you need.
Using Quarter Square Triangle (QST) Quilt Blocks as alternate blocks
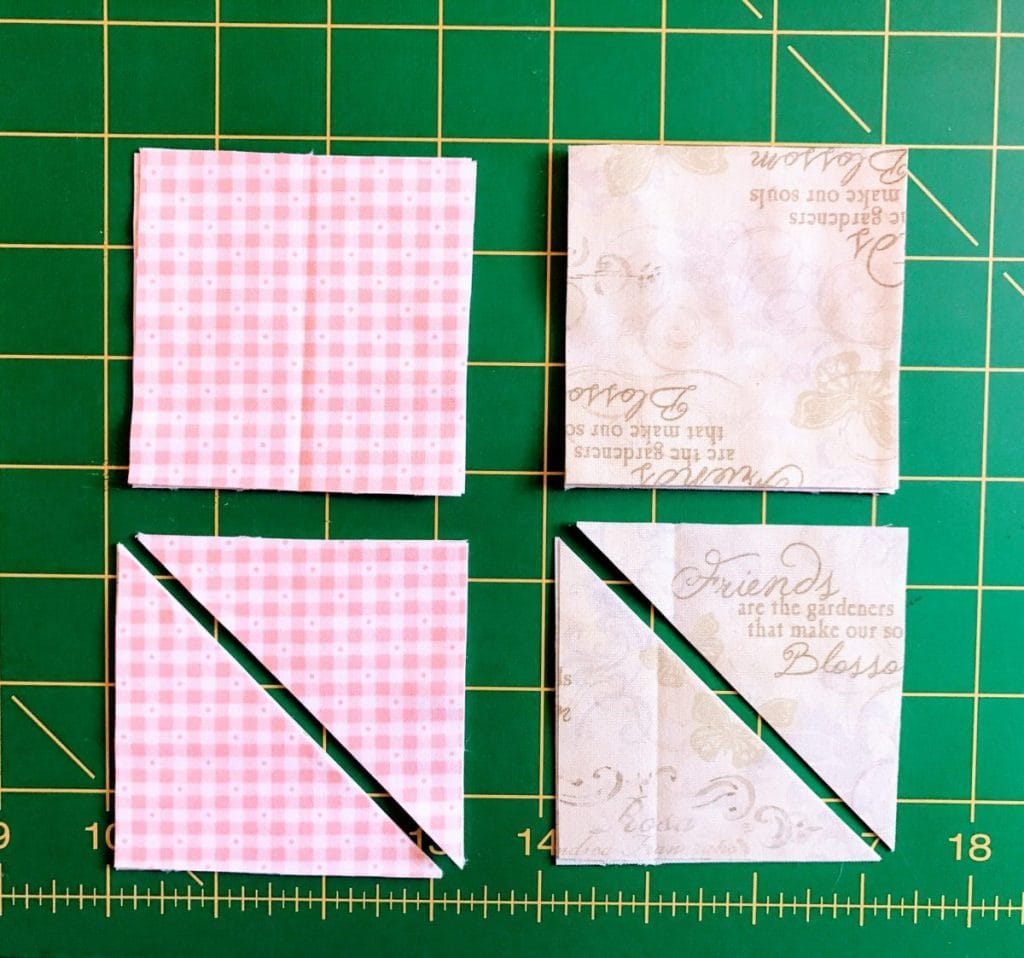
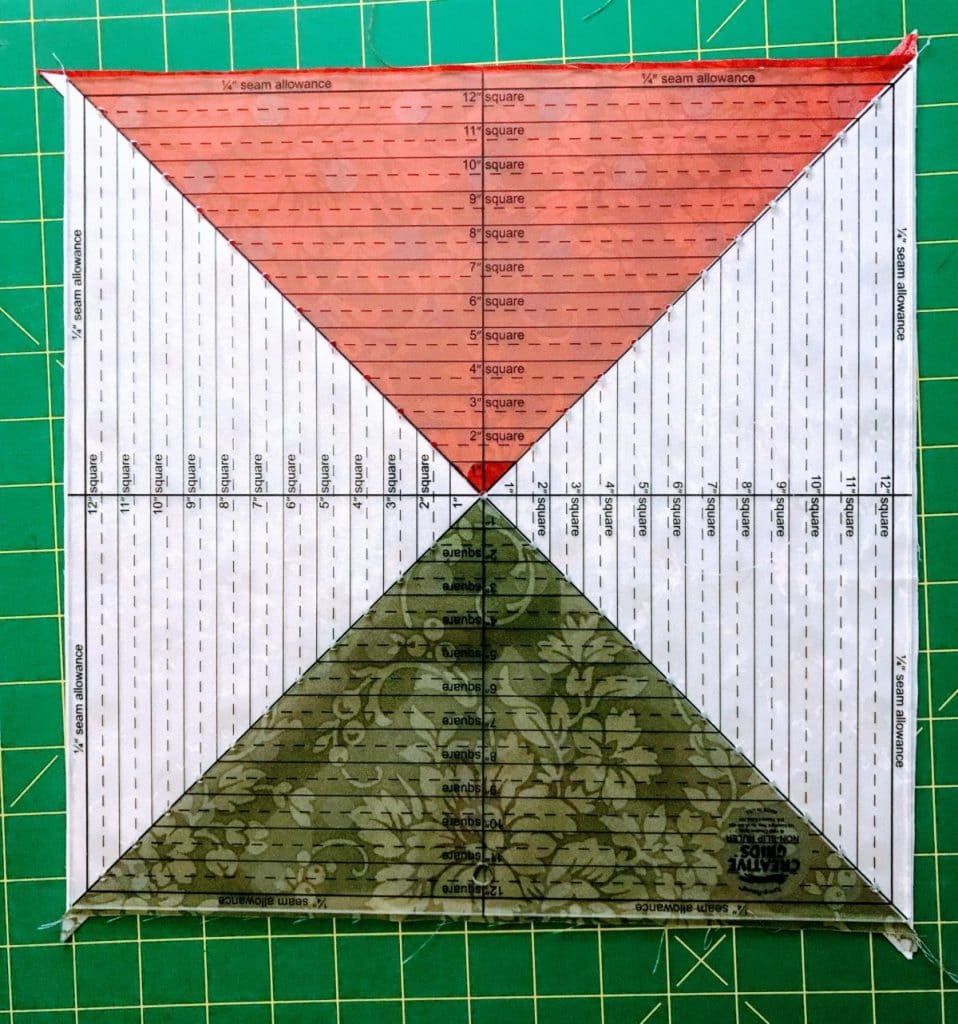
Now it’s time to cut for the QST blocks. Here again you will be very happy if you have a stripology ruler. You will need it to cut the oversize blocks that make the Half Square Triangle (HST) blocks you will use to make the Quarter Square Triangle (QST) blocks.
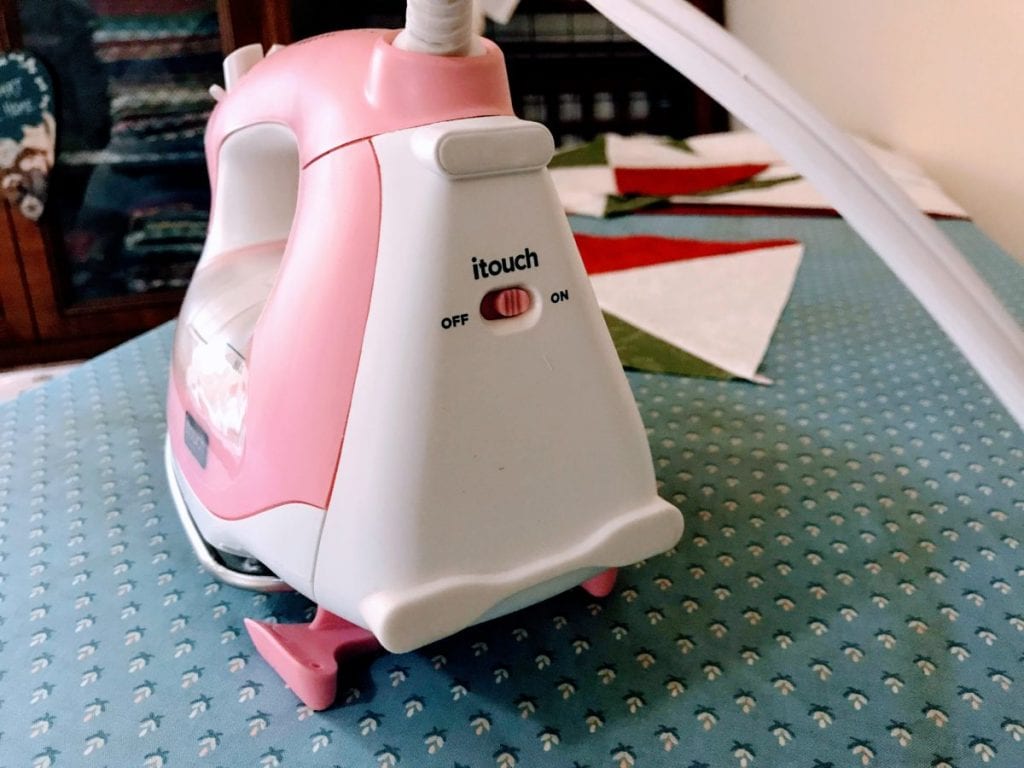
I’ve mentioned “press” several times. When you press a block, you don’t move the iron at all. I use and recommend the Oliso Smart Iron for its no-scorch and ergonomic friendliness. Just touch the iron handle and it lowers, ready to press. Take your hand off and it lifts off the board. And yes, you can turn off that feature on the back of the iron.
But I like not lifting that heavy and HOT iron up on its heel and worrying about tipping. Plus it has a 30-minute shut-off, a 12 foot cord, a flat pressing core, and an easy-to-fill tank in the center you can refill while you work. It’s expensive, but it is worth it for the self-lifting feature alone.
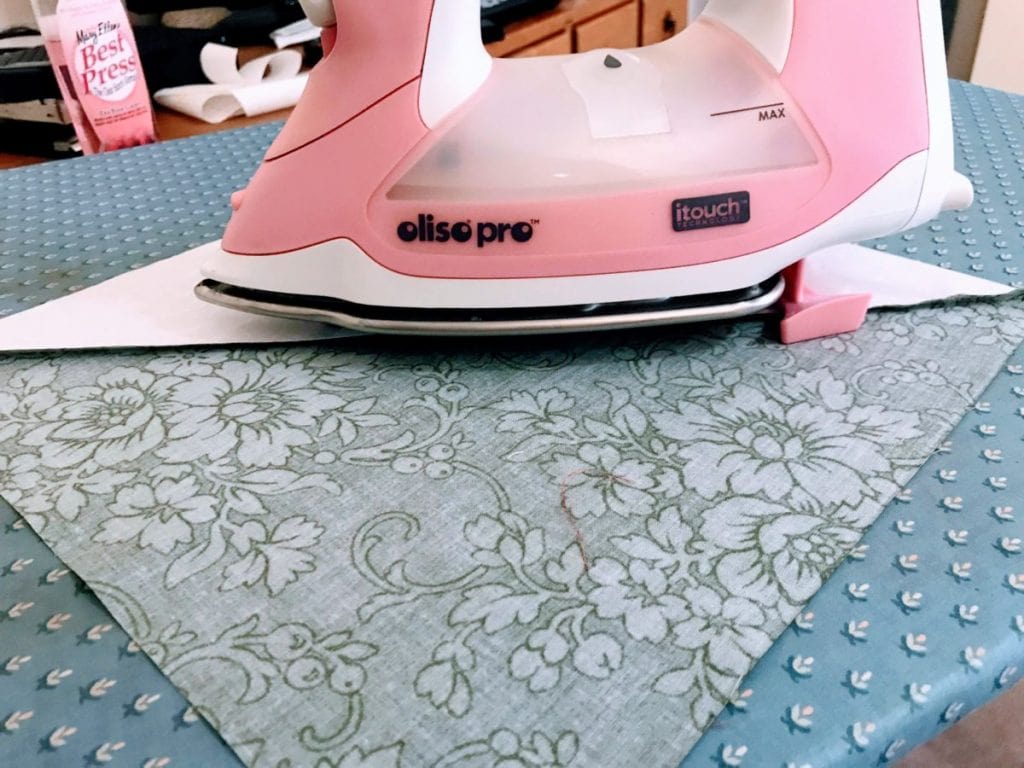
In the picture above, I am pressing the HST blocks. I had to take my hand off the iron to take the picture and it automatically lifted itself up!
Place two HST blocks of different colors right sides together. Draw a diagonal line through the center and sew on either side of the line. You will make a QST. It will need to be squared up.
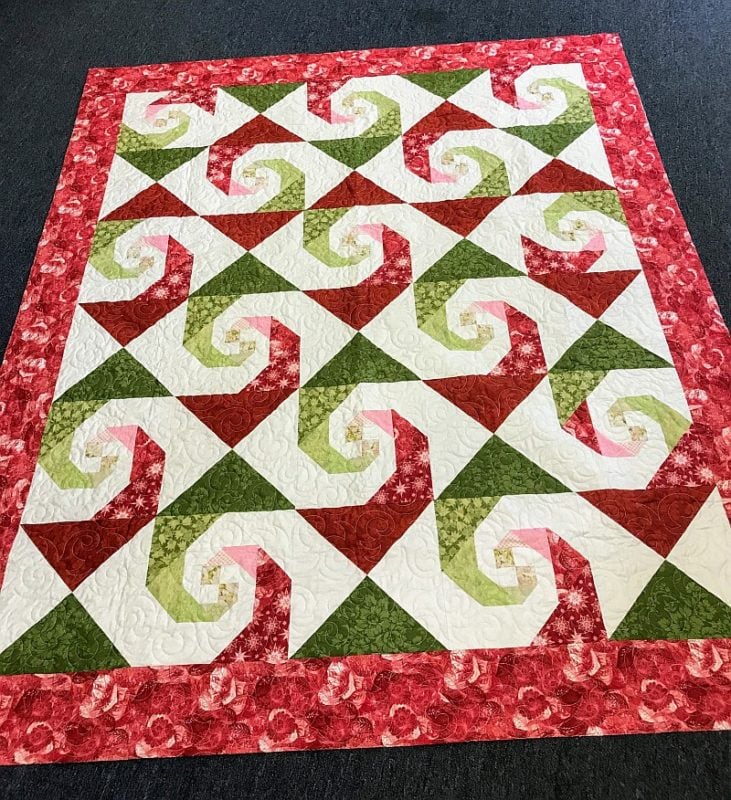
Here is the quilt!
If you would like to make this pattern, click here to order. It is available immediately as a PDF download or it can be mailed to you.
Have another tip to offer? Send it to me or reply below and I will add it here.
Don’t forget to sign up for the newsletter! Once a week, I send updates on quilt-related information I have found while wandering the web. This might be an inspiring article, a tip or tutorial I have discovered (or written), and occasionally exclusive offers & discounts as well as immediate access to the secret page of free patterns, guides, and printables. You can follow my page on Facebook, or join the Make Believe Quilters group, too.

Could you post s picture of finished block? Looks very cute
It’s in the quilt, but I will isolate it and put it at the end of the article. Thanks for asking!