
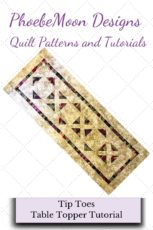
How To Make a Modern Table Runner
According to the Modern Quilt Guild, modern quilts are primarily functional and inspired by modern design. Modern quilts often use bold colors and prints, high contrast areas of solid color, improvisational piecing, lots of negative space for quilting, and alternative layouts such as asymmetrical designs.
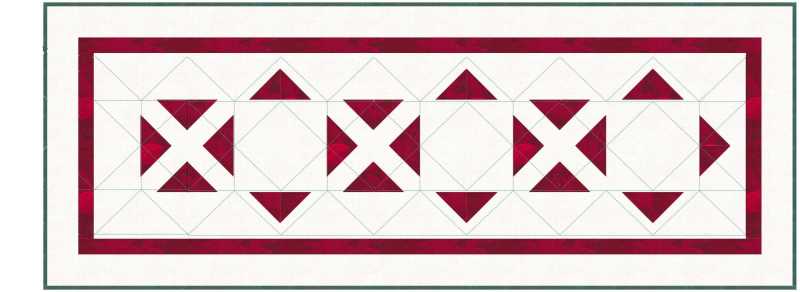
The open design of this table runner lets you fussy cut fabrics for the center of a block or just leave it open so you can show off your quilting stitches. Fast and easy to make – it took me about 3 hours to make the top.
This was my design:
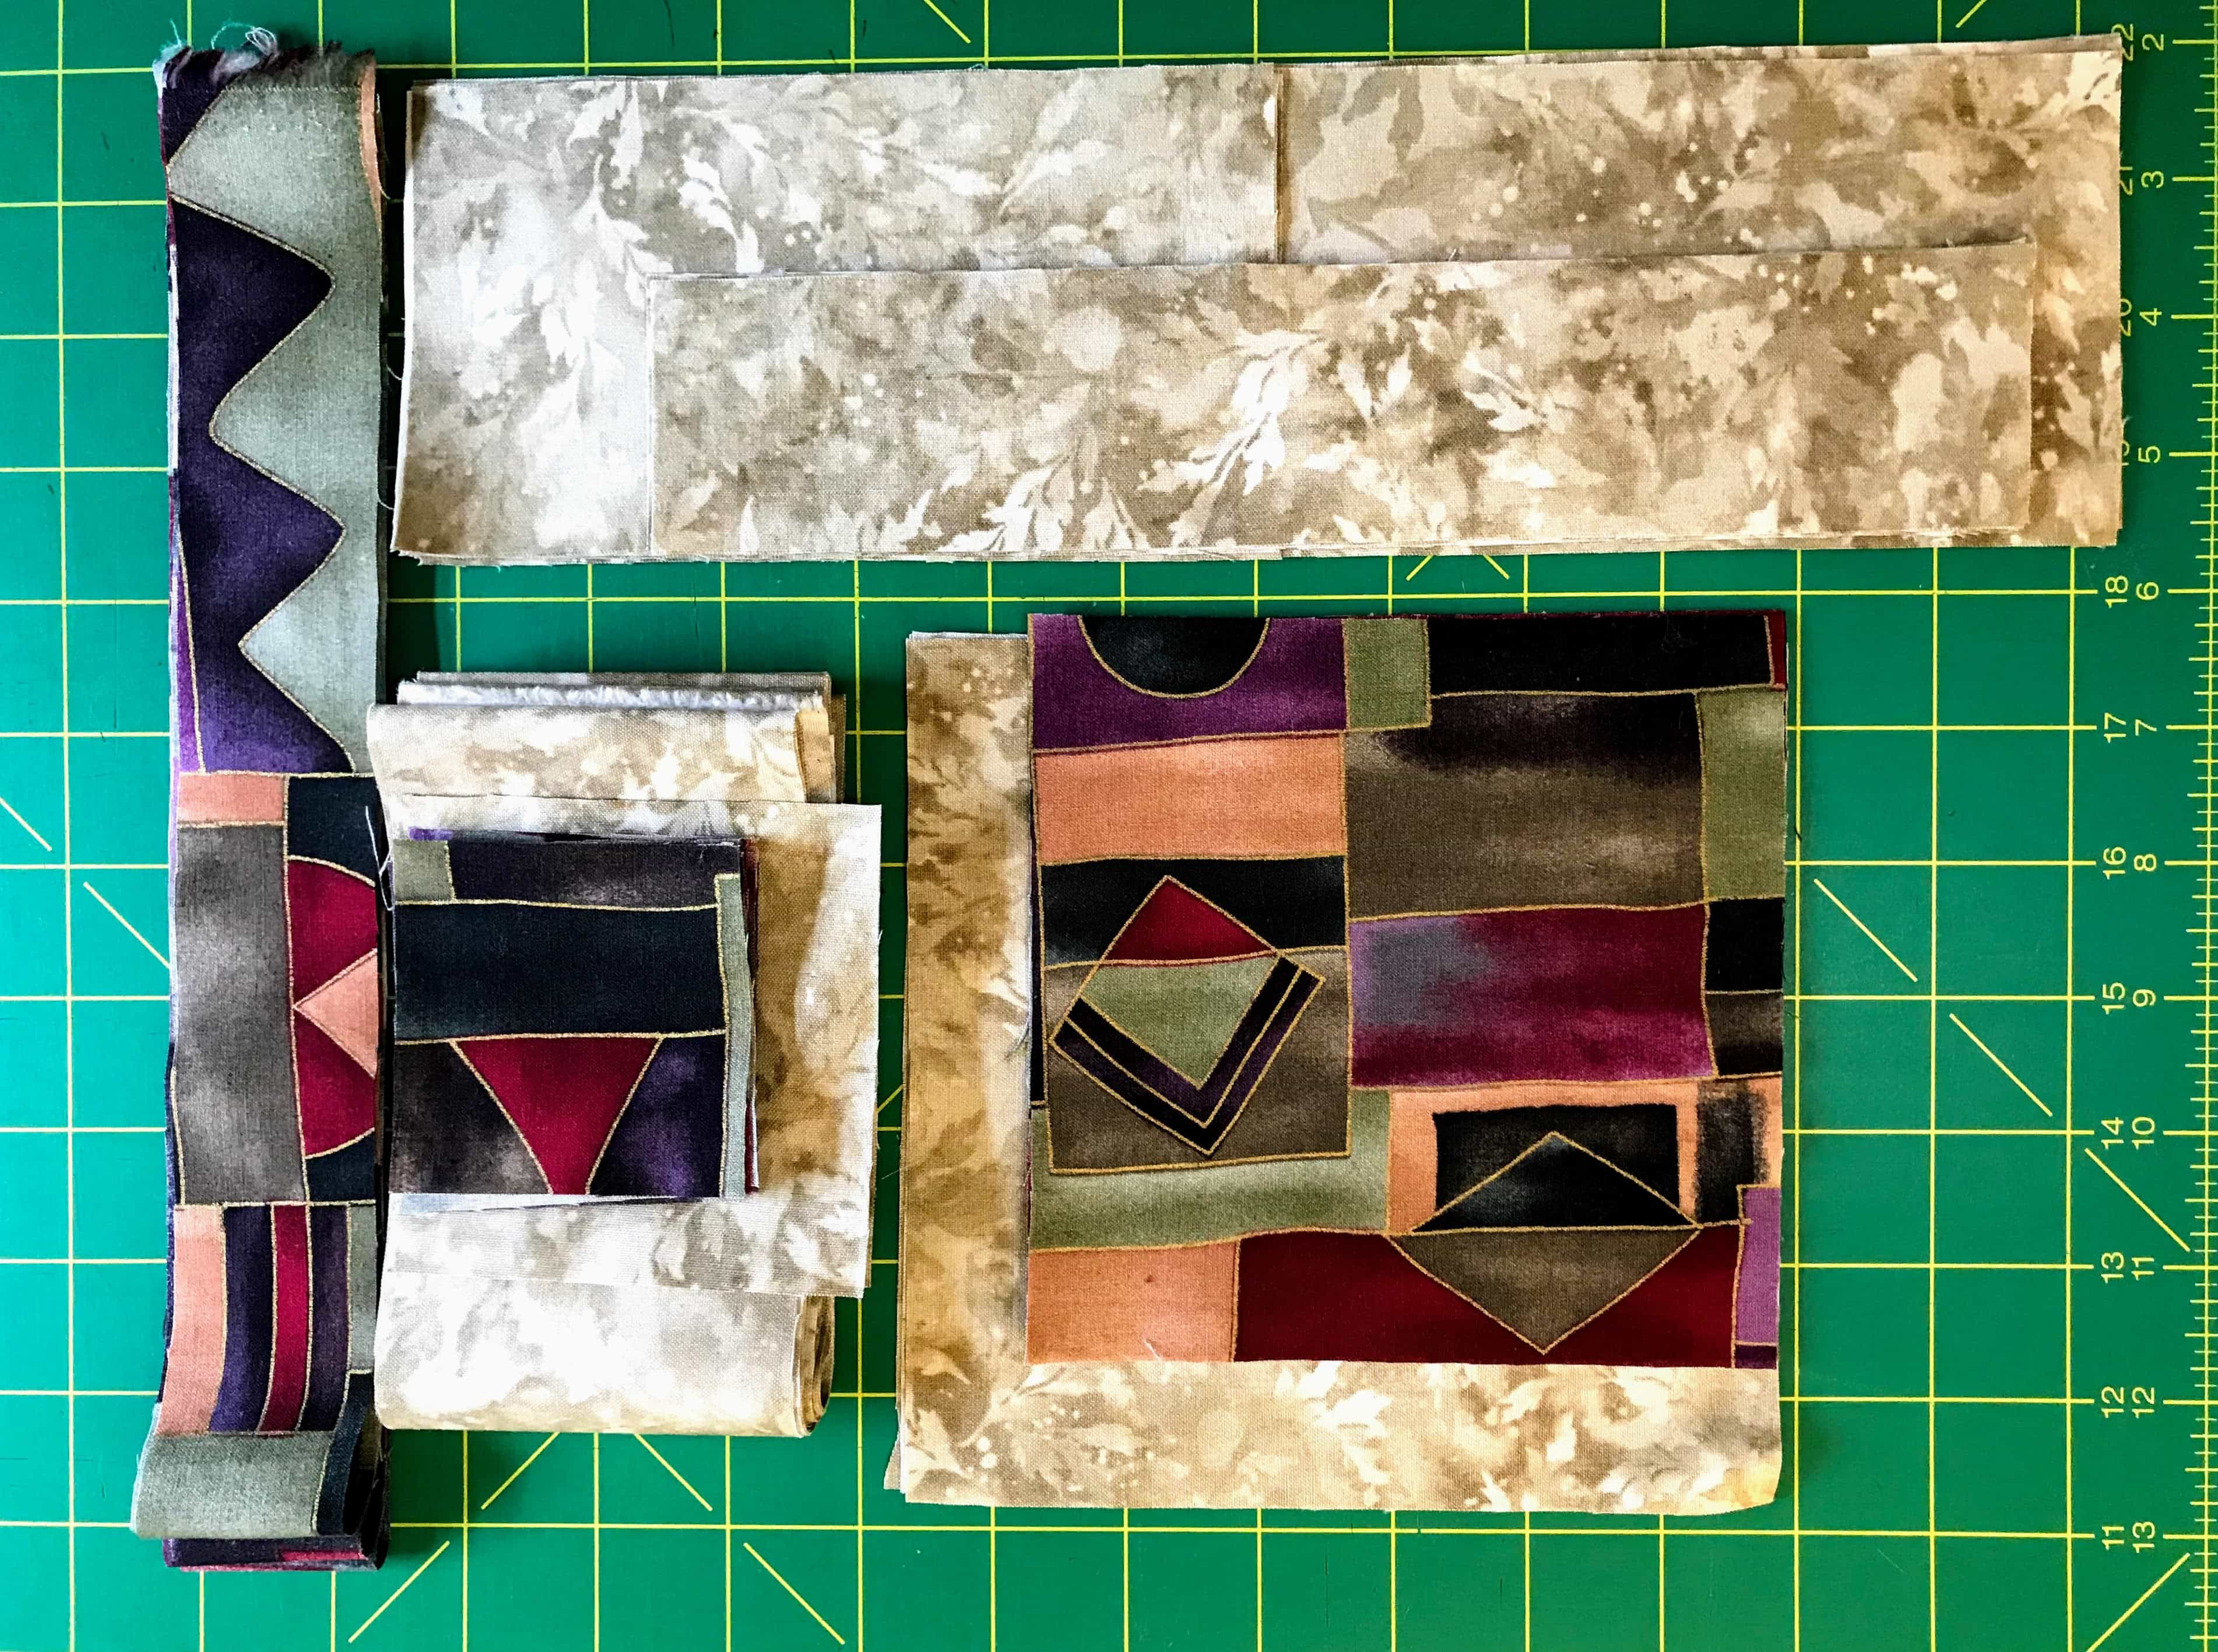
These are my fabrics:
Fabric Requirements:
1/3 yard Red (my red is that multicolored fabric)
1/3 yard Green binding (not in the picture)
1-yard background (the tan leaf fabric)
Things you will find helpful:
(not required)
- A 6-1/2″ Fussy Cut Square Ruler
- Rotary Cutter and Sharp Blade
- A mat that rotates
- A Walking Foot
- Spray Starch
Let’s Make a Modern Table Runner!
Cutting Instructions
- Red
- Cut (1) strip 5-1/2″ wide by the WOF. Cut this strip into (3) 5-1/2″ squares and (14) 2-1/2″ squares.
- Cut (3) strips 1-1/2″ wide by the WOF for the first border.
- Green
- Cut (4) strips 2-1/2″ wide by the WOF for the binding
- Background
- Cut (1) strip 6-1/2″ wide. Cut this strip into (3) 6-1/2″ squares.
- Cut (3) strips 3-1/2″ wide by the WOF. Cut these strips into (6) 3-1/2″ x 12-1/2″ rectangles, (3) 3-1/2″ x 6-1/2″ rectangles and (2) 3-1/2″ squares
- Cut (4) strips 3″ wide by the WOF for the outer border.
- Cut (2) strips 2″ wide by the WOF. Cut this strip into (6) 2″ x 10″ rectangles.
Sewing Ahead
You will need some long strips to create the border and binding. To save time, sew all these strips end to end ahead of time.
Assemble:
- (4) 3″ wide background strips
- (4) 2-1/2″ wide green binding strips
- (3) 1-1/2″ wide red first border strips
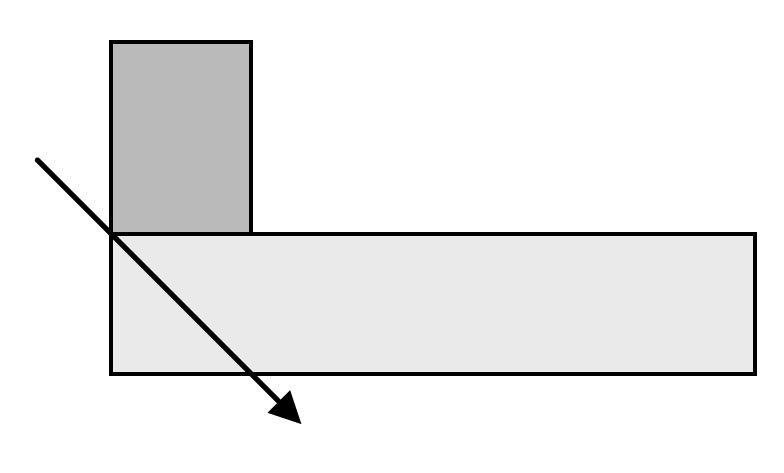
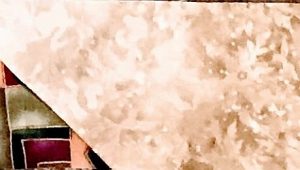
Working with each group of strips individually, create 3 groups of LOONG strips. Trim seams to 1/4″ and press open. Miter the joins if you like by sewing the two strips right sides together at an angle as shown to left. Cut off the excess 1/4″ from the seam. Press the seam open
Make a Practice Block First!
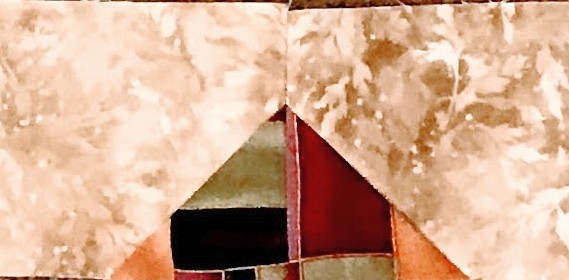
I suggest you practice on a piece of scrap fabric first. Cut a 5-1/2″ square block on the diagonal to make (2) triangles.
Place a 2″ x 10″ background rectangle right sides together along the diagonal of one of the triangles. Match the center of the rectangle with the center of the long side of the triangle so a little bit hangs over each end. Sew using a 1/4″ seam.
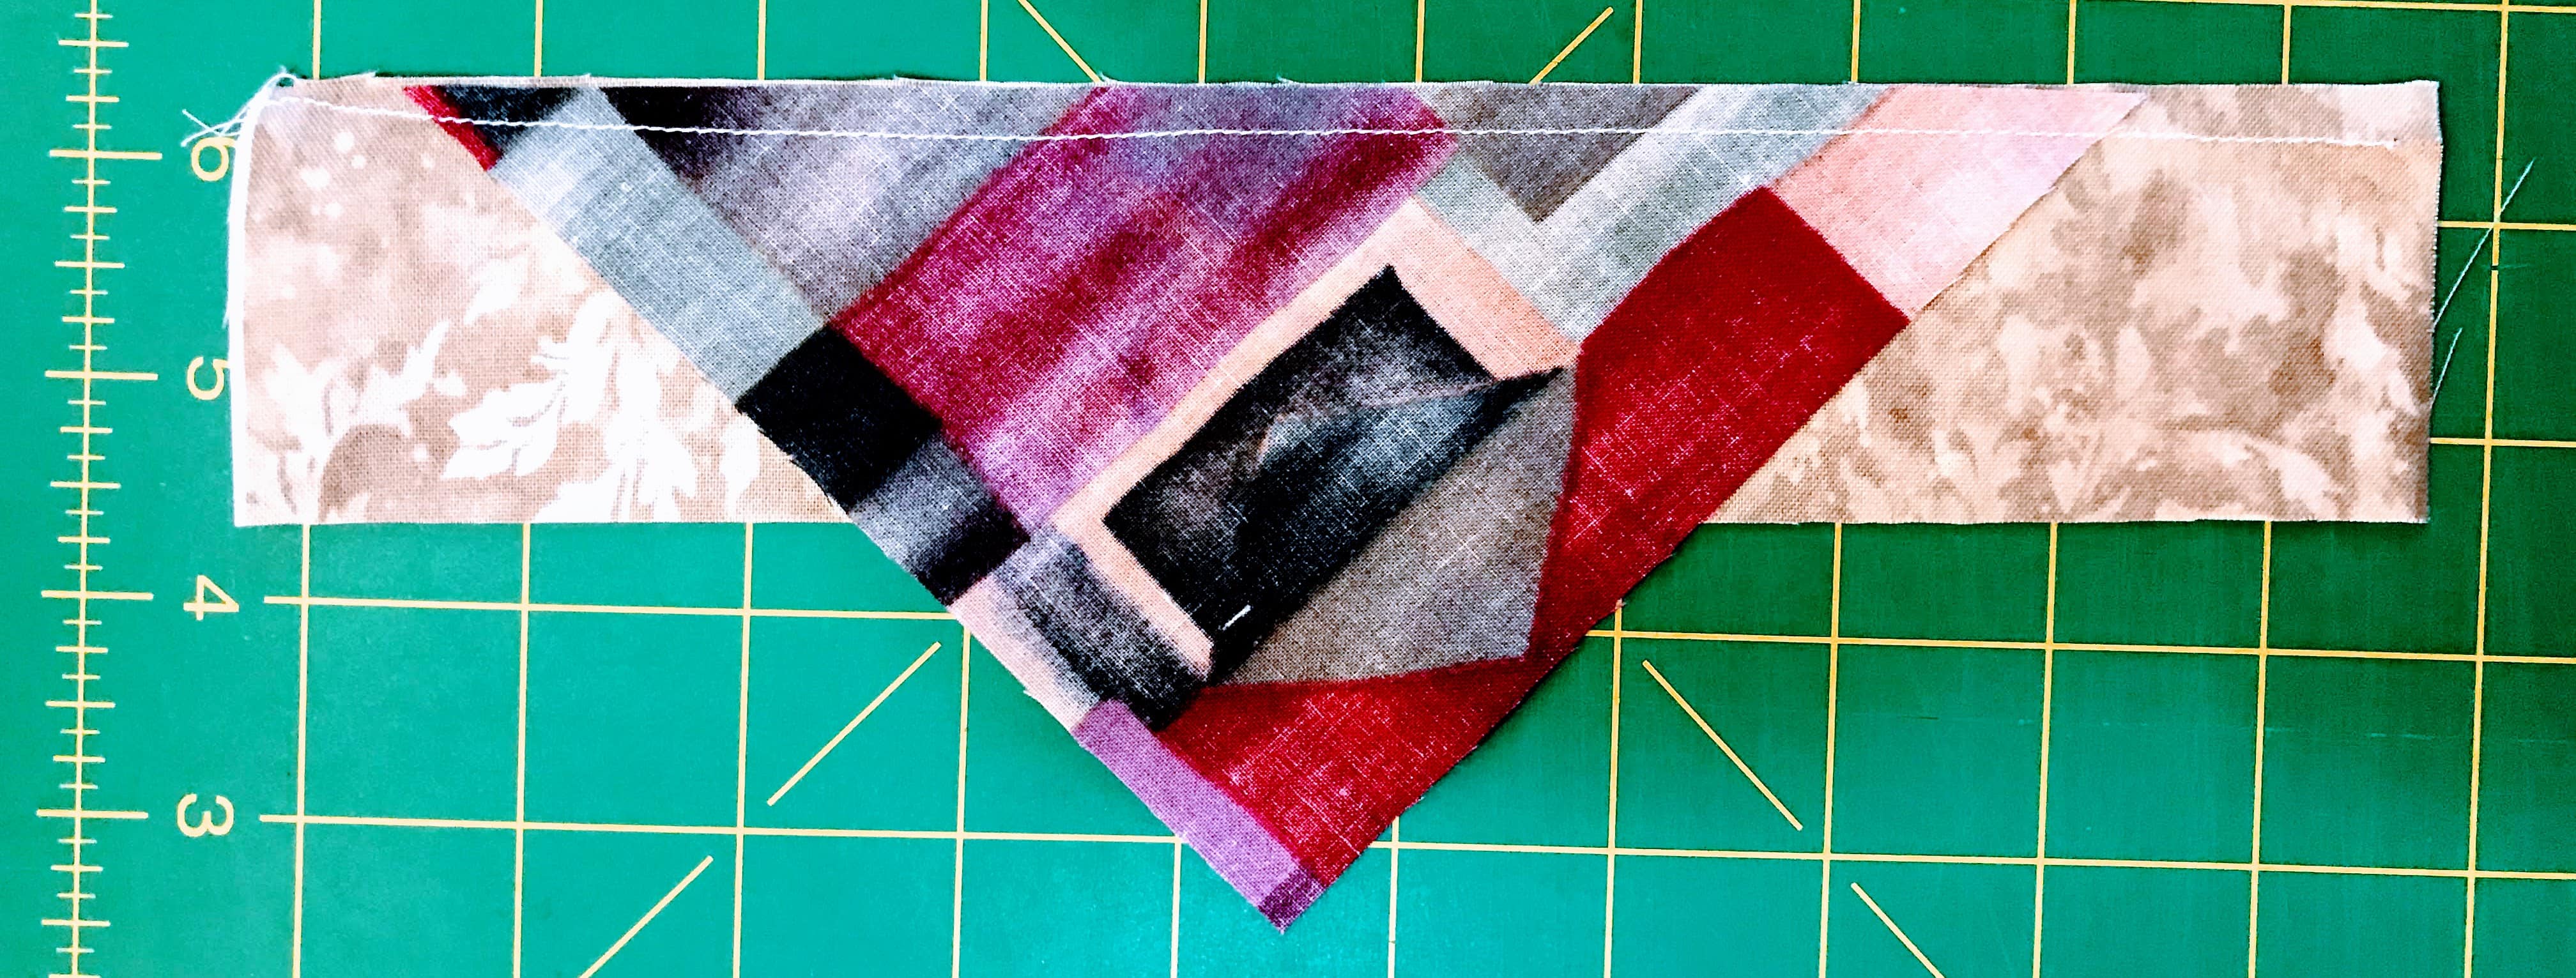
Open up this unit and press to the dark. Place the other red triangle right sides down on the other edge of the background rectangle. Make sure the two points line up with each other. Sew and press open, pressing to the dark.
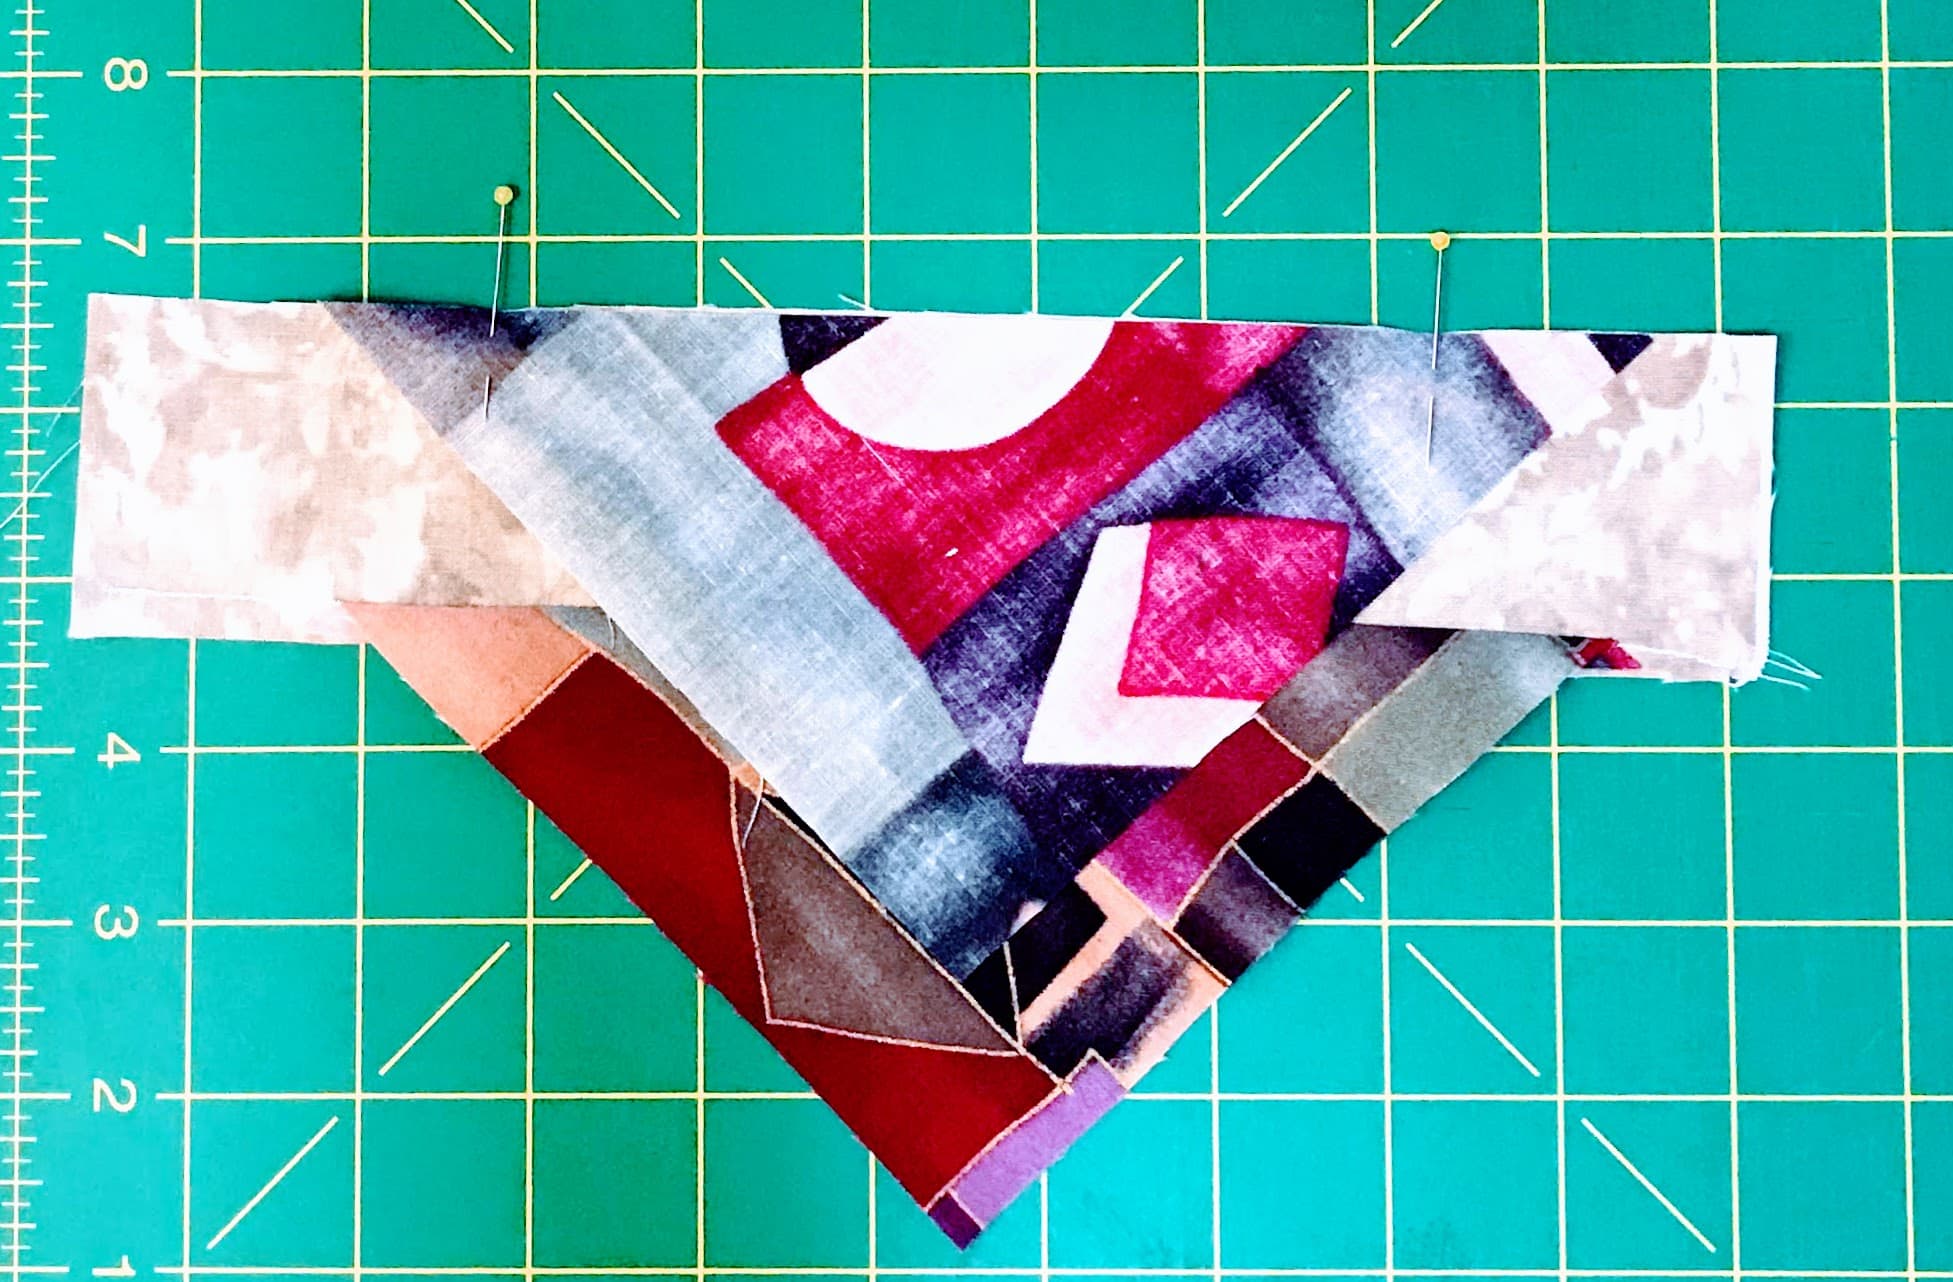
Cut the square in half again.
Just as you did before, sew a 2″ x 10″ rectangle between the two halves. Take care to match up the triangles exactly. Press toward the dark.
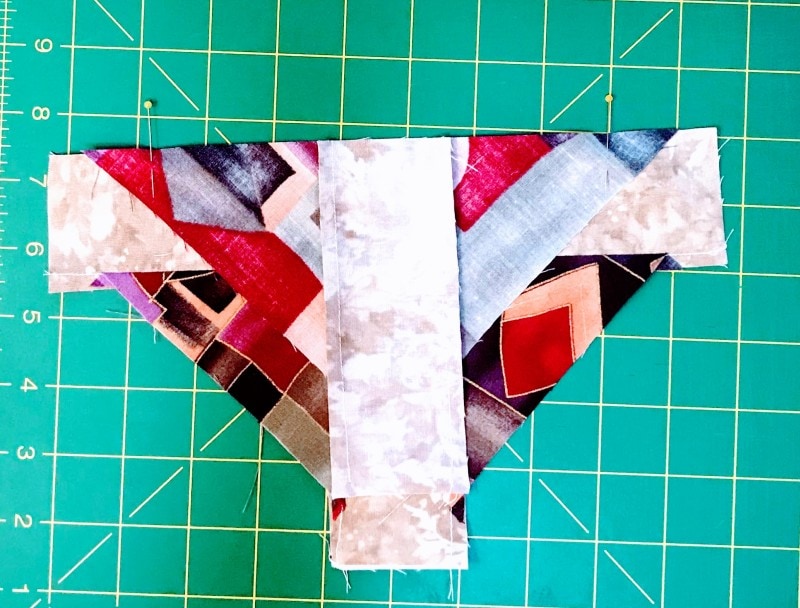
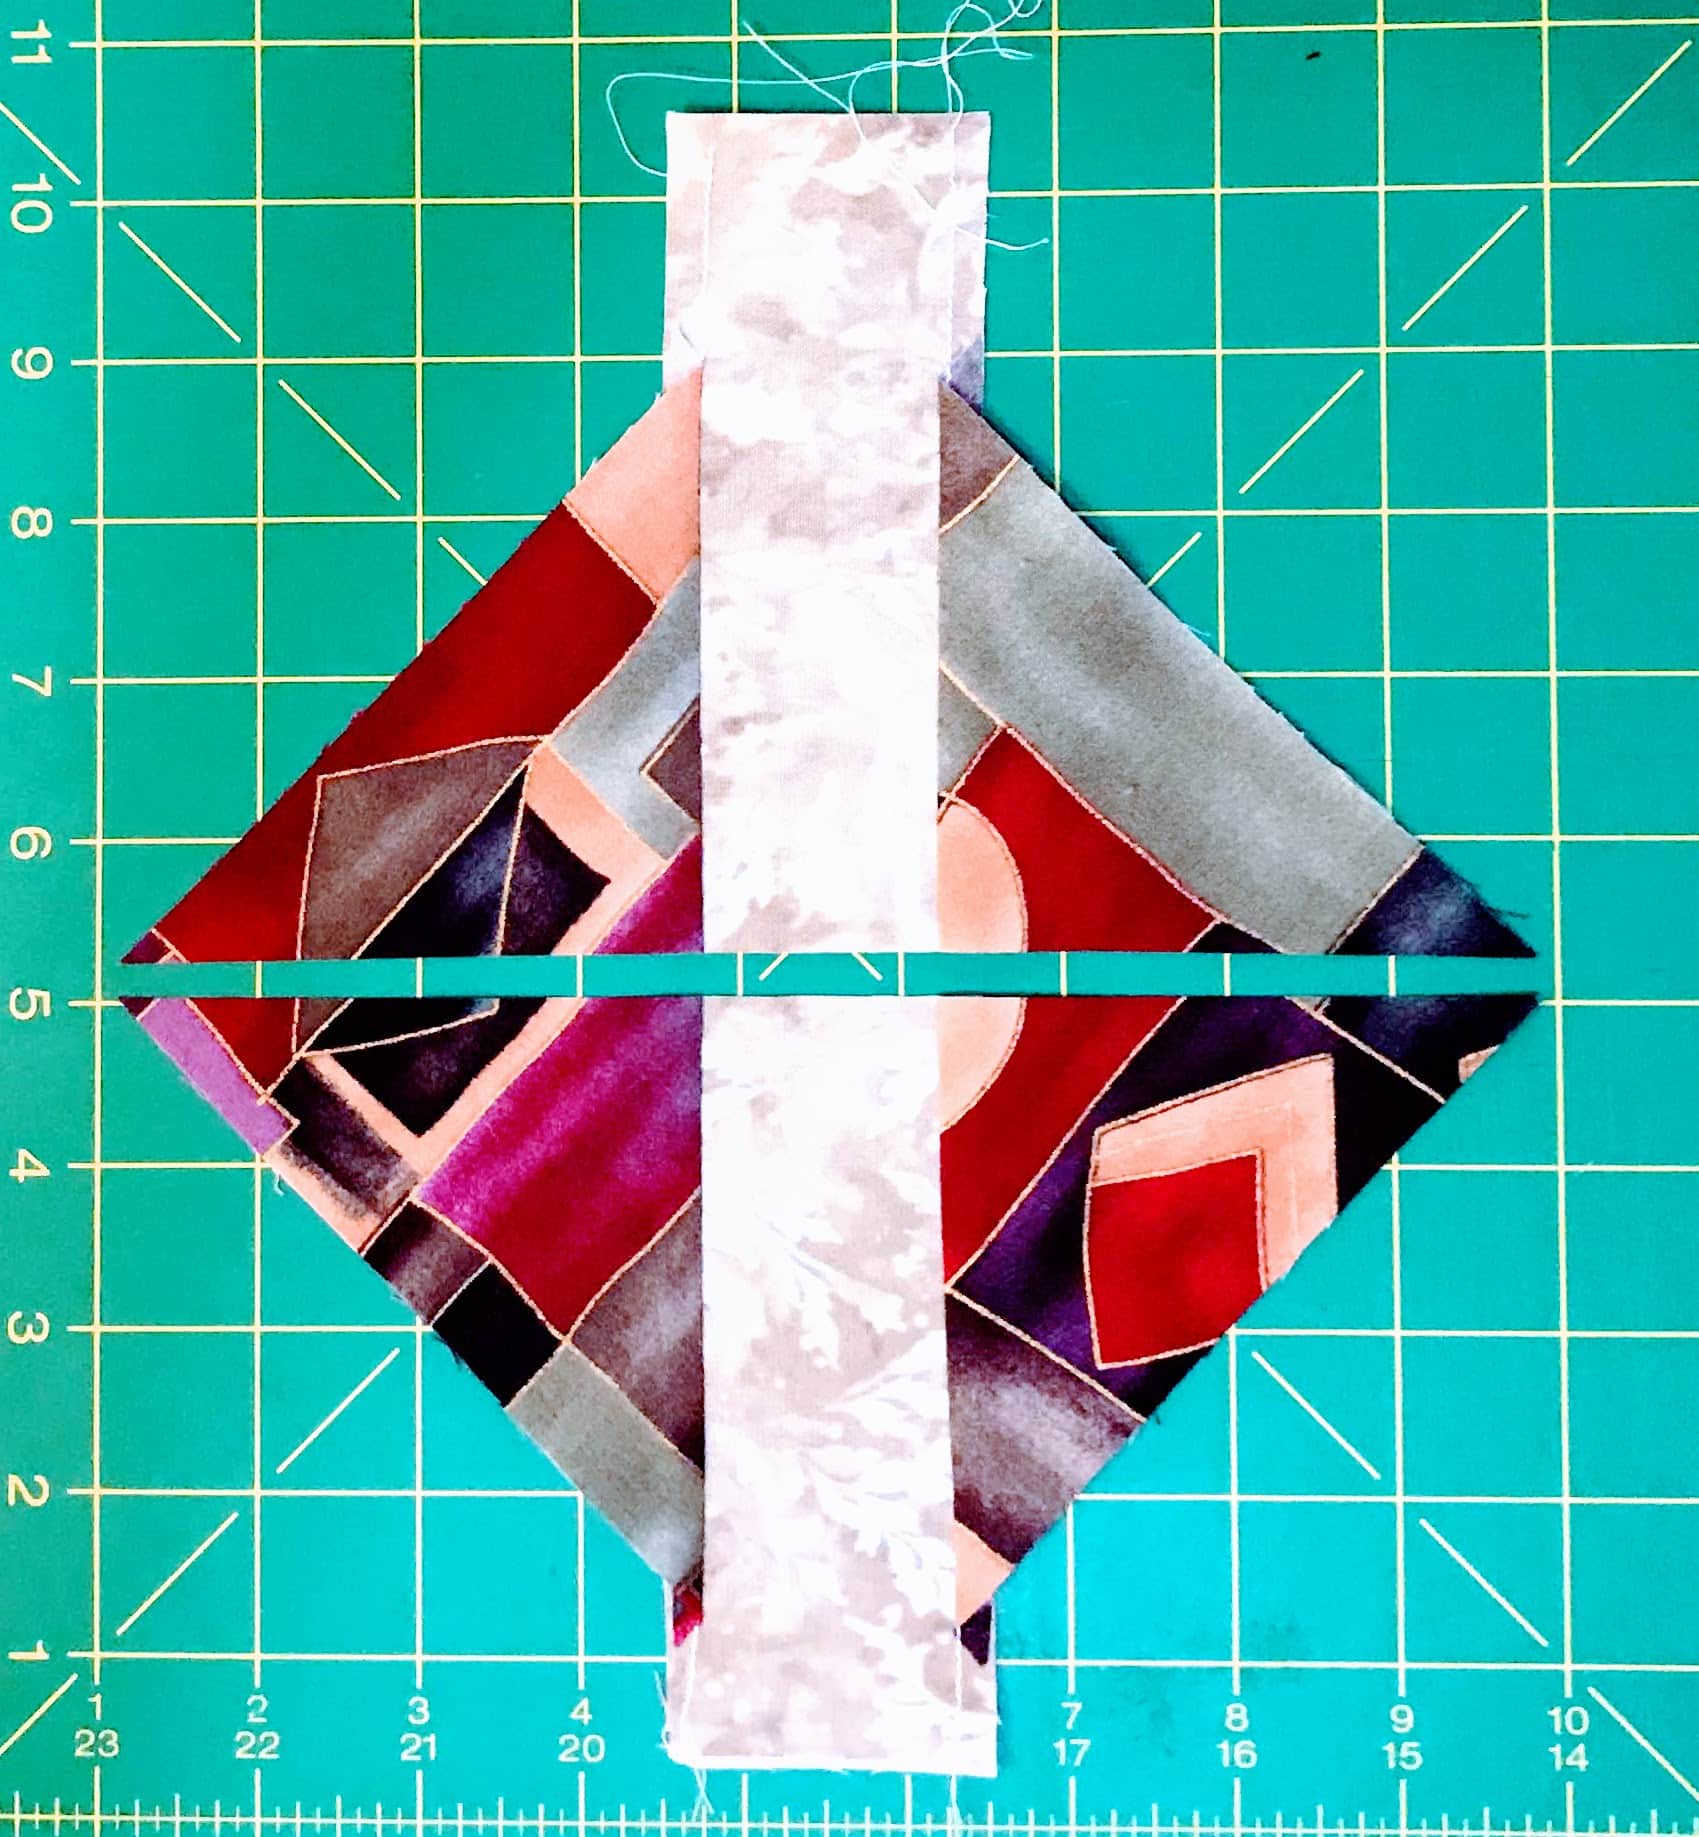
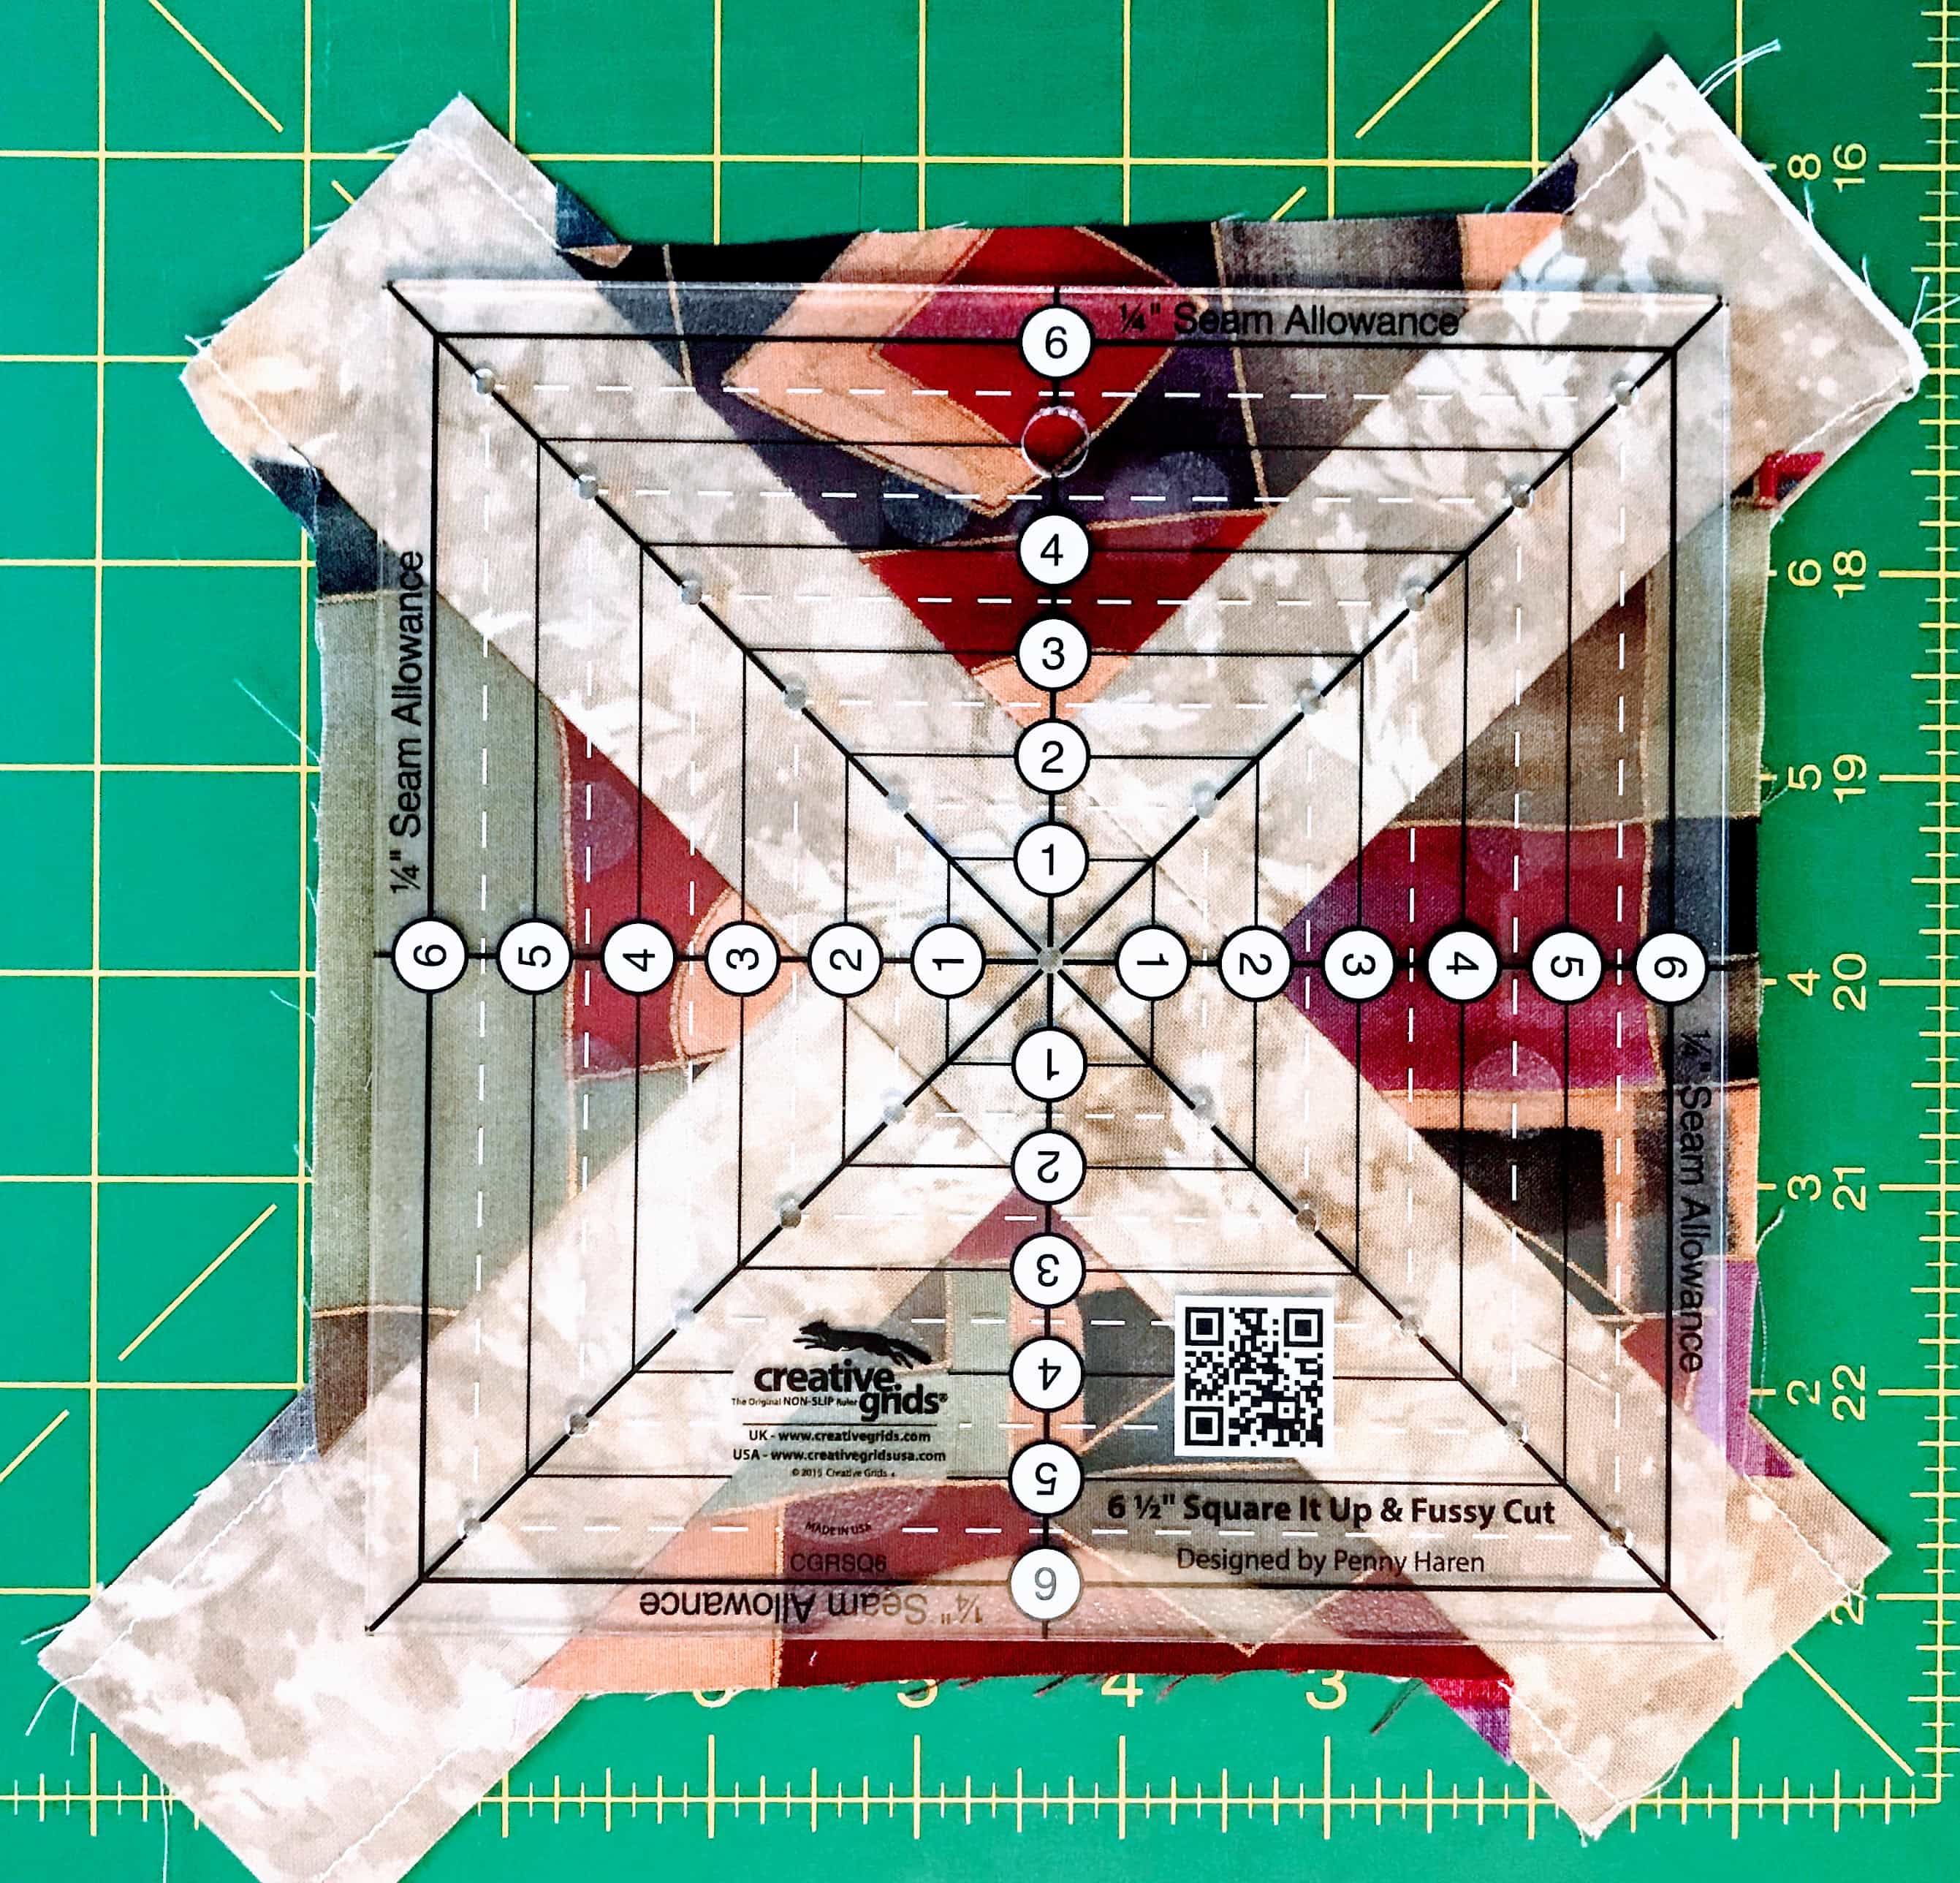
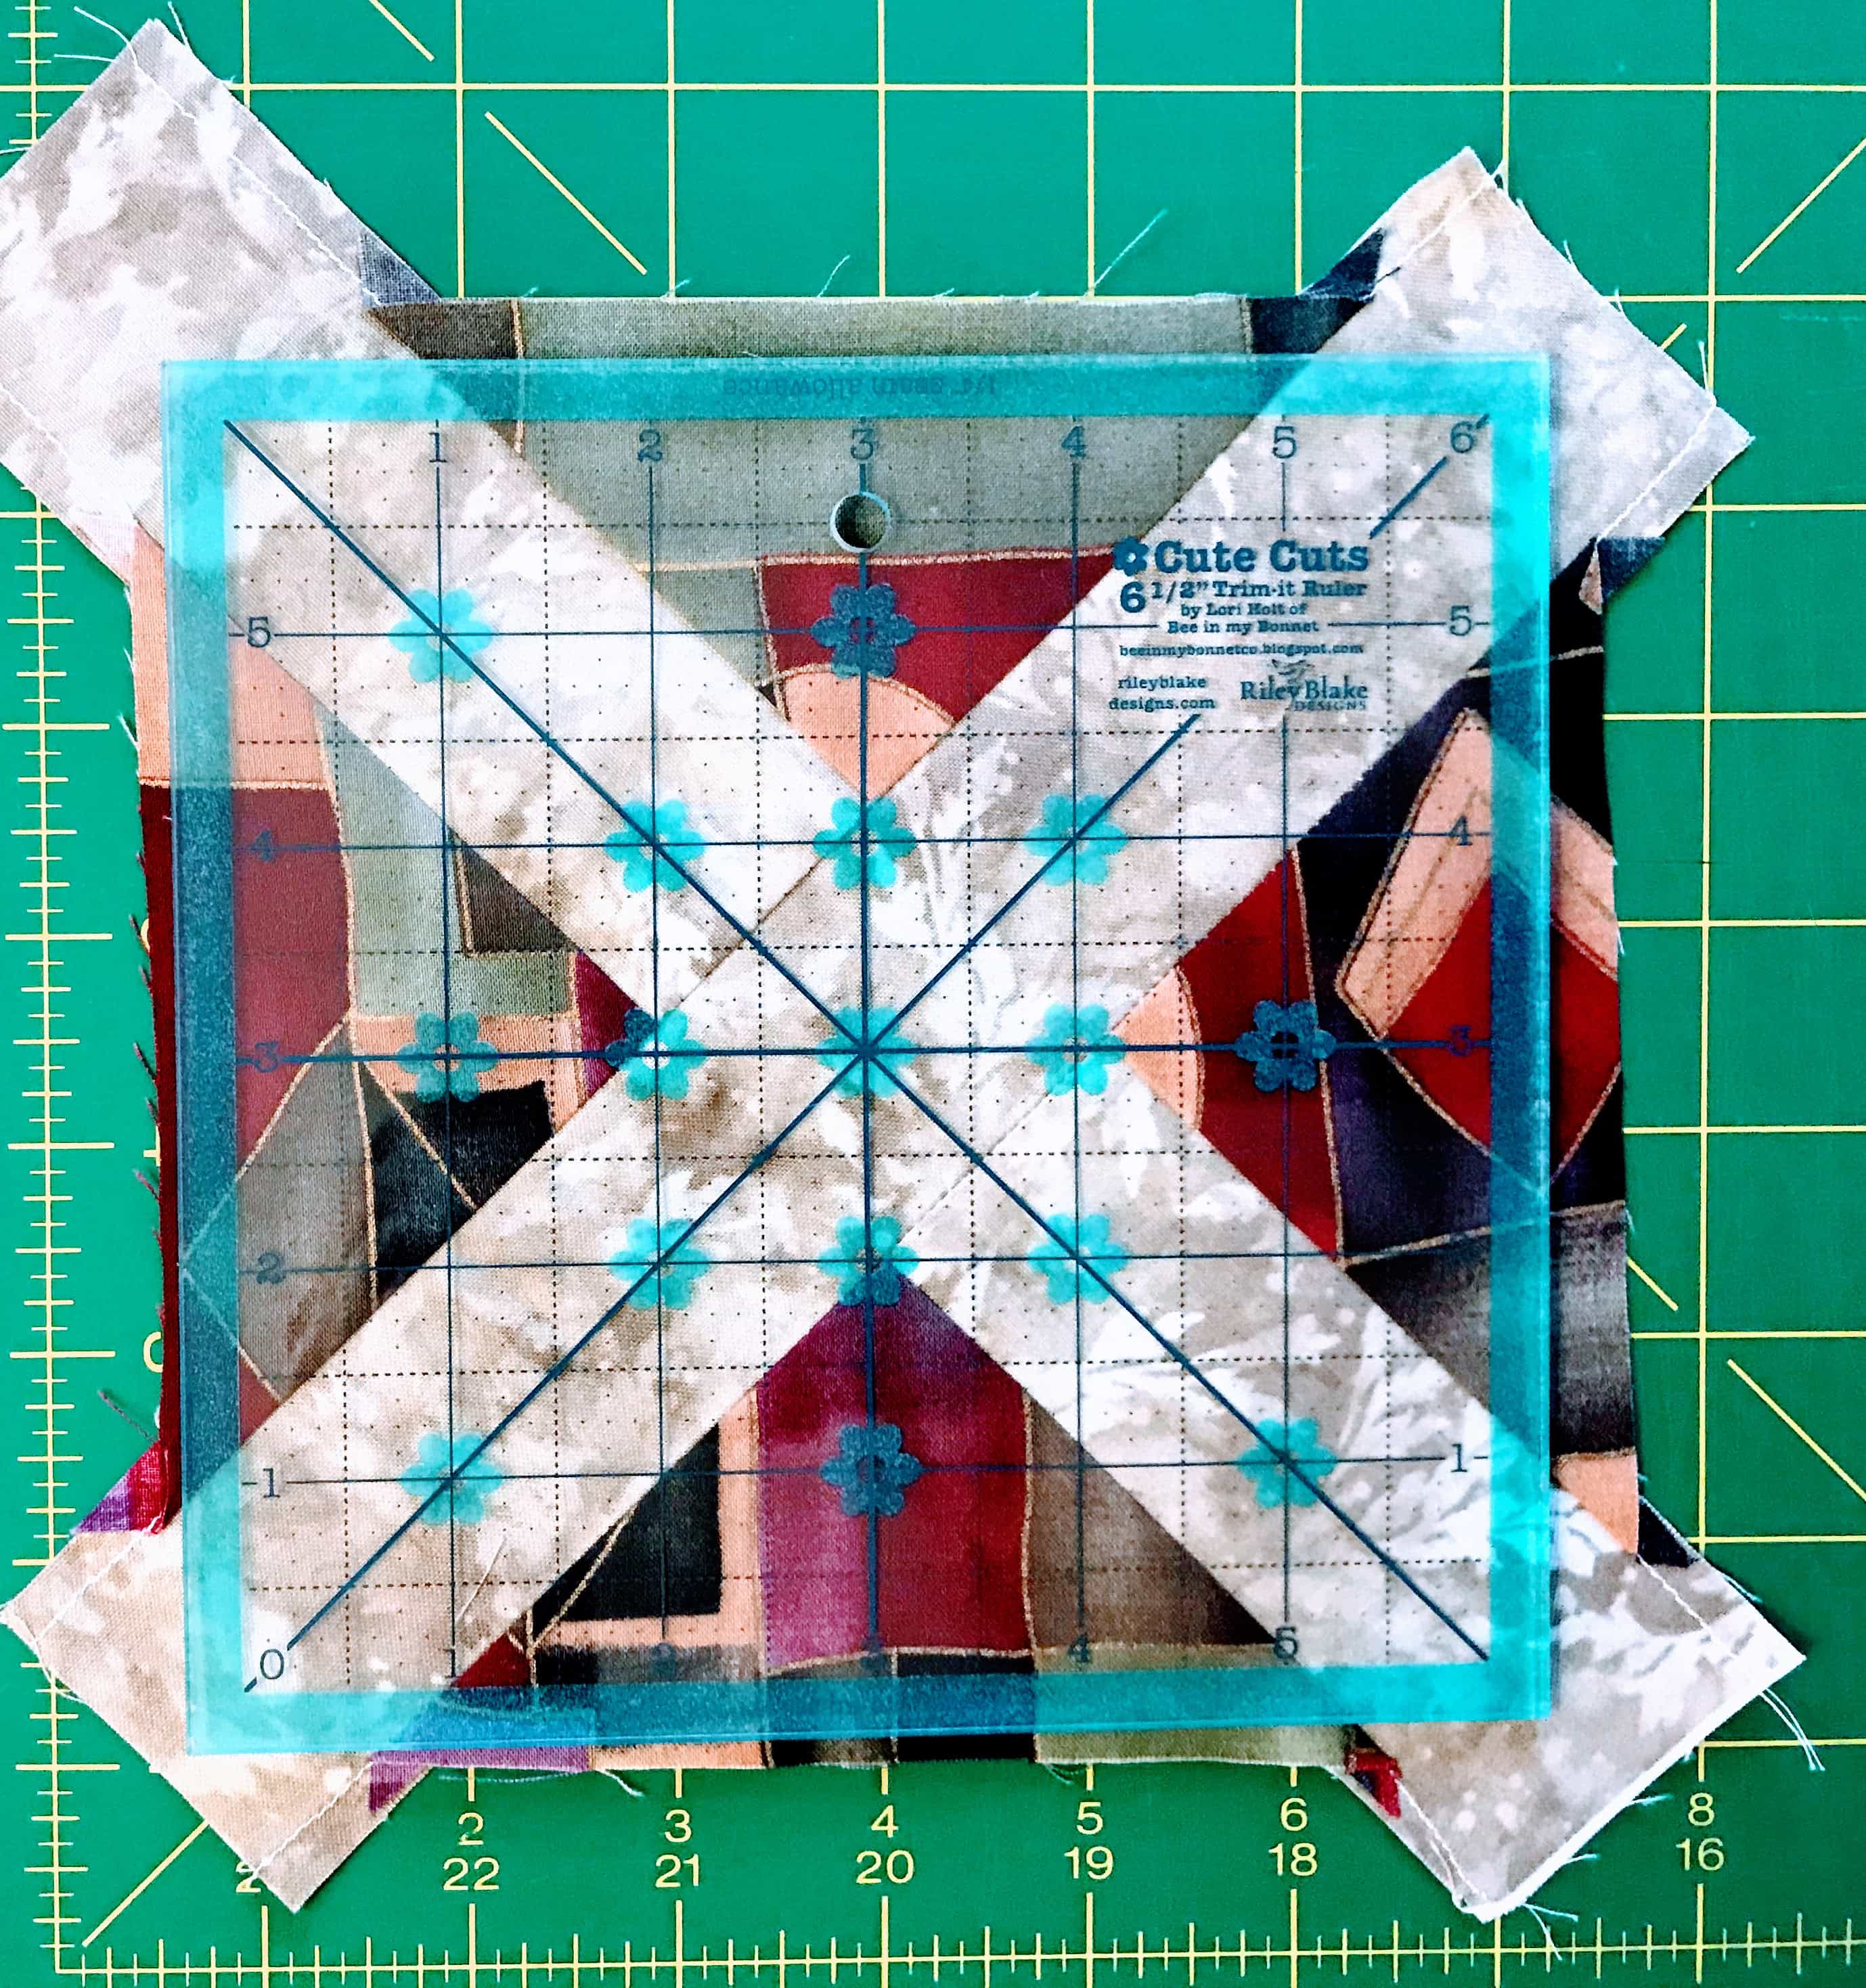
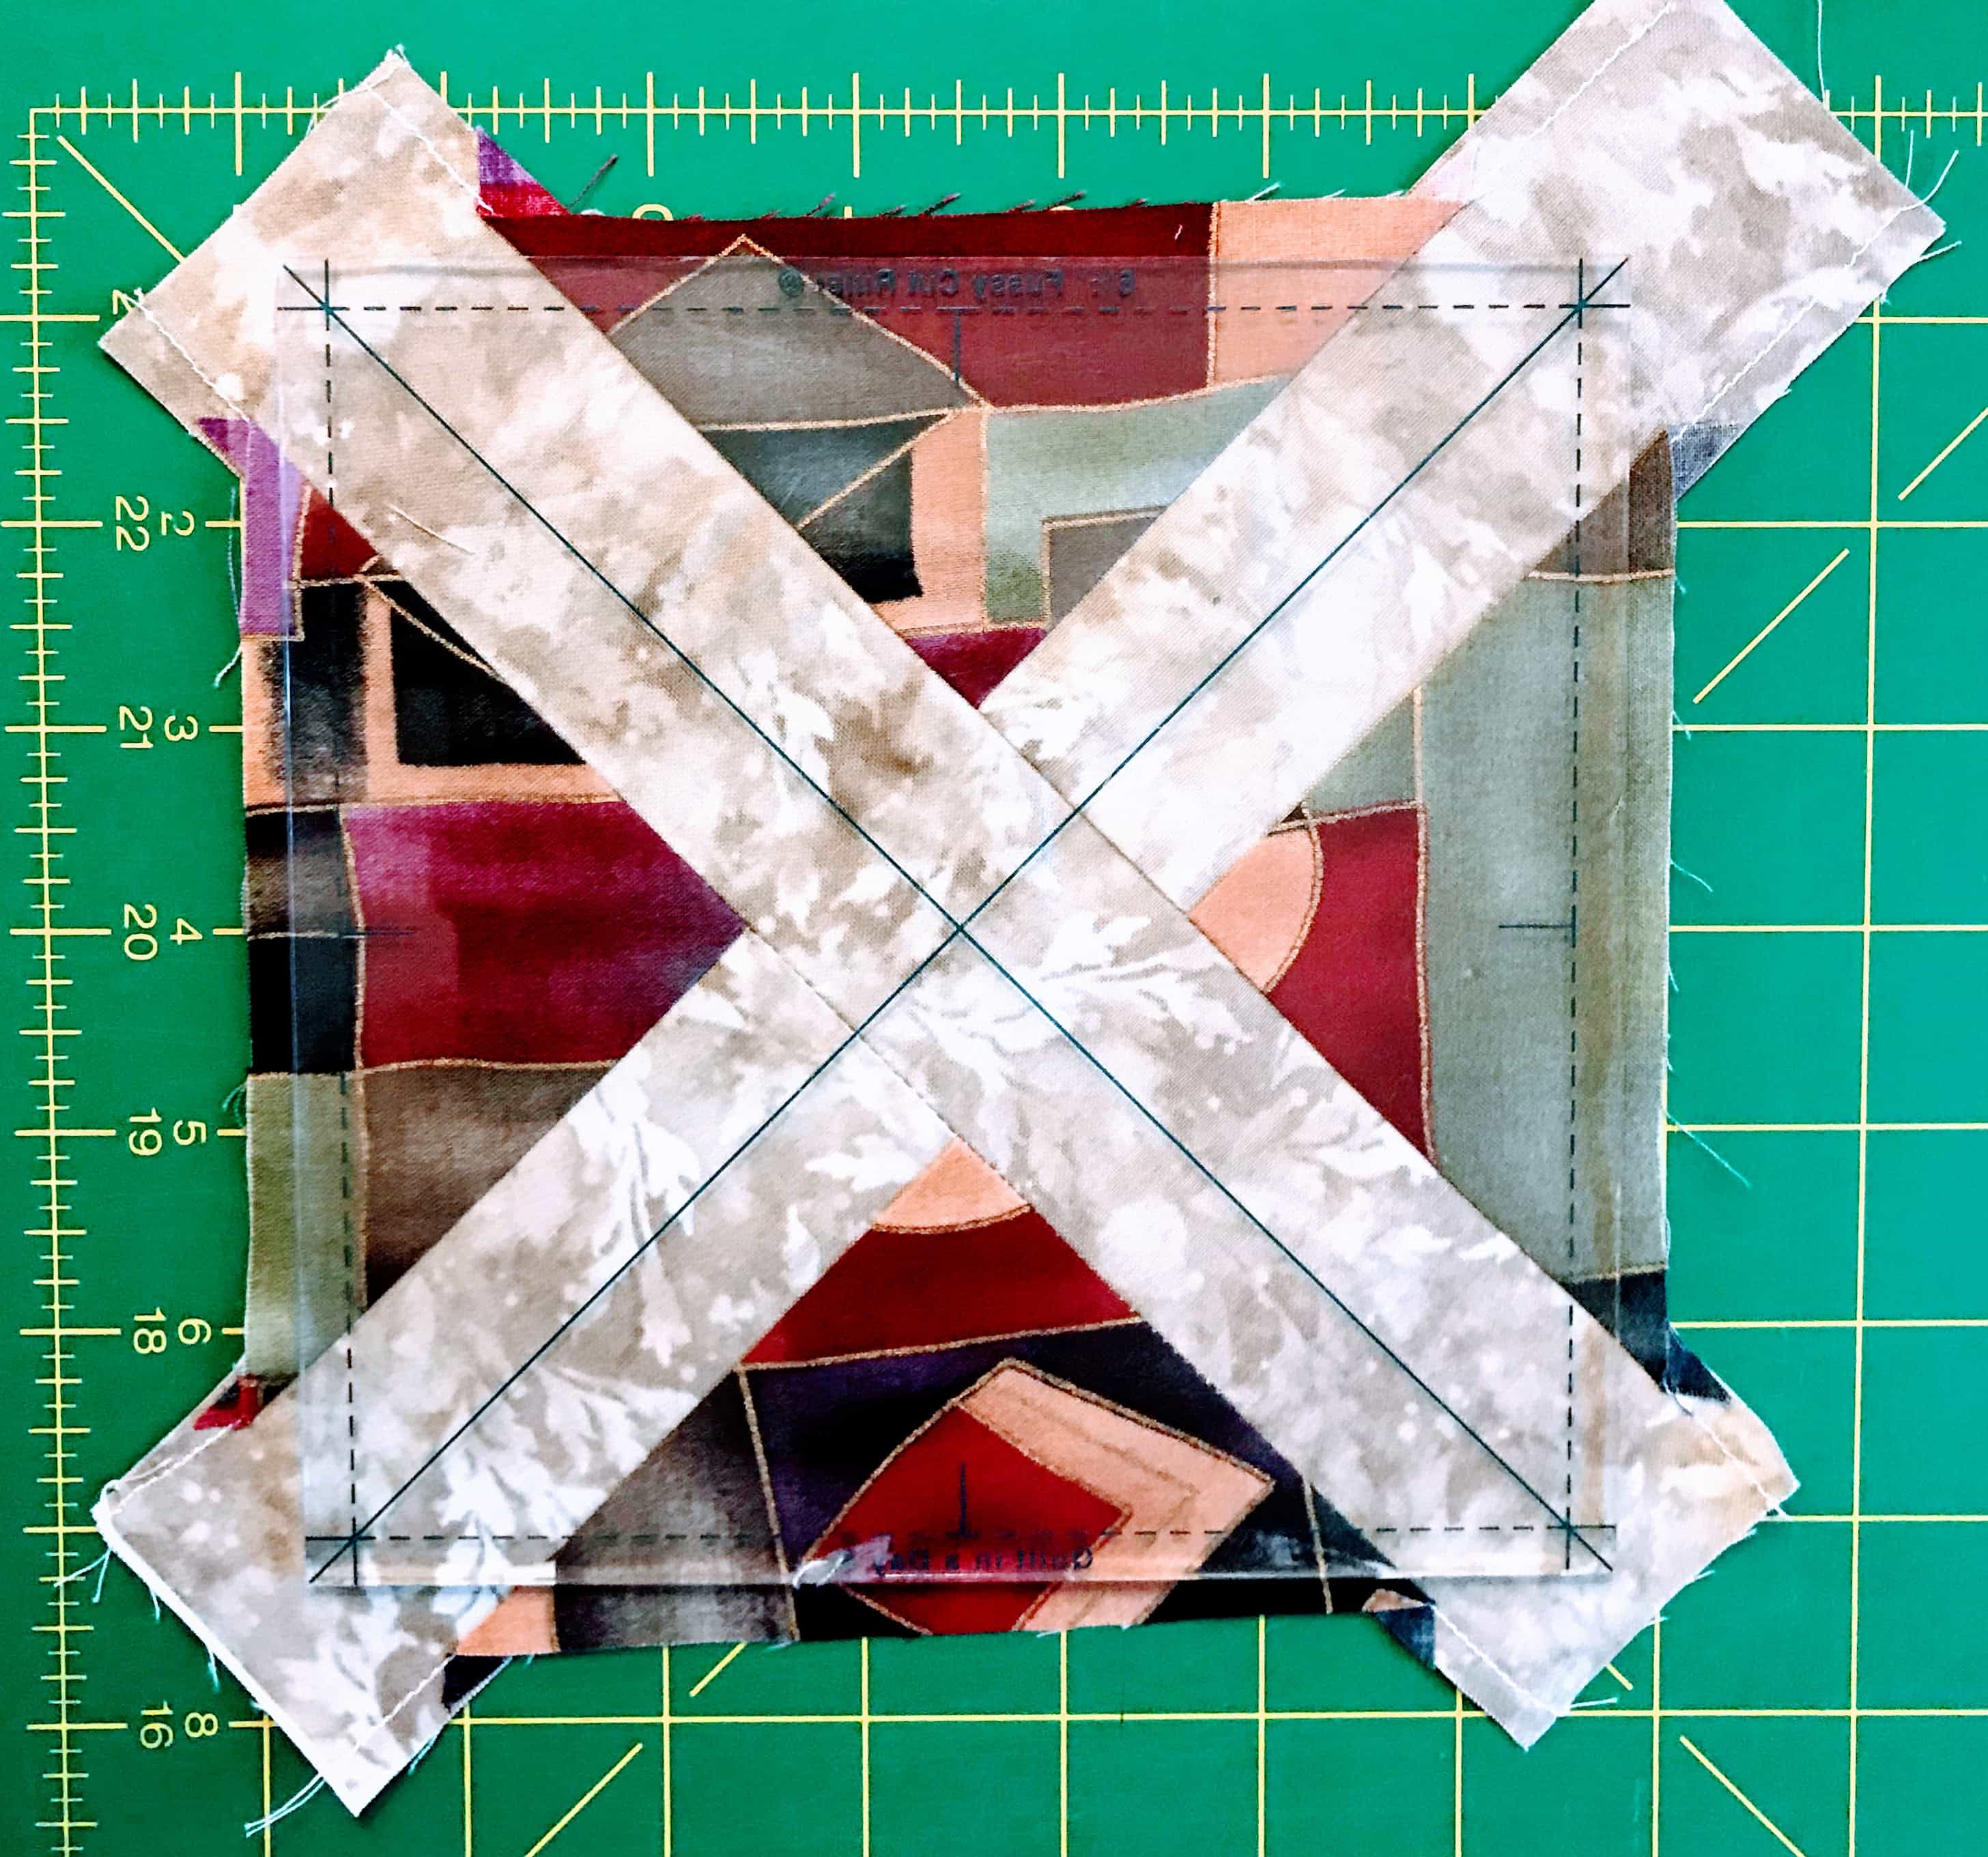
How to Square Up the Quilt Block
Center a 6-1/2″ Fussy Cut ruler on top of the block you just created, which will be just a little larger than the ruler. Cut around it. A rotating mat will be very helpful here.
Let’s Begin!
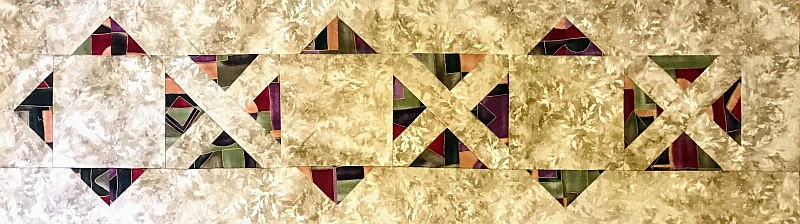
Assemble:
- (3) Red 5-1/2″ squares
- (6) Background 2″ x 10″ rectangles.
- (3) Background 6-1/2″ squares
- (1) background 3-1/2″ x 6-1/2″ rectangles
Following the directions above, make (3) X Blocks. Press and square up to 6-1/2″. Sew a 6-1/2″ background square to the right side of each one, then sew them in a row. Sew the background 3-1/2″ x 6-1/2″ rectangle to the left side of the row. Press away from the pieced block.

Adding the Borders
Assemble:
- (6) background 3-1/2″ x 12-1/2″ rectangles
- (2) background 3-1/2″ x 6-1/2″ rectangles
- (2) background 3-1/2″ squares
- (14) red 2-1/2″ squares
Draw a diagonal line on the back of each of the 2-1/2″ red squares. This will be your sewing line. Match that square right sides together with the 3-1/2″ x 12-1/2″ rectangles so the line connects the two sides. Sew.
Fold the square over the seam to the corner of the rectangle and press. If it matches exactly, you can trim the underside to a 1/4″ seam. If not, unpick the seam and try again.
Make (1) unit like each of these below, with triangles at opposite corners.

Using the same method, make (4) units with a triangle at either end. Press.

Using the 3-1/2″ x 6-1/2″ rectangles, make (1) like each of these below with triangles at opposite corners. Press.

U.sing the 3-1/2″ squares, make (2) like the ones below. Press

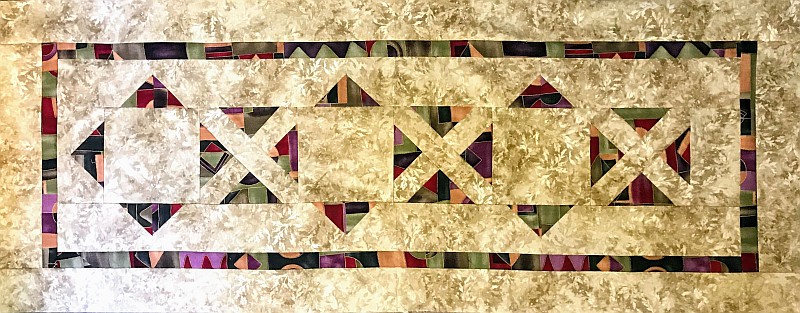
Set these units into rows as shown below. These will be your top and bottom borders.


Sew the right border on first, then the top and bottom borders. Press to the border. Your tablerunner top should measure 12-1/2″ x 42-1/2″.
The Outer Borders
From the LOONG 1-1/2″ wide red strip, cut (2) 12-1/2″ rectangles and sew to both sides of the tablerunner top. Take care to match the center of the strip with the center of the tablerunner top.
Cut (2) 44-1/2″ long rectangles from the same strip. Again matching centers, sew these to the top and bottom of your tablerunner top. Use a walking foot if you have one.
From the LOONG 3″ wide background strip, cut (2) 14-1/2″ rectangles and sew to both sides of the tablerunner top. Take care to match the center of the strip with the center of the tablerunner top.
Cut (2) 49-1/2″ long rectangles from the same strip. Again matching centers, sew these to the top and bottom of your tablerunner top. Use a walking foot if you have one.
You are done! Pin your top to the wall for a couple of days in an obvious place so you can decide on a quilting motif. Don’t forget to make a label.
Have another tip to offer? Send it to me or reply below and I will add it here.
Don’t forget to sign up for the newsletter! Once a week, I send updates on quilt-related information I have found while wandering the web. This might be an inspiring article, a tip or tutorial I have discovered (or written), and occasionally exclusive offers & discounts as well as immediate access to the secret page of free patterns, guides, and printables. You can follow my page on Facebook, or join the Make Believe Quilters group, too.


Very well done tutorial, and what a wonderful design. I like your modern take on a traditional holiday. Thank you for being a part of the Christmas in July Pattern Parade.
So different and nice too, thanks for sharing.
Thanks for sharing your modern Christmas runner! Very striking.
Wonderful tutorial!
I am in love with your design. This will look great in so many combinations of colors. Thank you for the great tutorial to go along with it!
Great design!! Thanks for sharing.
Thank you for the tutorial. I like the design.
Your table runner is wonderful. What a great design to use. So versatile. Thanks for a great tutorial.
Lovely to share the hop with you.
Thanks so much for sharing! What a great project!
Very cool table runner and great tutorial! Thanks for sharing! xx
I love this design – wouldn’t it be pretty in a full-sized quilt too? Thank you for inviting us over for a visit throughout the hop.
Thank you for this wonderful pattern. It’s perfect for a gift I want to make for my dear friend.
Both versions look good, but since I love red and white, that one is pulling me! Thank you.