
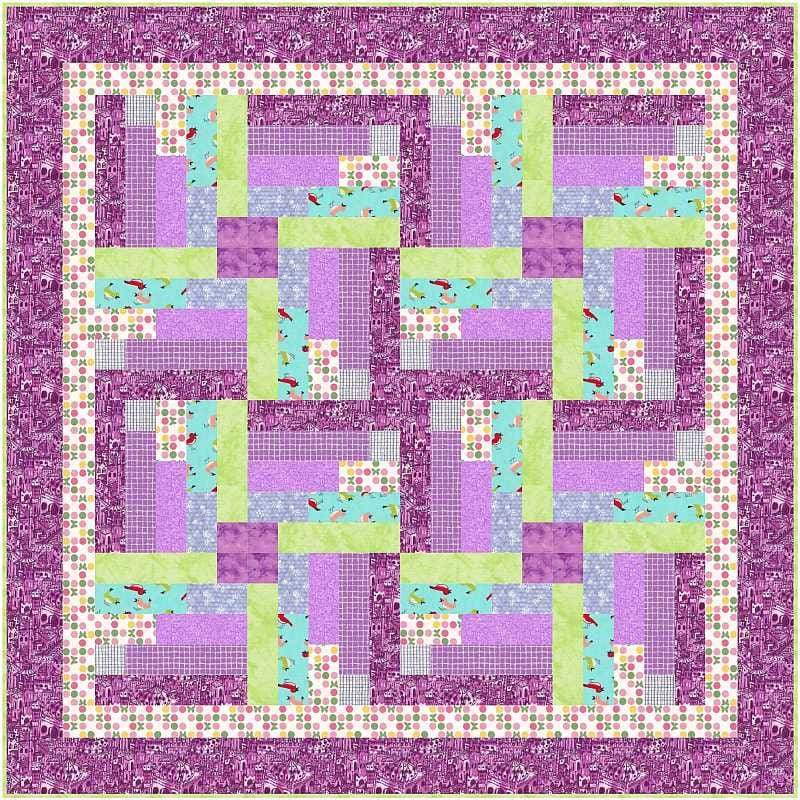
The Faux Log Cabin Quilt Block
Just like a traditional Log Cabin Quilt Block, the Faux Log Cabin Quit Block is made from strips. But those strips don’t revolve around a central square in a faux log cabin. They start out small and increase in size so the design isn’t actually created until you put four blocks together.
How to Make a Faux Log Cabin Quilt
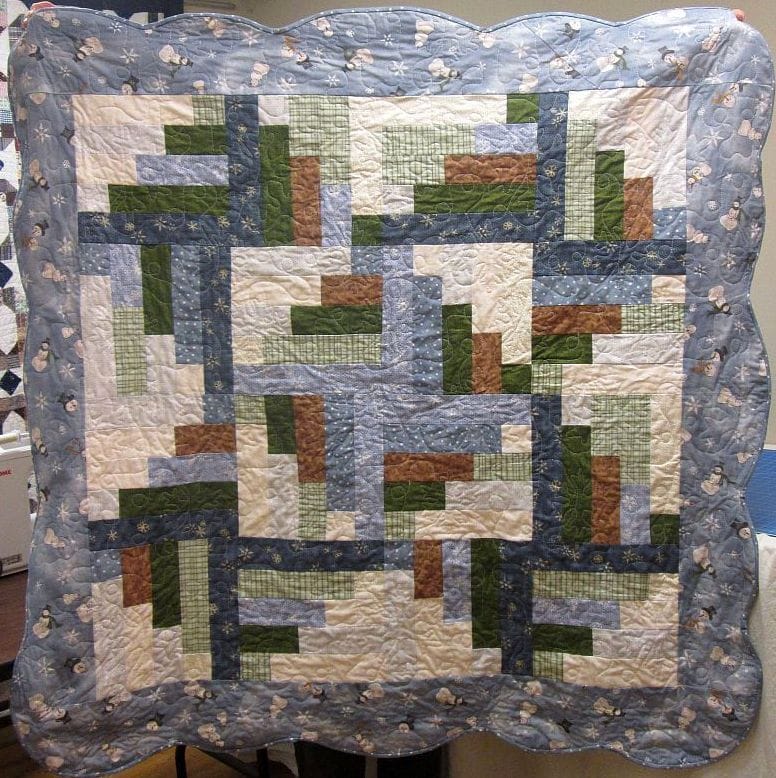
In this tutorial, I am working on the Slalom Race Quilt Pattern. Here is a sample I made about 10 years ago:
A free printable with information on making the scalloped border with the Scallops, Waves, and Vines ruler from Quilt-in-a-Day and finishing the endings of a bias binding using The Binding Tool is available to subscribers at the bottom of the page.
Before starting this project, I recommend that you press your fabric with spray sizing. It will make it easier to cut small pieces. Take the time to clean your machine, put in a new needle, and fill a few bobbins. When pressing, just hold the iron over a spot for a moment or two. This pattern assumes a perfect 1/4” seam.
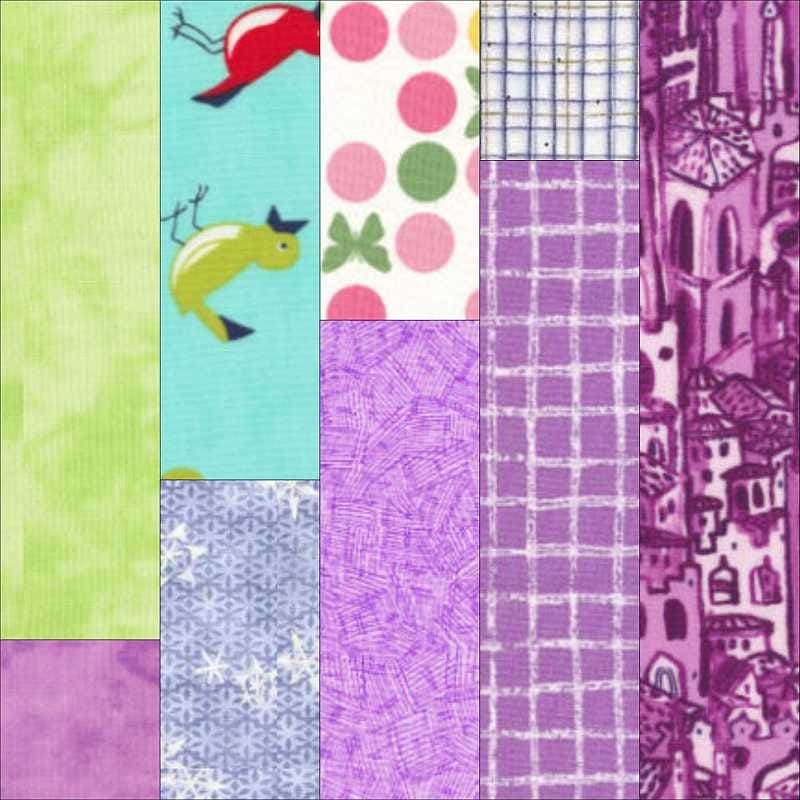
Fabric Requirements:
- 3 light fat quarters
- 5 dark fat quarters
- yardage for the inner border, outer border, and binding according to the pattern
Things you will find helpful:
- A strip cut ruler
- A 8-1/2″ square ruler
- Best Press or other spray starch
- A walking foot
- Halloween Candy
Light Fat Quarters
Press the 3 light fat quarters and trim to 17-1/2″ × 18″, avoiding the selvage.
Cut these fat quarters into (6) 9″ × 17-1/2″ rectangles.
Dark Fat Quarters
Press the 5 dark fat quarters and trim to 17-1/2″ × 18″, avoiding the selvage.
Cut these fat quarters into (10) 9″ × 17-1/2″ rectangles.
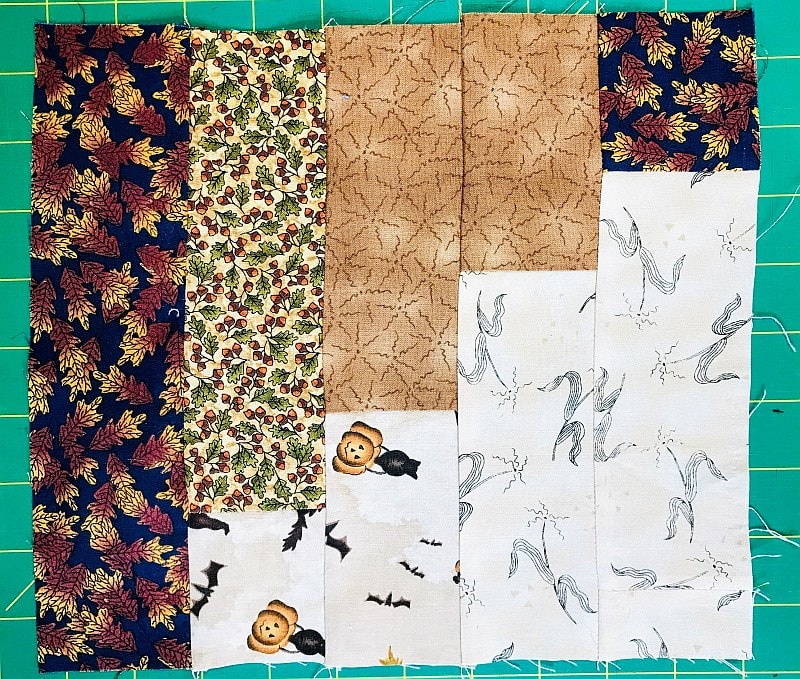
This is the layout of the Faux Log Cabin Quilt Block
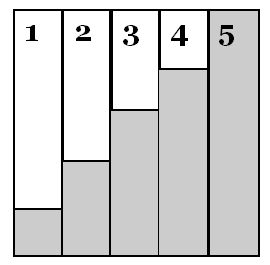
For Strips One and Four
Cut a 2″ × 17-1/2″ strip from (3) different light 9″ × 17-1/2″ rectangles. Your leftover rectangles will measure 7″ × 17-1/2″.
Cut a 2″ × 17-1/2″ strip from (3) different dark 9″ × 17-1/2″ rectangles. Your leftover rectangles will measure 7″ × 17-1/2″.
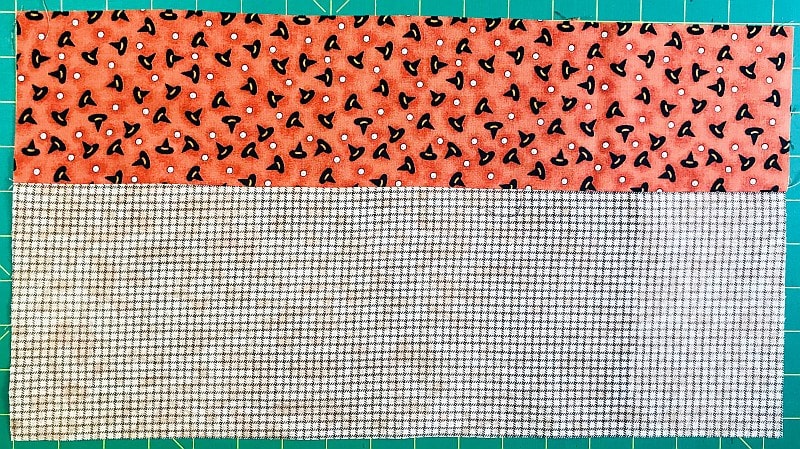
To make the Strip One units, sew a 2″ × 17-1/2″ dark strip to the bottom of a light 7″ × 17-1/2″ rectangle. The new two-part rectangles will measure 8-1/2″ × 17-1/2″. Make (3) units and press to the dark.
Cut the two-part rectangle into (7) 2″ × 8-1/2″ strips. You will have 21 strips but you will only need 16 for this project. Save the leftover strips for use in another project.
To make the Strip Four units, sew a 2″ × 17-1/2″ light strip to the top of a dark 7″ × 17-1/2″ rectangle. The new two-part rectangles will measure 8-1/2″ × 17-1/2″. Make (3) units and press to the dark.
Cut the two-part rectangle into (7) 2″ × 8-1/2″ strips. You will have 21 strips but you will only need 16 for this project.
Strips 2, 3 and 5
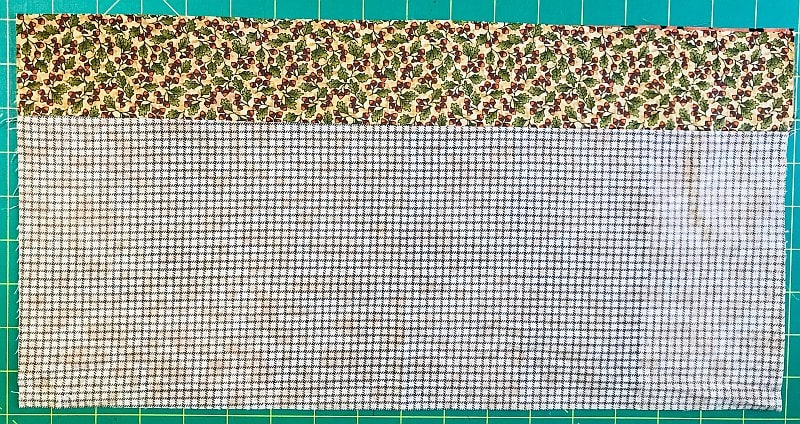
To make the Strip Two units, cut a 5-1/2″ × 17-1/2″ strip from (3) different light 9″ × 17-1/2″ rectangles. Your leftover rectangles will measure 3-1/2″ × 17-1/2″.
Cut a 3-1/2″ × 17-1/2″ strip from (3) different dark 9″ × 17-1/2″ rectangles. Your leftover rectangles will measure 5-1/2″ × 17-1/2″.
Sew a 3-1/2″ × 17-1/2″ dark strip to the bottom of a light 5-1/2″ × 17-1/2″ rectangle. The new two-part rectangles will measure 8-1/2″ × 17-1/2″. Make (3) units and press to the dark. Cut the two-part rectangle into (7) 2″ × 8-1/2″ strips.
You will have 21 strips. You will only need 16 for this project.
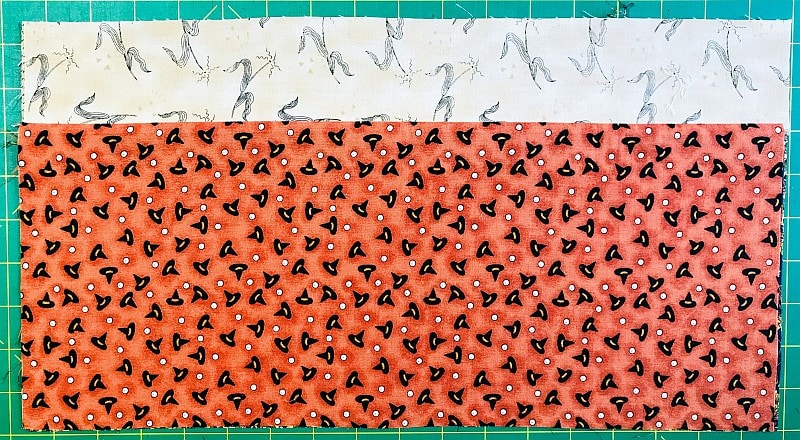
To make the Strip Three units, sew a 3-1/2″ × 17-1/2″ light strip to the top of a dark 5-1/2″ × 17-1/2″ rectangle. The new two-part rectangles will measure 8-1/2″ × 17-1/2″.
Make (3) units and press to the dark. Cut the two-part rectangle into (7) 2″ × 8-1/2″ strips.
You will have 21 strips. You will only need 16 for this project.

To make the Strip Five unit, cut (16) 2″ × 8-1/2″ strips from (3) different dark 9″ × 17-1/2″ rectangles.
Time to Sew the Faux Log Cabin Quilt Blocks
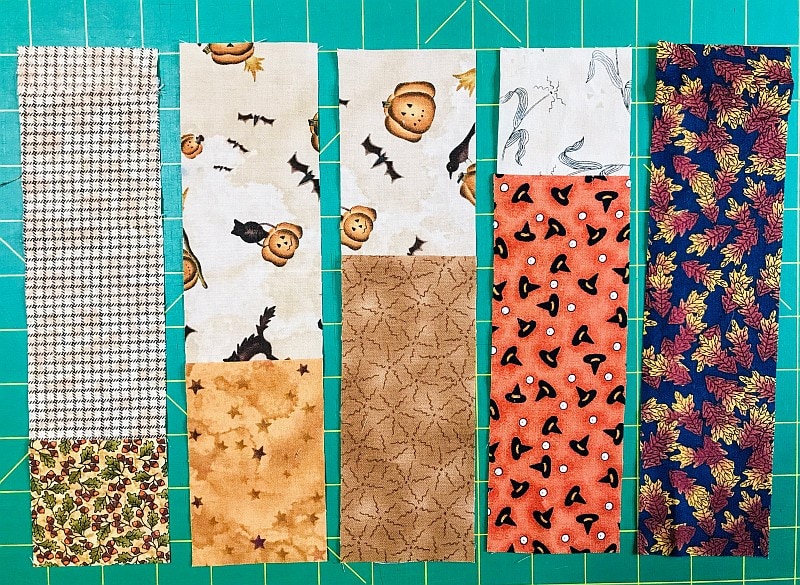
Sew strip 1 to strip 2. Make 16 sets. Sew strip 3 to strip 2, then strip 4 to strip 3. Finally, sew strip 5 to strip 4 and press all the seams in one direction. Square up the (16) blocks to 8-1/2″ × 8-1/2″.
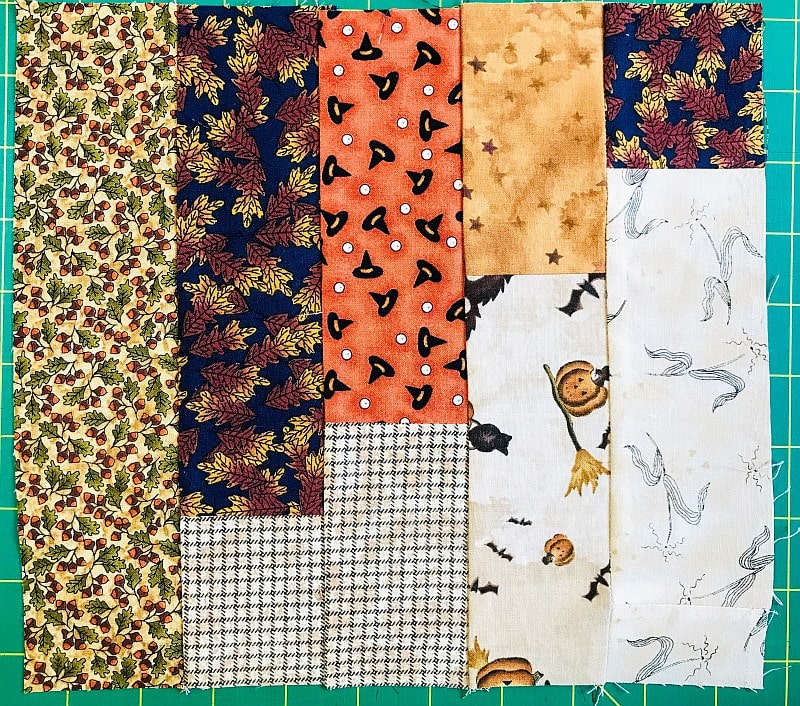
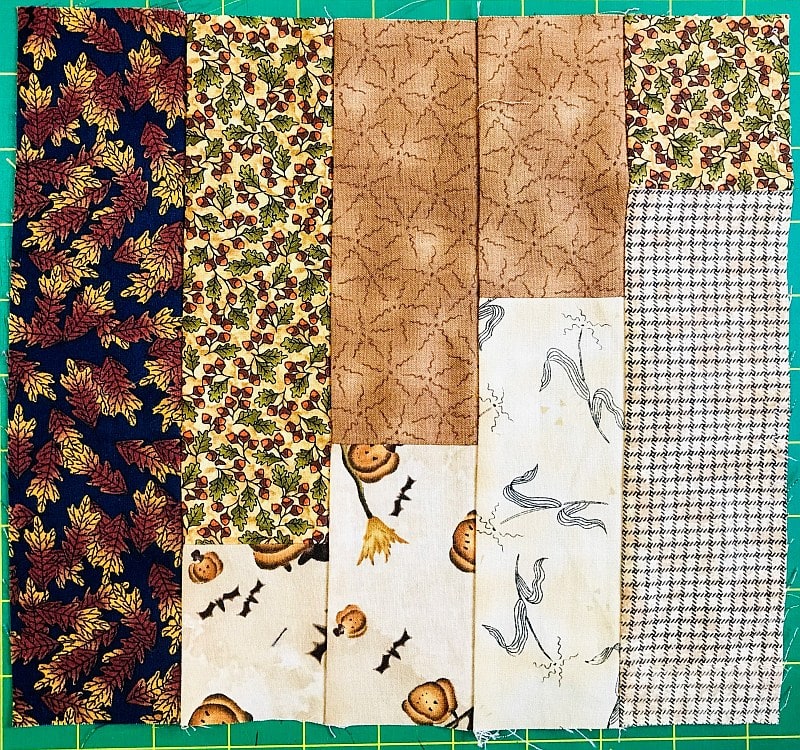
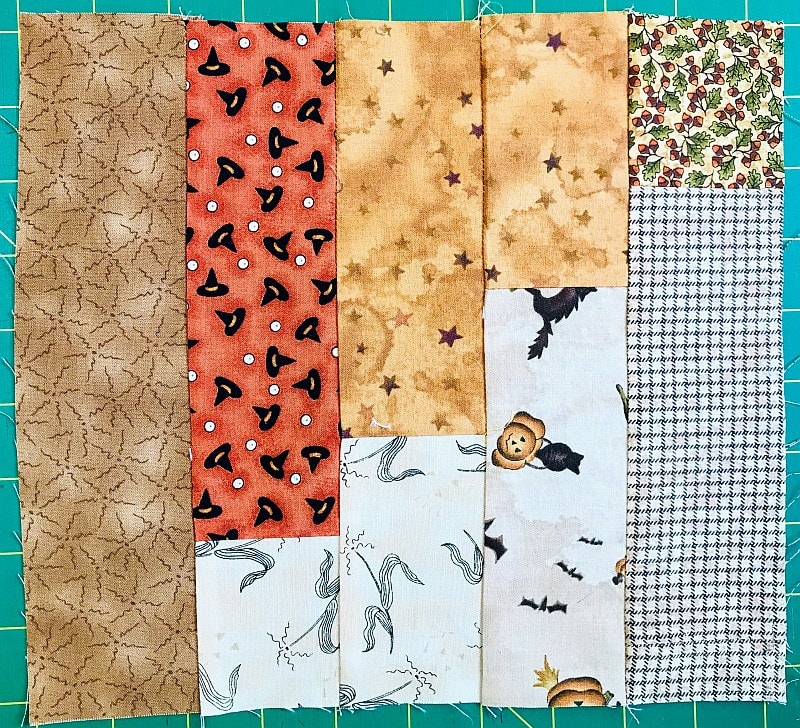
Lay these blocks on a floor, bed, or design wall and play. Once you have decided on an arrangement, sew them in four rows of four blocks each. Press the seams of the even rows to the right and the odd rows to the left. This will help your blocks nestle at the seams and keeps your quilt top straight.
Attach the borders according to the pattern. You are done! If you are making a wall hanging, here is an article on How to Add a Hanging Sleeve. Don’t forget to make a label!
Please add kris@scrapdash.com to your contacts list to make sure you get the confirmation message. Drag the confirmation message from the Promotion tab to the Primary tab if you use Gmail.
If you are already a subscriber, it’s okay to fill out this form. You won’t be put on the mailing list twice.
Have another tip to offer? Send it to me or reply below and I will add it here.
Don’t forget to sign up for the newsletter! Once a week, I send updates on quilt-related information I have found while wandering the web. This might be an inspiring article, a tip or tutorial I have discovered (or written), and occasionally exclusive offers & discounts as well as immediate access to the secret page of free patterns, guides, and printables. You can follow my page on Facebook, or join the Make Believe Quilters group, too.

I’m having a hard time locating the Faux Log Cabin link to PRINT. What am I doing wrong?
The blue purchase button for the pattern is under the picture. The Print Friendly button for the tutorial is ALL THE WAY down at the bottom of the page. It’s a thin green button.