
To visit the other designers in this hop, see the list at the bottom of the page. To print this page, use the green Print Friendly button at the bottom, just above the comments. If that doesn’t work, try pressing down the CNTRL button and the P button at the same time. Or the COMMAND button and the P button if you are on a Mac. That should bring up the printer dialog.
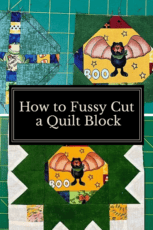
Today I thought I would show you how to fussy cut a monster into a sunflower block. Well, these aren’t monsters exactly, are they? But they will be fun on the front of a Trick or Treat bag.
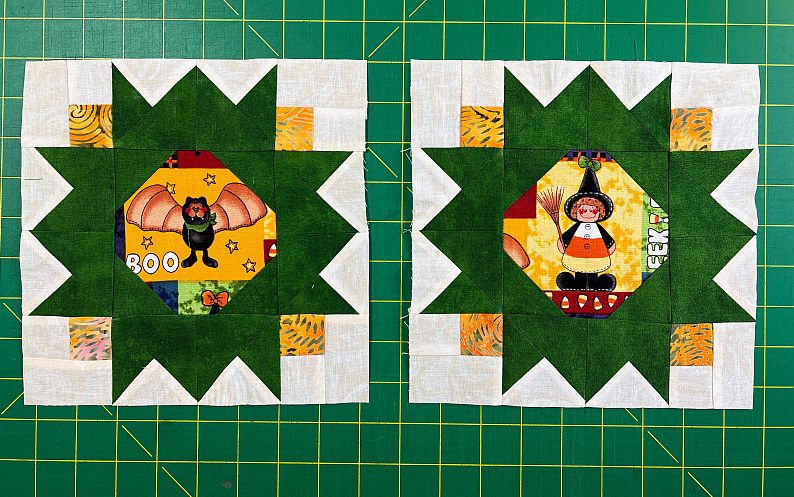
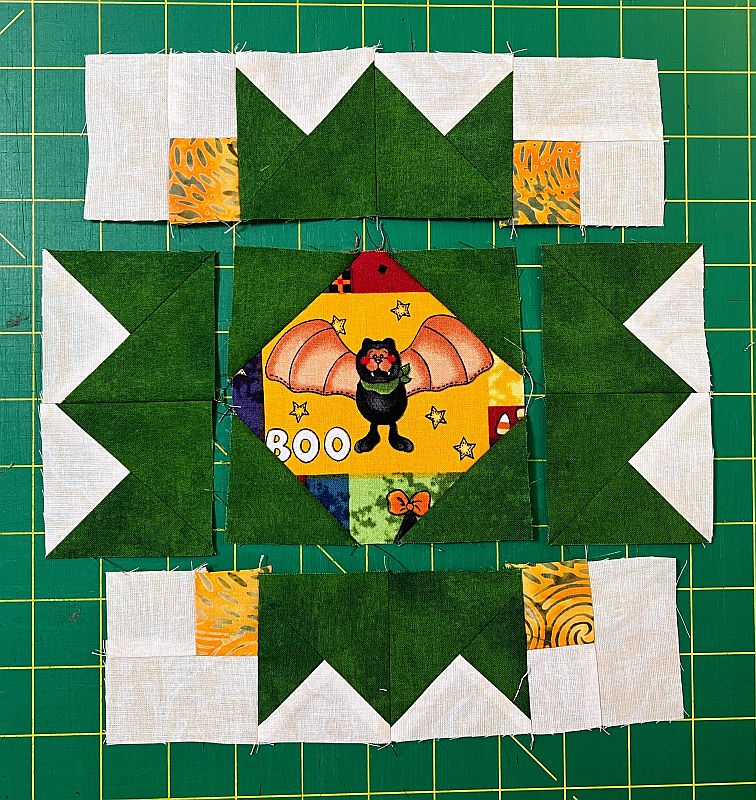
This block is made of three basic units. The 4-1/2″ center is fussy cut to feature a Halloween character. It is surrounded by a 2″ square to give the illusion of a circular center. The leaves are made of two Quarter-Square-Triangle [QST] blocks. The corners are a four-patch, colored to highlight the fussy cut square.
Fabric Requirements
Before starting this project, I recommend that you press your fabric with spray sizing. It will make it easier to cut small pieces. Take the time to clean your machine, put in a new needle, and fill a few bobbins. When pressing, just hold the iron over a spot for a moment or two. This pattern assumes a perfect 1/4” seam.
Center
- Fabric to Fussy Cut
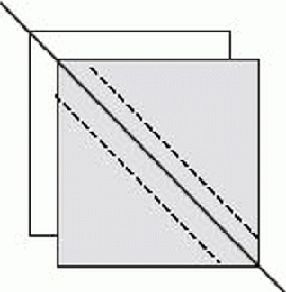
- (8) Green Squares. Draw a diagonal line on the back of each of these squares
QST
- (8) 3″ Green Squares. Draw a diagonal line on the back of each of these squares
- (4) 3-1/2″ Green Squares
- (4) 3-1/2″ Ecru Squares. Draw a diagonal line on the back of each of these squares.
Three-Patch Corner
- (8) 1-1/2″ × 2-1/2″ Blender Ecru rectangles
- (8) 1-1/2″ Blender Ecru squares
- (8) 1-1/2″ Orange squares
How to Fussy Cut
Place a 4-1/2″ Square-Up Ruler on a design that you would like to feature in your fabric. It might be easier to work from the back, so you can draw a pencil line around the design. Cut on your pencil line and double check that it is still 4-1/2″.
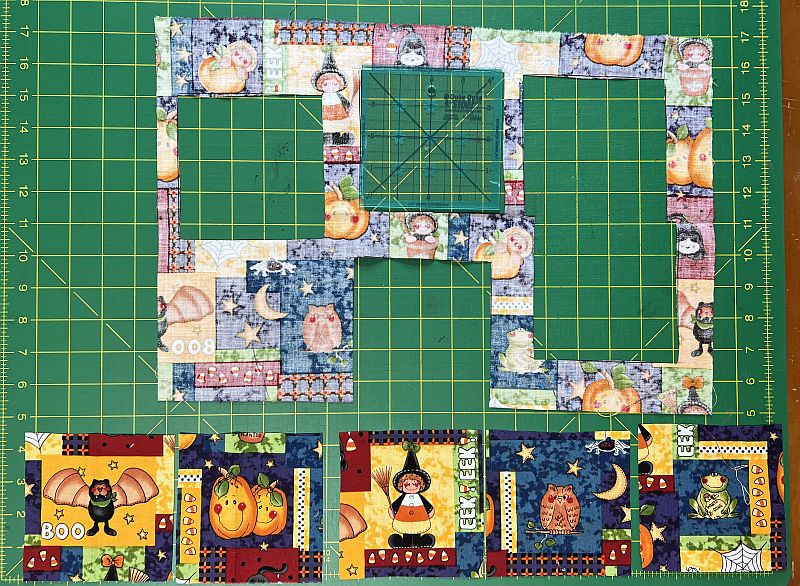
For this project, you will need [2] fussy-cut pieces. You may want to cut another piece that you can use as a test block. If all turns out well, you can use it to make a mug rug or a placemat.
To make the test block, place the 2″ Green square on a corner of the fussy-cut piece, right sides together, oriented so the diagonal line touches two sides. Sew on this line.
If your sewing machine struggles with something this small, try starting your stitch on another piece of fabric. You could also physically hold the two threads behind the block so they can’t pull. I find that starching the fabric helps as well.
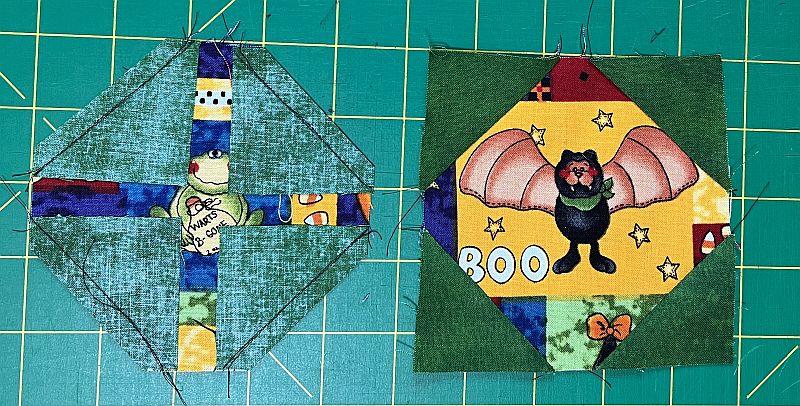
Fold the square over the seam. It should touch the corner so the edge is square. If it does, you can trim the fussy-cut piece underneath to a 1/4″ seam. If not, unpick the seam and try again. For the test block, you can sew and test each of the four corners.
If you are happy with the results, add the corner block to the fussy-cut squares by going from one unit to the next. This is called chain stitching. Make a total of [2] units like this. Trim and press.
How to Make a Quarter Square Triangle (QST)
To make the QSTs, start with Half-Square-Triangles [HSTs.]
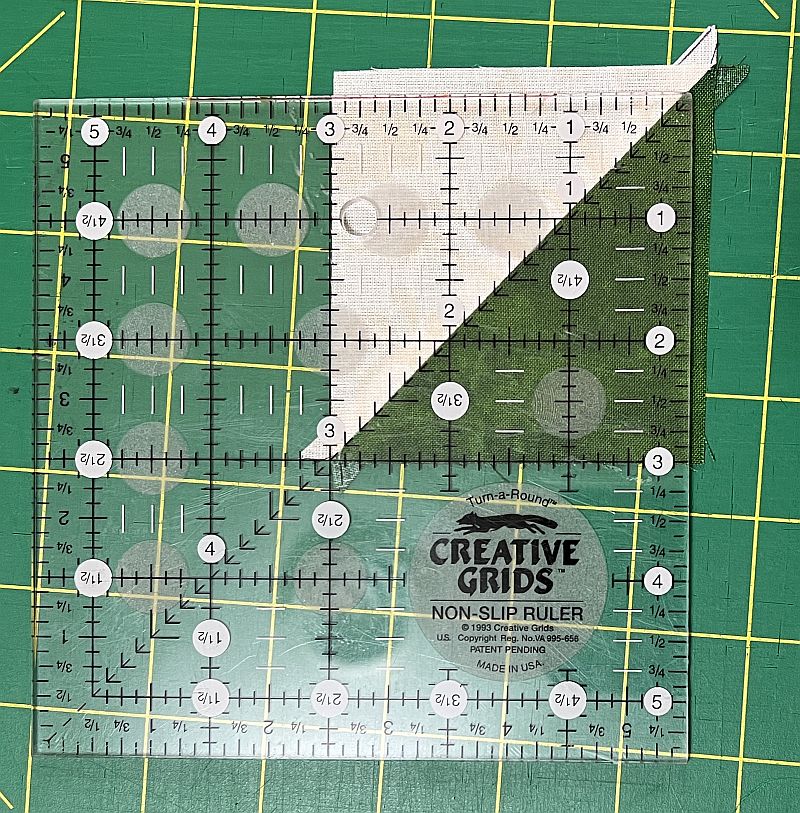
Again, you might want to make a test block. To do this, place a 3-1/2″ Green square right sides together with a 3-1/2″ Ecru square. This time you are sewing 1/4″ to both sides of the diagonal line. Cut on the line and press the seam open.
Square up this block to 3″, taking care to keep the diagonal line on the ruler on the diagonal seam. I am using a Creative Grid ruler below but you can use any ruler with a diagonal line.
You will make [2] Green/Ecru HSTs. To continue making the test block, make [2] more 3″ Green/Ecru HSTs following the directions above for a total of [4] HSTs.
Place these right sides together with the [4] 3″ Green squares so the diagonal line bisects the seam. Sew 1/4″ on both sides of this line, taking care not to disturb the seam that is pressed open.
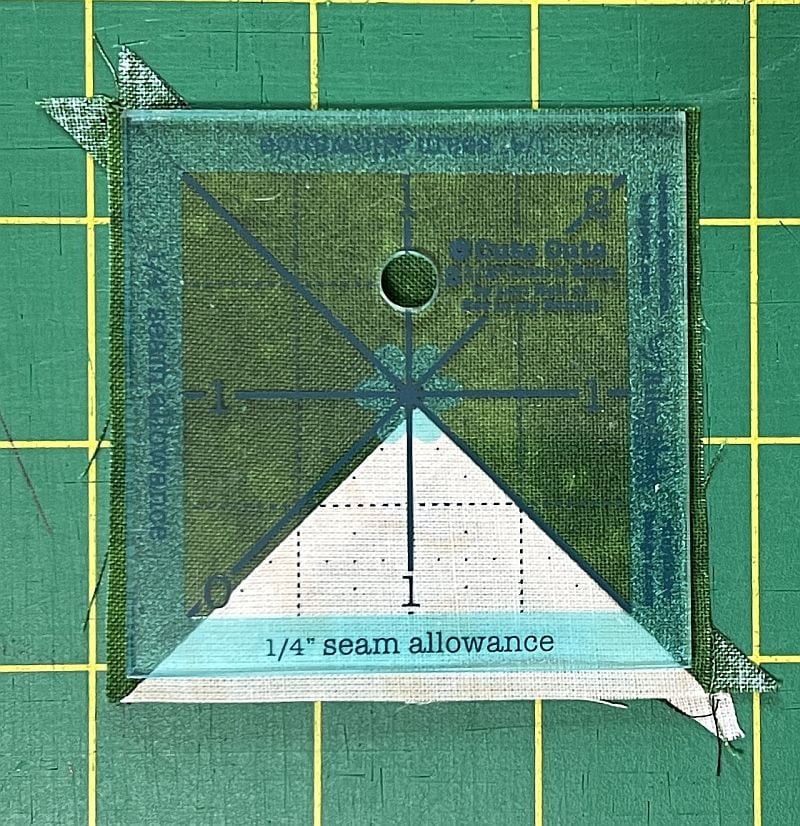
Cut these apart and press the seam open again. You will have made [8] QSTs. Place a 2-1/2″ square-up ruler so the two diagonal lines on the ruler match up with the two diagonal seams. Cut around this ruler.
Sew these two units side. Press open or to the side. It should measure 2-1/2″ × 4-1/2″. If you are happy with your test unit, make [8] double units total.
Making the Three-Part Corners
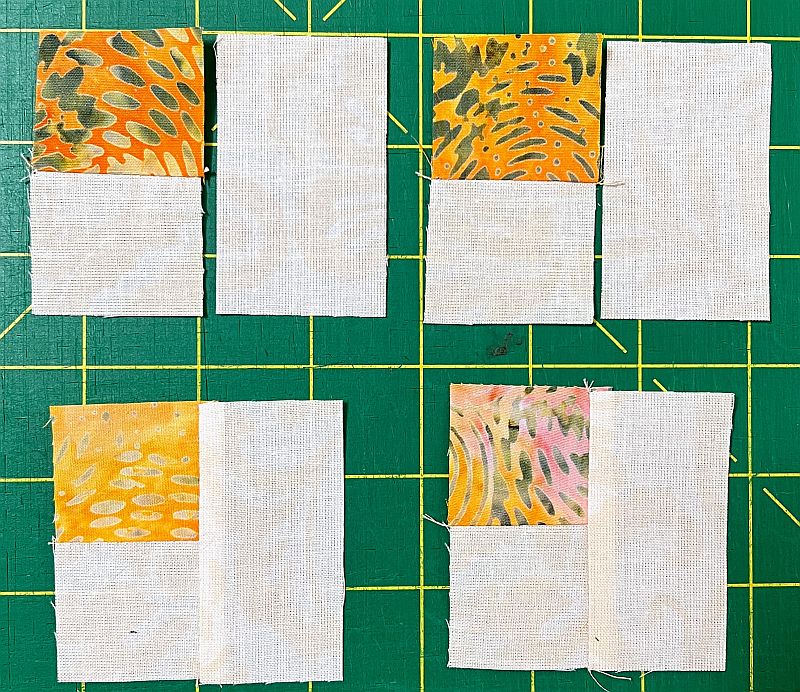
To make the corner Three-Patches of the block, sew the 1-1/2″ Ecru square to the same size Orange square. Press toward the orange. Sew the 1-1/2″ × 2-1/2″ Ecru rectangles to one side of this unit as shown. Press. Make (8)
Sew a Three-Patch to both sides of (4) double QST units, rotating the block to match the design as shown below. Make (4) rows and press as shown. These are the top and bottom rows of the block. It will measure 2-1/2″ × 8-1/2″.
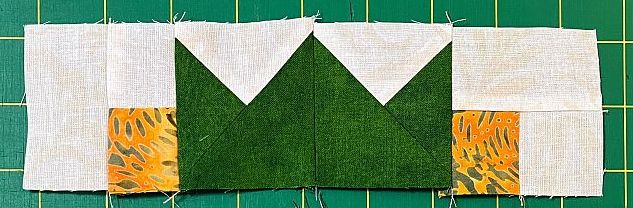
Sew a double QST unit to both sides of the fussy cut block as shown below. Press to the QSTs. Sew the rows you just made to the top and bottom of the block and press. It should measure 8-1/2″ square. If you are happy with your test block, make a total of (2). Square up these blocks to 8-1/2″.
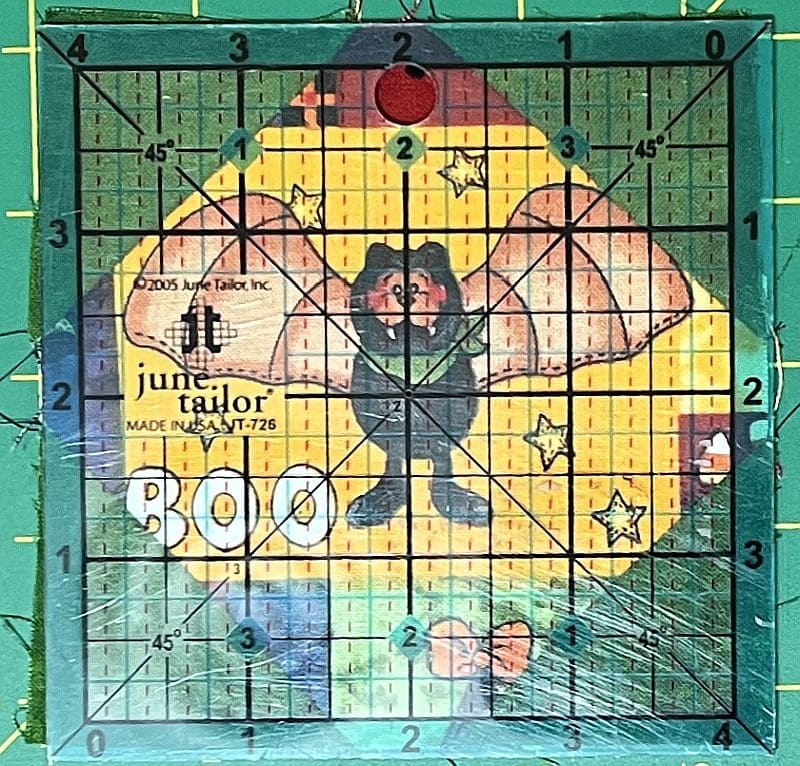
Time to Square it Up
All I have to do now is press it firmly and square it up. I like the CGR Square-it-up and Fussy-Cut rulers for this because they have diagonal lines to place on each of the four corners, and center straight lines both horizontal and vertical for the middle.
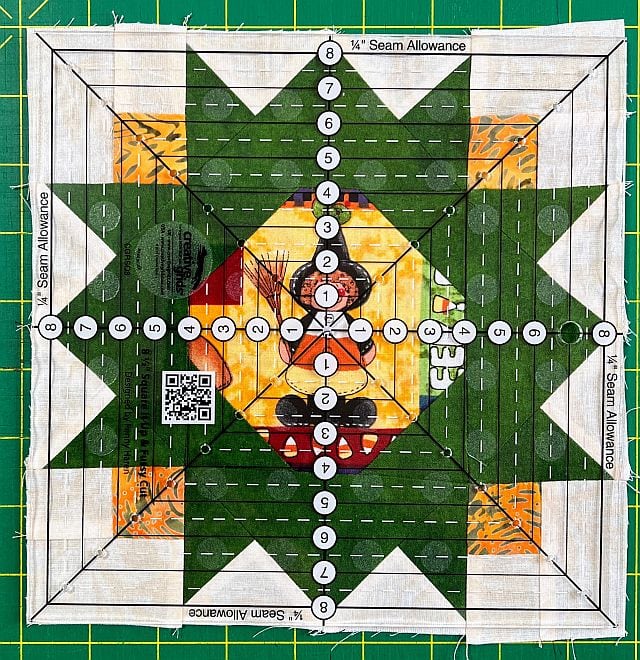
Sometimes you only have to trim off a little bit.
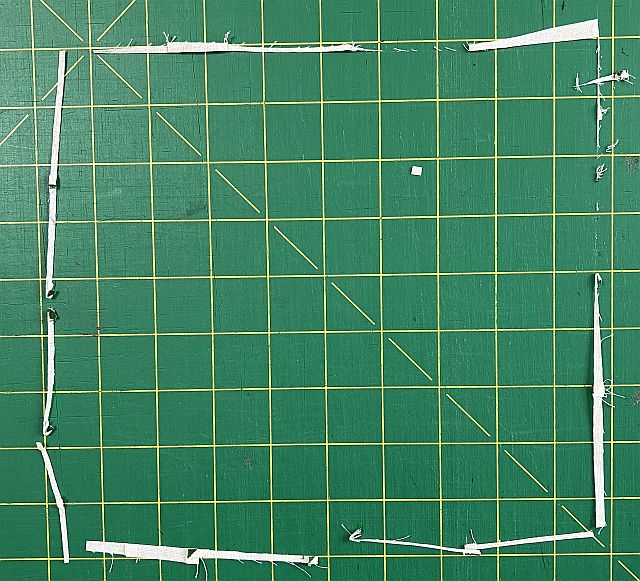
And it’s done!
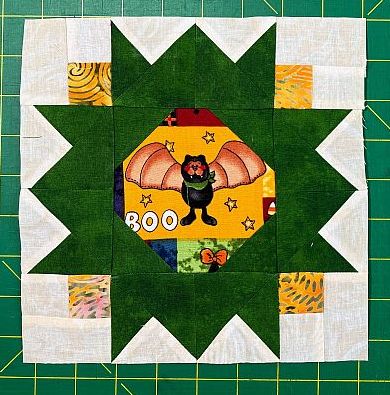
Maybe I will use it on the front of a Fabric Bag…
Please add kris@scrapdash.com to your contacts list to make sure you get the confirmation message. Drag the confirmation message from the Promotion tab to the Primary tab if you use Gmail.
If you are already a subscriber, it’s okay to fill out this form. You won’t be put on the mailing list twice.
Have another tip to offer? Send it to me or reply below and I will add it here.
Don’t forget to sign up for the newsletter! Once a week, I send updates on quilt-related information I have found while wandering the web. This might be an inspiring article, a tip or tutorial I have discovered (or written), and occasionally exclusive offers & discounts as well as immediate access to the secret page of free patterns, guides, and printables. You can follow my page on Facebook, or join the Make Believe Quilters group, too.
Other Designers
Monday October 23
Tuesday October 24
Wednesday October 25
- Karrin’s Crazy World
- Just Because Quilts
- Quilt Doodle Designs
- Elizabeth Coughlin Designs
- MS P Designs USA
Thursday October 26
Here are other Halloween ideas:
- Boo!-ti-ful Halloween Wall Hanging or Lap Quilt
- Halloween Hoppin’ – Using Purple in a Halloween Quilt
- Halloween Freebie – Spiders in My Attic
- Ghastly Ghouls and Zombies
- A Batty Pumpkin Quilt Block
- Free Braided Table Topper Pattern for Halloween
- Orange You Glad Harvey?
- Boo! A Fussy Cut Monster Mash Quilt Block
- A Quilted Halloween Story

Very pretty blocks and fabrics. They look wonderful for Autumn and Halloween. Thahk you also for another tutorial.
What monsterously cute block these are. I think I need a new ruler. That square it up and fussy cut ruler looks like a great one to have in my sewing room.
Such adorable blocks – perfect for a halloween bag!
Thank you for the tutorial. Gosh, wouldn’t this work out great for any holiday season? You’ve got me thinking…
Great tutorial! The fabric is adorable that you used.
Great tutorial and block! Thanks so much!
Thank you for the tutorial. Great blocks for Halloween.
Very cute! I love fussy-cutting to add whimsy to my pieced blocks.
Very cute! I love fussy-cutting to add whimsy to my pieced blocks.
Thanks so much for the tutorial on this ever so fun block. The blocks you have used for an example let us know that the potentials are amazing.
Cute blocks! Love the fussy cuts.