

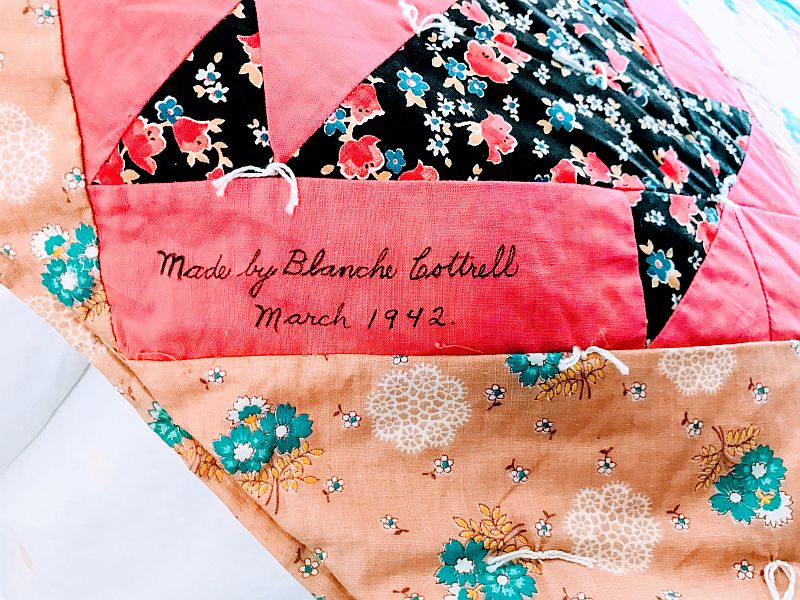
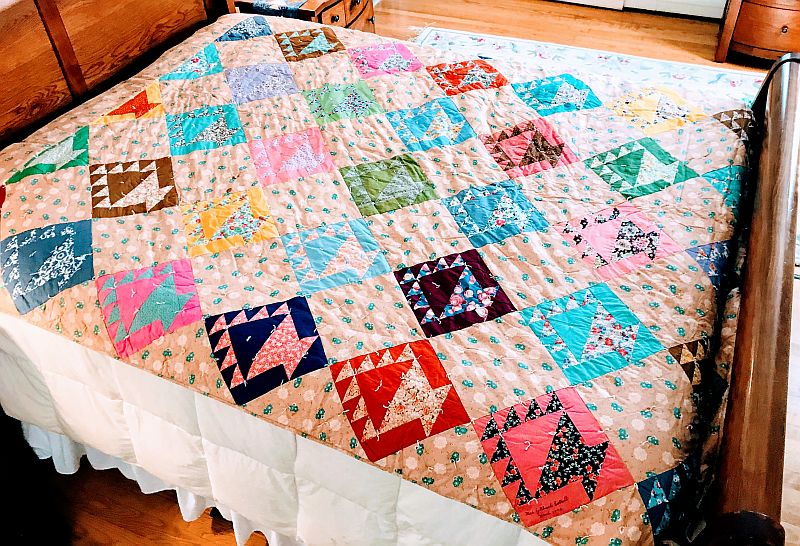
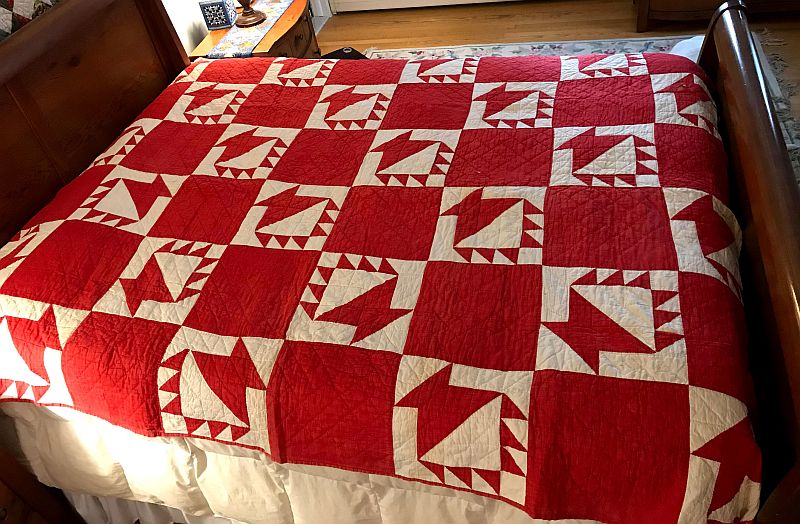
One of the things that has always fascinated me about antique quilts are the blocks they used and the names they gave the blocks. I find them inspiring. Here are two antique “Cake Stand” quilts that are in my collection. The first one is from the 40’s – bless the woman who signed her work! – but the red and white one is circa 1900 or slightly earlier judging from the turkey red. It was probably called just “baskets” back then. With some exceptions, quilt blocks weren’t given names prior to the newspaper circulation wars of the Depression.
Creating the Cake Stand Block
This block uses a lot of half-square-triangle units (HSTs). Eight of them, in fact, which makes this block the perfect one for the Magic 8 method. Here is how to make it.
PLEASE NOTE: This is a 10″ Block.
Assemble:
- (1) 6″ x 6″ Background Square
- (1) 6″ x 6″ Color Square
On the back of the Background squares, draw 4 lines: one vertically through the center; one horizontally through the center and one on both diagonals. These will be your cutting lines.
Place the Background square and the color square right sides together. Sew 1/4″ on both sides of the diagonal lines.
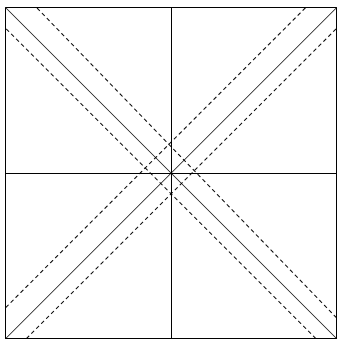
Press your sewn block. Don’t move the iron. Just press with a hot iron in an up and down motion. You want it to lay very flat before cutting. Cut it apart on the drawn lines. If you cut it apart using a rotary cutter, take care not to move the squares with each cut. A rotating cutting mat will come in very handy.
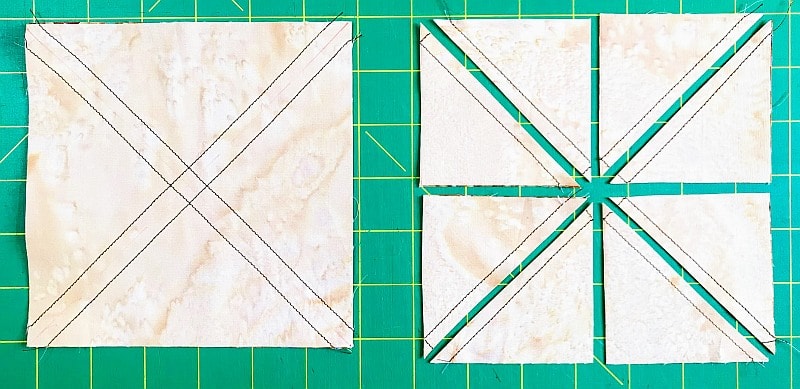
When you have all the blocks cut, you will need to square them up. There are two ways you can square up your block. You can place a 2-1/2″ ruler so the diagonal line is directly over the seam and just cut two sides. Or you can press open the block (pressing to the dark) and square it up to 2-1/2″ x 2-1/2″.
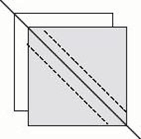
The Traditional Way of Making an HST
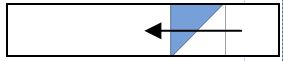
This block needs one larger HST. It’s easier to make that using the Traditional Method of making HSTs. In this method, you place a 7″ x 7″ Color square right sides together with a 7″ x 7″ Background square. Draw a diagonal line on the back of one square. Sew 1/4″ on both sides of the line. Cut on the line and press to the dark. Square up this block to 6-1/2″.
Putting it all together
Assemble:
- The (8) small HSTs that you just made
- (1) large HST
- (2) 2-1/2″ x 2-1/2″ Background squares
- (2) 2-1/2″ x 6-1/2″ Background rectangles
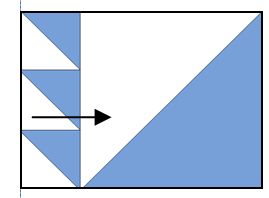
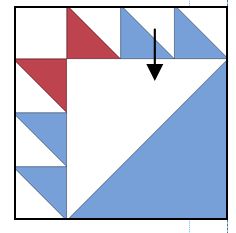
Sew (1) group of three small HSTs in a row as shown below. These will be the top row of your block.
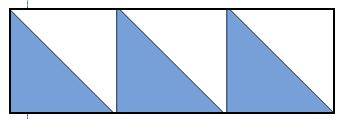
Sew a 2-1/2″ Background square to the left side of this row. Press to the small square.
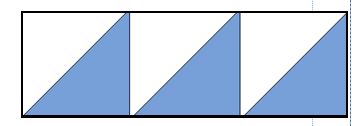
Sew (1) group of three small HSTs in a row as shown. These will be the side row of your block. Notice that the angle is different.
Sew the side row to the left side of the large HST as shown. Press to the large HST.
Sew the two-part unit with the Background square on the left to the top of the block you just created. Press to the larger HST.
Stop and look at your block. See the two HSTs that are colored red in the graphic? They make a little bow tie. If your block also has a bow tie, you are doing great! If not, you have to rearrange your small HSTs.
Sew a small HST to the right side of a 2-1/2″ x 6-1/2″ Background rectangle as shown. Press to the rectangle.
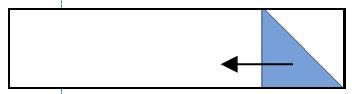
Sew this set to the right side of the unit you just made. Press to the rectangle.
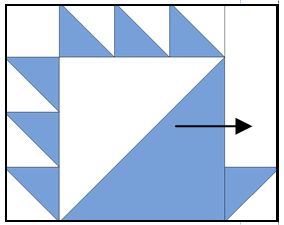
Sew a small HST to the right side of a 2-1/2″ x 6-1/2″ Background rectangle as shown below. Notice that this HST is at a different angle. Press to the rectangle. Sew the remaining 2-1/2″ Background square to the right side of the HST and press to the HST. Sew this unit to the bottom of your basket block.
Because of the way you pressed your seams, they should just nest together and give you a flat block. Use pins to encourage this behavior. Press from the back so you can fix any twisted seams. Your block should measure 10-1/2″ square.
If this block looks familiar, it is because it is the same one as the one I used in the Amish Baskets pattern. That quilt was based on an antique Amish quilt.
Please add kris@scrapdash.com to your contacts list to make sure you get the confirmation message. Drag the confirmation message from the Promotion tab to the Primary tab if you use Gmail.
If you are already a subscriber, it’s okay to fill out this form. You won’t be put on the mailing list twice.
Have another tip to offer? Send it to me or reply below and I will add it here.
Don’t forget to sign up for the newsletter! Once a week, I send updates on quilt-related information I have found while wandering the web. This might be an inspiring article, a tip or tutorial I have discovered (or written), and occasionally exclusive offers & discounts as well as immediate access to the secret page of free patterns, guides, and printables. You can follow my page on Facebook, or join the Make Believe Quilters group, too.

thank you for sharing this cute pattern. every cake needs a cake stand to complete its look
Thank you!