
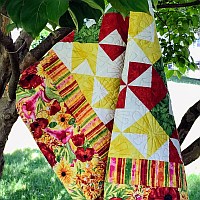
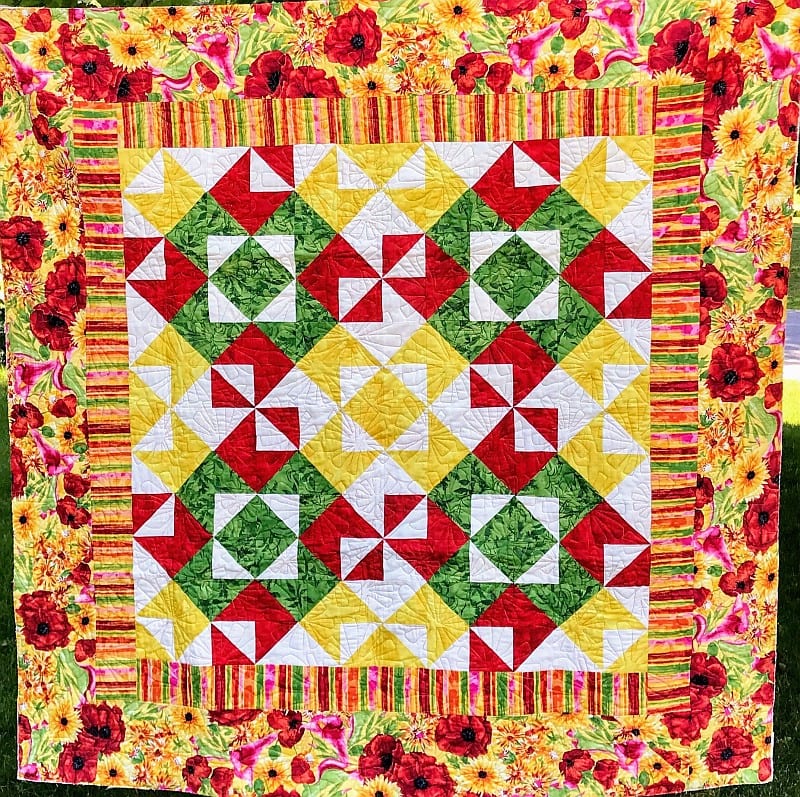
Summer Poppies
For my project, I am working on a 36″ square wallhanging called Summer Poppies with some lovely red and yellow fabric. If you would like to sew along, you will need:
- Yellow: 1/3 yard
- Green: 1/3 yard
- Background (white in my sample): 1/2 yard
- Accent border and binding: 1/2 yard
- Border (mostly red poppies in my sample): 7/8 yard
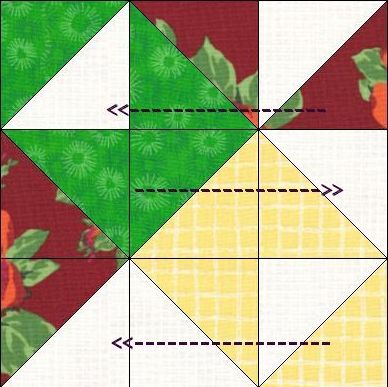
Here is the block I am using:
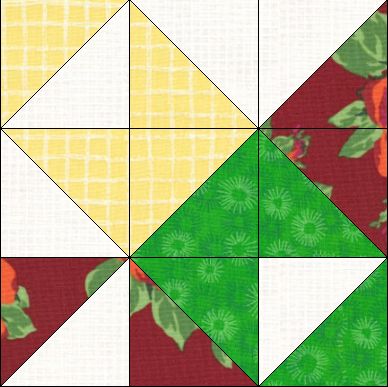
You will need to make 8 of these blocks using the Magic Eight Method to make the HSTs. The directions given below assume a perfect 1/4″ seam allowance. After you put these blocks together, you will surround them by a small first border and a larger outer border. Here is how to make it.
- Yellow: Cut (2) strips 5-3/4″ wide by the WOF (Width of Fabric). Cut these strips into (8) 5-3/4″ squares.
- Green: Cut (2) strips 5-3/4″ wide by the WOF (Width of Fabric). Cut these strips into (8) 5-3/4″ squares.
- Background (white in my sample): Cut (3) strips 5-3/4″ wide by the WOF (Width of Fabric). Cut these strips into (16) 5-3/4″ squares.
- Accent (also used in binding): Cut (7) strips 2-1/2″ wide. Sew these end to end to make one LONG strip, mitering the join if you prefer.
- Border (mostly red poppies in my sample): Cut (2) strips 5-3/4″ wide by the WOF (Width of Fabric). Cut these strips into (8) 5-3/4″ squares. Cut (4) strips 4-1/2″ wide to use in the outer border.
Using the Magic Eight Method, make:
- (48) yellow/white HSTs
- (32) border/white HSTs
- (16) green/white HSTs
- (32) green/red HSTs
- (16) green/yellow HSTs
Press and square up these HSTs to 2-1/2″ if necessary.
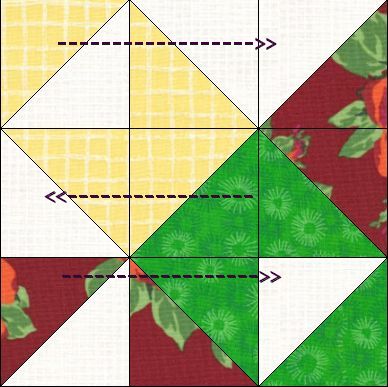
Sew them in rows, pressing the block seams of every other row in opposite directions.
Do not press the row seams just yet. Your block should measure 6-1/2″ square.
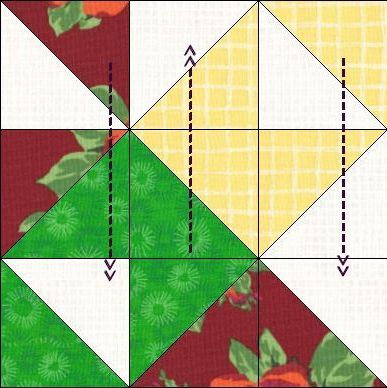
Now sew them in a four-patch, turning each block so the green/white HSTs are in the center.
|  |
 |  |
Finger press the seams of the blocks as you sew them so they face opposite directions. Don’t be afraid to use pins.
Adding the Borders to the Summer Poppies Quilt
Press the project and square up to 24-1/2″ x 24″ 1/2″ if necessary.
Cut (2) 2-1/2″ wide accent strips 24-1/2″ long. Sew these to either side of the center you just made. Press to the border. Your quilt top should now measure 24-1/2″ x 28-1/2″.
Cut (2) 2-1/2″ wide accent strips 28-1/2″ long. Sew these to the top and bottom of your quilt top. Press to the border. Your quilt top should now measure 28-1/2″ x 28-1/2″.

Cut (2) 2-1/2″ wide accent strips 28-1/2″ long. Sew these to either side of the center you just made. Press to the border. Your quilt top should now measure 28-1/2″ x 36-1/2″.
Cut (2) 2-1/2″ wide accent strips 36-1/2″ long. Sew these to the top and bottom of your quilt top. Press to the border. Your quilt top should now measure 36-1/2″ x 36-1/2″.
You are done! Give your top one last pressing, then quilt as desired. Don’t forget to add a hanging sleeve.
I decided to finish this quilt with curved corners. For that, you need bias binding! Here is how to make it.
Please add kris@scrapdash.com to your contacts list to make sure you get the confirmation message. Drag the confirmation message from the Promotion tab to the Primary tab if you use Gmail.
If you are already a subscriber, it’s okay to fill out this form. You won’t be put on the mailing list twice.
Have another tip to offer? Send it to me or reply below and I will add it here.
Don’t forget to sign up for the newsletter! Once a week, I send updates on quilt-related information I have found while wandering the web. This might be an inspiring article, a tip or tutorial I have discovered (or written), and occasionally exclusive offers & discounts as well as immediate access to the secret page of free patterns, guides, and printables. You can follow my page on Facebook, or join the Make Believe Quilters group, too.