
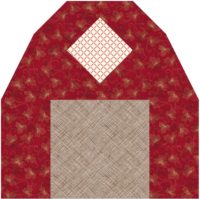
My husband grew up on a Dairy Farm in Wisconsin so I chose the milk barn to represent that state. It would be fun to put a cow in the doorway if you can find a motif that fits. Of course, there is room for a barn quilt over the doors.
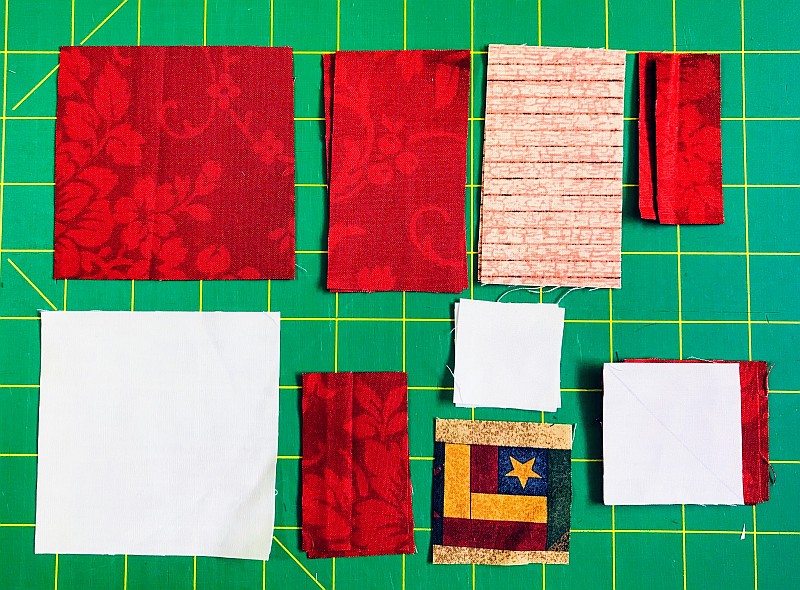
Fabric Requirements & Cutting Instructions
Barn Red
Cut (1) strip 3-1/2″ wide by the WOF. From that strip, cut (1) 3-1/2″ x 3-1/2″ square, (2) 2″ x 3-1/2″ rectangles, (2) 1-1/2″ x 2-1/2″ rectangles,
(2) 1″ x 2-1/2″ rectangles and (3) 2″ x 2″ squares.
Barn Doors
Cut (2) 2″ x 3-1/2″ rectangles
Background
Cut 1 strip 3-1/2″ wide by the WOF. From that strip, cut (1) 3-1/2″ x 3-1/2″ square, (1) 2″ x 2″ square, and
(2) 1-1/2″ x 1-1/2″ squares.
Quilt Motif
Cut (1) 2″ x 2″ square.
This tutorial uses a Tri-Recs ruler. There are other Half-Rectangle rulers that cut the same block. If you prefer one of those rulers, alter the cutting directions to fit that ruler.
Before starting this project, I recommend that you press your fabric with spray sizing. It will make it easier to cut small pieces. Take the time to clean your machine, put in a new needle, and fill a few bobbins. When pressing, just hold the iron over a spot for a moment or two. This pattern assumes a perfect 1/4” seam.
Making Half-Square Triangle Quilt Blocks the Traditional Way
The Traditional Method of making Half-Square Triangle Blocks (HSTs) uses two squares that are 7/8″ larger than the finished size of the final block. In other words, if you want a block that finishes at 3″ x 3″, you will start with two squares that are 3-7/8″ square. (I cheat and round up a little, but this means I have to square up my block later on.)
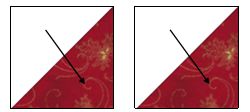
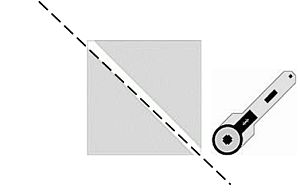
Draw a diagonal line on the wrong side of one square. Place the two squares right sides together and sew on both sides of the line. Cut on the line and press to the dark.
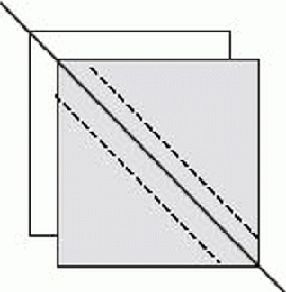
You will have made two identical Half Square Triangle (HST) blocks. These should measure 1/2″ larger than the size of the finished block because of the seam allowance. In other words, a 3″ finished block will measure 3-1/2″ square.
There are two ways you can square up your block. While the HST is folded, you can place a square ruler so the diagonal line is directly over the seam and just cut two edges. Then open up the block and press.
Or you can simply press the block open, place a ruler the same size as your unfinished block on top, matching the diagonal line on the ruler with the seam on the HST, and cut around the ruler. Here are some square-up rulers on Amazon.
Use the 2″ x 2″ red square and the 2″ x 2″ background square to make (2) 1-1/2″ unfinished HSTs.
How to Make a Square-in-a-Square Quilt Block
There are many different methods of making a Square in a Square block. This is a traditional method.
A square-in-a-square block is basically a square set on point. The center square is the block that is being placed on-point and the four corners are the corner setting triangles.
These corner setting triangles should have their edges on the straight of grain. To make these triangles, you cut a square on the diagonal.
There is a formula for this! To find the size of the square that you will cut on the diagonal, start with the finished size of the center square. Divide this number by 1.414 and add 7/8″. That’s 0.875 if you are using a calculator. Round the final number up a little. You will be squaring up this block when you are done, so this gives you a little wiggle room.
Cut two of these blocks to make the four corners.Your block on-point will be the finished size of the center square multiplied by 1.414. If you are guestimating, use 1.5 times the size of the center square. It will come close.
Would you like a chart with all the measurements in one place so you don’t have to figure it out? Subscribe to the newsletter below for this bonus!
For this block, you will need a 2″ x 2″ block for the barn quilt to set on point and (2) 2″ x 2″ red squares to cut on the diagonal to make the triangles for the four corners.
Sew a triangle to opposite sides of the center square. Press to the triangle. Sew a triangle to the remaining two sides and press to the triangle. Square up to 2-1/2″.
How to Make a Half-Rectangle Quilt Block
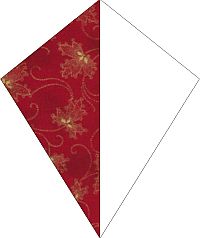
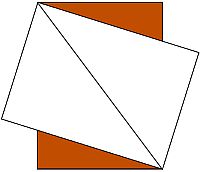
When I first tried to make a half-rectangle quilt block, I thought it would be made the same way as a traditional half-square triangle quilt block. In other words, draw a line on the diagonal of one block, sew the two blocks together 1/4″ from that line, then cut on the line. Boy, was I wrong! That method makes a kite.
I discovered that while you still need to draw a diagonal line on the background of one of the rectangles, you can’t place them right sides together. They have to be offset to accommodate the 1/4″ seam.
To make a half-rectangle quilt block (HRT), start with two rectangles that are 1-1/2″ wider and 1-3/4″ longer than your desired finished block. This time when you place your two rectangle fabrics together you TURN one of them so the diagonal line meets the opposite corner then it would if you just placed the two fabrics on top of each other.
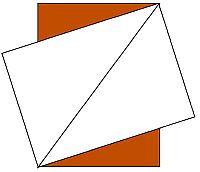
Now you can draw your diagonal line on the back of one rectangle. Sew 1/4″ on both sides of the line and cut on the line. Press to the dark.
Confusing, eh? It gets worse – this is a directional block. Before you sew and cut, fold the top rectangle back on the line. Is your rectangle going in the direction you want? If not, redraw that line on the other diagonal and turn the top rectangle in the other direction.
Let me show you an easier method.
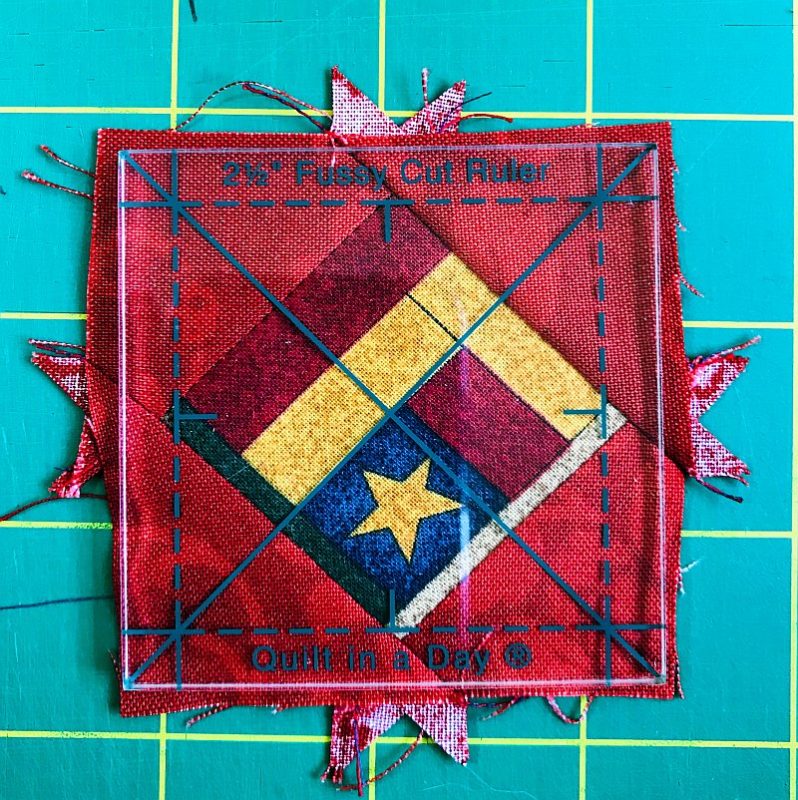
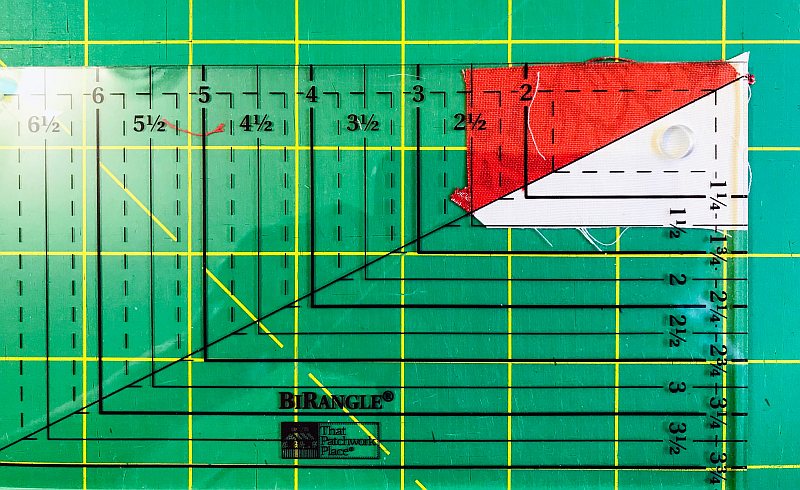
Use the Tri-Recs Ruler. This tool is designed to help you make triangle-in-a-square quilt blocks, so it has two pieces: one for the center triangle and one for the sides. You will only need the smaller side triangle in this pattern.
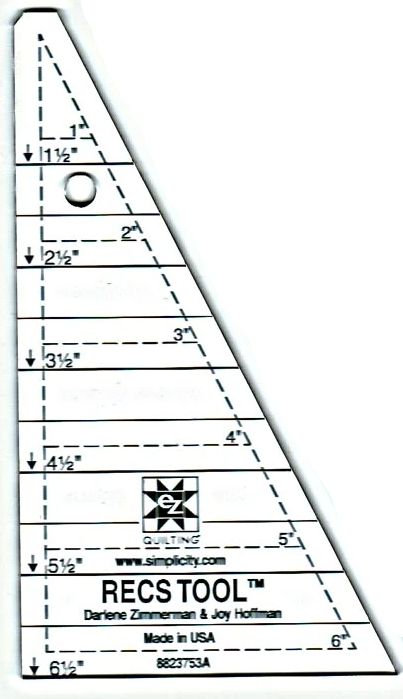
Starting with 2 strips of fabric (the dark and the light) the same size as the unfinished size of the block, lay the smaller ruler on the strip with the size line of the strip on the ruler along the bottom.
Cut along both edges. Don’t forget that little notch! That will help you match up the pieces later. Then rotate this ruler 180 degrees and cut the other side.
Don’t forget, this is still a directional block! Before committing yourself to that cut, double check – is it going in the right direction? In this particular pattern, it doesn’t matter, as you will need one of each.

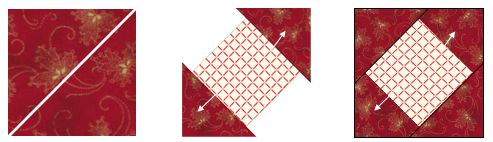
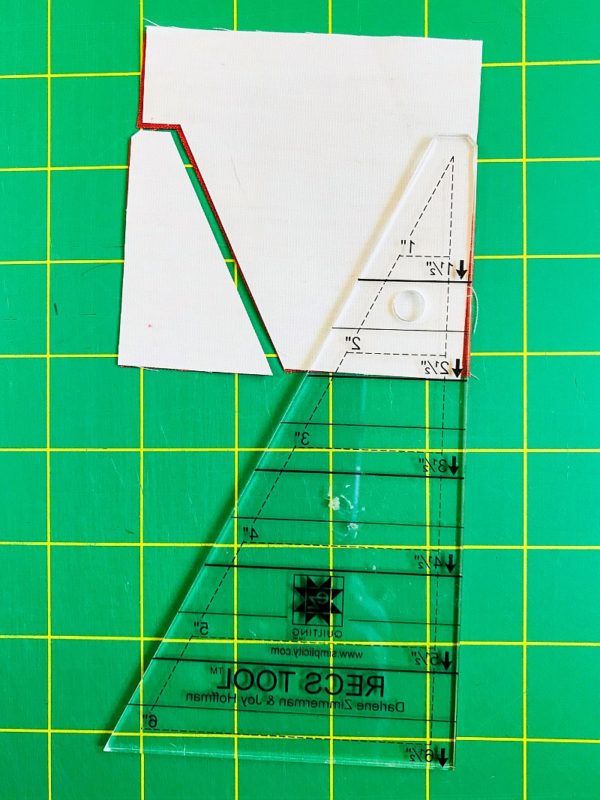
Lay the red and background 3-1/2″ squares on top of each other right sides up. Place the straight side of the ruler on the left side of the block as shown and cut both pieces at once. Make sure that you clip that little corner on the ruler. It helps you line up the pieces later on. That will give you the two pieces you need for one block.
Now reverse the ruler and place the straight side on the right-hand side of the block. That gives you the two pieces you need for the other block. Sew your blocks with a 1/4″ seam, press, and square them up to 1-1/2″ x 2-1/2″ if necessary.
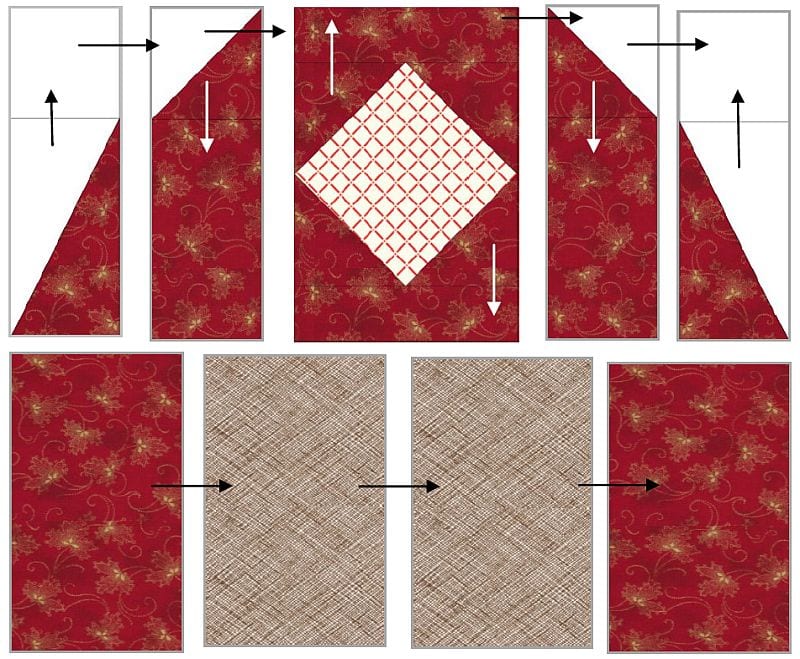
Putting it all Together
This block is sewn in columns. Sew the 5 top columns side-by-side first, then sew the bottom columns side-by-side. Press, then sew the two groups together and you are done!
Please add kris@scrapdash.com to your contacts list to make sure you get the confirmation message. Drag the confirmation message from the Promotion tab to the Primary tab if you use Gmail.
If you are already a subscriber, it’s okay to fill out this form. You won’t be put on the mailing list twice.
Have another tip to offer? Send it to me or reply below and I will add it here.
Don’t forget to sign up for the newsletter! Once a week, I send updates on quilt-related information I have found while wandering the web. This might be an inspiring article, a tip or tutorial I have discovered (or written), and occasionally exclusive offers & discounts as well as immediate access to the secret page of free patterns, guides, and printables. You can follow my page on Facebook, or join the Make Believe Quilters group, too.

Perfect block for Wisconsin! Love it.
YOU DON’T MAKE IT EASY TO PARTICIPATE
Absolutely wonderful – I got some fabric many years ago of “Joe Boxer” with cows with a towel over her back (I have no idea why the towel) but it’s more photo than artsy and I think she needs to stand in the barn door. Maybe a chicken on top with loopy quilting stitched to look like hay. Perfect block for the center of a farm “Eye Spy” quilt too. Thank you.
Oh, dear. The very first paragraph has information on the Block of the Week series, along with a link for the Facebook group, if that is what you mean. If you meant the pattern, there are three ways to get it. You can hit the print button on your computer (right-click and choose print, or use Cntrl-P) and print out the page, or use the green Print Friendly button at the bottom of the page to get rid of the ads. Lastly, you could subscribe to the blog and get this and ALL the other patterns that I created for subscribers at https://scrapdash.com/subscribe/ . I keep adding to that page!
Thanks for that easier way. =) I love your barn block!
I”ve subscribed twice and haven’t received the block.
Thank you for the Red Barn pattern. Looking forward to doing the block. Thanks for the easier way to do the block.
Joy Teague
Hi Kris! I want to say just one thing to a precious commenter – on earth, we say thank you. Thank you, Kris, for this delightful block representing Wisconsin! I am born and bred in Wisconsin and have lived here most of my 62 years – a brief stint in Los Angeles. This is block is so fun and is just perfection. I even have the Recs tool – it’s like a sign that I should make one, huh?! I’ve noticed that a few new barns have moved beyond the red color – like a fletching blue but they are very rare. ~smile~ Roseanne
I love this charming barn block! Can’t wait to get the pattern instructions to print out. =)
Me too. Subscribed twice and no block. I agree with elder responder: you don’t make it easy. Any chance you could please just email your week 39 block at this point please?
Each week is being presented by a different designer. Week 39 is Maryland – that one is being presented by https://flyingparrotquilts.com/2021/04/25/usa-block-tour-maryland-quilt-block/ So you would have to go there to get it. If you signed up for this sites block, you would just get the barn block (week 9)