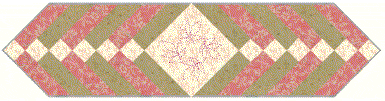
Free Braided Table Runner Quilt Pattern
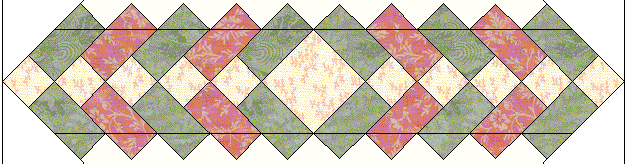
This 12″ x 38″ table topper makes up very quickly out of three different fat quarters. Fix yourself a cup of hot tea and I bet you are done before it cools! (Yes, this is our original pattern from 1996:-)) An updated tutorial is here.
For illustrative purposes, we are using the color names shown in the example. You are free to use whatever color you please, of course:-)) A 1/4″ seam allowance is assumed.
Cutting
Start by cutting a 9-1/2″ x 21″ strip from each of the (3) fat quarters. Cut the remainder of each fat quarter into (4) 2″ x 21″ strips.
- From both the pink and green 9-1/2″ x 21″ strips, cut a piece 9-1/2″ x 12″. Set aside the remainder for use in another project.
- From the white 9-1/2″ x 21″ strip, cut a 9-1/2″ x 9-1/2″ square. Set aside the remainder for use in another project.
- From (3) of both the pink and green 2″ x 21″ strips, cut (6) 9-1/2″ long strips, for a total of 12 strips. Avoid using the selvage. Set aside the remaining strip for use in another project.
- From the white 2″ x 21″ strips, cut (2) that are 12″ long. Set aside the remaining strip for use in another project.
Sewing and Cutting

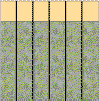
Sew a 2″ x 12″ white strip to the short side of the 9-1/2″ x 12″ pink piece, making an 11″ x 12″ block. It should look like the block to the left. Repeat for the green. Press to the dark. Cut these blocks into (6) strips 2″ x 11″ long, like the block to the right.
Inventory
You should have:
Now it is time to put them together, but first a note on pressing. It is almost impossible to keep your strips pressed to the dark. Rather, you should try to keep them all pressed away from the center square. Pin carefully as you piece this top together. Nesting the seams will help you keep your intersections sharp.
Sewing

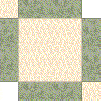
Sew a 9-1/2″ long green strip to either side of the 9-1/2″ x 9-1/2″ white square, like the one on the left. Press away from the center.
Sew a two-part green strip to the other two sides, placing the small square at opposite corners as shown to the right. Note that the strip will not go all the way to the end of the block. It feels really odd, but don’t worry about it, you are doing okay.
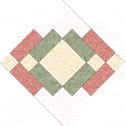
Sew a pink 9-1/2″ x 2″ strip to the two-part green strips on both sides of the table runner, starting with the end that has the little square. Remember, this strip won’t reach all the way to the end of the previous strip. Now add a two-part pink strip, again starting at the end that has the little square. Double-check to ensure that the seams fold in opposite directions.
Keep adding strips, alternating colors, and making sure to place the square on the correct corner. Do you see how it is going together almost like a log cabin?
Press Carefully
After you have sewn all your strips, press carefully. Get all those seams going in one direction on the back so the top lays flat. Now place your ruler in the body of this top and rotary cut it straight. Make sure your 1/4″ mark lines up with the point of the center square so you don’t cut off your point when you sew on the binding. (The diagram below shows where you should lay the 1/4″ mark on your ruler.)
You are almost done! Just add batting and backing, quilt as desired. You can “pillowcase” this topper to finish it or use 92″ of commercially prepared bias binding or make 92″ of 2-1/2″ wide straight-grain binding from the leftover white. Don’t worry about the Quilt Police, they don’t write tickets on any straight grain binding under 100″ long.
Enjoy!
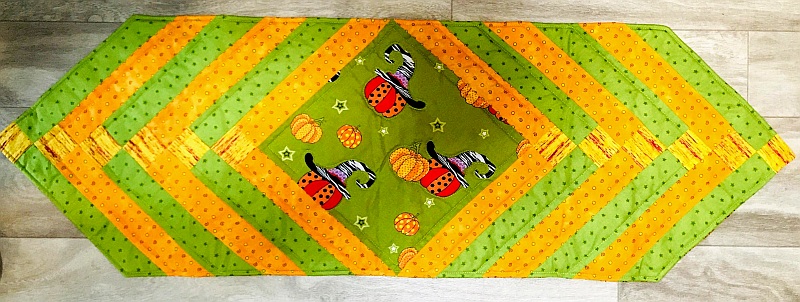
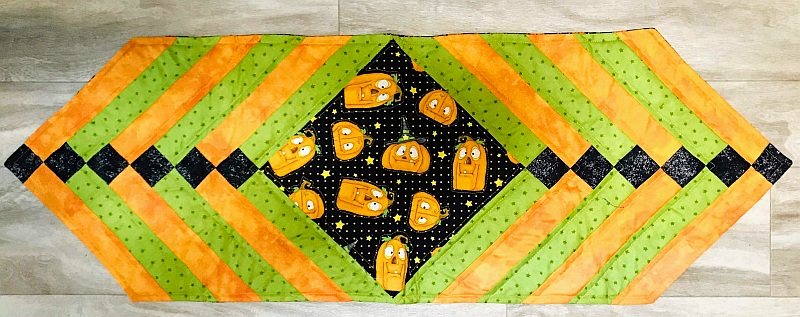
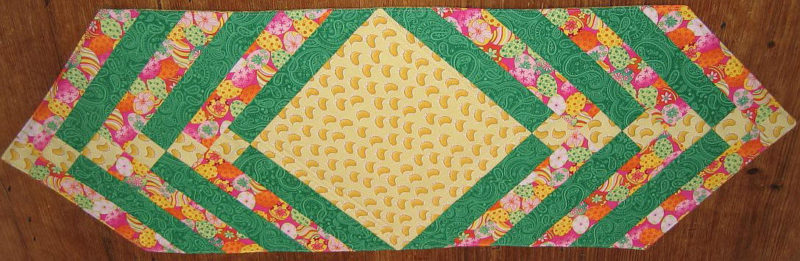
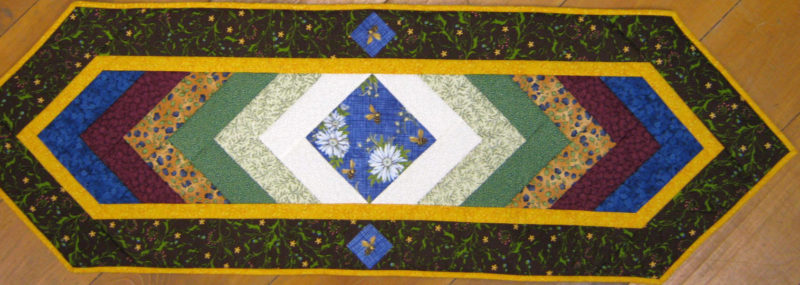
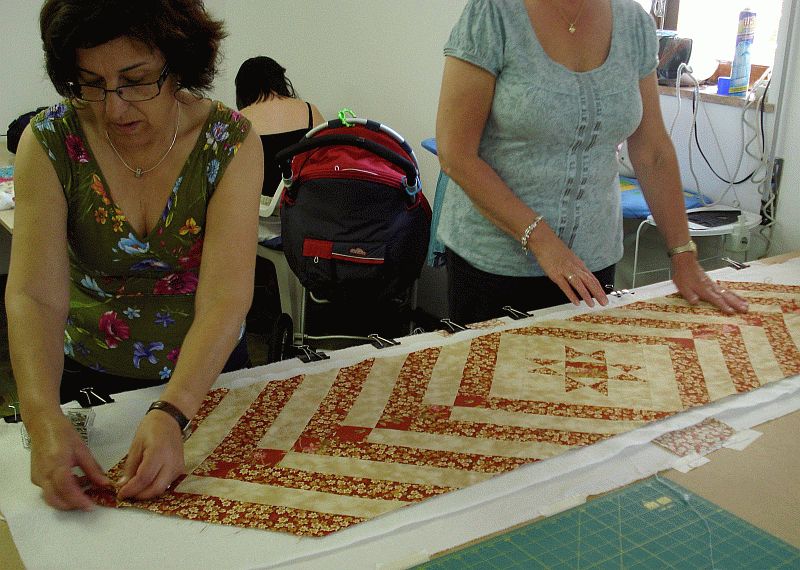
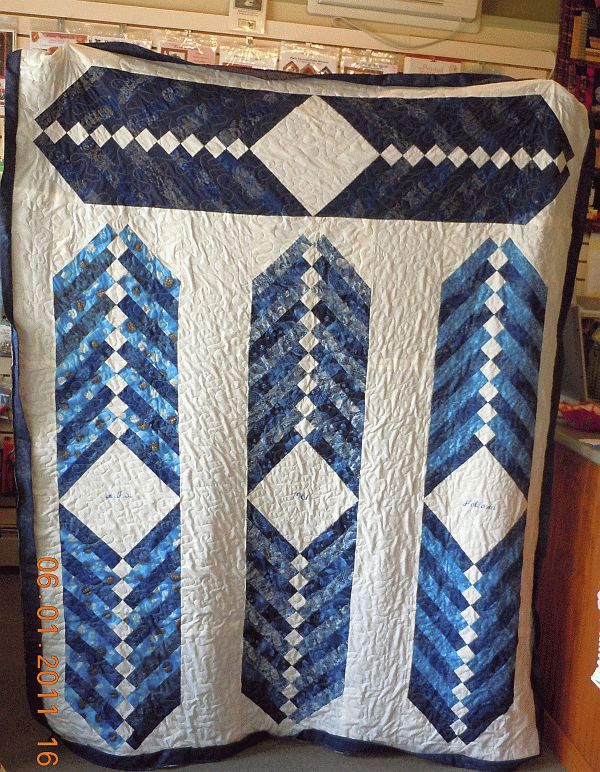
Gallery

Don’t forget to sign up for the newsletter! Once a week, I send updates on quilt-related information I have found while wandering the web. This might be an inspiring article, a tip or tutorial I have discovered (or written), and occasionally exclusive offers & discounts as well as immediate access to the secret page of free patterns, guides, and printables. You can follow my page on Facebook, or join the Make Believe Quilters group, too.
