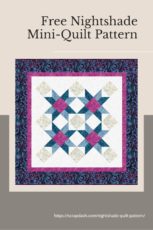
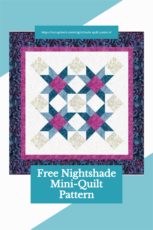
Nightshade Quilt Pattern from Woodcut Blossoms
Note: This post may contain affiliate links. That means we may earn a commission at no additional cost to you if you purchase via our links. Not all links are affiliate links. I only recommend products I use and trust. As an Amazon Associate, I earn from qualifying purchases.
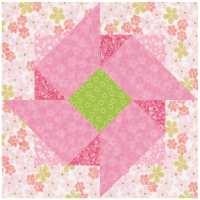
Heidi Pridemore of the Whimsical Workshop was kind enough to share her line of fabric for Island Batik with me so that I could bring you this tutorial. The stars in the Nightshade Quilt Pattern are shining over these night blooming flowers. Plan to spend an enjoyable day piecing this sparkling 30″ mini-quilt.
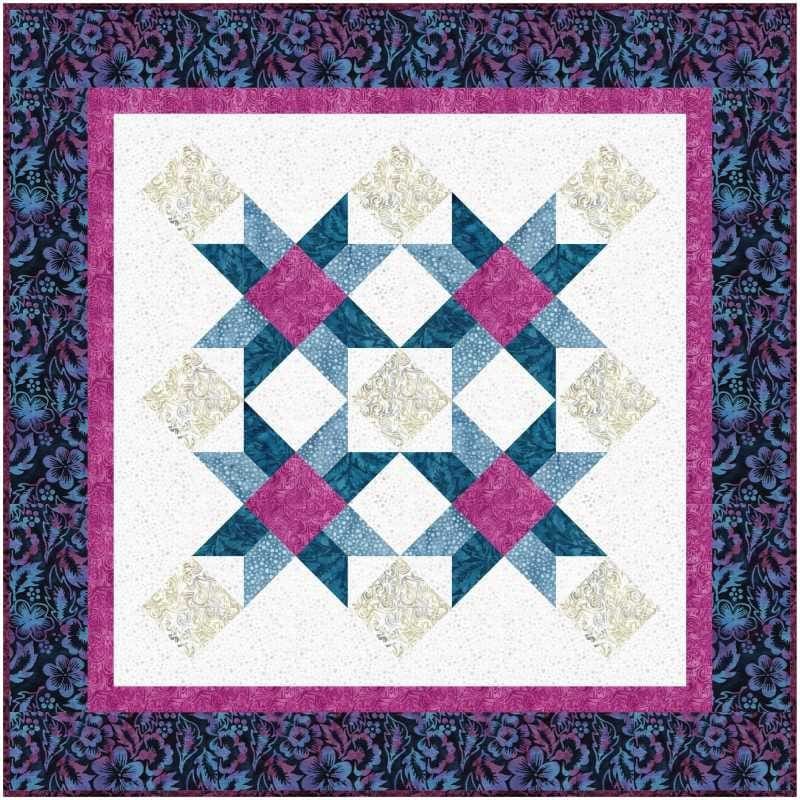
Fabric Requirements:
- 5/8 yd Background
- 1/2 yd Border
- 1/4 yd Blue Bubbles
- 1/2 yd Fuchsia
- 1/8 yd Dark Blue
- 1/8 yd Cream Swirls
Things you will find helpful
- A 2-1/2″ and 8-1/2″ square ruler
- A mat that rotates
- A mechanical pencil
- Best Press or other spray starch
Cutting Instructions
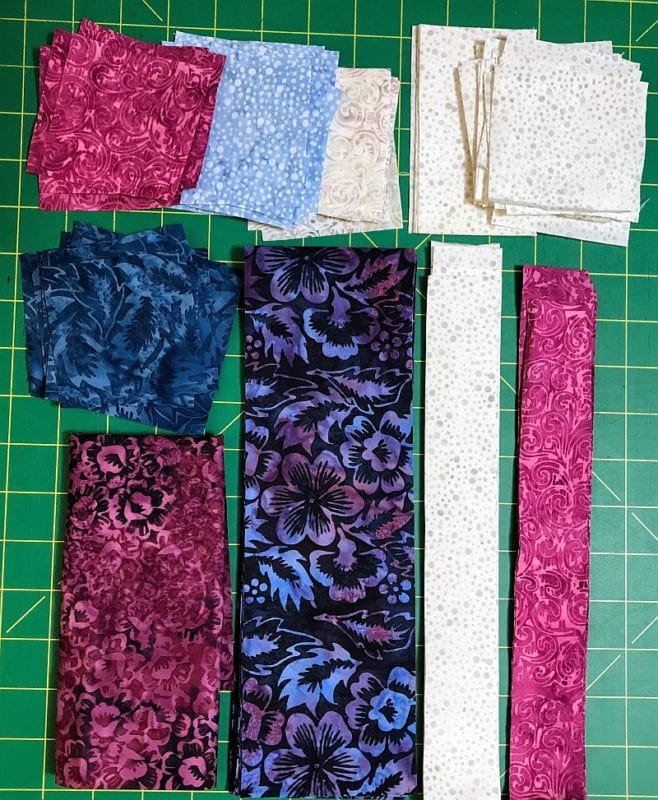
Cream Swirls
Cut (2) strips 3″ wide by the WOF. Cut these strips into (18) 3″ × 3″ squares.
Dk Blue
Cut (1) strip 3-1/2″ wide by the WOF. Cut this strip into (4) 3-1/2″ × 3-1/2″ squares and (8) 3″ × 3″ squares.
Blue Bubbles
Cut (1) strip 3-1/2″ wide by the WOF. Cut this strip into (4) 3-1/2″ × 3-1/2″ squares and (8) 3″ × 3″ squares.
Fuchsia:
- Cut (1) strip 3″ wide by the WOF. From this strip, cut (8) 3″ × 3″ squares.
- Cut (3) strips 1-1/2″ wide by the WOF. Sew them end to end to make a very long strip. Miter the join if you prefer. You will use this in the first border.
- Cut (3) strips 2-1/2″ wide for the binding.
Background:
- Cut (3) strips 3″ wide by the WOF. Cut these strips into (34) 3″ × 3″ squares.
- Cut (1) strip 2-1/2″ wide by the WOF. Cut this strip into (8) 4-1/2″ × 2-1/2″ rectangles.
- Cut (3) strips 1-1/2″ wide by the WOF. Sew them end to end to make a very long strip.
Miter the join if you prefer.
Border:
- Cut (3) strips 3-1/2″ wide. Sew them end to end to make a very long strip. Miter the join if you prefer. If your fabric is directional, wait until that step to cut.
How to Create and Square Up a Half Square Triangle (HST) Quilt Block
The Traditional Method of making Half Square Triangle Blocks (HSTs) is to place two identical squares right sides together. These squares should be 7/8″ larger than the finished size of the final HST. Draw a diagonal line on the back of one square. Sew 1/4″ on both sides of the line. Cut on the line and press to the dark.

You will have made two identical Half Square Triangle (HST) blocks. My personal preference is to cut squares 1″ larger than the finished size of the final HST and square it up to the correct size after pressing.
There are two ways you can square up your block.
You can place a square ruler so the diagonal line is directly over the seam and just cut two sides. Quilt-in-a-Day has a Square Up Ruler that uses this method.
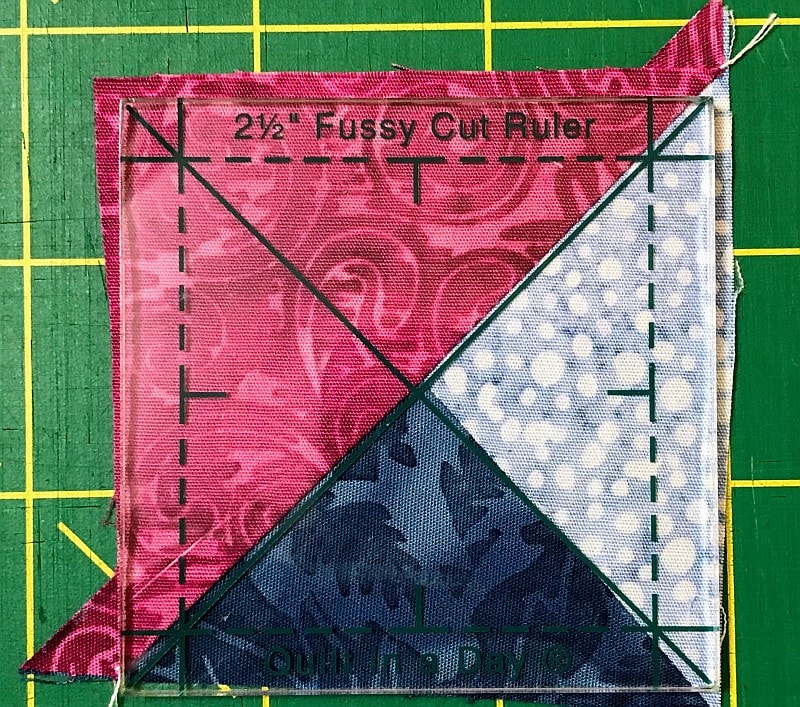
Or you can press open the block (pressing to the dark) and square it up using a ruler the same size as the block you are making. A fussy-cut ruler with lines on both diagonals will be very helpful with this.
Making the HSTs and Blocks
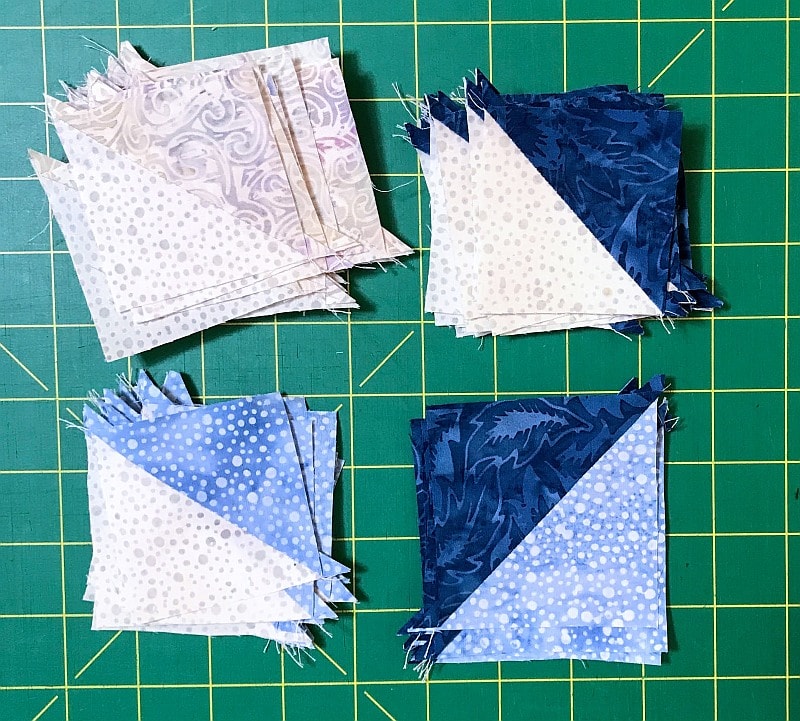
Using the (18) 3″ × 3″ Cream Swirls squares and (18) 3″ × 3″ Background squares, make (36) Cream Swirls/Background HSTs. Press to the dark and square them up to 2-1/2″.
Using the (8) 3″ × 3″ Dark Blue squares and (8) 3″ × 3″ Background squares, make (16) Dark Blue/background HSTs. Press to the dark and square them up to 2-1/2″ × 2-1/2″.
Using the (8) 3″ × 3″ Blue Bubbles squares and (8) 3″ × 3″ Background squares, make (16) Blue Bubbles/Background HSTs. Press to the dark and square them up to 2-1/2″ × 2-1/2″.
Using the (4) 3-1/2″ × 3-1/2″ Dk Blue squares and (4) 3-1/2″ × 3-1/2″ Blue Bubbles squares, make (8) Dk Blue/Blue Bubbles HSTs. Press to the dark and square them up to 3″ × 3″.
Match each of the Dk Blue/Blue Bubbles HSTs with a 3″ × 3″ Fuchsia square, right sides together. Draw a
diagonal line on the back of each of the Fuchsia squares, bisecting the seam. Sew 1/4″ on either side of the line. Cut on the line.
Each packet will make (2) three-part HSTs which will be mirror images of each other. Make (16) total. Press the seam open and square up to 2-1/2″ × 2-1/2″.
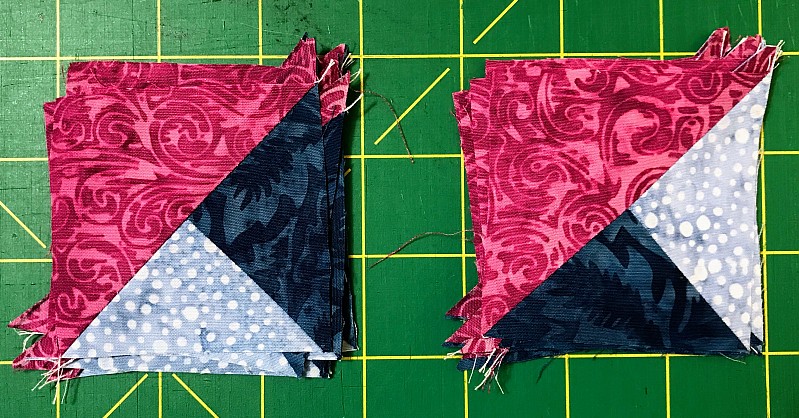
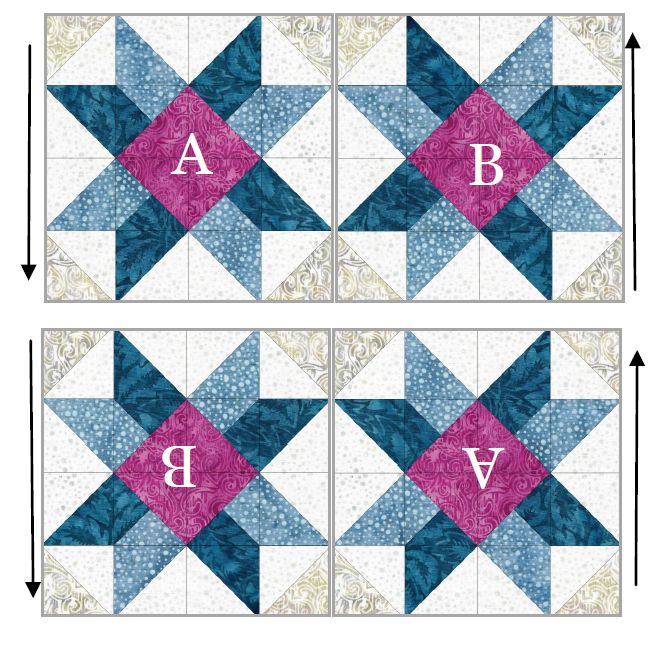
Kris’s note: I am switching off to the graphics in the pattern because I think it is easier to understand.

Making the Quilt Top
Sew the blocks you just made into (2) two-patch rows, pressing as shown below. Use pins to keep the rows lined up neatly. Reversing the direction of one of the rows, make the center top. It will measure 16-1/2″ square.
Adding the first border
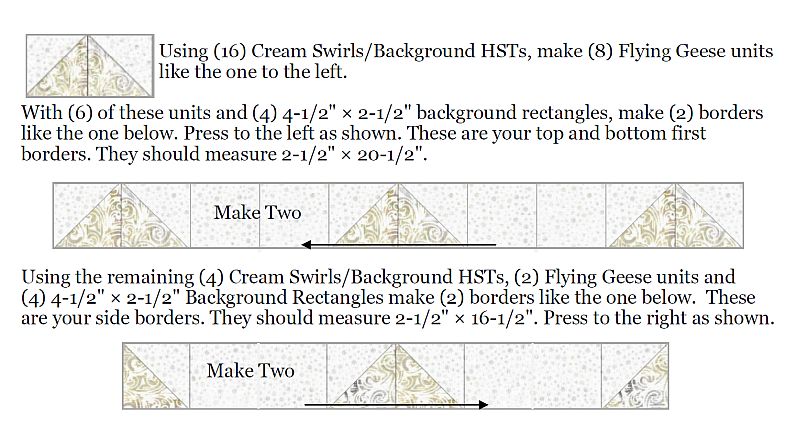
Sew the 2-1/2″ × 16-1/2″ pieced borders that you just made to both sides of the quilt top. Press to the border. Because of the way you pressed your seams, they should just touch each other at the intersections. Use pins to encourage this behavior.
Sew the Sew the 2-1/2″ × 20-1/2″ pieced borders that you just made to the top and bottom of the quilt top. Press to the border.
Cut the 1-1/2″ Background strips into (2) 20-1/2 × 1-1/2″ rectangles and (2) 22-1/2 × 1-1/2″
rectangles. Carefully matching centers, sew a 1-1/2″ × 20-1/2″ back-ground rectangle to both sides of the quilt top. Press to the border. This is the floating border, so named because it floats the center of the top away from the outer borders.
Again matching centers, sew the 1-1/2″ × 22-1/2″ background rectangles to both the top and bottom of the quilt top. Use pins and ease to fit.
Cut the 1-1/2″ wide Fuchsia strips into (2) 22-1/2″ × 1-1/2″ rectangles and (2) 24-1/2″ × 1-1/2″ rectangles. Sew the 22-1/2″ × 1-1/2″ Fuchsia rectangle to both sides of the quilt top you just made. Again, use pins and match centers, easing to fit if necessary. Repeat with the 24-1/2″ × 1-1/2″ rectangles sewn to both top and bottom. Press to the border.
Adding the Outer Border
Measure your top horizontally through the center. It should measure 24-1/2″, but if not, use your measurement and cut two 3-1/2″ border strips to that length. Sew these strips to both sides, taking care to match centers. Press to the border.
Measure your top vertically through the center including the new borders. It should measure 30-1/2″, but if not, use your measurement and cut two 3-1/2″ border strips to that length. Sew a strip to both the top and bottom, taking care to match centers. Press to the border.
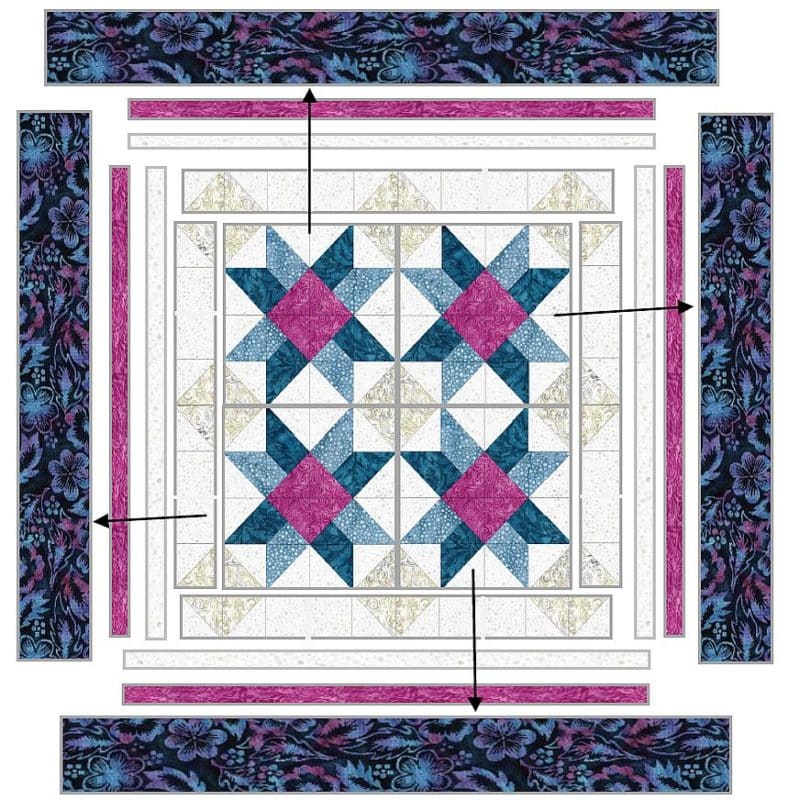
You are done! Give your quilt top one final pressing before batting, backing and quilting it. Don’t forget to add a label giving your name, city and state, and date. Enjoy!
Please add moc.hsadparcs@sirk to your contacts list to make sure you get the confirmation message. Drag the confirmation message from the Promotion tab to the Primary tab if you use Gmail.
If you are already a subscriber, it’s okay to fill out this form. You won’t be put on the mailing list twice.
Don’t forget to sign up for the newsletter! Once a week, I send updates on quilt-related information I have found while wandering the web. This might be an inspiring article, a tip or tutorial I have discovered (or written), and occasionally exclusive offers & discounts as well as immediate access to the secret page of free patterns, guides, and printables. You can follow my page on Facebook, or join the Make Believe Quilters group, too.

