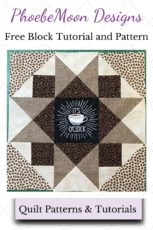
How to Make a Shaded Four-Patch Quilt Block
This type of block is also known as a Cat’s Cradle Quilt Block. There are three methods on this page; a traditional one, a way of making multiples, and a way that uses the Creative Grid Cat’s Cradle Ruler to make several different sizes.
This is a Traditional Method of Making a Shaded Four-Patch Quilt Block, one at a time.
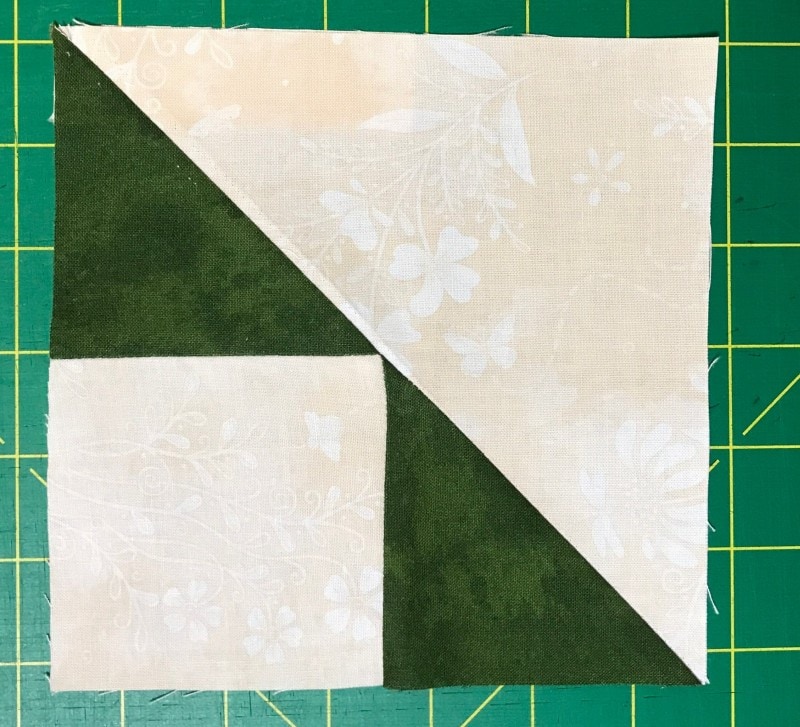
The traditional method uses individual pieces cut to make this block, as shown below.
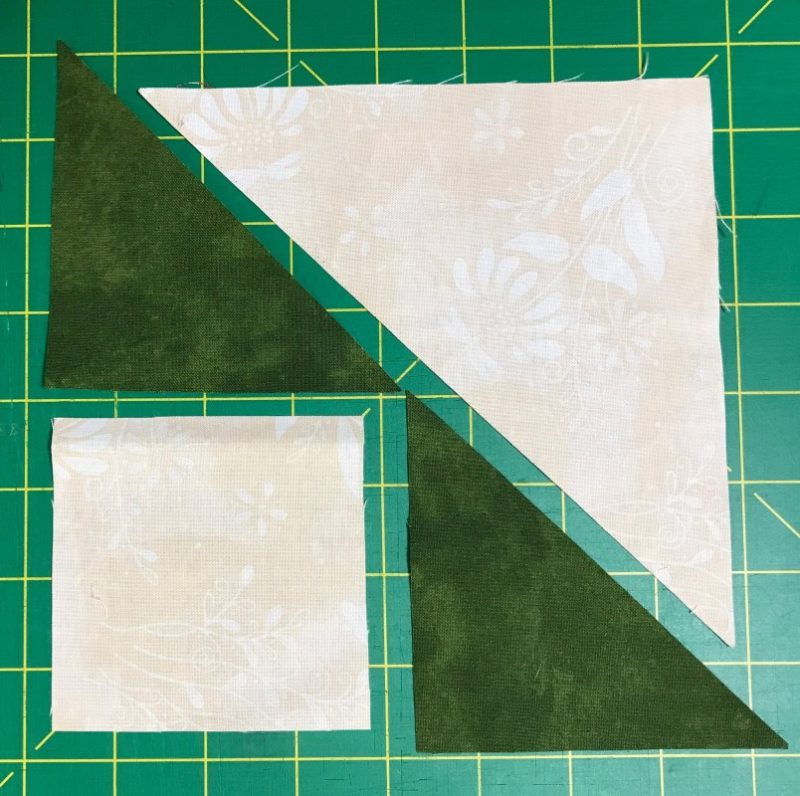
Assemble:
- (1) 3-1/2″ Background square
- (1) 3-7/8″ Green Square, cut on a diagonal to make two triangles.
- (1) 6-7/8″ Background square, cut on a diagonal to make two triangles.
COMMENT: I normally round up squares that require a 1/8th inch measurement. That did NOT work well here. I found myself having to creatively square up the blocks far too often. Try it yourself using scraps and see what you prefer.
Start by sewing one of the Green triangles to the side of a Background square. Press to the dark.
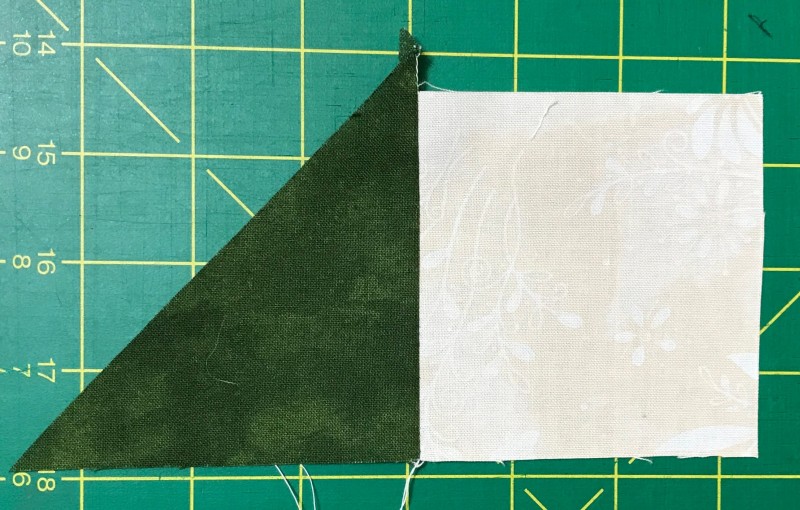
Sew another Green triangle to the other side of the block.
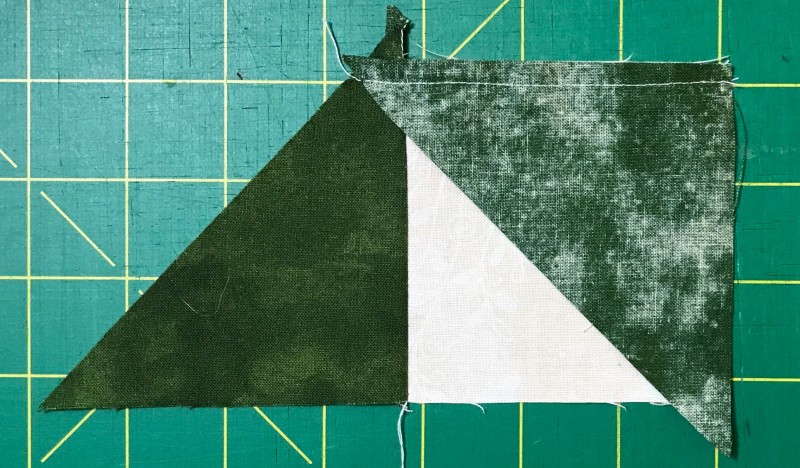
Press. Place a background rectangle right sides together and sew.
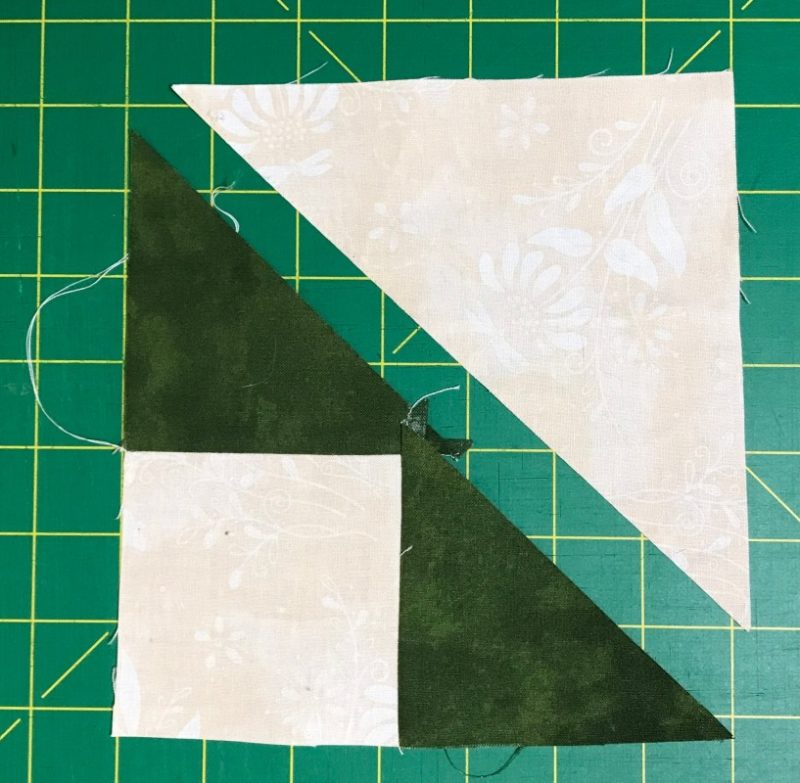
Aim for the X made by the seams of the Background square (I darkened it with a blue pen so you could see it better. )
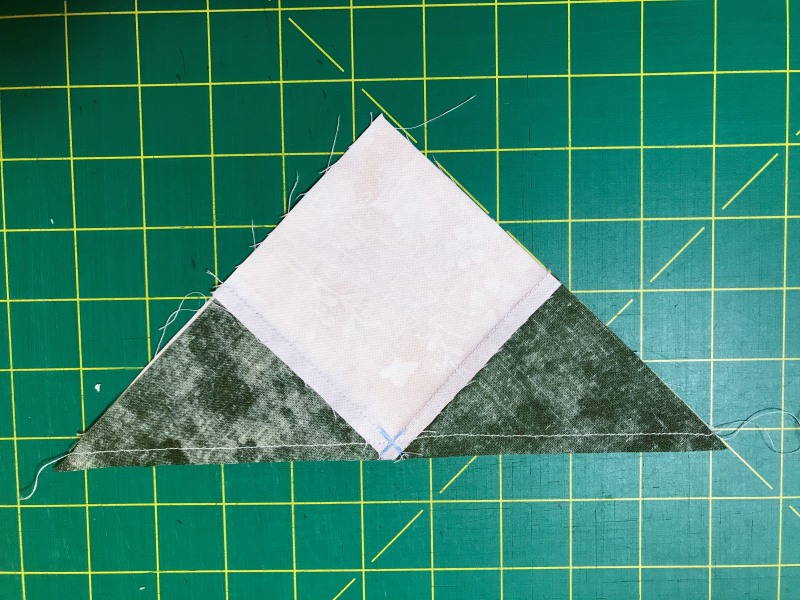
This will help your seam just touch the bottom of the square on the right side. Press to the large triangle and square up to 6-1/2“.
To Make the Shaded Four-Patch Quilt Block, two at a time
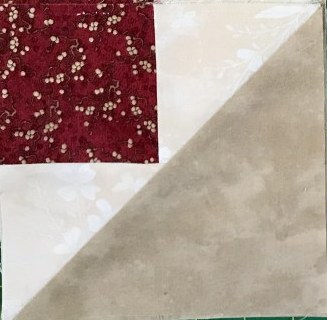
Assemble:
- (2) 3-1/2″ Red squares
- (2) 3-1/2″ × 4-1/2″ Background rectangles
- (1) 7-1/2″ × 6-1/2″ Tan rectangles
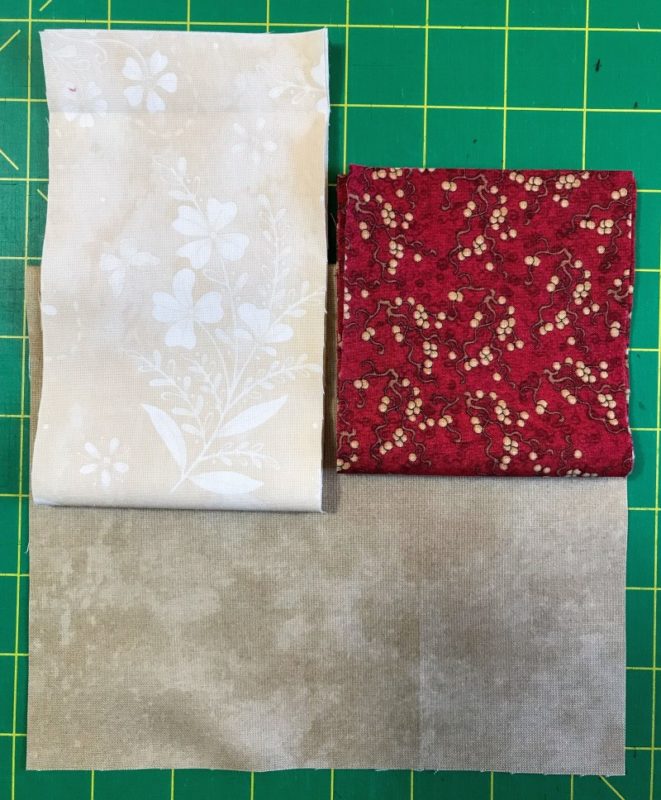
Sew a 3-1/2″ Red square to the end of a 3-1/2″ × 4-1/2″ Background rectangle. Make 2. Press to the rectangle. COMMENT: I struggled with pressing directions here. If you are more comfortable with pressing to the dark or pressing seams open, I suspect it will all work. But it is easier to see the sewing lines you have to draw later on if you just clip the center and press the square to the rectangle.
Sew these two units together, alternating colors. The center seams will not match up. Press the seam open.
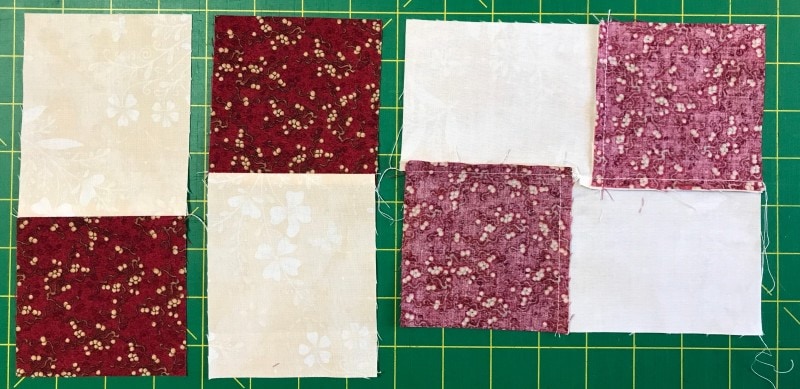
On the back of this unit, draw a line from the upper right corner at a 45-degree angle. It should just touch the edge of the left Red square. Note that it will not end at the other corner.
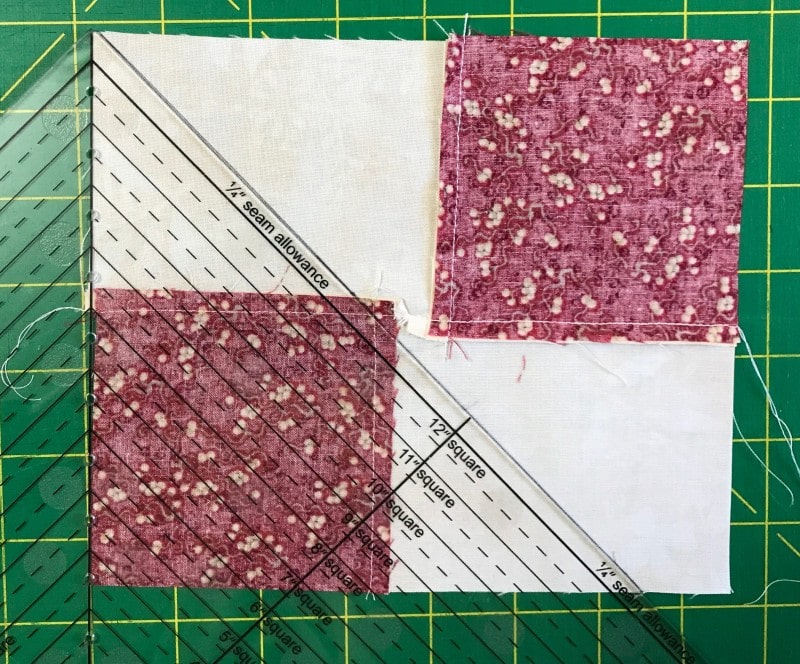
Turn the block around so you can draw the second line from the lower-left corner at a 45-degree angle. It should just touch the edge of the right Red square. Note that it will not end at the other corner. These two lines will probably be 3/4″ apart.
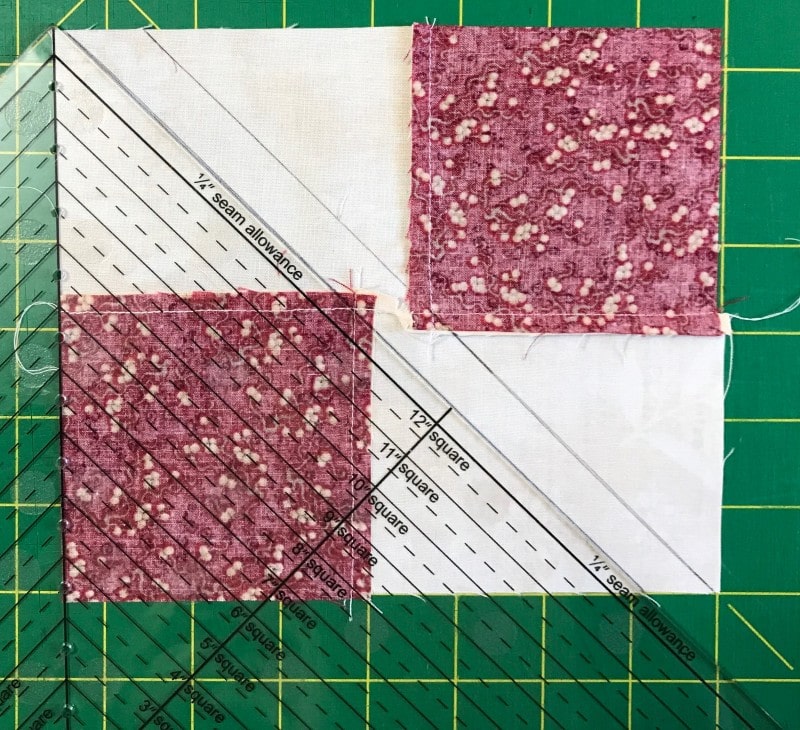
Place the 7-1/2″ × 6-1/2″ Tan rectangle right sides together with this unit. Sew on the lines you drew. Cut this unit apart. You may want to trim your seams to 1/4″.
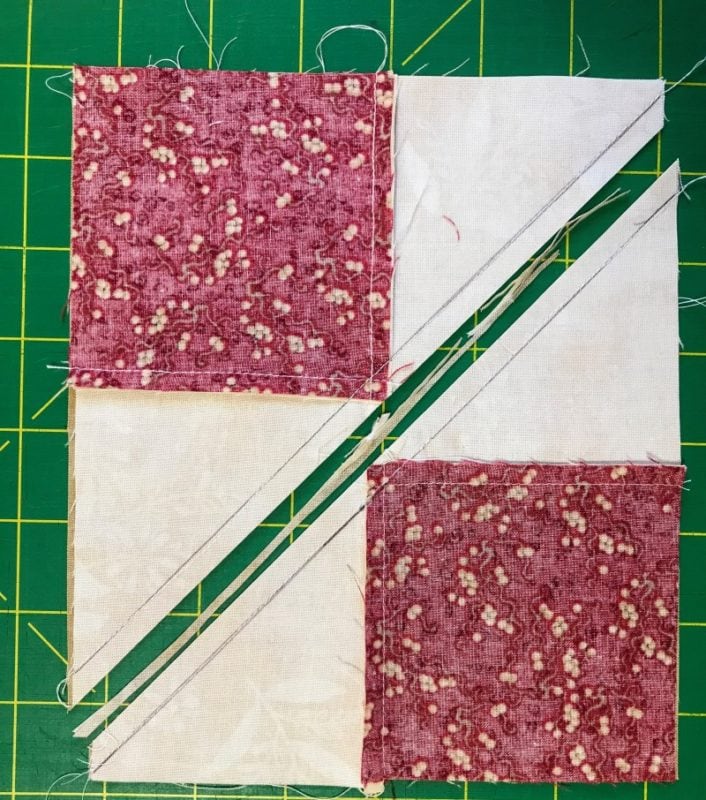
Press your blocks to the large triangle and square up to 6-1/2“.
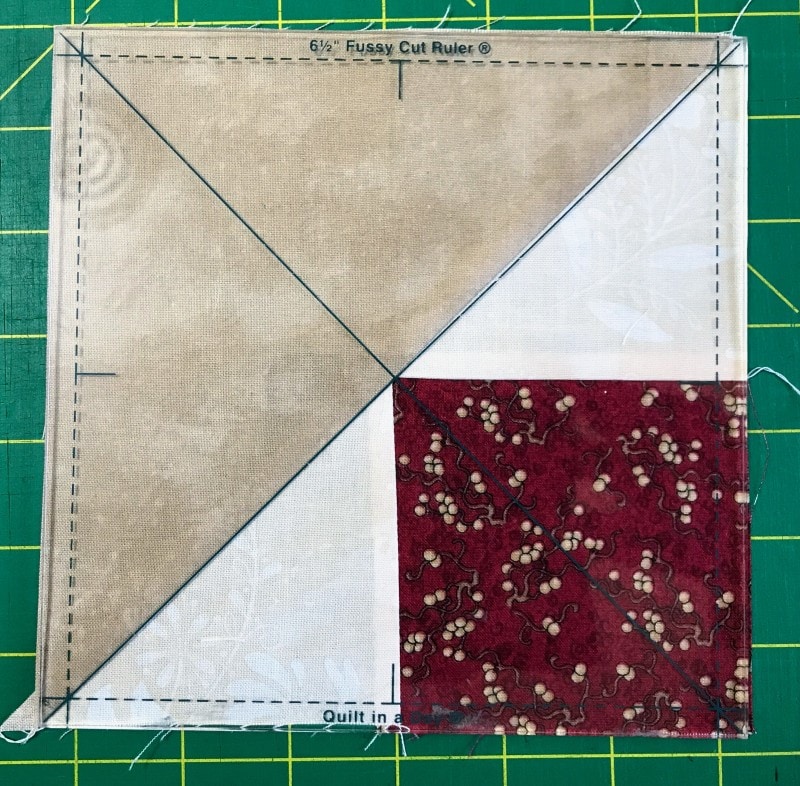
To Make the Cat’s Cradle Block using a Creative Grid Ruler
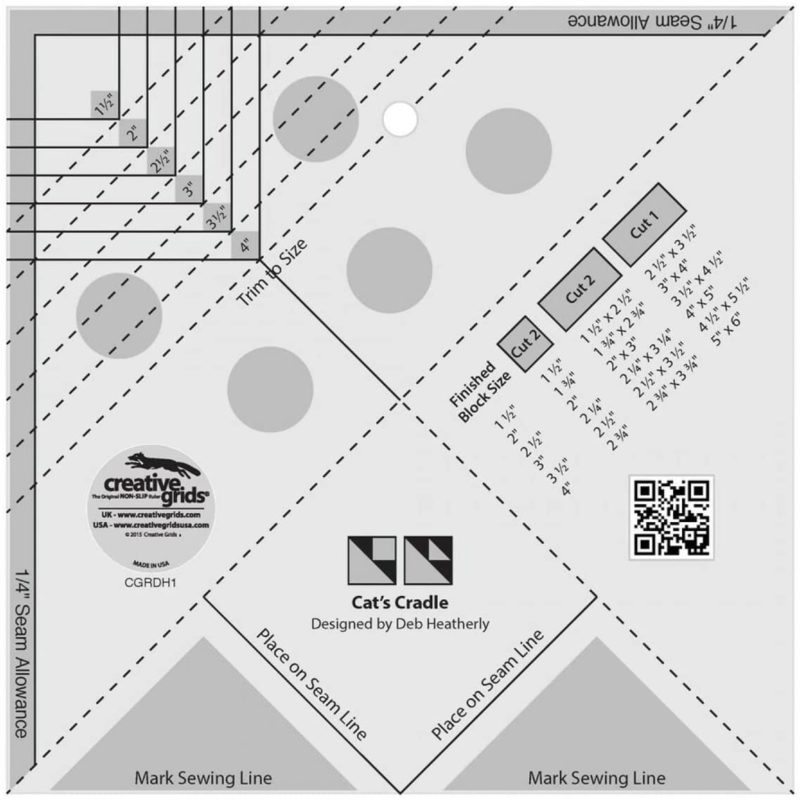
The Creative Grid Cat’s Cradle Ruler uses the same method as the Red Shaded Four-Patch above, but the measurements you need are on the ruler, and you can use the ruler itself to square up the block. Notice that it only goes up to 4″ finished, however.
There is another Creative Grid ruler that makes larger sizes of the Cat’s Cradle Ruler but it does NOT use the sizes given in this tutorial. No need to look them up – the measurements are conveniently printed on the rulers.
Don’t forget to sign up for the newsletter! Once a week, I send updates on quilt-related information I have found while wandering the web. This might be an inspiring article, a tip or tutorial I have discovered (or written), and occasionally exclusive offers & discounts as well as immediate access to the secret page of free patterns, guides, and printables. You can follow my page on Facebook, or join the Make Believe Quilters group, too.

