
Zombie Mini-Quilt
Here are general directions to make a 28″ square Zombie Mini-Quilt. There is a pattern at the bottom of this page that gives more details.
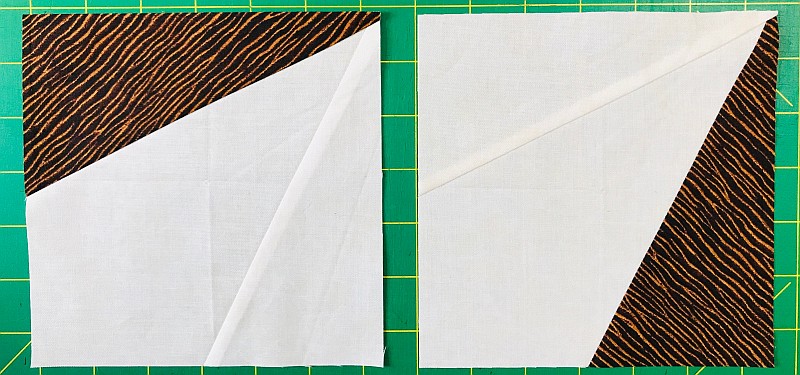
In this pattern, you have the option of using a specialty ruler, called an On-Point Ruler by Quilt in a Day to make the Triangle in a Square block. (You can also use the Accuquilt die #55770 ) The piecing of this block is tricky the first time. Take your time! Full instructions are in the pattern, or you can download the technique sheet below. Both the pattern and the technique sheet include a paper-piecing template.
See the Triangle On-Point Tutorial here.
Fabric Requirements
- 5/8 yard Zombie Flesh (mine is a mottled batik, which did not show up well in the pictures)
- 1/4 yard Background
- 5/8 yard Zombie Flesh
- 1/4 yard Zombie Smile and Eyes
- 1/8 yard Zombie Nose
- 5/8 yard Zombie Eyebrows and Hair, Border and Binding
This quilt is made almost entirely of Triangle On-Point Blocks. Following the directions from the ruler, the technique sheet, or the Tutorial, make these blocks:
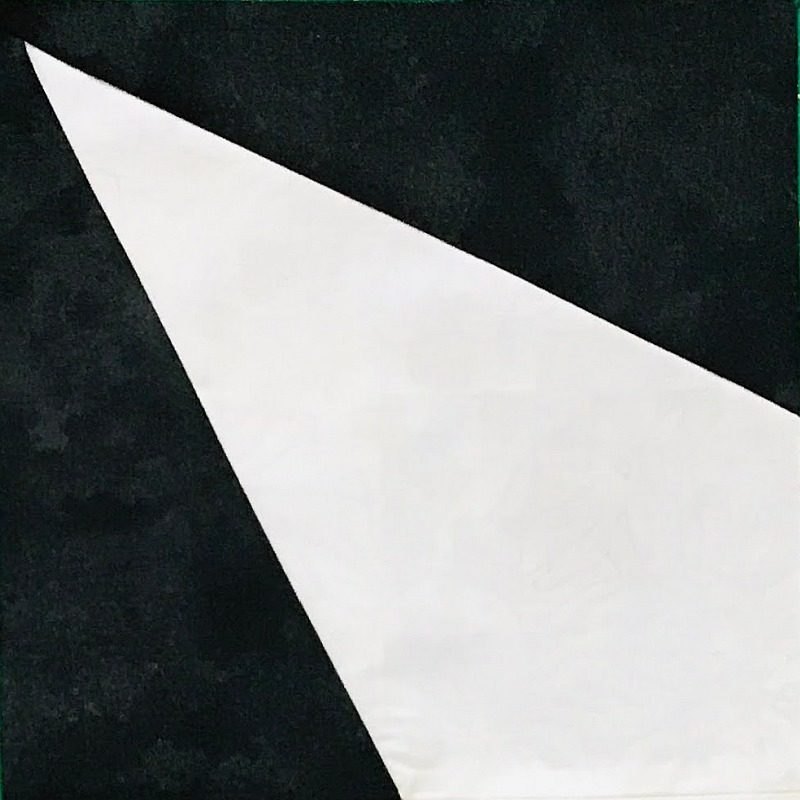
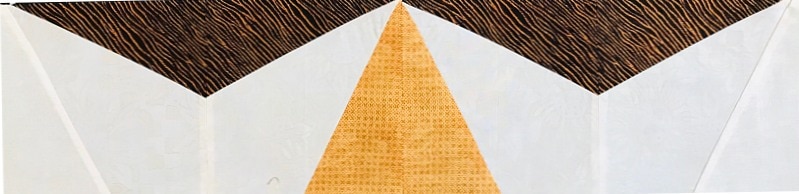
Block A:
Make (4) of these blocks, press, and square up to 6-1/2″. These are the Eyebrow blocks.
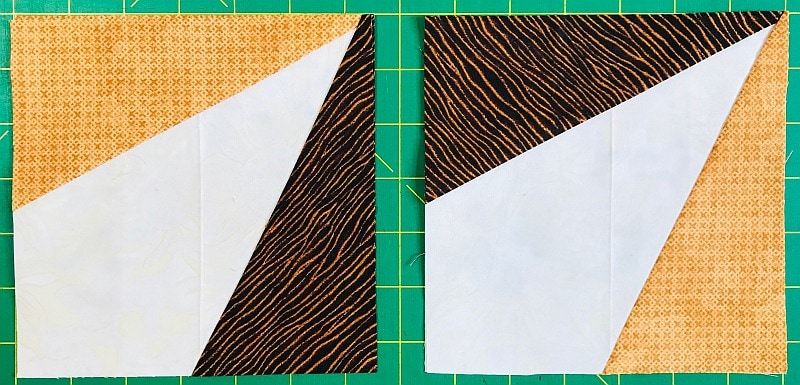
Block B
Make (2) of each of these blocks for a total of 4. Press, and square up to 6-1/2″.
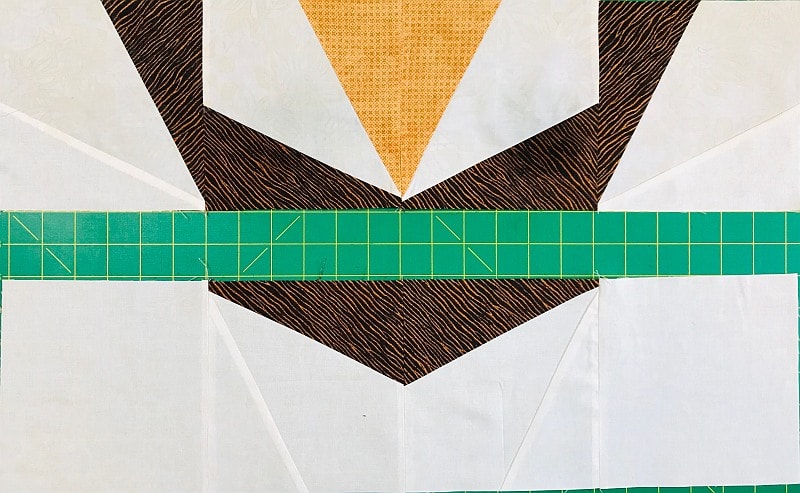
Block C
Make (2) of these blocks, press, and square up to 6-1/2″. That’s the Flesh fabric in the center – it did not show up well in the photographs.

Block D
Make (1) of these blocks, press, and square up to 6-1/2″. That’s the background fabric in the center.

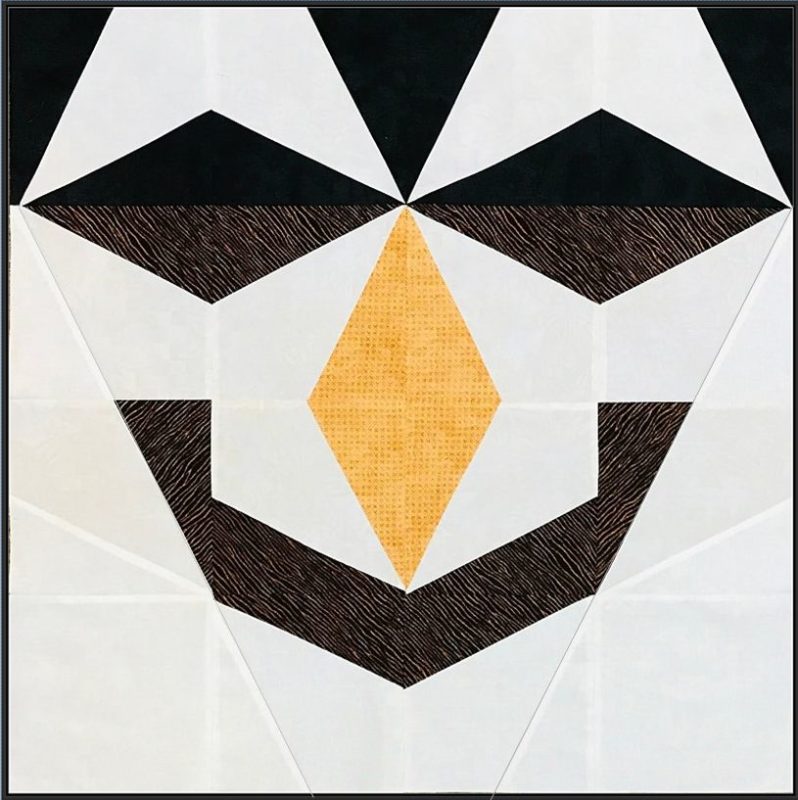
Rows and Rows of Zombie Blocks

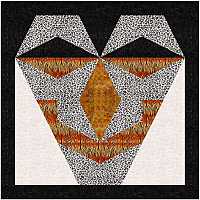
Here’s My Zombie
Add a black border to make the hair and frame the face. I will be quilting details in the face to make it stand out from the background a little better. I think this will end up as a table topper, although I might put it on the front door Halloween night.
Here are other Halloween ideas:
- Boo!-ti-ful Halloween Wall Hanging or Lap Quilt
- Halloween Hoppin’ – Using Purple in a Halloween Quilt
- Halloween Freebie – Spiders in My Attic
- Ghastly Ghouls and Zombies
- A Batty Pumpkin Quilt Block
- Free Braided Table Topper Pattern for Halloween
- Orange You Glad Harvey?
- Boo! A Fussy Cut Monster Mash Quilt Block
- A Quilted Halloween Story
Please add kris@scrapdash.com to your contacts list to make sure you get the confirmation message. Drag the confirmation message from the Promotion tab to the Primary tab if you use Gmail.
If you are already a subscriber, it’s okay to fill out this form. You won’t be put on the mailing list twice.
Have another tip to offer? Send it to me or reply below and I will add it here.
Don’t forget to sign up for the newsletter! Once a week, I send updates on quilt-related information I have found while wandering the web. This might be an inspiring article, a tip or tutorial I have discovered (or written), and occasionally exclusive offers & discounts as well as immediate access to the secret page of free patterns, guides, and printables. You can follow my page on Facebook, or join the Make Believe Quilters group, too.

That is one charming zombie, and a wonderful tutorial too! Thank you!!
-Soma
How unique! I love your zombie quilt!
Very creative!
Very Spooky! What a great tutorial. Thanks for sharing!
That’s a Zombilicous quilt. Such a spooky one too.
Thanks for the tutorial.
Your zombie is awesome! Thanks for the tutorial.
That is one awesome, spooky zombie! Thanks for sharing the tutorial!
This guy is very cool and totally catches the Ghastly of this hop. Thanks for the tutorial.
I like your zombie. Great job!
What an awesomely cool Zombie block! Thanks for sharing how to make it.
Cute Zombie mini quilt! Thanks so much for the tutorial!
He is definitely a ghastly ghoul…love him! As a fan of zombie movies, this guy makes such a creepy fun block. Thanks for sharing your great tutorial!
Wow, that’s an impressive zombie quilt. In the right colours, I can definitely see creepy clown, too.
Wow! Thanks for your zombie tutorial.
Good morning! Your zombie does look rather friendly! I’ll bet that smile has fooled many of folks . . . the fools. Very cute and creative. Thanks for sharing with us. ~smile~ Roseanne
Wow, what a zombie! Love the cat meme, too. =)
That’s an adorable zomie – and the cat meme is great!! Thanks for sharing, Kris!!
Very creative! He should get together with my Frankenquilter mini – they’d be quite the pair!