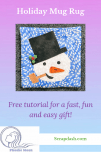
Snowman Mug Rug Tutorial
Note: This post may contain affiliate links. That means we may earn a commission at no additional cost to you if you purchase via our links. Not all links are affiliate links. I only recommend products I use and trust. As an Amazon Associate, I earn from qualifying purchases.
What is a mug rug? It’s an oversize coaster that you put on the table to hold your beverage and a small snack. It’s not quite as big as a placemat – it can range from 4″ to 10″ and any shape that suits your creativity.
Its primary job is to look cute and provide you with sustenance during those long sewing sessions.
This tutorial is for a cute little snowman mug rug that makes up quickly using fusible applique and buttons for the accents. Just in time for a stocking stuffer gift! Need snowman noses? Try Carrot Buttons Look for Poinsettia Buttons and Lite Steam-a-Seam II, too.
Assemble:
- (2) 7″ squares of fabric for the snowy background and backing
- (1) 4″ square of white snowball fabric
- (1) 4″ square of black for the top hat and button eyes
- (1) tiny piece of fabric for the corncob pipe
- (1) tiny piece of fabric for the nose if you aren’t using a button
- (1) tiny piece of fussy cut fabric for the poinsettia accent unless you are using a button
- (1) sheet of fusible web
- (1) 7″ square of batting
- (1) mechanical pencil
I am going to show you what I do. If you prefer another method, try that one. To read more about other methods, see our tutorial at https://phoebemoon.com/fusible-quilt-applique-technique/
Print this template. It should print out at roughly 5″ x 5″ but don’t worry if it is not exact. There are no quilt mug police. If your pieces are not the right size, just make your mug rug a different size. You could even use this motif on the side of a placemat or as the center of the free braided tabletopper pattern.
To print a picture, right-click on the picture and open it in a new tab. Then go to that picture and Cntrl-P to open the print dialog. If you are given the option, print full size.
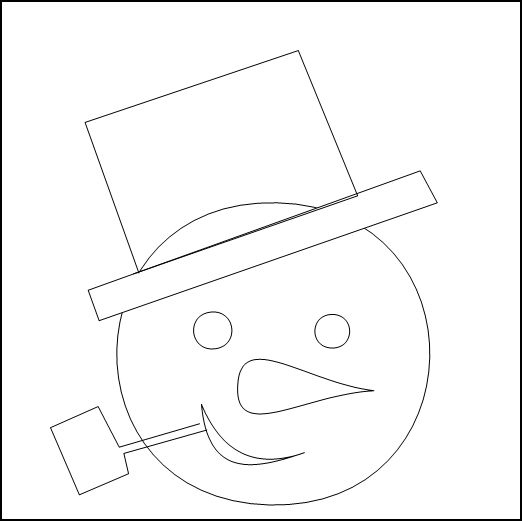
Trace the motifs on the back of the fusible web. Make sure you are writing on the back of the fusible web and not the front. Separate the motifs by the color of the fabric. Don’t cut the individual motifs yet.
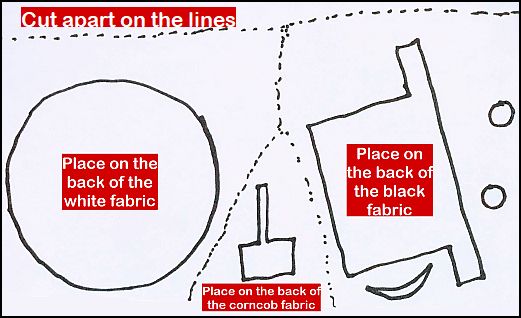
Fusible Applique
Following the directions on the back of the fusible web package, adhere each of the three sections of fusible web to the back of the appropriate fabric. I recommend Lite Steam-a-Seam II because it makes this part of the applique easier than if you firmer products.
Cut out the motifs and remove the paper. Here are my favorite small scissors – very sharp, with the ability to clip tiny motifs and not leave strings behind.
Put the background piece right side up on the ironing board. Once you have cut out all your pieces, just arrange them on the background piece. The circle goes down first, then the eyes, the pipe, the mouth covering the end of the pipe, and the hat. If you are using a fabric flower or nose, put them in place, too. Move them around until you like the arrangement, then lightly touch with the iron. If nothing moved, you can fuse it a little more firmly.
If you have an Applique Pressing Sheet, you can use it here. I wouldn’t buy one just for this project, but if you like fusible applique and think you will be doing more, it’s a good investment. It is a see-through sheet that protects your project as you are ironing the motifs.
You aren’t done yet! If you think your mug rug will get used a lot, you might want to finish the edges of the motifs using a small zig-zag or even a straight stitch. I don’t usually bother because most of my fusible applique work ends up on the wall. But it is up to you.
To finish your mug rug, use the pillowcase method. Place the backing right side down on the snowman, then add the batting. Sew all the way around the outside, leaving a small space for turning. You might want to use a 3/8″ seam, and clip the corners to make turning easier. When you turn it inside out, the batting should be in the middle. Now you can add the buttons if you are using them. The stitches that hold the buttons in place will also hold the three layers of your quilt together.
Enjoy!
Don’t forget to sign up for the newsletter! Once a week, I send updates on quilt-related information I have found while wandering the web. This might be an inspiring article, a tip or tutorial I have discovered (or written), and occasionally exclusive offers & discounts as well as immediate access to the secret page of free patterns, guides, and printables. You can follow my page on Facebook, or join the Make Believe Quilters group, too.


Thank you for the cute mug rug!
Thank you for the tutorial. I love mug rugs and your snowman is so cute.
Well, isn’t he a cutie! Thanks so much for sharing the drawing and the tutorial.
Thank you! It’s the buttons that really make him special.
Thanks! The Pinterest board had a lot more ideas, too.
I am working on a Santa, too…he will be in the free section for subscribers.