Something Fishy Goldfish Quilt Block Tutorial Blog Hop
Note: This post may contain affiliate links. That means we may earn a commission at no additional cost to you if you purchase via our links. Not all links are affiliate links. I only recommend products I use and trust. As an Amazon Associate, I earn from qualifying purchases.
The challenge for this month is to create a block and/or project with the theme of Something Fishy. Here is a way to make a large fish block and set it on point. This Goldfish Block makes a great 12″ block for a table runner or quilt.
To visit the other designers in this hop, see the list at the bottom of the page. To print this page, use the green Print Friendly button at the bottom, just above the comments. If that doesn’t work, try pressing down the CNTRL button and the P button at the same time. Or the COMMAND button and the P button if you are on a Mac. That should bring up the printer dialog.
Something Fishy Goldfish Quilt Block
Before starting this project, I recommend that you press your fabric with spray sizing. It will make it easier to cut small pieces. Take the time to clean your machine, put in a new needle, and fill a few bobbins. When pressing, just hold the iron over a spot for a moment or two. This pattern assumes a perfect 1/4” seam.
making the table runner at the bottom of the page.
Assemble:
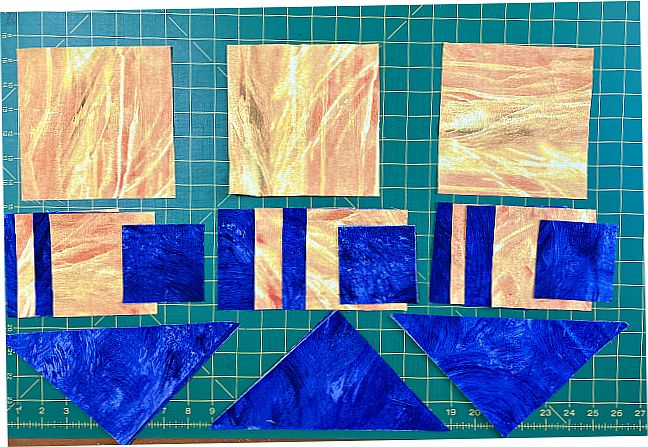
- (2) 3-3/4″ Gold square
- (1) 6-1/4″ Gold square
- (2) 3-3/4″ Blue squares
- (2) 3-3/8″ Blue squares
- (2) 7″ Blue squares, cut on the diagonal to make (4) triangles
How to Create and Square Up a Half Square Triangle (HST) Quilt Block
The Traditional Method of making Half Square Triangle Blocks (HSTs) is to place two identical squares right sides together. These squares should be 7/8″ larger than the finished size of the final HST. Draw a diagonal line on the back of one square. Sew 1/4″ on both sides of the line. Cut on the line and press to the dark.

You will have made two identical Half Square Triangle (HST) blocks. My personal preference is to cut squares 1″ larger than the finished size of the final HST and square it up to the correct size after pressing.
There are two ways you can square up your block.
You can place a square ruler so the diagonal line is directly over the seam and just cut two sides. Quilt-in-a-Day has a Square Up Ruler that uses this method.
Or you can press open the block (pressing to the dark) and square it up using a ruler the same size as the block you are making. A fussy-cut ruler with lines on both diagonals will be very helpful with this.
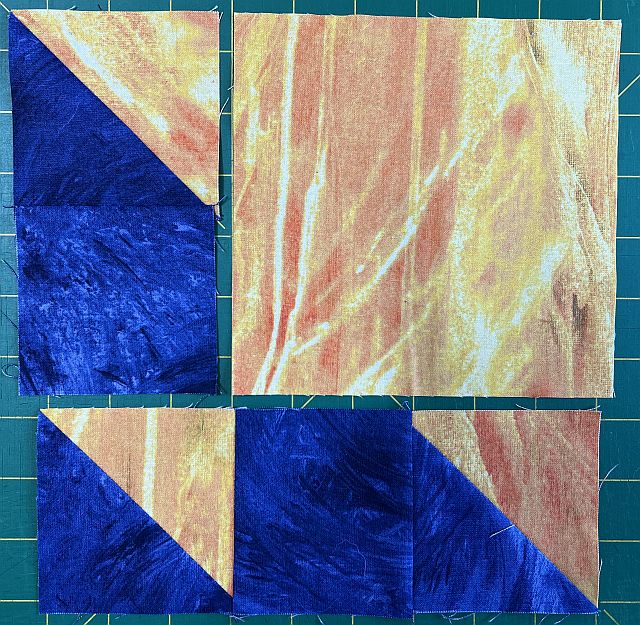
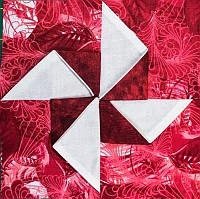
Place a 3-3/4″ Blue square right sides together with a 3-3/4″ Gold square. Draw a diagonal line on the back of one square. Sew 1/4″ on both sides of the line. Cut on the line. This will make (4) HSTs but you will only need (3) for this project. Press to the dark and square up to 3-3/8″.
Creating the Goldfish Quilt Block
Assemble:
- The (3) 3-3/8″ HSTs you just made
- (2) 3-3/8″ Blue squares
- (1) 6-1/4″ Gold square
Sew (1) HST to (1) 3-3/8 Blue square as shown left, pressing to the dark. Sew this to one side of the 6-1/4″ Yellow square, matching the configuration shown below. Press to the dark.
Sew (2) HSTs to both sides of (1) 3-3/8 Blue square as shown below, pressing to the dark. Sew this to the other side of the 6-1/4″ Yellow square, matching the configuration shown. Press to the dark.
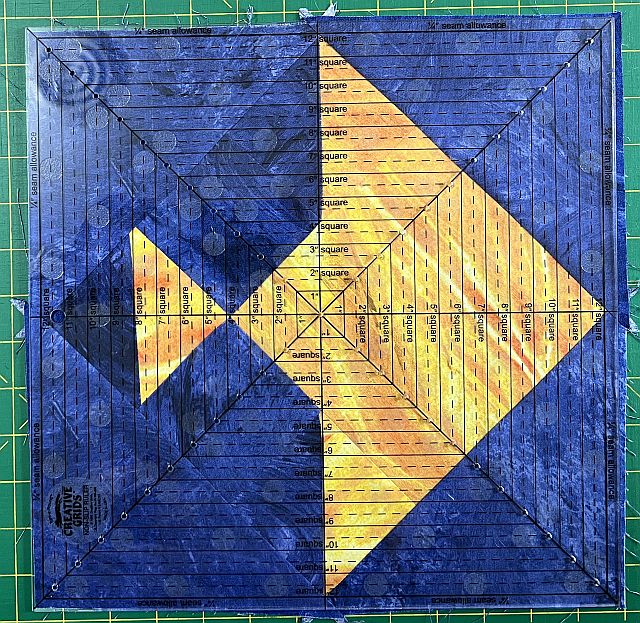
Press this block from the back so you can fix any twisted seams. Square it up to 9″
(not 9-1/2″) if necessary.
Setting the Block on Point
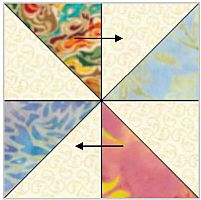
Matching the center of the long side of the triangle with the center of the block, sew a triangle to opposite sides of the Goldfish block you just made. Press to the dark.
Sew the remaining triangles to the other sides. Press to the dark and square up to 12-1/2″.
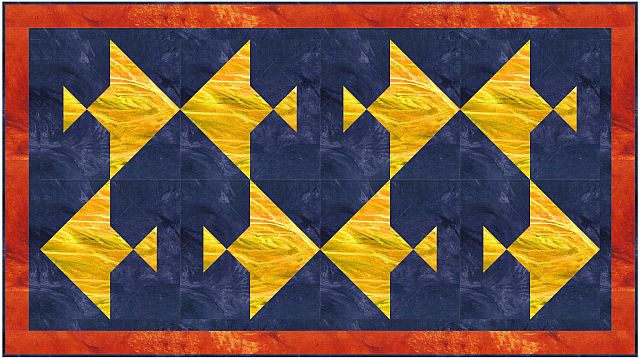
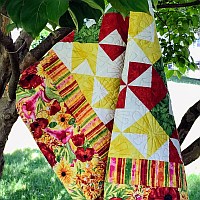
What can you do with this block?
How about appliqueing it on front of a bag, or making a quick table runner? Of course, you can always make a quilt! Here is a table runner I made.
Please add moc.hsadparcs@sirk to your contacts list to make sure you get the confirmation message. Drag the confirmation message from the Promotion tab to the Primary tab if you use Gmail.
If you are already a subscriber, it’s okay to fill out this form. You won’t be put on the mailing list twice.
Don’t forget to sign up for the newsletter! Once a week, I send updates on quilt-related information I have found while wandering the web. This might be an inspiring article, a tip or tutorial I have discovered (or written), and occasionally exclusive offers & discounts as well as immediate access to the secret page of free patterns, guides, and printables. You can follow my page on Facebook, or join the Make Believe Quilters group, too.
Other Designers
JULY 22
JULY 23
- Patchouli Moon Studio
- Words & Stitches
- Quilted Snail
- Quilting Between The Rails
- Sew Many Yarns
- Hazel’s Daughter
JULY 24
JULY 25
- MooseStashQuilting
- Ms P Designs USA
- Quilt and Color
- Selina Quilts


Adorable block, thanks for sharing!
Sweet pattern–and I like your choice of blue and gold for the blocks! Thanks for sharing it with us!
What a fun block. I love that ruler you shared. I might have to go shopping for that one!
Great fish block, thanks so much for the tutorial!
Cute gold fish, reminds me of those fish crackers, lol!
I love this fish block and your tutorial is great! Having them go nose to nose on your runner was a fun idea. They would be so cute on a baby quilt, too. Thanks for sailing with us on this fishy challenge, Kris!
I almost made a quilt using these blocks but knew someone else would so opted not to. Great tutorial.
Great looking block. Thanks for sharing
Yes, a super fun and cute block. Thanks for the tutorial.
Your table runner looks great! Thank you for the goldfish tutorial!
Thank you for the handy fish tutorial. I made mine something like this, but with some alterations. I’m on in two days. Can’t wait to see all at the various fish!!
The goldfish block is wonderful. What a surprise that you used them in that configuration, a sweet surprise for me. 🙂
Great Fishy block for the Fishy hop!
So nice of you to provide us with the block pattern too. It is wonderful!