Round the Mountain Mini Mystery – Ready, Set….

Are you ready?!?!   This is going to be a fun little mystery that finishes to a 36″ x 36″ Mini Quilt.  If you would like to make it a little bigger (51″ x 51″), you can set it on point.  I will add those instructions to the last hour of the mystery.

The first clue in this quilt mystery will post at 9 AM Eastern. Clue Posts will continue at the top of every hour through 3 PM.

Please send me your pictures!  I’d like to know how you felt about this pattern, too.  I’ve never done a mini before – was it fun? Too much work? Let me know!

Everyone who sends a picture will get a free copy of the completed pattern at the end of the mystery.  My email address is phoebemoondesigns@gmail.com

Here is the picture page: https://scrapdash.com/round-the-mountain-pictures/

Things you will find helpful for sewing

A strip cutting ruler or Accuquilt Strip Cutting Dies. (If you have an Accuquilt cutter, this is the most accurate way to go.)
A 2-1/2″, 4-1/2″ and a 6-1/2″ square ruler
A Quarter Inch Foot
Best Press or other spray starch
chocolate (just kidding!)(maybe not)

Before beginning this or any other project, wash and press your fabric. If you like the feeling of crisp fabric as you sew, use a little spray starch. Take the time to clean your machine, put in a new needle, and fill a few bobbins.

If you aren’t sure how to use a Stripology ruler, there is a tutorial here. In the tutorial, I am using a Cut n Press like the one below. The big ones are hard to find!

Fabric Requirements and Cutting Directions

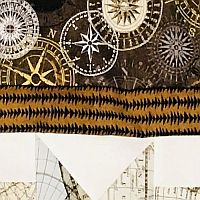
These are my fabrics.  I couldn’t find fabrics that exactly matched the colors in the pattern so I picked the stripe first and tried to get complementary colors and fabrics. As each clue is presented, cross off my colors and write in yours.

The 'Round the Mountain Mini-Quilt Mystery

1 stack of (34) 5″ charm squares

1/2 yd Background fabric (the off white in my fabric)

Cut (1) strip 6″ wide.  From that strip, cut (2) 5-1/2″ squares.  Cut the remainder of those strips in half the long way so you have (2) 3″ wide strips. Cut those strips into (18) 3″ x 3″ squares.
Cut (1) strip 3″ wide.  Cut this strip into (8) 3″ x 3″ squares.
Cut (2) strips 2″ wide. Cut these strips into (16) 4-1/2″ x 2″ rectangles.
Cut (4) strips 1-1/4″ wide. Cut these strips into (8) 16-1/2″ x 1-1/4 rectangles.

1/4 yd Tan Accent (the green in my fabric)

Cut (1) strip 3″ wide.  From that strip, cut (8) 3″ x 3″ squares.
Cut (2) strips 1″ wide.  From those strips, cut (4) 16-1/2″ x 1″ rectangles.

1/3 yd Blue Accent (the globes in my fabric)

Cut (1) strip 5-1/2″ wide. From that strip, cut (2) 5-1/2″ x 5-1/2″ squares and (8) 4-1/2″ x 1-1/2″ rectangles.

1/3 yd Outer Border (the compasses in my fabric)

Cut (4) strips 3″ wide by the WOF.

Inner Border  –1 yard striped fabric for the inner border if the stripe is parallel to the selvage OR 1/4 yd striped fabric if the stripe is perpendicular to the selvage.

Cut (4) 2″ wide strips running the length of the stripe.

1/4 yd Binding

Cut (4) strips 2-1/4″ wide by the WOF.

1-1/4 yards backing

If you are going to set it on point, you will need two squares of fabric that are 26-1/2″ x 26-1/2″.

Round The Mountain Clues

Questions or comments? Click on Leave a Reply below or Leave a Comment in the upper left hand corner.

Don’t forget to sign up for the newsletter! Once a week, I send updates on quilt-related information I have found while wandering the web. This might be an inspiring article, a tip or tutorial I have discovered (or written) and occasionally exclusive offers & discounts as well as immediate access to the secret page of free patterns, guides, and printables. You can follow my page on Facebook, or join the Make Believe Quilters group, too.

PhoebeMoon Designs is a participant in the Amazon Services LLC Associates Program, a program designed to provide a means for sites to earn advertising fees by advertising and linking to Amazon.com. As an Amazon Associate I earn from qualifying purchases.