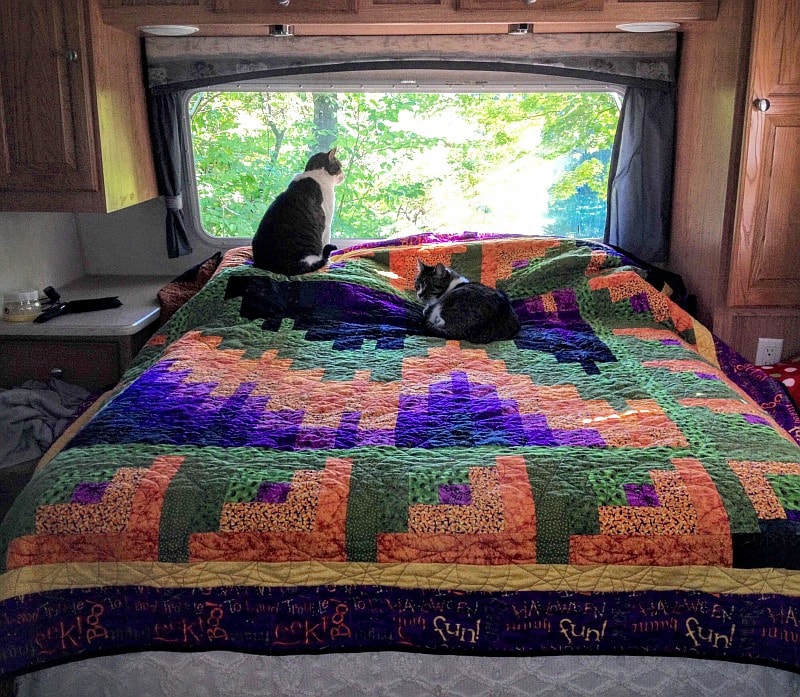
Halloween Quilt Pattern Tutorial: I used to teach at a quilt retreat held at the Bayside Inn in Cooperstown NY. I wouldn’t stay at the Inn, I would stay in a camping trailer we had at the time at Shadowbrook Campground. One year I offered two different classes – a log cabin and a bargello. A quilter challenged me to combine them, so I did!
Yes, you can buy the pattern.
How to make a bargello quilt
First, what is a bargello? A bargello quilt is one made of strips of fabric that are arranged by color to create an illusion. Perhaps a wave, a knot, a flame, diamonds, a heart, sometimes even animals. Each of the fabric prints in a strip should contain one of the colors in the next fabric strip with the final fabric co-ordinating with the first one.
The hardest part about a bargello…
is finding the fabrics. I found a border print with a purple background that gave me the basic colors: purple, red, orange, gold, green, and black. Each of the fabric prints in a bargello should contain one of the colors in the next fabric. Here are the fabrics I used for the bargello:
- orange with a light purple background
- mottled orange with red
- orange with red swirls
- green with orange/red flecks
- green with black figures
- green with black spiders and red eyes
- black on black spiderweb
- gray on black spiderweb
- gray with black flecks
- black owls on deep purple
- deep purple with black flecks
- light purple with black spiderwebs
- and back to the beginning
The bargello strips are sewn in a circle before being cut. In the picture above, you may have noticed that each of the columns of fabric is cut to a different width. This is another characteristic of a bargello quilt. They can be as thin or as wide as needed to create the design.
After the strips have been cut to the desired width, a seam is picked out and the strips laid out in a row. For example, the first strip would have a seam between fabrics 1 and 2 undone. The next strip would have the seam between 2 and 3 undone. The third strip would have the seam between 3 and 4 undone, and so on. As a result, the design is created when the strips are laid evenly next to each other. Use lots of pins when sewing those strips together! It’s easy to drop a strip and not know where to put it.
How to Make a Curved Log Cabin Block
The log cabin blocks in this quilt are built with a little trick – the two outer logs are not pieced, but a solid strip of fabric. This allowed me to create the illusion of an inner green border. You can read more about How to Make a Log Cabin Quilt here.
However, the four corner blocks were made to give the illusion of a curved block. This is easy to do with the Marti Michell log cabin ruler.
You don’t have to use this block on the corner of a quilt. It’s basically a Drunkards Path, isn’t it? Or put four of them together for a snowball block.
Two more borders were added to the quilt, and it was done! This quilt finishes about 85″ x 93″.
Here are other Halloween ideas:
- Boo!-ti-ful Halloween Wall Hanging or Lap Quilt
- Halloween Hoppin’ – Using Purple in a Halloween Quilt
- Halloween Freebie – Spiders in My Attic
- Ghastly Ghouls and Zombies
- A Batty Pumpkin Quilt Block
- Free Braided Table Topper Pattern for Halloween
- Orange You Glad Harvey?
- Boo! A Fussy Cut Monster Mash Quilt Block
- A Quilted Halloween Story
Have another tip to offer? Send it to me or reply below and I will add it here.
Don’t forget to sign up for the newsletter! Once a week, I send updates on quilt-related information I have found while wandering the web. This might be an inspiring article, a tip or tutorial I have discovered (or written), and occasionally exclusive offers & discounts as well as immediate access to the secret page of free patterns, guides, and printables. You can follow my page on Facebook, or join the Make Believe Quilters group, too.