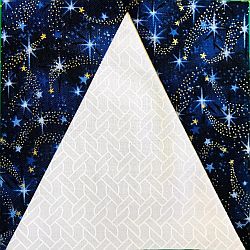
How to Use the V Block Ruler to Make Triangle in a Square Quilt Blocks

Do you struggle with Triangle-in-a-Square quilt blocks? They do make wonderful patterns, like Storm at Sea, but it can be tricky to make them in different sizes and square them up. Sewing those angles has always seemed to be a problem for me.  Then I discovered the V Block Ruler.

This is a Four-Part Series of Tutorials. 

  1. How to Make HSTs using Magic
  2. Making Square in a Square Block
  3. Using the V Block Ruler to make Triangle in a Square Blocks
  4. How to finish your quilt like a pillowcase (a knife-edge finish)

Kris’s note: When I was making this tutorial, I had to really pay attention to what I was doing.  I really shouldn’t have had to, the V Block ruler is a great ruler.  But I didn’t make TOO many mistakes before I caught on:-))

The V Block Ruler
This is the V Block ruler on a sheet of white paper.

I needed (8) 4-1/2″ square Triangle-in-a-Square blocks to make the Midnight Star Tabletopper. To make them using the V Block Ruler from Studio 180, I needed to cut:

  • (1) 5″ wide strip of dark blue fabric by the WOF (Width of Fabric) and
  • (1) 5″ wide strip of background fabric by the WOF (Width of Fabric)

To make this block, start with a strip of fabric 1″ wider than the finished size of the block you are making. In this case, I am making a 4″ finished block, so my strips are 5″ wide.

Making the Center Triangle

To make the center triangle, you start with part of the strip folded over on itself.  Place the ruler so that the dotted line that says “Fold line for center triangles” along the straight edge of the fabric.  If you use the solid line, the triangle will be too large.  (Ask me how I know.)  The bottom of the strip should match up with the line on the ruler that represents the finished size of the eventual block.  Cut on the slanted edge of the fabric.

Flip the fabric so the angle you just cut is in the opposite direction.  This gives you one cut side of the triangle. Cut along the other side.  You now have two triangles!  Continue this process until you have made 8 triangles.

Making the Side Triangles

Making the side triangles is a little trickier.  Straighten the edge of the strip, removing the selvage, and place the two strips wrong sides together.  That way you will be cutting both the right side of the block and the left side of the block at the same time.

Place the flat tip of the ruler along the top of the strip, the solid line along the cut side edge, and the 4″ line along the bottom. Cut along the angled edge.

Using the V Block Tool to make Half Rectangle Blocks

Leaving the strip in place, turn the ruler upside down, aligning the cut angle with the line that says “Side Triangle Trim #2”.  Slide the ruler so the flat tip is along the bottom.  Make a straight cut along the side of the ruler.

Using the V Block Tool to make Half Rectangle Blocks

You are back at the beginning again.  Continue this process until you have made all the side triangles that you need for your project.

Putting the Triangle-in-a-Square Block together

Separate your left and right side triangles and lay them on either side of your center triangle, right sides up.

The center triangle and the side triangles of a Triangle in a Square Block

Matching the cut edges, chain stitch all the left-hand triangles to the center triangle.

Stitching the side of the triangle to the center triangle in a Triangle in a Square Quilt Block
Here is how it is pinned.
Quilt Pieces being sewn into a Triangle in a Square block
Here is what it SHOULD look like going through the machine.

Press to the dark and repeat for the other side.

How to Make a Triangle in a Square Quilt Block Using the V Block Tool from Studio 180

Press. 

Now it is time to square up your blocks!

Place the ruler on top of your block so the lines of the 4″ V align with the seam of the center triangle.

The V Block Ruler in position
Can you see the little red arrow by the 4″ mark? That’s where you put the point of the triangle.

Trim along the side and top.

How to Make a Triangle in a Square Quilt Block Using the V Block Tool from Studio 180

Now turn the block over and match up the 4-1/2″ line along the bottom and the X along the top. The X should match up with your point. Trim along the side and top.

How to Make a Triangle in a Square Quilt Block Using the V Block Tool from Studio 180

Your block is now square!  You will need 8 of them if you are making the Midnight Star Table Topper.

Please add moc.hsadparcsobfsctd@sirk to your contacts list to make sure you get the confirmation message. Drag the confirmation message from the Promotion tab to the Primary tab if you use Gmail.

If you are already a subscriber, it’s okay to fill out this form. You won’t be put on the mailing list twice.

Have another tip to offer? Send it to me or reply below and I will add it here.

Don’t forget to sign up for the newsletter! Once a week, I send updates on quilt-related information I have found while wandering the web. This might be an inspiring article, a tip or tutorial I have discovered (or written), and occasionally exclusive offers & discounts as well as immediate access to the secret page of free patterns, guides, and printables. You can follow my page on Facebook, or join the Make Believe Quilters group, too.