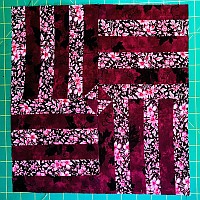
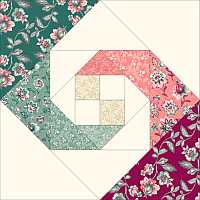
How to Make a Twisted Rail Fence Quilt Block
To make this block, you will need:
- 1/8 yard Dark Red
- 1/8 yard Light Red
Cut this fabric into strips depending on what size block you are making. I like using my Stripology ruler when cutting strips. It keeps my hand steady and my cuts accurate. The strip-cutting ruler in the picture below is a June Taylor ruler. It’s a little smaller, so I used it because I was cutting a small amount.
The trick to using any strip-cutting ruler is to place the horizontal line on either the selvage or the fold and cut your zero line first. Here I have just laid my two fabrics on top of each other, so I cut both strips at the same time.
Here you can see the strips I needed to cut, plus the four small squares. You can easily cut squares from strips with a strip-cutting ruler. Just turn it sideways.
I drew a diagonal line on the back of the small squares.
I sewed two groups of six strips each, then cut them into squares to make them into Rail Fence blocks. I placed the small squares on these blocks, right sides together, arranged so the diagonal touched two edges and the fabric did NOT match.
Then I sewed on the line and flipped the square over the seam. It matched exactly (whew!) so I was able to trim away the fabric underneath. I sewed the rail fence blocks so the squares were in the corner and…tada!
Have another tip to offer? Send it to me or reply below and I will add it here.
Don’t forget to sign up for the newsletter! Once a week, I send updates on quilt-related information I have found while wandering the web. This might be an inspiring article, a tip or tutorial I have discovered (or written), and occasionally exclusive offers & discounts as well as immediate access to the secret page of free patterns, guides, and printables. You can follow my page on Facebook, or join the Make Believe Quilters group, too.