Bug Jar Quilt Block – May Block of the Month
Note: This post may contain affiliate links. That means we may earn a commission at no additional cost to you if you purchase via our links. Not all links are affiliate links. I only recommend products I use and trust. As an Amazon Associate, I earn from qualifying purchases.
Have you ever caught a bug and kept it in a jar? It’s fun to see a lightning bug flash or a caterpillar turn into a butterfly! But then you have to let them go. Here is a quilt block pattern so you can keep it forever.
I need to tell you a little story about this quilt block. Before the Quiltbus, I owned an online shop called HickoryHill Quilts. We were the second Quilt Shop to go online, after Pine Tree Quiltworks of Maine. The internet was new (this was 1997) and most people didn’t have computers. So fabric that was sold by mail was generally done by catalog. Y’all may remember getting the Keepsake Quiltings catalog back in the day.
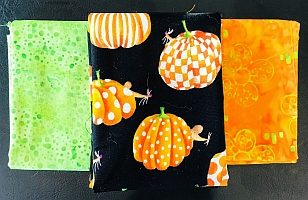
I decided I would get around this by creating a fat eighths club. I would send members a fat eighth (11″ x 18″) piece of fabric for every new fabric that came into the shop. It was a small but fun club. People would send me pictures of what they made with the fabric and I would share them on rec.crafts.textiles.quilting newsgroup forum. One woman came up with a very ingenious block:
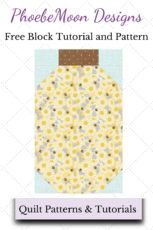
The Bug Jar Quilt Block
I’m sorry, I don’t remember her name. I did hear later on the forum that she had passed away. (If you know, please remind me.) She never really got to see how that block exploded. For a while, *everyone* was doing bug jar blocks – wine bottles, baby food jars, fish bowls, mason jars, soda bottles, jam jars – you name it. It was really fun to see all the varieties.
I honestly don’t remember much about her original block, other than it used an 11″ x 18″ piece of fabric. I think I have reproduced her block correctly, but if you were a member back then and I got it wrong, please let me know.
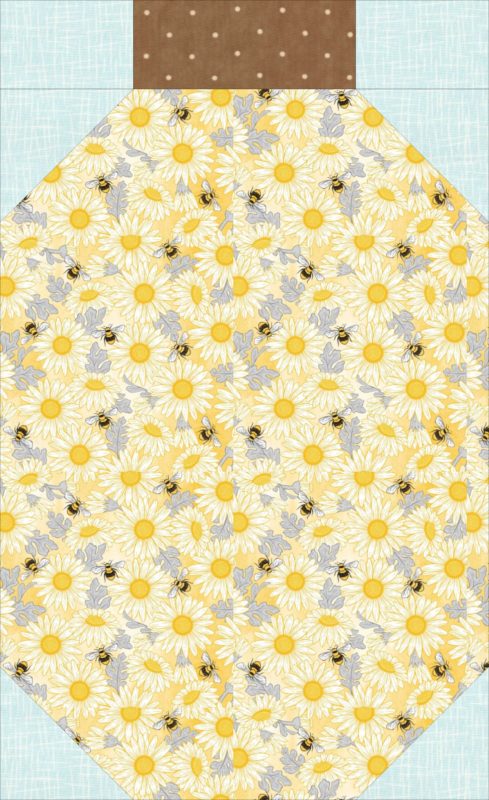
So without further ado, here is the pattern.
You will need:
- (1) 11″ x 16-1/2″ piece of Bees fabric
- (4) 4″ squares sky background fabric
- (2) 2-1/2″ x4″ sky background fabric
- (1) 2-1/2″ x 4″ bottle top fabric
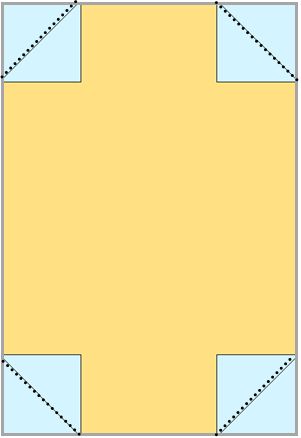
Draw a diagonal line on the back of the (4) 4″ sky fabric squares. This will be your sewing line.
Place a sky square in each corner of the bug fabric block, right sides together, so the diagonal line intersects each edge. Sew on the line. Flip it over the seam and press. If it matches the corner exactly, you can trim the underside to 1/4″.
Making the Jar Lid
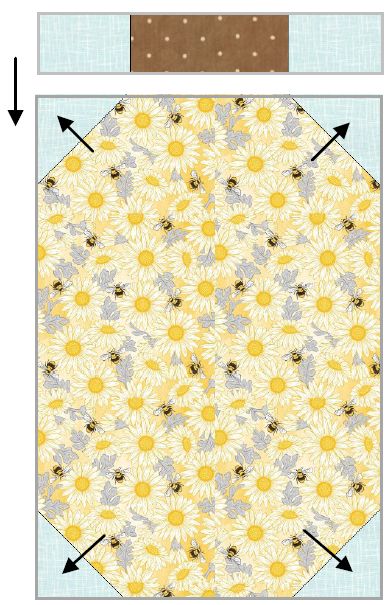
Sew a 2-1/2″ x 4″ sky background rectangle to each side of the 2-1/2″ x 4″ bottle top rectangle using a 1/4″ seam. Press to the bottle top rectangle.

Sew the bottle top unit to the bug jar unit. Press. You have made a bug jar! It should measure 11″ x 16-1/2″.
Please add moc.hsadparcs@sirk to your contacts list to make sure you get the confirmation message. Drag the confirmation message from the Promotion tab to the Primary tab if you use Gmail.
If you are already a subscriber, it’s okay to fill out this form. You won’t be put on the mailing list twice.
Don’t forget to sign up for the newsletter! Once a week, I send updates on quilt-related information I have found while wandering the web. This might be an inspiring article, a tip or tutorial I have discovered (or written), and occasionally exclusive offers & discounts as well as immediate access to the secret page of free patterns, guides, and printables. You can follow my page on Facebook, or join the Make Believe Quilters group, too.

