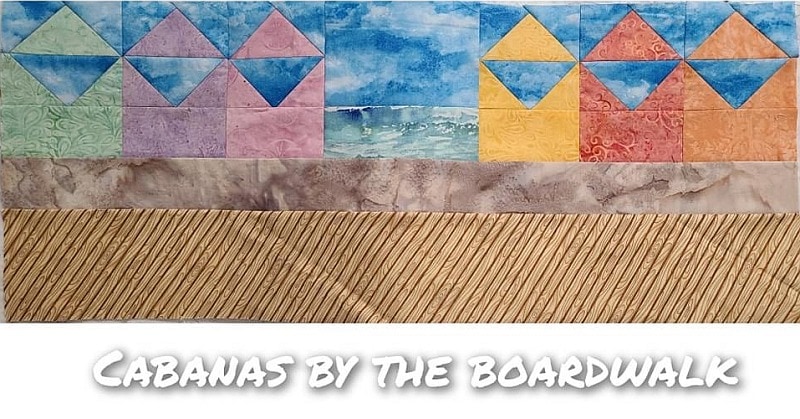
Cabanas on the Boardwalk Free Quilt Row Pattern
Note: This post may contain affiliate links. That means we may earn a commission at no additional cost to you if you purchase via our links. Not all links are affiliate links. I only recommend products I use and trust. As an Amazon Associate, I earn from qualifying purchases.
This design was created for the Seaside Adventure Row by Row. Feel free to embellish it to create your own adventure! Do you have a scrap of leftover lace or a lone earring? They would be great on the cabanas! How about fussy cutting fabrics for fusible applique to create seagulls, sandcastles, shells or other items on the beach? Why not have people or dogs peeking out the cabana windows?
The boardwalk could be cut out of a piece of wood-look fabric, but there are instructions in the pattern to piece it from scraps. Don’t like the boardwalk? Make it a sidewalk, or delete it altogether and make the beach larger. This is YOUR Seaside Adventure.
Before starting this project, I recommend that you press your fabric with spray sizing. It will make it easier to cut small pieces. Take the time to clean your machine, put in a new needle, and fill a few bobbins. When pressing, just hold the iron over a spot for a moment or two. This pattern assumes a perfect 1/4” seam.
Helpful Items (not required)
- A long ruler and several small, square ones (2-1/2″, 4-1/2″, 6-1/2″)
- Sharp Pins
- Flying Goose Ruler from Quilt-in-a-Day
- DON’T FORGET a Thread Snipper. A good pair of Fiskars thread snips will make your life immeasurably easier.
How to Make the Cabanas on the Boardwalk Row
Cutting Instructions
For EACH of the (6) Cabanas:
Cut (1) strip 2-1/2″ wide. From that strip, cut (2) 2-1/2″ squares and (2) 2-1/2″ × 4-1/2″ rectangles.
Sky
Cut (1) strip 4-1/2″ wide. From that strip, cut (1) 6-1/2″ × 4-1/2″ rectangle and (6) 2-1/2″ × 4-1/2″ rectangles.
Cut (1) strip 2-1/2″ wide. From that strip, cut (12) 2-1/2″ squares.
Ocean
Cut (1) strip 2-1/2″ wide. From that strip, cut (1) 6-1/2″ × 2-1/2″ rectangle.
Sand
Cut (1) strip 2-1/2″ wide. From that strip, cut (1) 30-1/2″ × 2-1/2″ rectangle.
Various Browns (Note: if you have fabric that looks like boards, ignore this instruction.)
Cut (15) 24-1/2″ × 2-1/2″ strips.
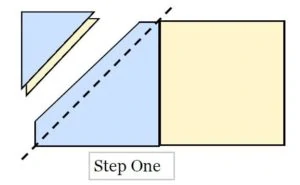
A Flip-n-Sew Method of Making a Flying Goose Block
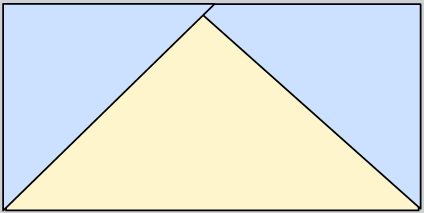
This is a traditional method of making Flying Geese Blocks. In this method, you sew a square on one side of a rectangle using a diagonal seam, then flip it over to create one side of the Flying Goose block. Press to the square. After you have double-checked to make sure everything lines up properly, cut off the excess underneath that square. Then repeat the process for the other side.
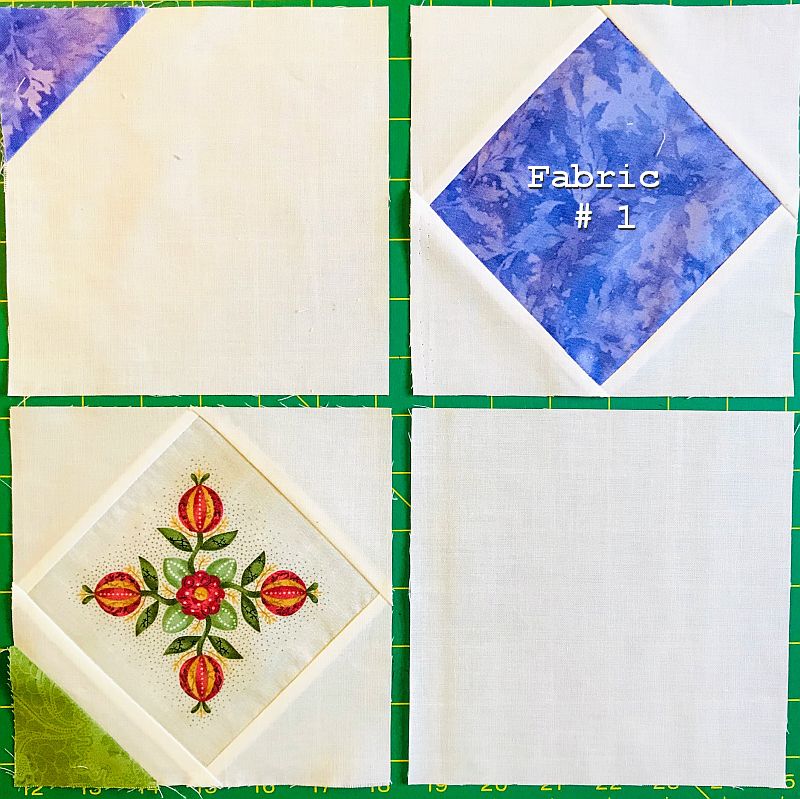
To use this method, cut a rectangle for the goose (shown in yellow) and two squares for the sky (shown in blue.) Cut the squares for the sky the same size as the height of the unfinished rectangle. Remember that the finished size will be 1/4″ smaller all the way around the rectangle due to the seam allowance. In other words, a 2-1/2″ x 4-1/2″ rectangle and (2) 2-1/2″ squares will be needed to make a 2″ x 4″ finished goose.
Draw a line on the diagonal on the wrong side of the sky square (shown in blue below.) Lining up the corners of the square with the edges of the goose rectangle (shown in yellow below), pin carefully and sew on the drawn line as shown. Cut off the excess and press. Do the other side, overlapping the first square. Press and trim all dog ears.
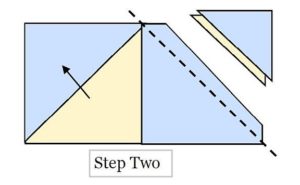
Make a test block first. If you are comfortable with the procedure, you can chain stitch these by doing the first step of all the blocks before going on to the second step.
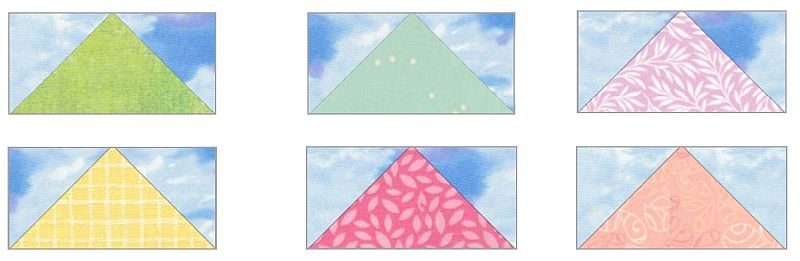
Assemble:
(12) 2-1/2″ Sky squares
(6) 2-1/2″ × 4-1/2″ Cabana rectangles (one from each color)
Following the directions above, make these (6) Flying Geese Blocks. Press toward the sky.
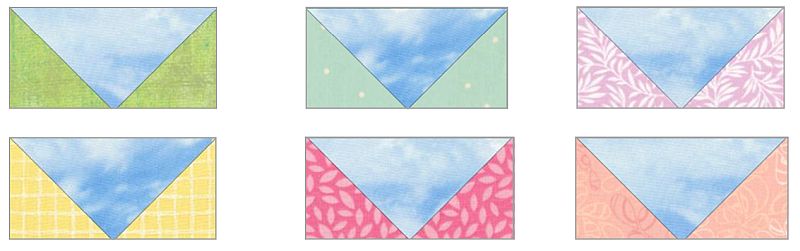
Assemble:
(12) 2-1/2″ Cabana squares (two from each color)
(6) 2-1/2″ × 4-1/2″ Sky rectangles
Following the directions above, make these (6) Flying Geese Blocks. Press toward the sky.
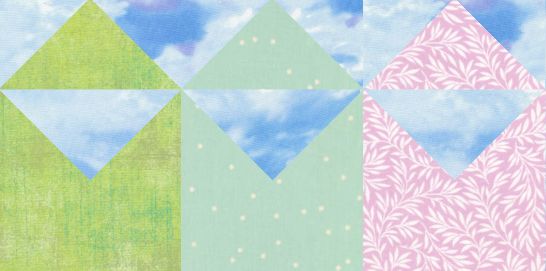
Piecing the Cabanas
Assemble:
(6) 2-1/2″ × 4-1/2″ Cabana rectangles (one from each color)
Using matching colors, piece the cabanas as shown. You can alternate the seams of the blocks or press them open. Your cabana should measure 6-1/2″ × 4-1/2″.
Make (6) Cabanas, one of each color. Sew them in (2) groups of (3) each.
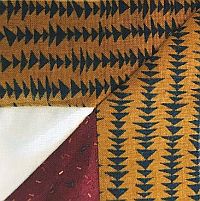
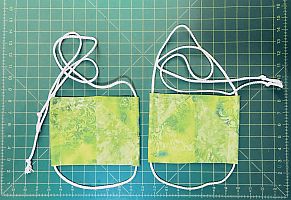
To Make the Boardwalk (if you don’t have fabric that looks like boards)
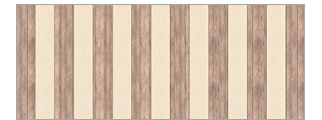
Assemble:
(15) 24-1/2″ × 2-1/2″ strips of Various Browns.
Sew these together the long way and press the seams open.
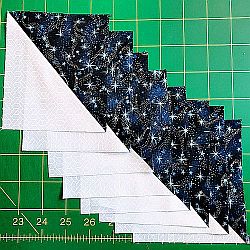
Place this on your cutting board. Using either the 45-degree angle on your cutting board or the one on your long ruler, make a cut from one side of this unit to the other. It doesn’t have to be exactly 45 degrees. You might like 30 degrees better, or perhaps 60 degrees. Try folding the fabric along a potential cut line to see if you like it before making a commitment.
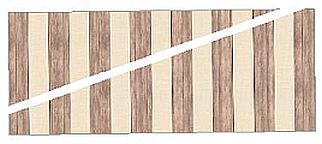
Make your first cut. Make your second cut 2-1/2″ to the side, giving you a 2-1/2″ wide slice of fabric with angled pieces. That is your boardwalk. Depending on the angle you chose, you may need to add some pieces to the end of that strip to make it long enough. Use the other end of the strip that you might otherwise discard.
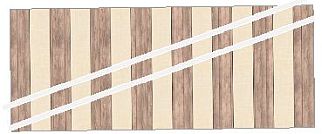
Your boardwalk should measure 30-1/2″ × 4-1/2″.

Assemble:
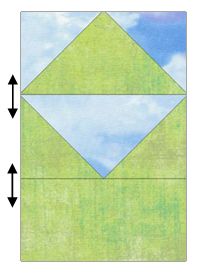
(1) 6-1/2″ × 2-1/2″ Ocean rectangles
(1) 6-1/2″ × 4-1/2″ Sky rectangles
(1) 30-1/2″ × 2-1/2″ Sand rectangle
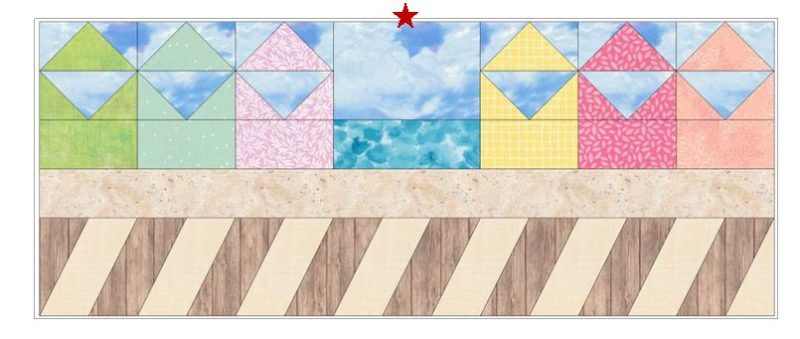
Sew the Ocean and Sky rectangles together to make a 6-1/2″ square. Press the seam open. Sew this between each set of Cabanas. Press the seam open.

Matching the center of the Cabana row with the center of the 30-1/2″ × 2-1/2″ Sand rectangle, sew the Cabanas to the Sand. Use pins to keep everything straight. Press the seam open.

Sew the Cabanas/Sand row to the Boardwalk, again matching centers. Press the seam open. Give your row one final pressing. It should measure 12-1/2″ × 30-1/2″.
Please add moc.hsadparcs@sirk to your contacts list to make sure you get the confirmation message. Drag the confirmation message from the Promotion tab to the Primary tab if you use Gmail.
If you are already a subscriber, it’s okay to fill out this form. You won’t be put on the mailing list twice.