Tea and Crumpets Mystery Quilt Blocks
Note: This post may contain affiliate links. That means we may earn a commission at no additional cost to you if you purchase via our links. Not all links are affiliate links. I only recommend products I use and trust. As an Amazon Associate, I earn from qualifying purchases.
Let’s put some Tea and Crumpets Mystery-Quilt Blocks together. Before we get started, though, I need to admit a mistake…
I Meant to Do That…
Somehow in my enthusiasm for this pattern, I miscounted the number of square-in-a-square blocks I needed. The PATTERN was right, it was the quilter who was wrong. Of course, there is no way I can get any more of the fabric with the little motifs, so I substituted a solid color for the missing square-in-a-square blocks.
So that means I have two Fabric #1’s and two Fabric #2’s. Argh!
Assemble:
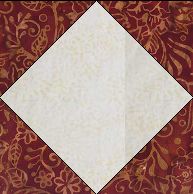
- (4) Fabric #1 Square-in-a-Square Blocks with no accent corners
- (3) Fabric # 2 Square-in-a-Square Blocks with a green accent corner
- (1) Fabric #2 Square-in-a-Square Blocks with no accent corners
- (5) 6-1/2″ Backgrounds Squares with no accent corners
- (3) 6-1/2″ Background Squares with blue accent corners
Create these four blocks. Press the row seams AWAY from the square-in-a-square blocks. When you sew the rows together, you can press that seam open or twirl it to reduce bulk. All blocks should finish 12-1/2″ square.
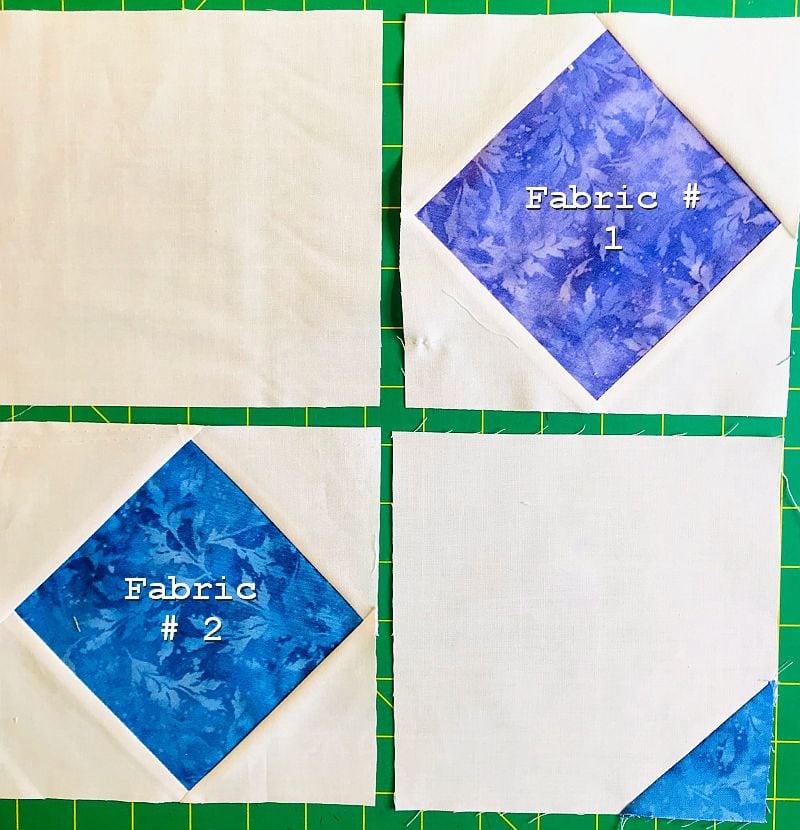
The above block is Block One. Make One block and label it as Block One.
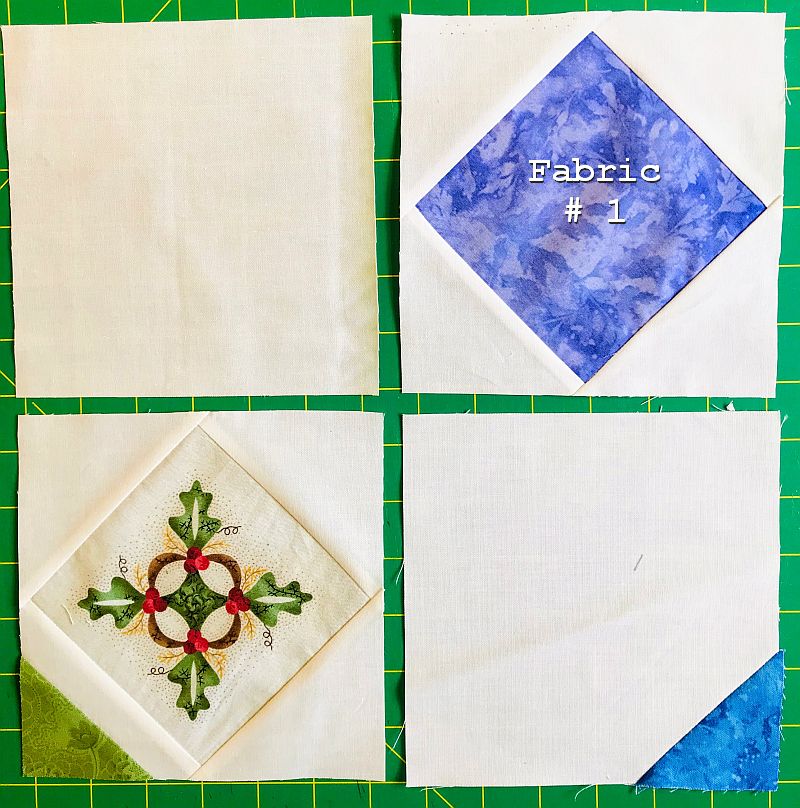
These are blocks Two and Three. Make two of these and label them Block Two and Block Three.
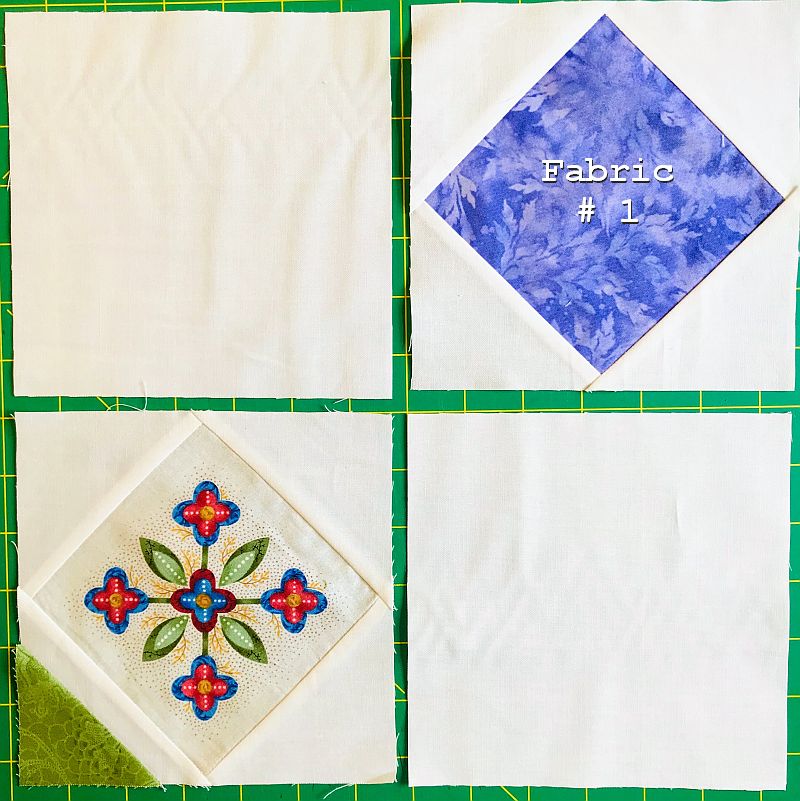
This is Block Four. Make one of these and label it Block Four.
Making More Tea and Crumpets Mystery-Quilt Blocks
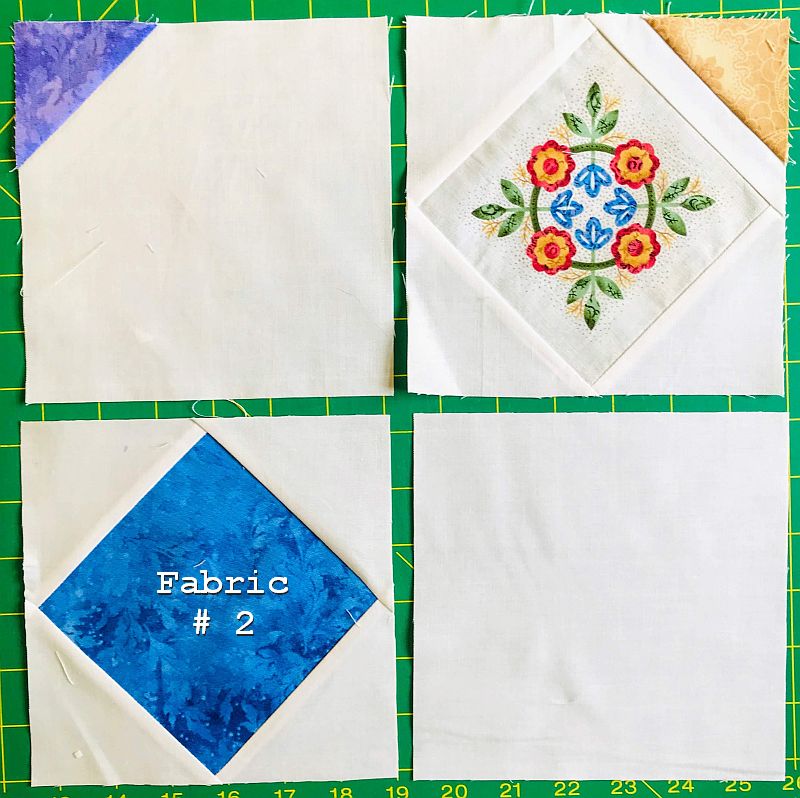
Assemble:
- (1) Fabric #1 Square-in-a-Square Blocks with no accent corners
- (3) Fabric # 2 Square-in-a-Square Blocks with a yellow accent corner
- (4) Fabric #2 Square-in-a-Square Blocks with no accent corners.
- (5) 6-1/2″ Backgrounds Squares with no accent corners
- (3) 6-1/2″ Background Squares with purple accent corners
Create these four blocks. Press the row seams AWAY from the square-in-a-square blocks. When you sew the rows together, you can press that seam open or twirl it to reduce bulk.
The above block is Block 17. Make One block and label it as Block 17.
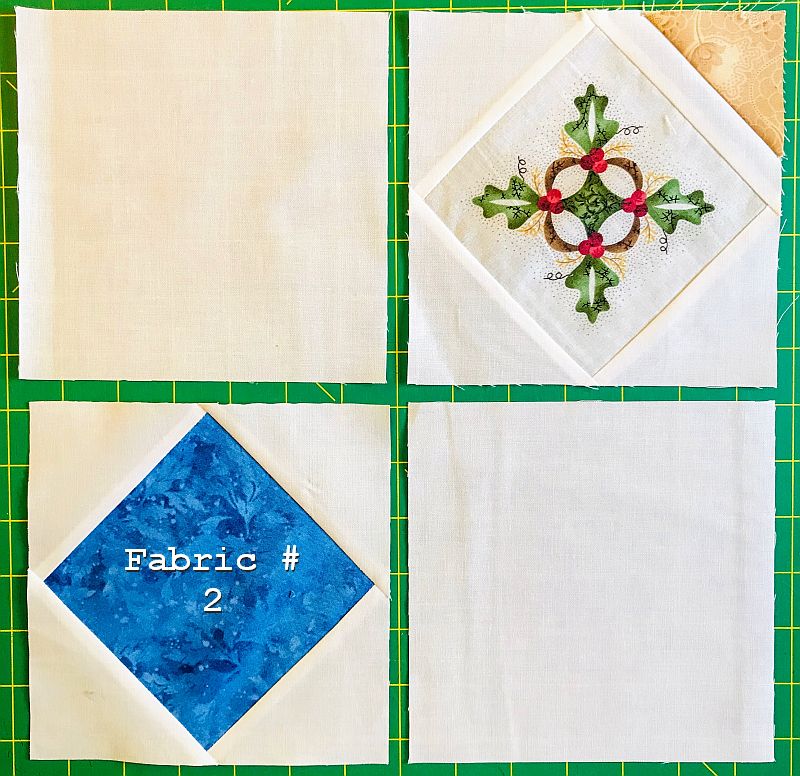
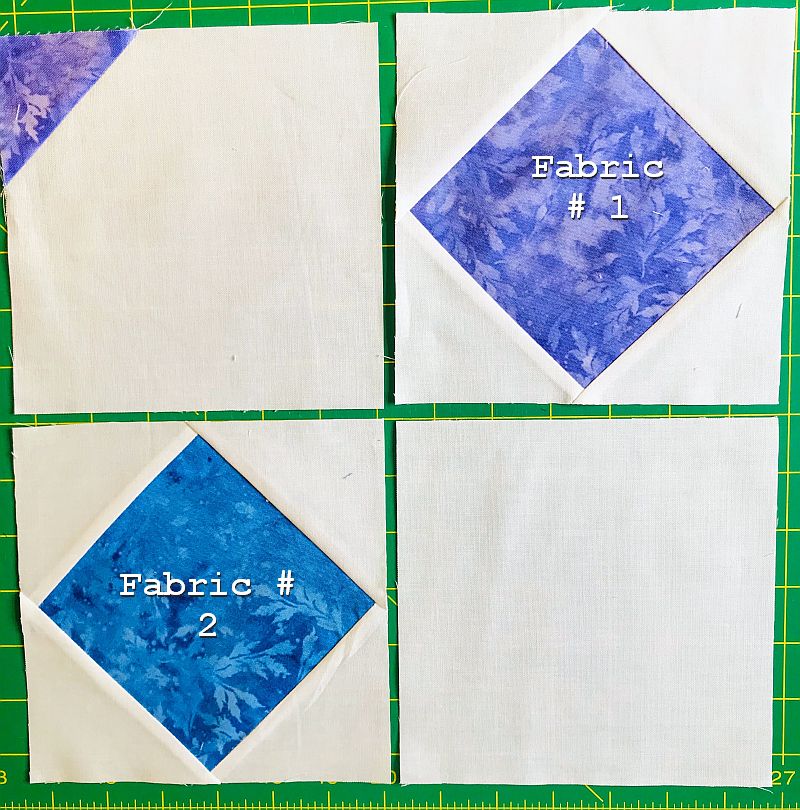
The above blocks are Blocks 18 and 19. Make Two blocks and label them as Block 18 and Block 19.
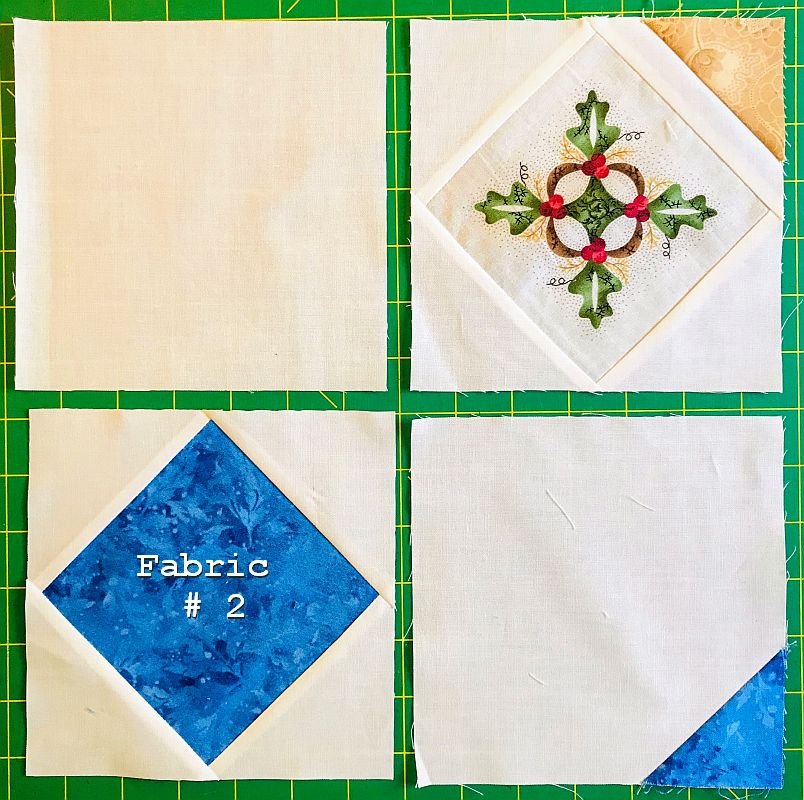
The above block is Block 20. Make One block and label it as Block 20.
Putting the Final Group of Blocks Together
Let’s put the final group of blocks together. Be sure to label everything so you get it in the right place when you sew the blocks into rows. Use a pencil to write the block number in the seam allowance on the back if you don’t have any stickers.
- (3) Fabric #1 Square-in-a-Square Blocks with no accent corners.
- (9) Fabric #1 Square-in-a-Square Blocks with yellow accent corners.
- (9) Fabric # 2 Square-in-a-Square Blocks with a green accent corner.
- (3) Fabric #2 Square-in-a-Square Blocks with no accent corners.
- (6) 6-1/2″ Backgrounds Squares with no accent corners.
- (9) 6-1/2″ Background Squares with blue accent corners.
- (9) 6-1/2″ Background Squares with purple accent corners.
Assemble:
Create these blocks. Press the row seams AWAY from the square-in-a-square blocks. When you sew the rows together, you can press that seam open or twirl it to reduce bulk. All blocks should finish 12-1/2″ square.
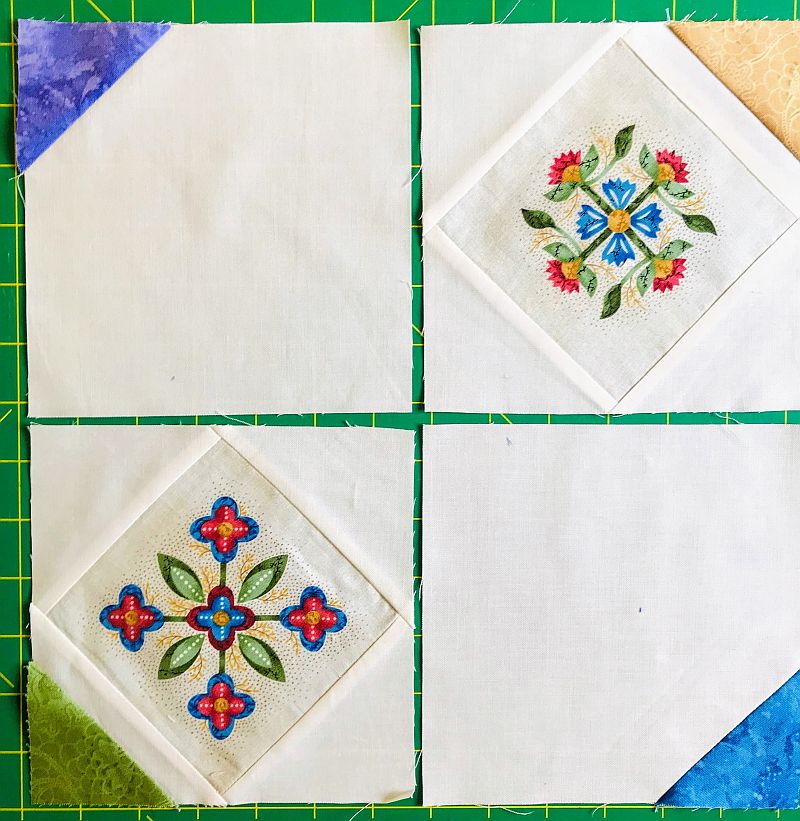
Make 3 of the blocks above and label them Blocks 5, 9, and 13.
Make 6 of the blocks above and label them Blocks 6, 7, 10, 11, 14, and 15.
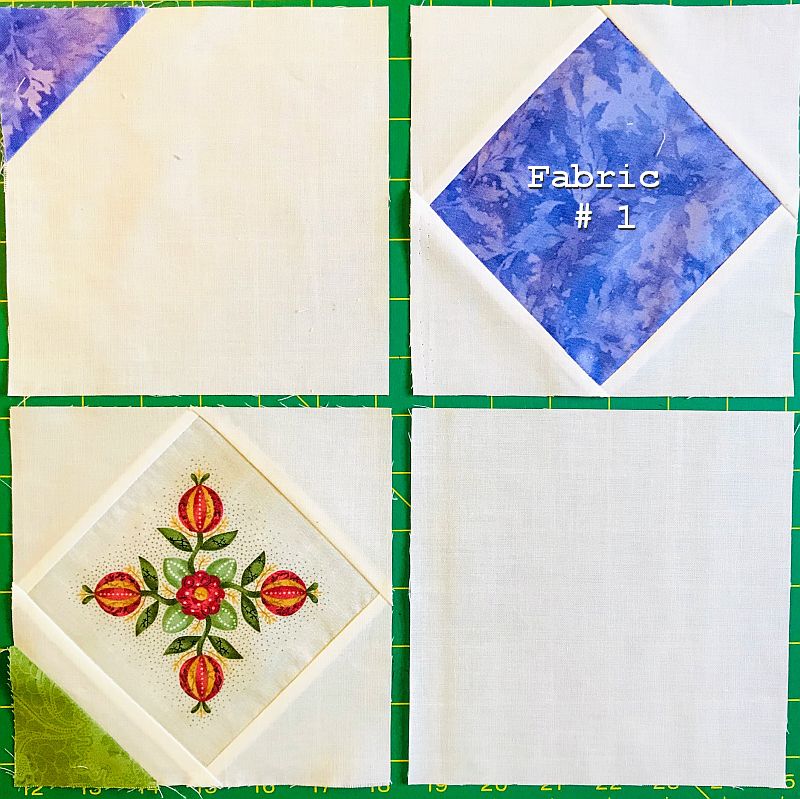
Make 3 of the blocks above and label them Blocks 8, 12, and 16.
Would you like to make a Square-in-a-Square block in a different size?
Please add moc.hsadparcs@sirk to your contacts list to make sure you get the confirmation message. Drag the confirmation message from the Promotion tab to the Primary tab if you use Gmail.
If you are already a subscriber, it’s okay to fill out this form. You won’t be put on the mailing list twice.
Don’t forget to sign up for the newsletter! Once a week, I send updates on quilt-related information I have found while wandering the web. This might be an inspiring article, a tip or tutorial I have discovered (or written), and occasionally exclusive offers & discounts as well as immediate access to the secret page of free patterns, guides, and printables. You can follow my page on Facebook, or join the Make Believe Quilters group, too.


There is no PDF connected with this mystery unless you mean the professional pattern that I give away at the end. You can print out all the clues just like you would any other web page. There is a print button at the bottom of every page, too.