Gnome for Thanksgiving Blog Hop
Note: This post may contain affiliate links. That means we may earn a commission at no additional cost to you if you purchase via our links. Not all links are affiliate links. I only recommend products I use and trust. As an Amazon Associate, I earn from qualifying purchases.
Gnome for Thanksgiving! Here’s a cute Gnome block that is completely pieced. You can easily add applique accents to make each gnome unique, or make him a seasonal decoration. Finishes at 12″. Make him into a mug rug, or use two to make a placemat. Three or more might make a table runner.
Be sure to see the other designers at the bottom of this page.
He gnomes if you’ve been bad or good
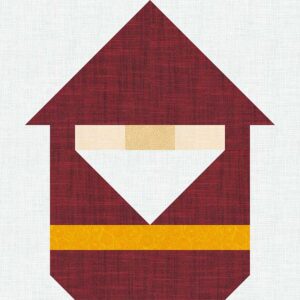
Fabric Requirements
- White background. Cut (2) 1-1/2″ x 5-1/2″ rectangles, (2) 2-1/2″ x 8-1/2″ rectangles, (2) 3-1/2″ squares, (2) 5-1/2″ squares, and (1) 3-1/2″ × 6-1/2″ rectangle. This includes fabric for making the Flying Geese using the traditional Squares-on-a-Corner method.
- Red suit. Cut (2) 1-1/2″ x 4-1/2″ rectangles, (1) 2-1/2″ x 8-1/2″ rectangles, (2) 3-1/2″ squares, and (1) 5-1/2″ × 10-1/2″ rectangle. This includes fabric for making the Flying Geese using the traditional Squares-on-a-Corner method.
- gnome nose. (1) 1-1/2″ x 2-1/2″ rectangle
- gnome face. (2) 1-1/2″ x 2-1/2″ rectangles
- gold belt. (1) 1-1/2″ x 8-1/2″ rectangle
Making the Flying Geese Blocks
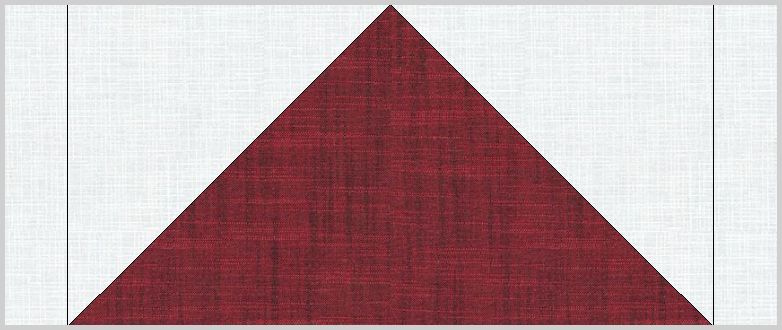
There are two Flying Geese blocks in this block, one that is 5″ x 10″ finished with a red center, and one that is 3″ x 6″ finished with a white center. Use your favorite method to make these. Because of the odd size of the first one, you may be happier with a more traditional method, but it is up to you. Here are some tutorials:
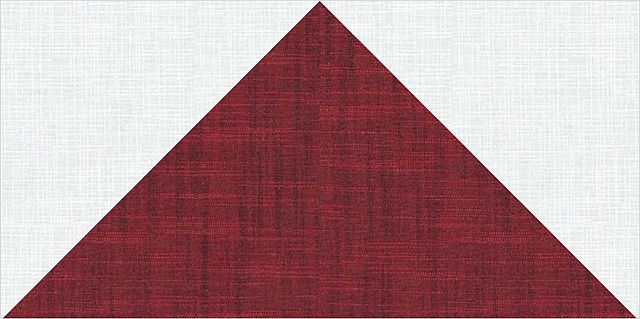
block with a red center. Press to the corner.
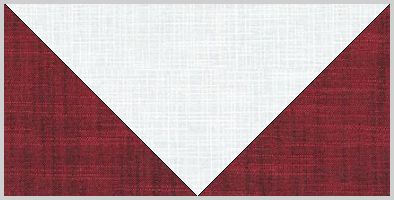
block with a white center. Press to the corner.
Sew a White 1-1/2″ x 5-1/2″ rectangle to both sides of the larger Flying Geese block. Press to the sides. This section will measure 5-1/2″ x 12-1/2″. Let’s call it Section A.
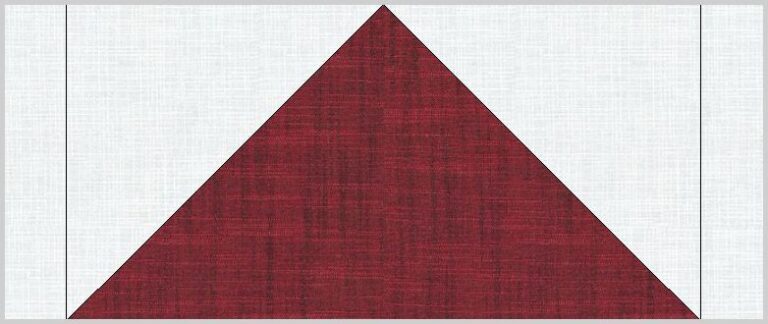
Don’t do anything to the smaller Flying Geese block just yet.
Making the Face and Beard
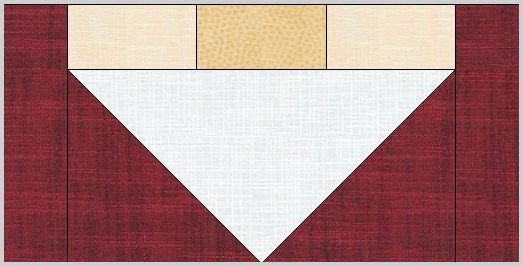
Sew the 1-1/2″ x 2-1/2″ nose rectangle between the two 1-1/2″ x 2-1/2″ face rectangles. Press to the nose. This section should measure 1-1/2″ x 4-1/2″. Sew this to the white center side of the smaller Flying Geese block. Press to the Flying Geese block.
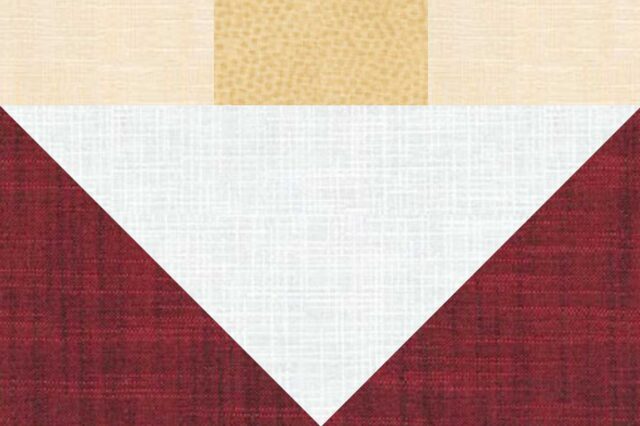
Sew the two 1-1/2″ x 4-1/2″ red rectangles to both sides of this unit, making it 4-1/2″ x 8-1/2″. Press to the red rectangles. Let’s call this Section B.
Adding the Body
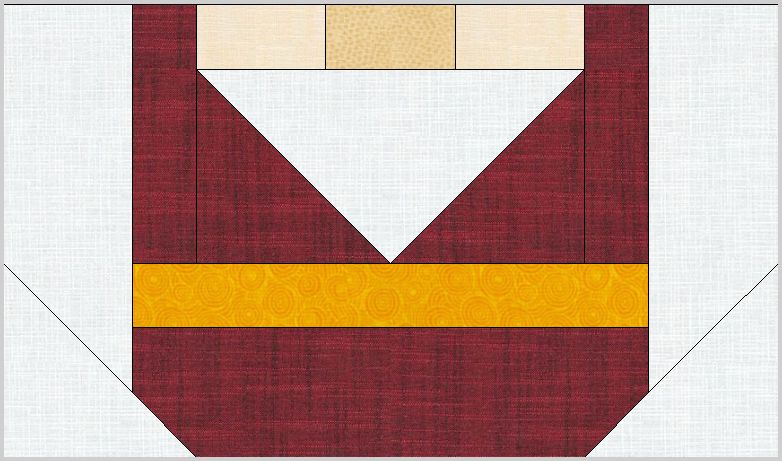
Sew the 1-1/2″ x 8-1/2″ belt rectangle to the bottom of Section B. Then sew the 2-1/2″ x 8-1/2″ Red rectangle to the bottom of the belt. This new section should measure 7-1/2″ x 8-1/2″.
Sew the (2) 2-1/2″ x 8-1/2″ Red rectangles to both sides of this section. This section now measures 7-1/2″ x 12-1/2″.
One last step. Place a 3-1/2″ White square in the lower left hand corner of the section you just made, right sides together. Sew on the diagonal from the bottom to the left. Flip the square over the seam and press. It should just line up with the seam. If all is well, you can trim the underside or just leave it alone.
Repeat for the lower right-hand corner. Your section should still measure 7-1/2″ x 12-1/2″. Section B has become Section C.
Creating the Gnome Block
Finally! Sew Section A to Section C. You have made a 12-1/2″ block! It might be a little too big for a mug rug, but maybe it would look good on the side of a placemat? On the pocket of a quillow?

Here I have combined it with the Forest Tree Quilt Block to make a Gnome for the Holidays table runner.
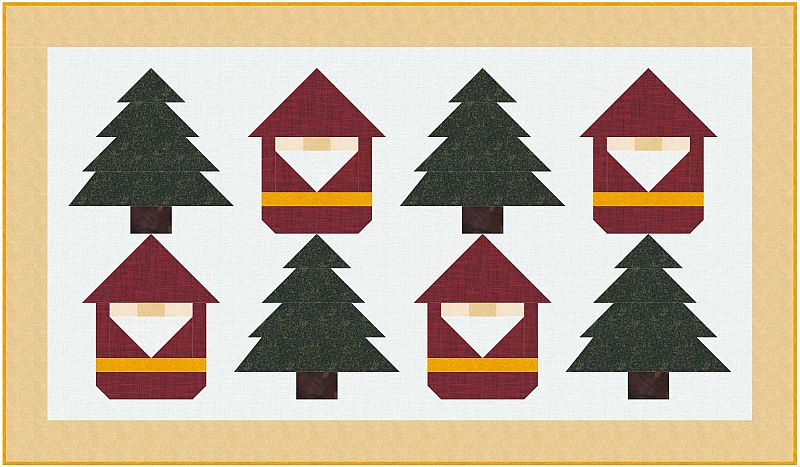
Be sure to visit the other designers in this blog hop on the bottom of this page.
Please add moc.hsadparcs@sirk to your contacts list to make sure you get the confirmation message. Drag the confirmation message from the Promotion tab to the Primary tab if you use Gmail.
If you are already a subscriber, it’s okay to fill out this form. You won’t be put on the mailing list twice.
Don’t forget to sign up for the newsletter! Once a week, I send updates on quilt-related information I have found while wandering the web. This might be an inspiring article, a tip or tutorial I have discovered (or written), and occasionally exclusive offers & discounts as well as immediate access to the secret page of free patterns, guides, and printables. You can follow my page on Facebook, or join the Make Believe Quilters group, too.
Other Designers
Monday Nov 18
Tuesday Nov 19
Wednesday Nov 20
Thursday Nov 21

Cute gnome.
Your gnome block is really wonderful! Thanks so much for the pattern and instructions.
Now how stinkin’ cute is that guy? I need him around here with my littles, since he Gnomes if you’ve been bad or good! HAHAHA
Love it combined with the tree block too. It would be a great table runner too. Thanks so much and have a wonderful Thanksgiving.
What a great, simple pattern for a Gnome. Sew on top of being simple it’s also cute as can be and appears to be a pretty quick project jumping off point.
Nice gnome block. He looks great alternating with the tree blocks.
Cute gnome! Thanks so much for sharing!
Cute block! Thank you for sharing!
That is an adorable gnome block with the tree! Thank you for sharing!
Very cute design! I can imagine using him in a variety of projects. Thanks for sharing!
Cute gnome block! Thanks for sharing the tutorial!
Very cute!
That is one cute little gnommie block. Thank you for sharing it with us. 😉 Carol
Very cute quilt block. Thank you for the tutorial.
Your table topper / wall hanging is so darn cute!! I LOVE the Christmas gnome! Thanks for giving us his pattern!