Skip to content
Facebook Facebook Group Instagram Pinterest E is for EtsyEmail

To get the latest tutorials, free patterns, and more every week. Subscribe to the newsletter

Scrapdash

  • HomeExpand
    • About PhoebeMoon and Scrapdash
    • Privacy Policy
    • Accessibility Policy
    • Terms and Conditions
    • Contact Me
    • Subscribe to the Newsletter
  • Quilt PatternsExpand
    • Alphabetical List
    • Wholesale Quilt Patterns by PhoebeMoon Designs
  • Free Quilt and Block PatternsExpand
    • Completed Mystery QuiltsExpand
      • Quilt Mysteries
      • Pretty Pictures
    • Free PatternsExpand
      • New Pattern
    • Quilt Block Tutorial
    • Fun StuffExpand
      • New Ideas
      • Travel
  • Tutorials
Scrapdash

How to Make a Quarter Square Triangle

This page contains affiliate links. If you make a purchase after clicking one, I may earn a small commission at no extra cost to you. I don’t ever recommend something I don’t use myself. As an Amazon Associate, PhoebeMoon Designs earns from qualifying purchases. For more information, see our Privacy Policy.

Here is How to Make a QST (Quarter Square Triangle Quilt Block) from HSTs (Half Square Triangle Quilt Blocks)

Use the green Print button under this article to print this page. If that doesn’t work, try Ctrl-P or Flower-P. That should bring up the Printer Dialog box.

QST blocks start with Half Square Triangle (HST) blocks. The Traditional Method of making HSTs is to place a dark square right sides together with a light square. Draw a diagonal line on the back of one dark. You will have made two Half-Square Triangle blocks. Don’t square these up just yet.
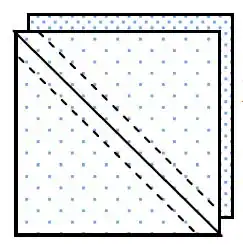
QST1 Two square papers with blue polka dots are stacked. Both are shown with a diagonal dashed line from the top left to bottom right, indicating where to fold. The top paper is slightly shifted to reveal the one below.

My personal preference is to make the original squares slightly too large and then square up the HST. However you are making Quarter Square Triangles (QSTs) using these HSTs so you may prefer to skip this step. Make a test block using both methods to see which gives you the best results.

To make a QST, lay (2) HSTs right sides together with opposite colors touching. Draw a diagonal line on the back of the top HST going through the seam. Sew 1/4″ on either side of this seam. Set your seam by pressing the sewn block, then cut it apart on the diagonal line.
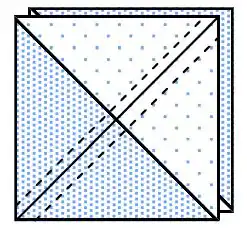
QST2 A square piece of patterned paper is folded at the corners toward the center, with dashed lines indicating fold lines, creating overlapping triangular flaps.

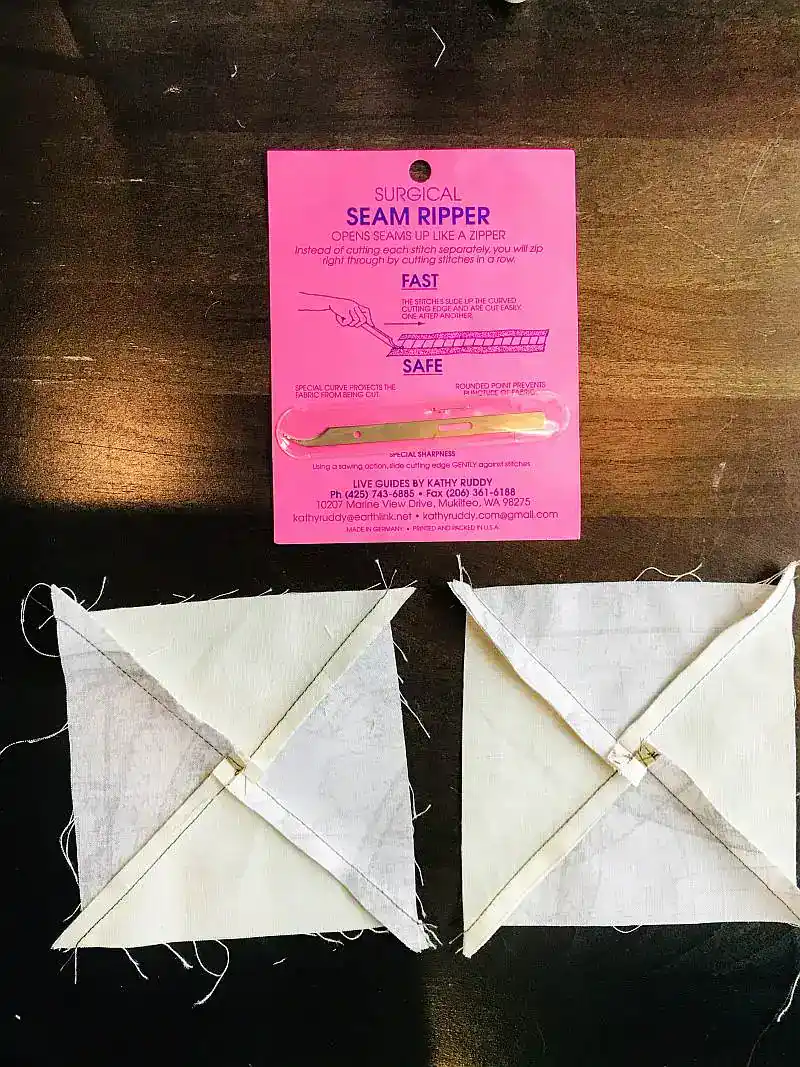
Before you square up this block, here is a trick that will help you reduce bulk anywhere you have an intersection. Finger press open the center seam, then pick a couple of stitches out of the center. It won’t unravel because the second seam will hold it.

Push two of the seams in opposite directions so each seam covers one patch. You know you have done it right if the seam twirls around the intersection, giving you a tiny four patch in the middle.
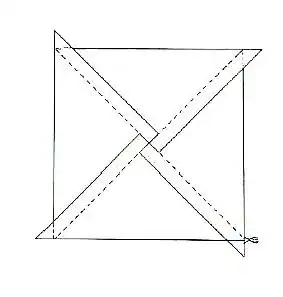
QST3 A simple line drawing of a square with its corners folded inward, creating intersecting lines and smaller triangles at each corner. The bottom right corner appears to have a small loop or string attached.
A pink package labeled Surgical Seam Ripper with a seam ripper tool is placed above two quilt blocks made of intersecting white and cream fabric strips—perfect for learning how to make a QST from HSTs—on a dark wooden surface.
Image from the Round the Mountain Mystery Quilt

There are two ways you can square up your block. If you have a square ruler of the size that you are making, place the diagonal line of a square ruler on the sewing line of the triangle. By cutting the two sides of the ruler, you are automatically squaring up the HST block before opening and pressing it.
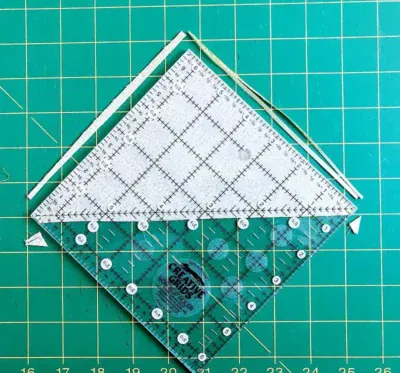
A clear quilting ruler placed diagonally on a green cutting mat with a grid pattern, measuring a white fabric triangle—illustrating how to make a QST from HSTs. Thin fabric trimmings are seen along the ruler’s edges.
HST Image from the Ten Speed Mystery

Or you can press open the block (pressing to the dark) and square it up using a ruler the same size as the block you are making. A fussy-cut ruler with lines on both diagonals will be very helpful with this.
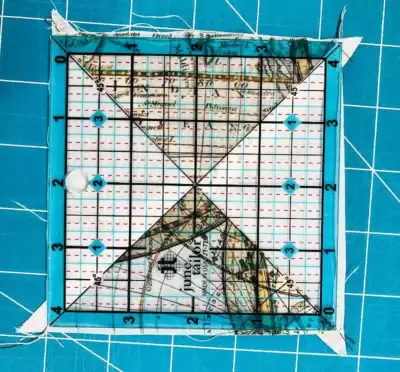
A quilting ruler is placed on a square fabric piece with a map design, demonstrating how to make a QST from HSTs. The fabric is trimmed along the ruler’s edges on a blue cutting mat with a white grid pattern.
QST Image from the Round the Mountain Mystery Quilt

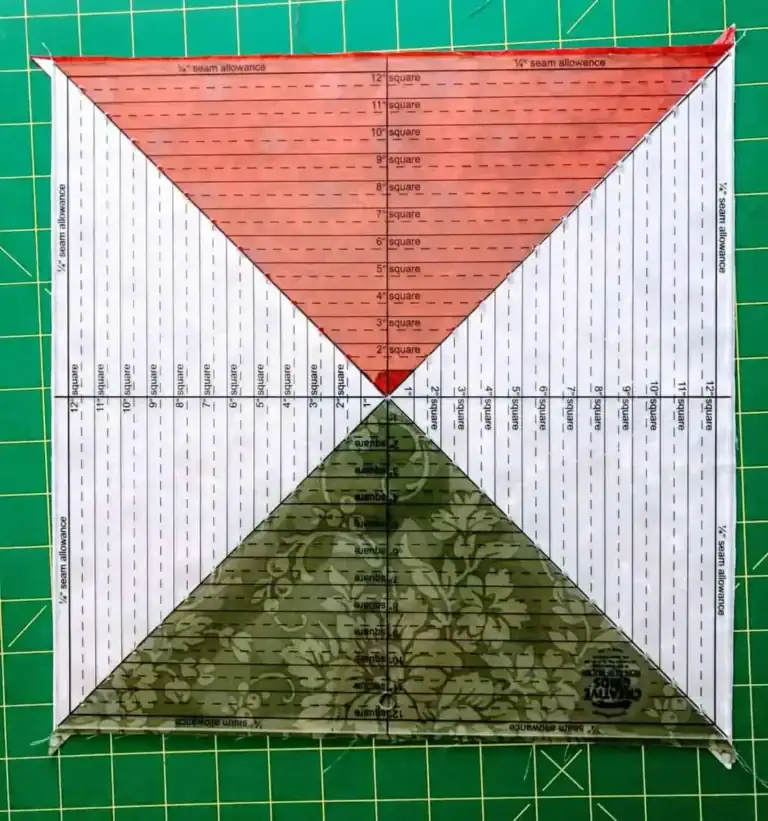
Yes, you can make a QST with two different colored sides just by using two different colored HSTs. Here are images from a Snail Trail Tutorial:
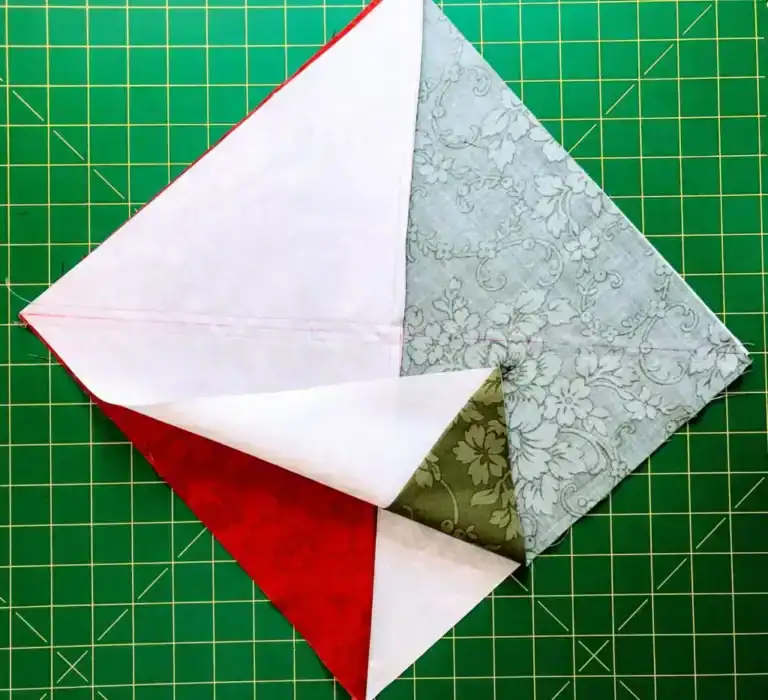
Four fabric triangles in red, white, green, and gray are sewn together in a square—partially folded back to reveal the layers—demonstrating how to make a QST from HSTs, placed on a green cutting mat with a yellow grid.
From the Snail Trail Tutorial, this is a square quilting ruler with colored and patterned triangles, divided by diagonal lines, is placed on a green cutting mat. The ruler displays measurement markings and seam allowance guides.

Other Methods of Making QST Quilt Blocks

  • The Bias Beauty Method (from 4 patch blocks)
  • The Bias Beauty Method (from strips)
  • Three Color
  • Three Color QST (using a Tucker Trimmer)
  • Split QST
  • Four Color (four triangles)

Don’t forget to sign up for the newsletter! Once a week, I send updates on quilt-related information I have found while wandering the web. This might be an inspiring article, a tip or tutorial I have discovered (or written), and occasionally exclusive offers & discounts as well as immediate access to the secret page of free patterns, guides, and printables. You can follow my page on Facebook, or join the Make Believe Quilters group, too.


CLICK THIS BUTTON TO PRINT THE PAGE

  • Home
  • PhoebeMoon Patterns
  • Free Patterns
  • Tutorials
  • Privacy Policy
  • Accessibility Policy
  • Subscription
  • Contact Me
  • Quilt Guilds
  • Quilt Shows
  • Quilt Shops
  • Quilt History

~~CONNECT~~

Facebook FacebookMake Believe QuiltersPinterest PinterestInstagram InstagramYouTube YouTubeEmail EmailEtsy Shop

Copyright ©  1997 - 2026 Scrapdash.  All Rights Reserved.

Sage Theme by Restored 316

Scroll to top
  • Home
    • About PhoebeMoon and Scrapdash
    • Privacy Policy
    • Accessibility Policy
    • Terms and Conditions
    • Contact Me
    • Subscribe to the Newsletter
  • Quilt Patterns
    • Alphabetical List
    • Wholesale Quilt Patterns by PhoebeMoon Designs
  • Free Quilt and Block Patterns
    • Completed Mystery Quilts
      • Quilt Mysteries
      • Pretty Pictures
    • Free Patterns
      • New Pattern
    • Quilt Block Tutorial
    • Fun Stuff
      • New Ideas
      • Travel
  • Tutorials
Search