Love and Luck – February Block of the Month
Note: This post may contain affiliate links. That means we may earn a commission at no additional cost to you if you purchase via our links. Not all links are affiliate links. I only recommend products I use and trust. As an Amazon Associate, I earn from qualifying purchases.
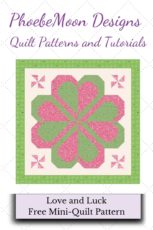
According to Irish folklore, those who find a four-leaf clover are destined for good luck. Each leaf in the clover is a good omen for faith, hope, love, and luck. Here is a quilt block that promises both love and luck. Four of them make a great table topper or mini quilt.
Before starting this project, I recommend that you press your fabric with spray sizing. It will make it easier to cut small pieces. Take the time to clean your machine, put in a new needle, and fill a few bobbins. When pressing, just hold the iron over a spot for a moment or two. This pattern assumes a perfect 1/4” seam.
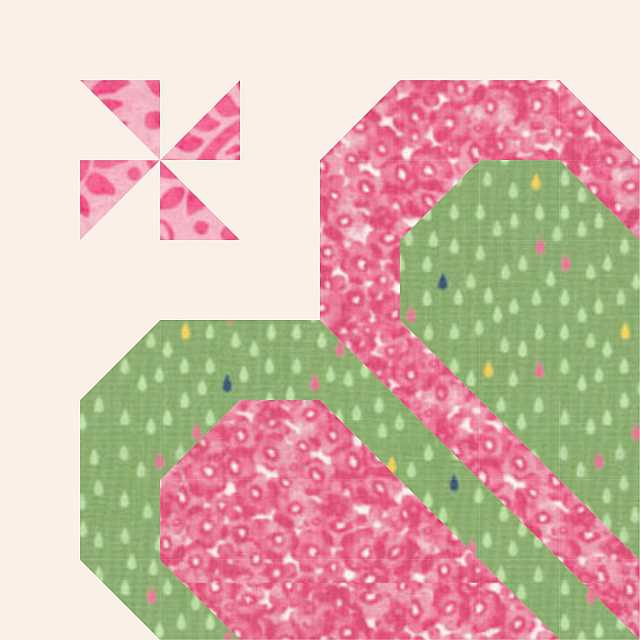
Cutting Instructions for Block
Background:
(2) 2″ × 3-1/2″ rectangles
(4) 2″ × 6-1/2″ rectangle
(4) 2-1/2″ square
Dark Pink:
(4) 2″ × 3-1/2″ rectangles
(8) 2-1/2″ squares
(3) 2″ squares
Light Pink:
(2) 2-1/2″ squares
Dark Green:
(3) 2″ × 3-1/2″ rectangles
(1) 2″ × 5″ rectangle
(8) 2-1/2″ squares
(2) 2″ squares
This block will use Half-Square Triangles. Here is an explanation of the traditional method.
How to Create and Square Up a Half Square Triangle (HST) Quilt Block
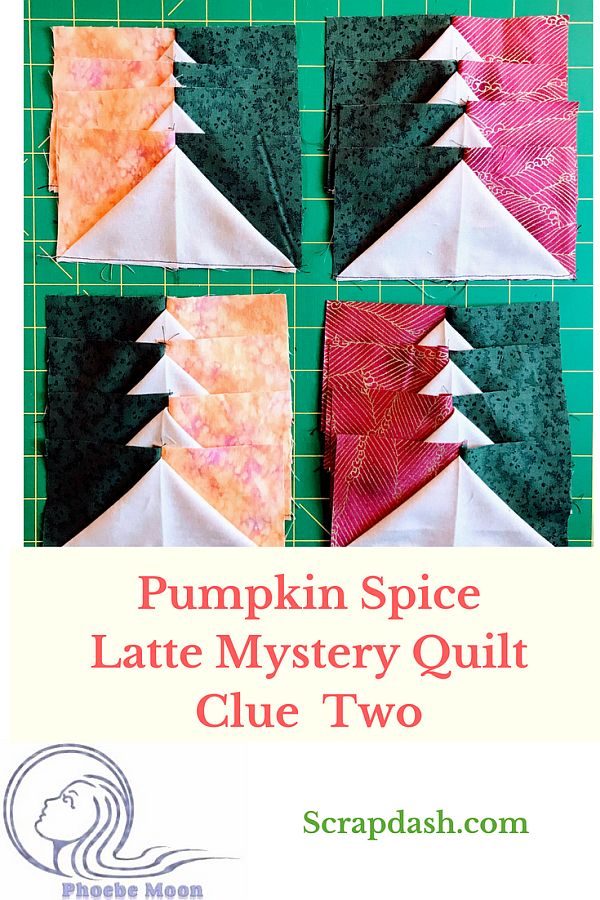
The Traditional Method of making Half Square Triangle Blocks (HSTs) is to place two identical squares right sides together. These squares should be 7/8″ larger than the finished size of the final HST. Draw a diagonal line on the back of one square. Sew 1/4″ on both sides of the line. Cut on the line and press to the dark.

You will have made two identical Half Square Triangle (HST) blocks. My personal preference is to cut squares 1″ larger than the finished size of the final HST and square it up to the correct size after pressing.
There are two ways you can square up your block.
You can place a square ruler so the diagonal line is directly over the seam and just cut two sides. Quilt-in-a-Day has a Square Up Ruler that uses this method.
Or you can press open the block (pressing to the dark) and square it up using a ruler the same size as the block you are making. A fussy-cut ruler with lines on both diagonals will be very helpful with this.
Following the instructions above, make these blocks:
Assemble:
(2) 2-1/2″ Light Pink Squares
(2) 2-1/2″ Background Squares
Using these squares, make (4) HSTs. Press to the dark and square them up to 2″ × 2″.
Assemble:
(1) 2-1/2″ Dark Pink Square
(1) 2-1/2″ Background Square
Using these squares, make (2) HSTs. Press to the dark and square them up to 2″ × 2″.
Assemble:
(1) 2-1/2″ Dark Green Square
(1) 2-1/2″ Background Square
Using these squares, make (2) HSTs. Press to the dark and square them up to 2″ × 2″.
Assemble:
(7) 2-1/2″ Dark Pink Squares
(7) 2-1/2″ Dark Green Squares
Using these squares, make (14) HSTs. Press to the dark and square them up to 2″ × 2″.
Putting the pieces together to make a block
This block is assembled in quadrants.
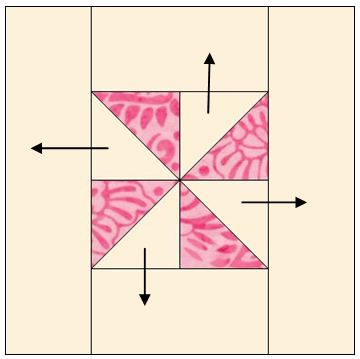
Assemble:
(4) Light Pink and Background HSTs
(2) 2″ × 6-1/2″ Background rectangles
(2) 2″ × 3-1/2″ Background rectangles
To assemble this unit, first put the pinwheel together. Sew the smaller Background rectangles to the top and bottom, then sew the larger Background rectangles to the sides. Press. This unit should measure 6-1/2″ square.
Assemble:
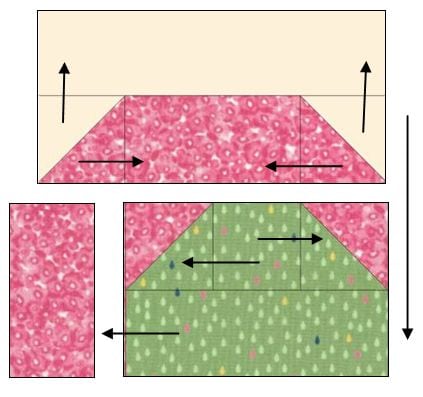
(2) Dark Pink and Background HSTs
(2) Dark Pink and Dark Green HSTs
(4) 2″ × 3-1/2″ Dark Pink rectangles
(1) 2″ × 6-1/2″ Background rectangles
(1) 2″ × 5″ Green rectangle
(1) 2″ Green squares
This unit is assembled in three parts as shown below. Assemble the Dark Green section first, then add the Dark Pink section to the left. The top section can be added in rows. Press. This unit should measure 6-1/2″ square.
Assemble:
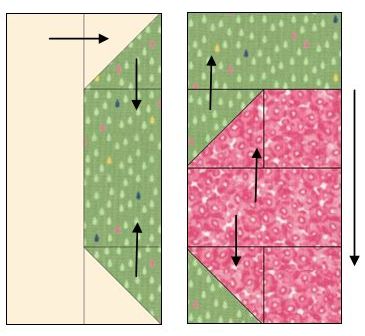
(1) 2″ × 6-1/2″ Background rectangles
(2) Dark Green and Background HSTs
(2) 2″ × 3-1/2″ Green rectangles
(2) Dark Green and Dark Pink HSTs
(2) Dark Pink 2″ HSTs
(2) 2″ × 3-1/2″ Pink rectangles
This unit is assembled in two parts as shown to the right. Press. This unit should measure 6-1/2″ square.
Assemble:
The remaining (10) HSTs
(1) 2″ Green squares
(1) 2″ Pink squares
(1) 2″ × 3-1/2″ Green rectangles
(1) 2″ × 3-1/2″ Pink rectangles
This unit is assembled in two parts as shown. Press. This unit should measure 6-1/2″ square.
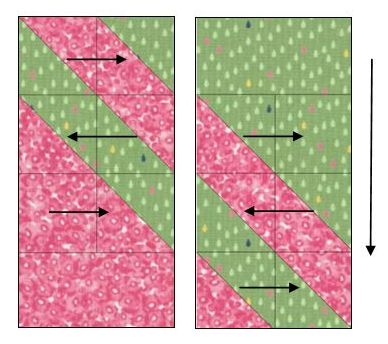
Assemble your four pieces as shown below and press. Square up the block to 12-1/2″.
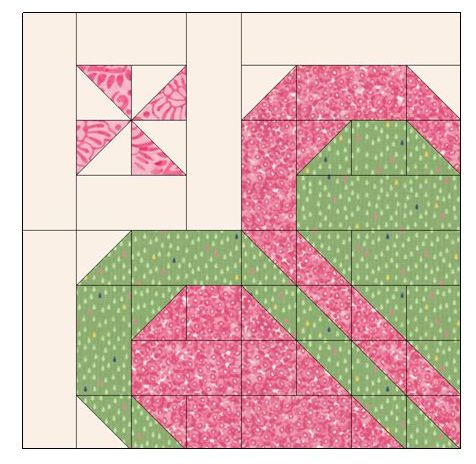
To make the table topper
Create and sew four blocks together, rotating them so they form the design.
Add a Border
Cut (3) Outer Border strips 2-1/2″ wide by the Width of Fabric. Sew these end to end, right sides together, to make one long strip. Miter the joins if you like by sewing the two strips right sides together at an angle as shown below. Cut off the excess 1/4″ from the seam. Press the seam open.
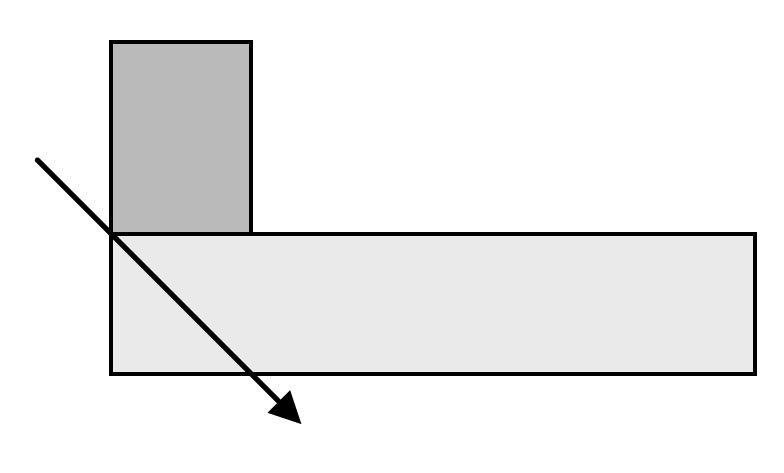
Cut (2) 2-1/2″ wide Border strips 24-1/2″ long and sew them to both sides of the top, taking care to match the center of the strip with the center of the top. Press to the border.
Cut (2) 28-1/2″ long Border strips and sew them to the top and bottom of your quilt top. Press to the border. You are done! Quilt as desired and enjoy!
Please add moc.hsadparcs@sirk to your contacts list to make sure you get the confirmation message. Drag the confirmation message from the Promotion tab to the Primary tab if you use Gmail.
If you are already a subscriber, it’s okay to fill out this form. You won’t be put on the mailing list twice.
Don’t forget to sign up for the newsletter! Once a week, I send updates on quilt-related information I have found while wandering the web. This might be an inspiring article, a tip or tutorial I have discovered (or written), and occasionally exclusive offers & discounts as well as immediate access to the secret page of free patterns, guides, and printables. You can follow my page on Facebook, or join the Make Believe Quilters group, too.


this is so pretty. it looks like it would be a lot of fun to make thank you