A Glimpse from Home Quilt Block with Pattern
Note: This post may contain affiliate links. That means we may earn a commission at no additional cost to you if you purchase via our links. Not all links are affiliate links. I only recommend products I use and trust. As an Amazon Associate, I earn from qualifying purchases.
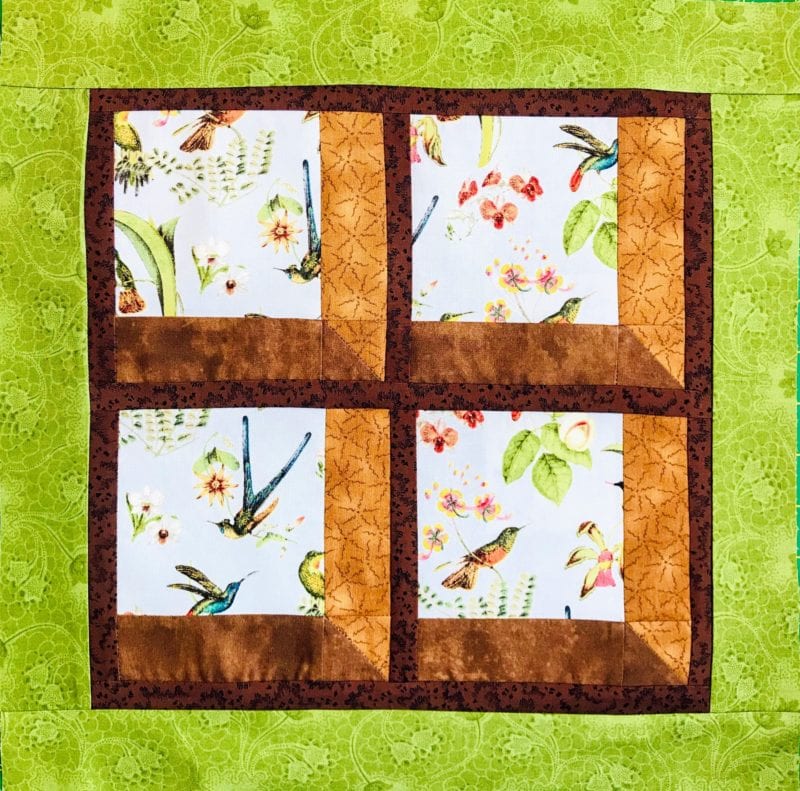
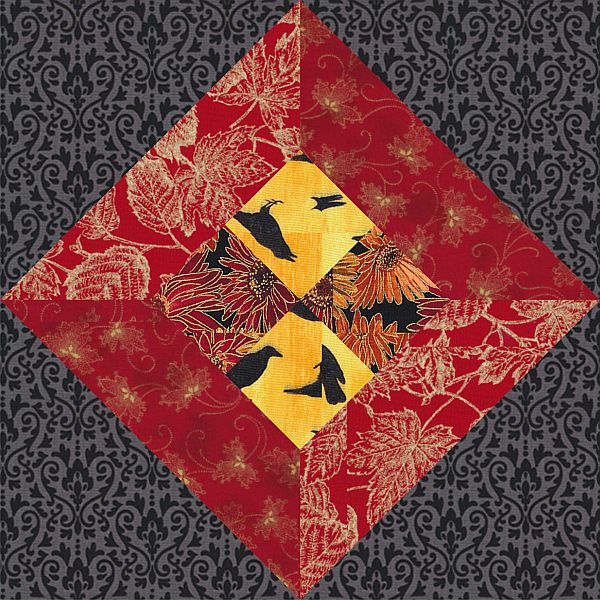
What do you see when you look out the window of your home? Find your favorite outdoor view and feature it in this 12″ pieced block. Are you stuck in a room without a view? The option of adding a border to make a Mini-Quilt for the wall is included in the pattern.
To visit the other designers in this hop, see the list at the bottom of the page. To print this page, use the green Print Friendly button at the bottom, just above the comments. If that doesn’t work, try pressing down the CNTRL button and the P button at the same time. Or the COMMAND button and the P button if you are on a Mac. That should bring up the printer dialog.
A Glimpse from Home
Before starting this project, I recommend that you press your fabric with spray sizing. It will make it easier to cut small pieces. Take the time to clean your machine, put in a new needle, and fill a few bobbins. When pressing, just hold the iron over a spot for a moment or two. This pattern assumes a perfect 1/4” seam.
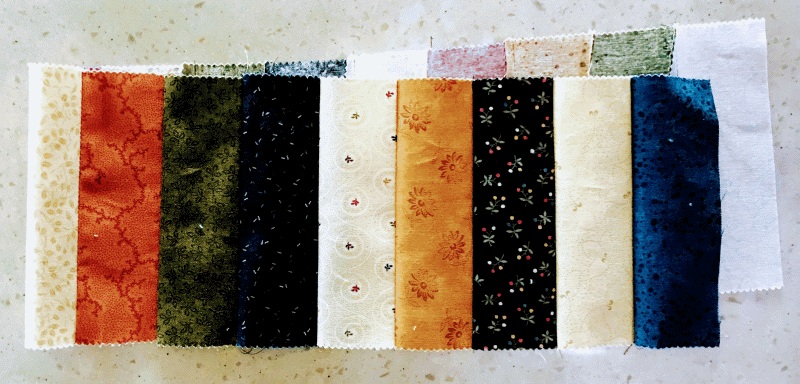
Fabric Requirements & Cutting Instructions
5 Fat quarters (or maybe even Fat Eighths) will do the trick! Other things you might find helpful are:
· Fine, sharp pins
· A 4-1/2″ and a 12-1/2″ square ruler
· Best Press or other spray starch
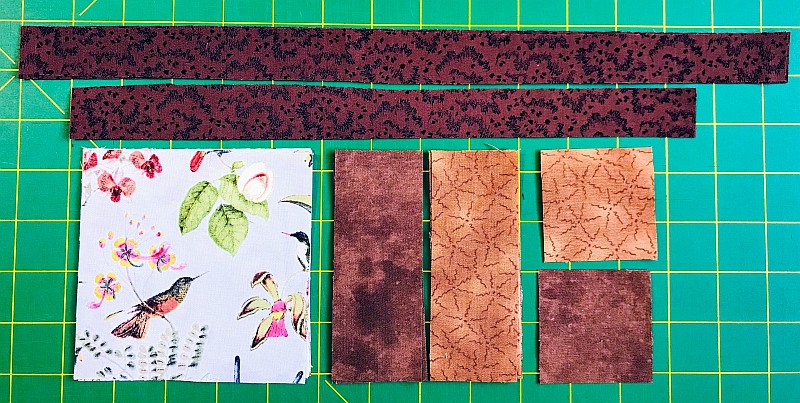
- Focus Fabric: Cut (4) blocks 4-1/2″ x 4-1/2″. You may want to Fussy Cut these. Here is a tutorial on How to Fussy Cut a Motif.
- Light Brown: (4) 1-3/4″ x 4-1/2″ rectangles and (2) 2-1/4″ x 2-1/4″ squares
- Medium Brown: (4) 1-3/4″ x 4-1/2″ rectangles and (2) 2-1/4″ x 2-1/4″ squares
- Dk Brown: (6) 1″ x 5-3/4″ rectangles; (3) 1″ x 12-1/2″ rectangles
- Dk Brown Optional: Also cut (2) 2-1/2″ wide x WOF (width of fabric) strips for binding
- Optional Border: (2) 2″ x 12-1/2″ rectangles and (2) 2″ x 15-1/2″ rectangles
How to Make an Attic Window Quilt Block with HST Corners
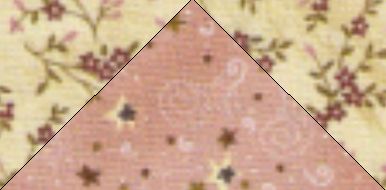
The faux-mitered corner of the attic window block is created using a Half Square Triangle block (HST.)
The Traditional Method of making Half-Square Triangle Blocks (HSTs) uses two squares that are 7/8″ larger than the finished size of the final block. In other words, if you want a block that finishes at 3″ x 3″, you will start with two squares that are 3-7/8″ square. (I cheat and round up a little, but this means I have to square up my block later on.)
For this block, you will need (4) blocks that finish at 1-1/4″ square, so you would start with (2) 2-1/4″ Light Brown squares and (2) 2-1/4″ Medium Brown squares.
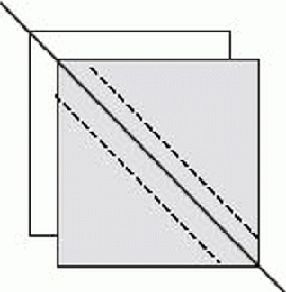
Draw a diagonal line on the wrong side of one square. Place the two squares right sides together and sew on both sides of the line. Cut on the line and press to the dark.
You will have made two identical Half Square Triangle (HST) blocks. These should measure 1/2″ larger than the size of the finished block because of the seam allowance. In other words, a 3″ finished block will measure 3-1/2″ square.
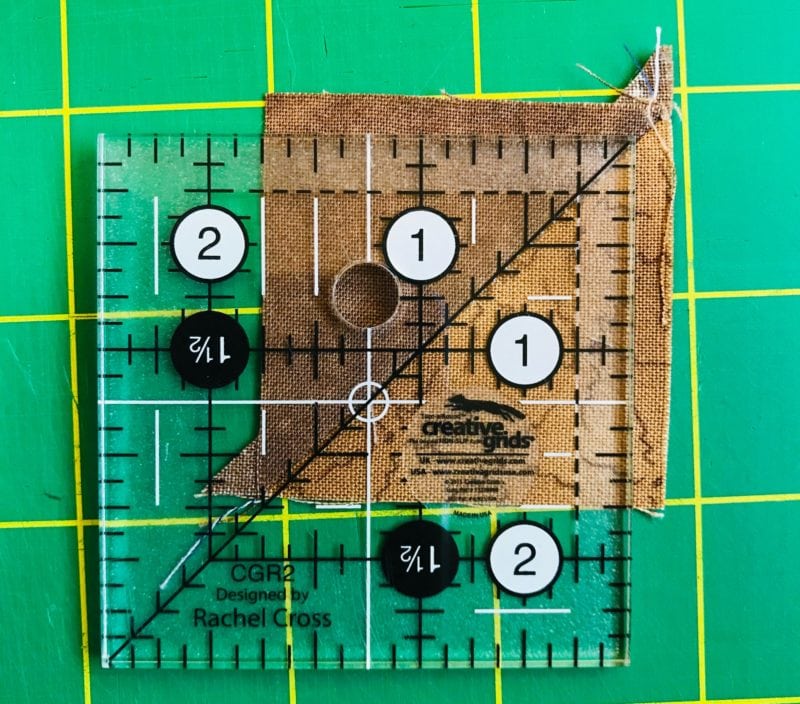
There are two ways you can square up your block. While the HST is folded, you can place a square ruler so the diagonal line is directly over the seam and just cut two edges. Then open up the block and press.
Or you can simply press the block open, place a ruler the same size as your unfinished block on top, matching the diagonal line on the ruler with the seam on the HST, and cut around the ruler. Here are some square-up rulers on Amazon.
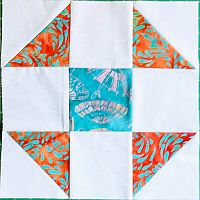
To Make the Attic Window Block
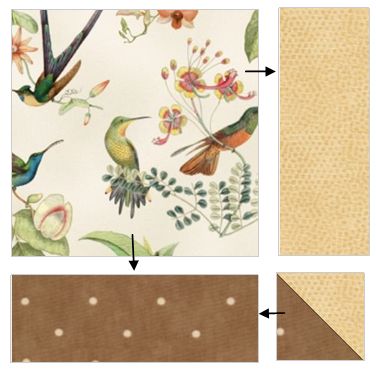
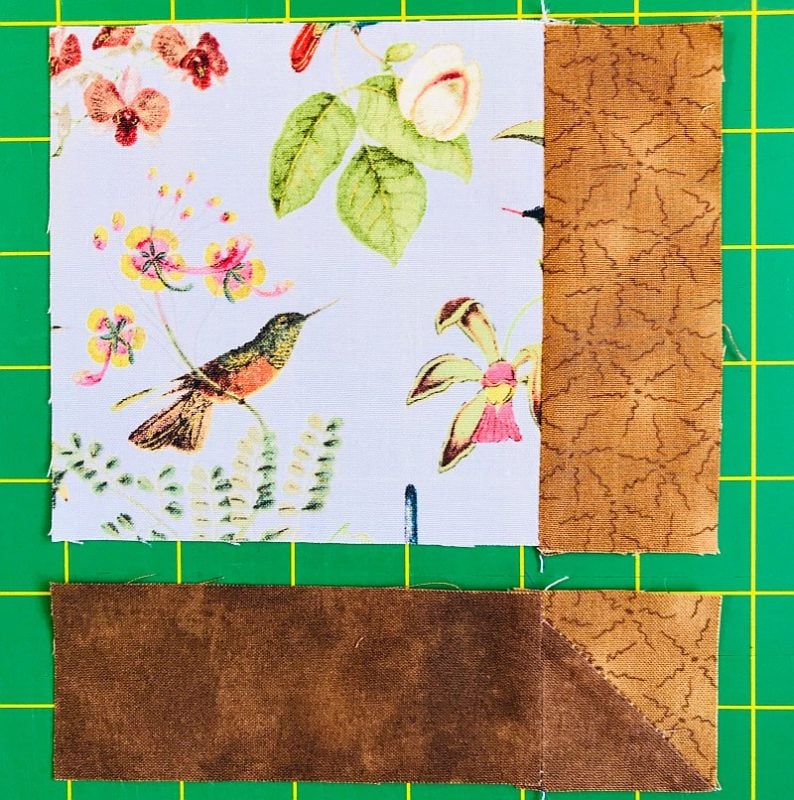
Sew 1-3/4″ x 4-1/2″ light brown rectangle to the right side of all the focus fabric blocks. Press to the rectangle.
Sew an HST block to the short side of all the 1-3/4″ x 4-1/2″ medium brown rectangles, taking care to match the colors. Press to the rectangle.
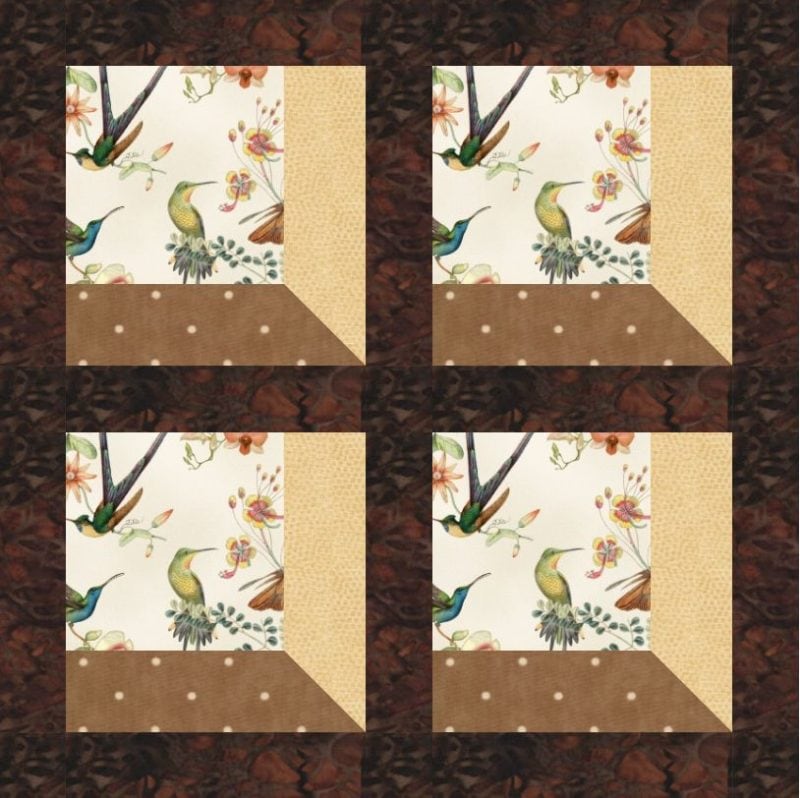
Sew this strip to the bottom of the focus fabric as shown. Press to the rectangle. Because of the way you have pressed your seams, they should just touch each other at the intersection.
Your block should measure 5-1/4″ x 5-1/4″.
Adding the Sashings
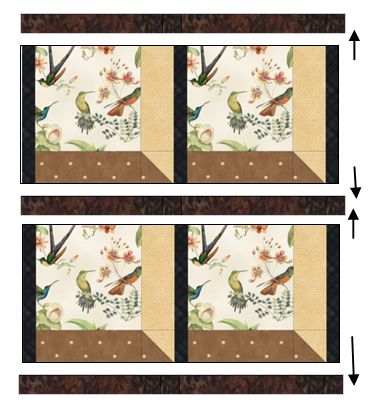
Sew a 1″ x 5-3/4″ dark brown rectangle to the right of (2) blocks. Press to the rectangle.
Sew (2) groups of two blocks as shown below. Press to the rectangle.
Sew a 1″ x 5-3/4″ to both sides of that unit and press to the rectangle.

Sew a 1″ x 12-1/2″ rectangle between the two rows and to the top and bottom, taking care to match the center of the row with the center of the rectangle. Use pins if needed.
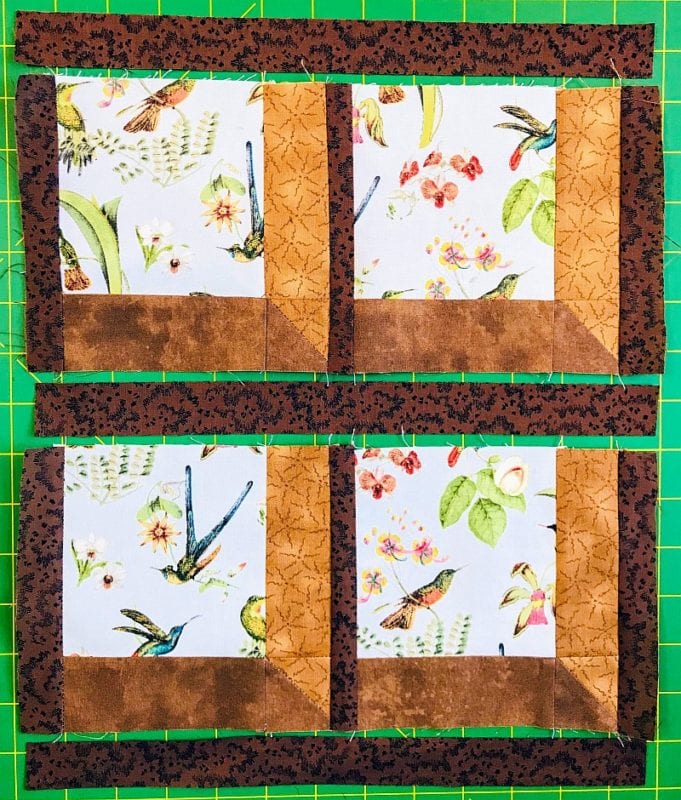
Your quilt top should measure 12-1/2″ square. Press and square up if necessary. You are done!
Please add moc.hsadparcs@sirk to your contacts list to make sure you get the confirmation message. Drag the confirmation message from the Promotion tab to the Primary tab if you use Gmail.
If you are already a subscriber, it’s okay to fill out this form. You won’t be put on the mailing list twice.
Optional Border
Sew a 2″ x 12-1/2″ border rectangle to both sides of the top, matching the center of the border to the center of the top. If necessary, ease to fit by placing the larger side down on the bed of the machine. The feed dogs will help gather the excess. Press to the border.
Sew a 2″ x 15-1/2″ border rectangle to the top and bottom of your top, matching centers. Ease to fit if necessary. Don’t just sew on a border and cut off the excess. That is a recipe for a wavy border. Take the time to measure it. Attach it using a walking foot if you have one.
Give your top a final pressing and enjoy! There should be enough leftover fabric for you to piece the backing. Quilt as desired and bind. Don’t forget to add a label! Here is how to make a label for your quilt.
Other Designers
Dutch Row Houses by Carolina Moore
Modern House by Crafty Staci
Attic Windows by Scrapdash
Birdhouse by Patchwork Breeze
Home Sweet Home by Patti’s Patchwork
Gnome Home by QuiltFabrication
House Around the Block
Santa’s Candy Shop by Inquiring Quilter
Beacon by Robin Kinley Designs Etc
Castle by Memory Barn Studio
Outhouse by Patchwork River Quilting
Ranch House by Emerald Falls Quilts
Gingerbread House by Appliques Quilts and More
Carpenter Nutcracker by Tourmaline & Thyme Quilts
Hill House by A Piece of Quiet Quilts
Thank you for this cute pattern.
this is wonderful. thanks so much for sharing the pattern.
Every month I sign up to get the Quilt Mania Block and every month I don’t get it.
thank you for this pattern. i will have fun making it.
Email sent to martikz@yahoo.com bounces. Is that the correct address? Did you ever mark an email with a pattern as spam?