On the Road Again – May Block of the Month
Note: This post may contain affiliate links. That means we may earn a commission at no additional cost to you if you purchase via our links. Not all links are affiliate links. I only recommend products I use and trust. As an Amazon Associate, I earn from qualifying purchases.
On the Road to the Stars! This block was inspired by a Balloon/Laser light show event that I went to last year. There were lots of different balloons but this was the hardest one to figure out until it was inflated.
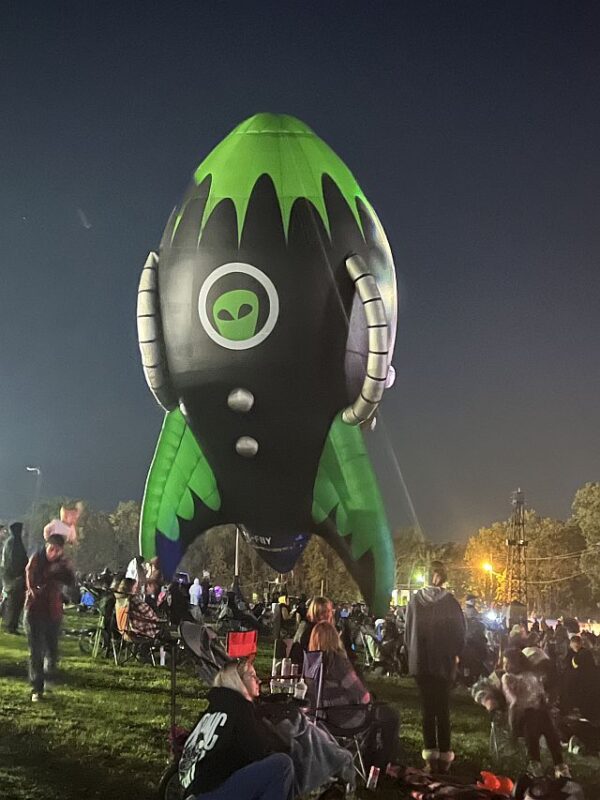
It’s a Bird! It’s a Plane! It’s a Rocket Ship!

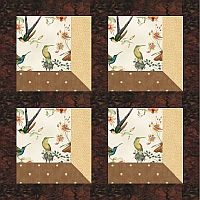
Here is my version of a 9-1/2″ Rocket Ship Quilt Block, which I use in these patterns:
This block consists of three smaller blocks – a Triangle in a Square, two Half-Square-Triangle Blocks, and a teeny-tiny Flying Geese Block.
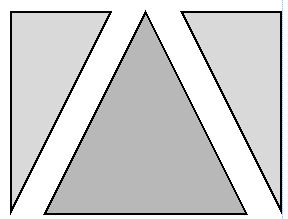
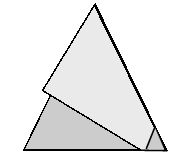
How to Make a Triangle in a Square Quilt Block
In this pattern, you will be using a specialty ruler called a Tri-Recs to make the Triangle in a Square block. Here is a general tutorial. The piecing of this block is tricky the first time. I suggest you make a practice block first.
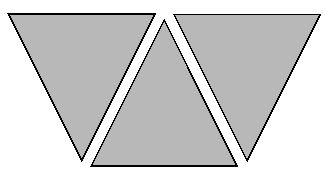
A Tri-Recs ruler actually has two pieces. There is a large isosceles triangle piece (which makes the center of the point block) and a half-triangle piece (which will make the two sides.) Because there is a right and left side of this block, you will need to cut both a right and left half-triangle piece. To do this, just fold the fabric right sides together before cutting.
To cut the isosceles triangle using the Tri-Recs ruler, align the square edge of the ruler with the edge of a strip of fabric the same size as the desired unfinished block along the strip size line on the ruler.
Using the smaller ruler, cut the half-triangle sides. Make sure that you clip that little corner on the ruler. It helps you line up the pieces later on.
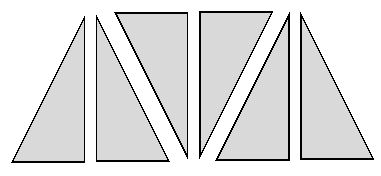
Lay the right side triangle on the center triangle, right sides together. That little snipped triangle will be on the lower right-hand side. It should line up with the bottom of the block exactly. When you sew the two triangles together using a 1/4″ seam allowance, the seam should go through the point of the snipped edge.
Open this unit and press to the outside triangle gently. Does it seem to line up properly? If so, add the left side block using the same seam allowance.
Open up the block again, press, and square it up if necessary.
Fabric Requirements for this block
- (1) 12″ × 3-1/2″ Blue rectangle
- (1) 12″ × 3-1/2″ Background rectangle
Following the instructions above, create a 3-1/2″ Triangle in a Square block

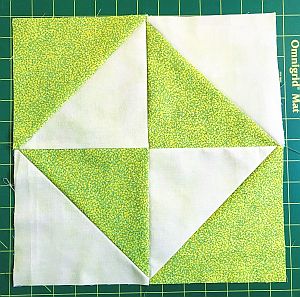
How to Create and Square Up a Half Square Triangle (HST) Quilt Block
The Traditional Method of making Half Square Triangle Blocks (HSTs) is to place two identical squares right sides together. These squares should be 7/8″ larger than the finished size of the final HST. Draw a diagonal line on the back of one square. Sew 1/4″ on both sides of the line. Cut on the line and press to the dark.

You will have made two identical Half Square Triangle (HST) blocks. My personal preference is to cut squares 1″ larger than the finished size of the final HST and square it up to the correct size after pressing.
There are two ways you can square up your block.
You can place a square ruler so the diagonal line is directly over the seam and just cut two sides. Quilt-in-a-Day has a Square Up Ruler that uses this method.
Or you can press open the block (pressing to the dark) and square it up using a ruler the same size as the block you are making. A fussy-cut ruler with lines on both diagonals will be very helpful with this.
Fabric Requirements
- (1) 4″ Background square
- (1) 4″ Blue square
Following the directions above, make (2) 3-1/2″ square HSTs.

A Flip-n-Sew Method of Making a Flying Goose Block
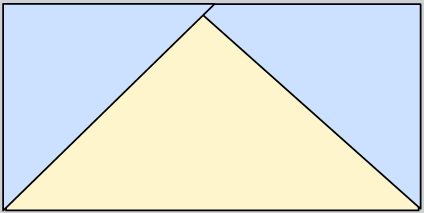
This is a traditional method of making Flying Geese Blocks. In this method, you sew a square on one side of a rectangle using a diagonal seam, then flip it over to create one side of the Flying Goose block. Press to the square. After you have double-checked to make sure everything lines up properly, cut off the excess underneath that square. Then repeat the process for the other side.
To use this method, cut a rectangle for the goose (shown in yellow) and two squares for the sky (shown in blue.) Cut the squares for the sky the same size as the height of the unfinished rectangle. Remember that the finished size will be 1/4″ smaller all the way around the rectangle due to the seam allowance. In other words, a 2-1/2″ x 4-1/2″ rectangle and (2) 2-1/2″ squares will be needed to make a 2″ x 4″ finished goose.
Draw a line on the diagonal on the wrong side of the sky square (shown in blue below.) Lining up the corners of the square with the edges of the goose rectangle (shown in yellow below), pin carefully and sew on the drawn line as shown. Cut off the excess and press. Do the other side, overlapping the first square. Press and trim all dog ears.
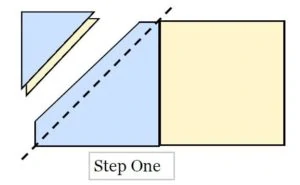
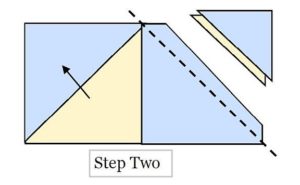
Make a test block first. If you are comfortable with the procedure, you can chain stitch these by doing the first step of all the blocks before going on to the second step.
Fabric Requirements
- (2) 2″ × 3-1/2″ Background rectangles
- (2) 2″ Blue squares
Following the directions above, make (1) 2″ x 3-1/2″ Flying Geese Block

Putting the Rocket Ship Block Together
Assemble:
- (1) Triangle in a Square block
- (2) HSTs
- (1) 2″ × 3-1/2″ Flying Geese block
- (1) 2″ × 3-1/2″ Blue rectangle
- (1) 3-1/2″ Blue square
- (4) 3-1/2″ Background squares
Sew the 2″ × 3-1/2″ Blue rectangles to the top of the small Flying Geese blocks. This unit should measure 3-1/2″ square.
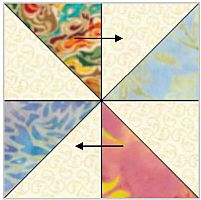
Sew all the units in the row arrangement shown below, pressing as directed by the arrows.
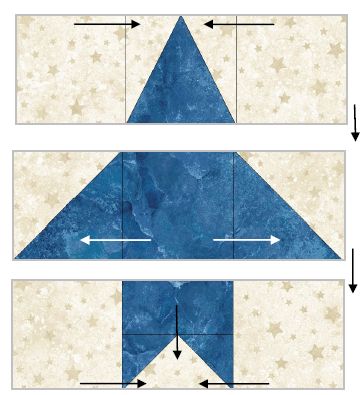
Sew the rows to make the Rocket Ship design. Press and square up to 9-1/2″ if necessary.
You are done! Enjoy!
Please add moc.hsadparcs@sirk to your contacts list to make sure you get the confirmation message. Drag the confirmation message from the Promotion tab to the Primary tab if you use Gmail.
If you are already a subscriber, it’s okay to fill out this form. You won’t be put on the mailing list twice.