Free Summer Poppies Quilt Tutorial with Pattern
Note: This post may contain affiliate links. That means we may earn a commission at no additional cost to you if you purchase via our links. Not all links are affiliate links. I only recommend products I use and trust. As an Amazon Associate, I earn from qualifying purchases.
Summer Poppies
For my project, I am working on a 36″ square wallhanging called Summer Poppies with some lovely red and yellow fabric. If you would like to sew along, you will need:
- Yellow: 1/3 yard
- Green: 1/3 yard
- Background (white in my sample): 1/2 yard
- Accent border and binding: 1/2 yard
- Border (mostly red poppies in my sample): 7/8 yard
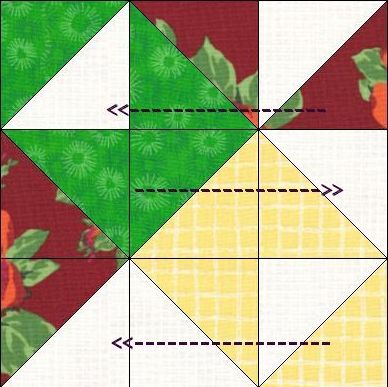
Here is the block I am using:
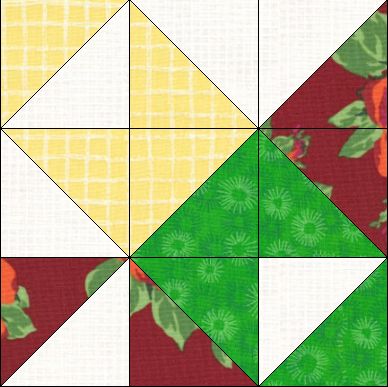
You will need to make 8 of these blocks using the Magic Eight Method to make the HSTs. The directions given below assume a perfect 1/4″ seam allowance. After you put these blocks together, you will surround them by a small first border and a larger outer border. Here is how to make it.
- Yellow: Cut (2) strips 5-3/4″ wide by the WOF (Width of Fabric). Cut these strips into (8) 5-3/4″ squares.
- Green: Cut (2) strips 5-3/4″ wide by the WOF (Width of Fabric). Cut these strips into (8) 5-3/4″ squares.
- Background (white in my sample): Cut (3) strips 5-3/4″ wide by the WOF (Width of Fabric). Cut these strips into (16) 5-3/4″ squares.
- Accent (also used in binding): Cut (7) strips 2-1/2″ wide. Sew these end to end to make one LONG strip, mitering the join if you prefer.
- Border (mostly red poppies in my sample): Cut (2) strips 5-3/4″ wide by the WOF (Width of Fabric). Cut these strips into (8) 5-3/4″ squares. Cut (4) strips 4-1/2″ wide to use in the outer border.
Using the Magic Eight Method, make:
- (48) yellow/white HSTs
- (32) border/white HSTs
- (16) green/white HSTs
- (32) green/red HSTs
- (16) green/yellow HSTs
Press and square up these HSTs to 2-1/2″ if necessary.
Sew them in rows, pressing the block seams of every other row in opposite directions.
Do not press the row seams just yet. Your block should measure 6-1/2″ square.
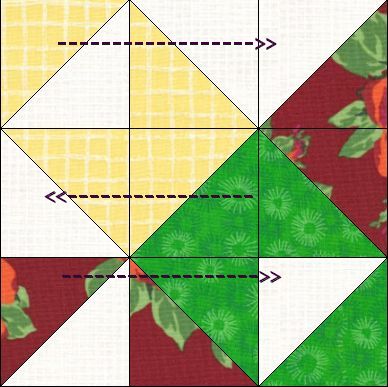
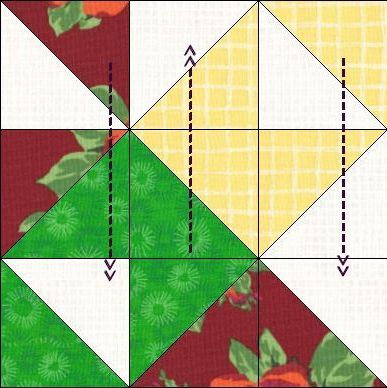
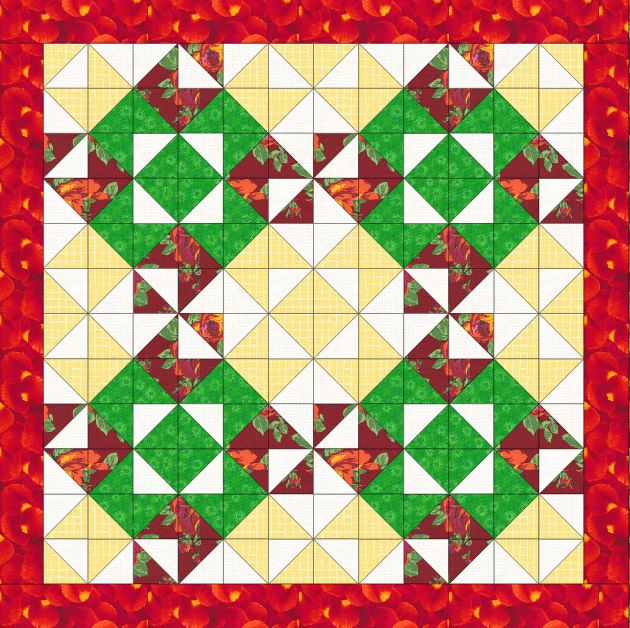
Now sew them in a four-patch, turning each block so the green/white HSTs are in the center.
 |  |
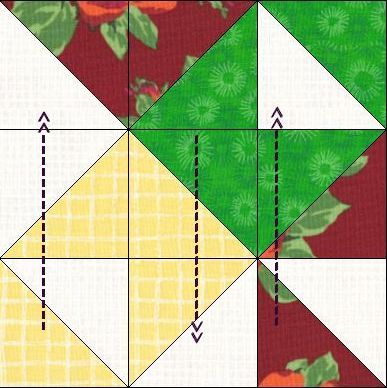 |  |
Finger press the seams of the blocks as you sew them so they face opposite directions. Don’t be afraid to use pins.
Adding the Borders to the Summer Poppies Quilt
Press the project and square up to 24-1/2″ x 24″ 1/2″ if necessary.
Cut (2) 2-1/2″ wide accent strips 24-1/2″ long. Sew these to either side of the center you just made. Press to the border. Your quilt top should now measure 24-1/2″ x 28-1/2″.
Cut (2) 2-1/2″ wide accent strips 28-1/2″ long. Sew these to the top and bottom of your quilt top. Press to the border. Your quilt top should now measure 28-1/2″ x 28-1/2″.
Cut (2) 2-1/2″ wide accent strips 28-1/2″ long. Sew these to either side of the center you just made. Press to the border. Your quilt top should now measure 28-1/2″ x 36-1/2″.
Cut (2) 2-1/2″ wide accent strips 36-1/2″ long. Sew these to the top and bottom of your quilt top. Press to the border. Your quilt top should now measure 36-1/2″ x 36-1/2″.
You are done! Give your top one last pressing, then quilt as desired. Don’t forget to add a hanging sleeve.
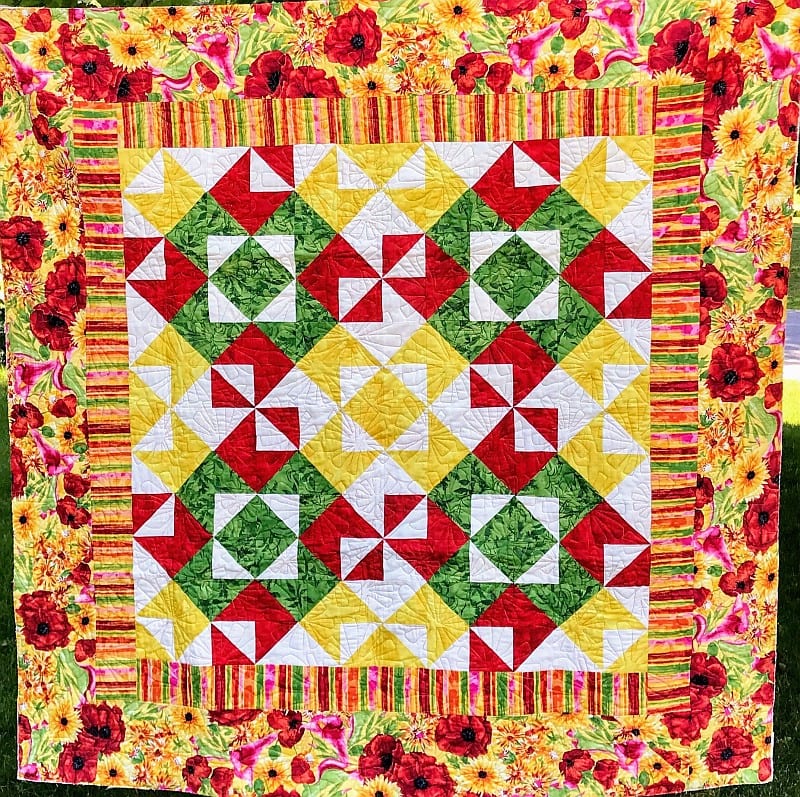
I decided to finish this quilt with curved corners. For that, you need bias binding! Here is how to make it.
Please add moc.hsadparcs@sirk to your contacts list to make sure you get the confirmation message. Drag the confirmation message from the Promotion tab to the Primary tab if you use Gmail.
If you are already a subscriber, it’s okay to fill out this form. You won’t be put on the mailing list twice.
Don’t forget to sign up for the newsletter! Once a week, I send updates on quilt-related information I have found while wandering the web. This might be an inspiring article, a tip or tutorial I have discovered (or written), and occasionally exclusive offers & discounts as well as immediate access to the secret page of free patterns, guides, and printables. You can follow my page on Facebook, or join the Make Believe Quilters group, too.


Your Summer Poppies Quilt is really lovely! Thank you so much for sharing the pattern with us!
Thank you!
Sweet project! I like the colors. Thank you for sharing the pattern!
What a bright and happy quilt, guess I will have to go out and buy some yellow fabric or maybe dig deeper into my stash!! Thanks for sharing!
Carmen
Lovely quilt, love the border and the vibrant colors that you used.
Beautiful! Thank you for sharing!
Beautiful quilt, thanks so much sharing your tutorial!
Another sweet wall hanging. I love the poppies. Such a bright, pretty project. Thank you for sharing another pattern with us. 😄
Your poppies are lovely and have turned into a very sweet wall hanging. Thanks for sharing the pattern and how too with us.
Lovely summer poppies. Thanks for the pattern.
Thanks SEW much for the tutorial in your Hop post!
Absolutely Gorgeous! Thanks for sharing.
Your Summer Poppies quilt is wonderful and so sunshiny. Thank you for the great tut; you are very generous. Hope your day is filled with sunshine.
What a happy, sunny quilt. Thank you for the tutorial, also.
Wow, that’s pretty! I don’t have a lot of yellow, but this could convince me to fix that problem. =) Thank you so much for making the pattern and tutorial available.
Summer poppies is perfect! Thank you for the pattern!
Your border fabric is just perfect it brings all the colors together so nicely. Thank you for the pattern.
You have certainly captured Sunshine. Thanks for the pattern.
Very pretty–I like the poppies.
Wowzers, this is so pretty! Thank you for brightening my day with a great pattern and full tutorial. You make it look so easy. Love it!
Your poppies are so fun and lovely all in one. Great combo of fabrics and blocks…love it! Thanks for sharing!
What a fun, sunshiney project! I love it!
I picked the border first:-))
That is so pretty. The focus fabric is beautiful and the border stripe sets off the center blocks so nicely.
That is so pretty. Thank you for sharing the pattern.
So pretty! Thank you for sharing.
What a great project Kris and a lovely pattern to boot. Thank you