Swirlybirds Mini-Quilt Free Pattern and Tutorial
Note: This post may contain affiliate links. That means we may earn a commission at no additional cost to you if you purchase via our links. Not all links are affiliate links. I only recommend products I use and trust. As an Amazon Associate, I earn from qualifying purchases.
Start with a Three-Dimensional Pinwheel Quilt Block
Gather some scraps so you can practice the technique before using it in a quilt. You will need:
- (4) 3-1/2″ squares of the fabric you are using for a background. Mine is a red and white swirl.
- (4) 4″ squares of the fabric you are using for your dark. Mine is a red.
- (4) 4″ squares of the fabric you are using for your light. Mine is a white.
The Traditional Method of Making HSTs
The Traditional Method of making Half Square Triangle Blocks (HSTs) is to place a 3-7/8″× 3-7/8″ dark square right sides together with a 3-7/8″× 3-7/8″ light square. Draw a diagonal line on the back of one square. Sew 1/4″ on both sides of the line. Cut on the line and press to the dark. You will have made two blocks that measure exactly 3-1/2″× 3-1/2″ square.
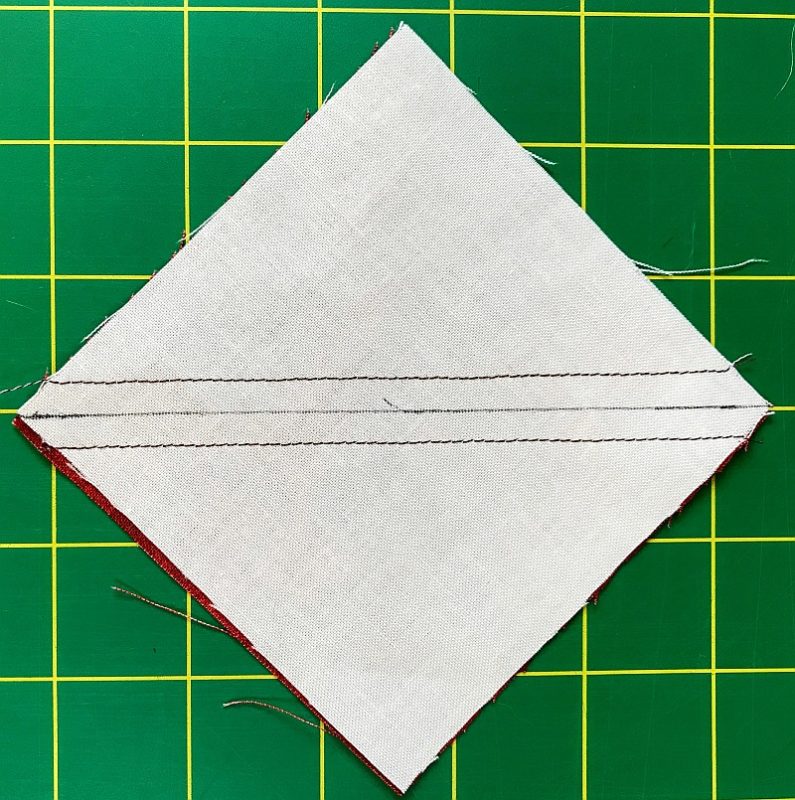
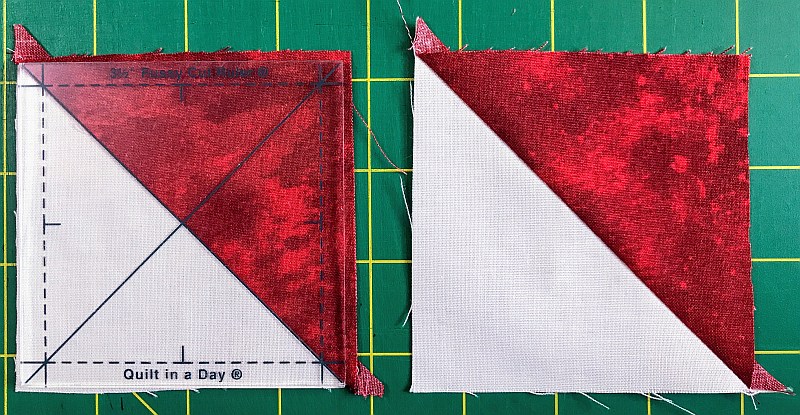
My personal preference is to cut the original squares slightly too large (4″) and square up the HST to 3-1/2″ later on. You can tell that I am a big fan of the Quilt-in-a-Day square-up rulers. You have just the lines you need and no more.
Using the HSTs to make a pinwheel
Fold your HSTs in half along the seam (below right.) One half of the triangle will be dark and the other will be light. Placing the seam on the left, fold the upper right-hand corner down against itself. (below left.)
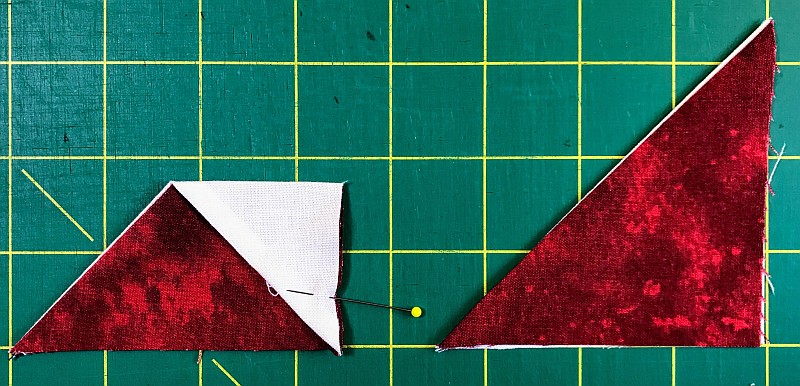
You have two choices here: fold the light over the dark, or the dark over the light. I laid them against the fabric I am using for the background and decided I liked the dark over the light better.
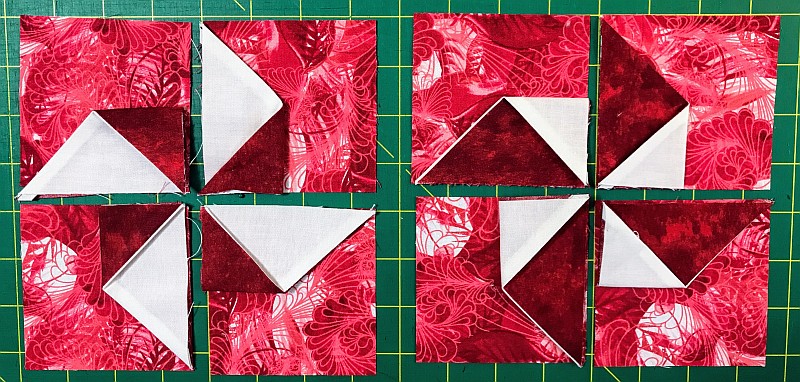
Stay stitch the pinwheels 1/8″ from the edge. Did you notice that they are actually all the same block? You turn them in different directions to make the design.
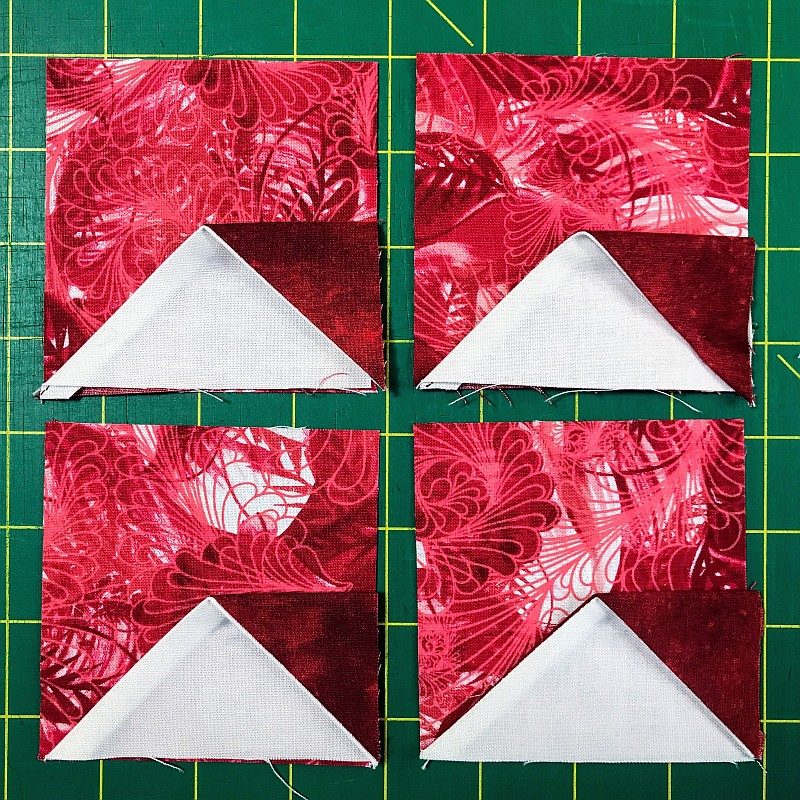
Sew these blocks in groups of two. Just like before, the top and bottom rows will be identical.
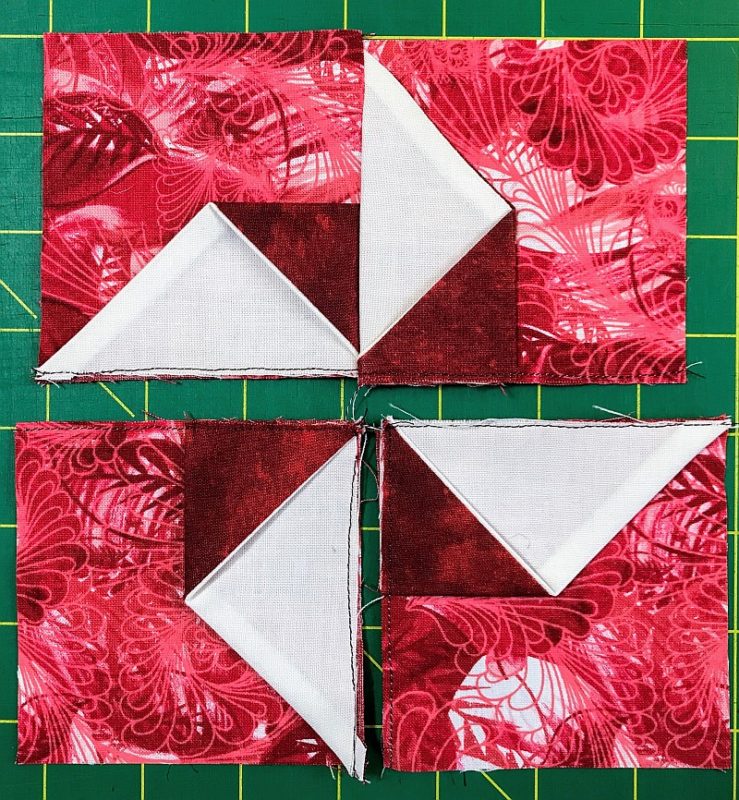
Sew them together and you have a 6-1/2″ pinwheel!
The Swirlybirds Mini-Quilt Pattern
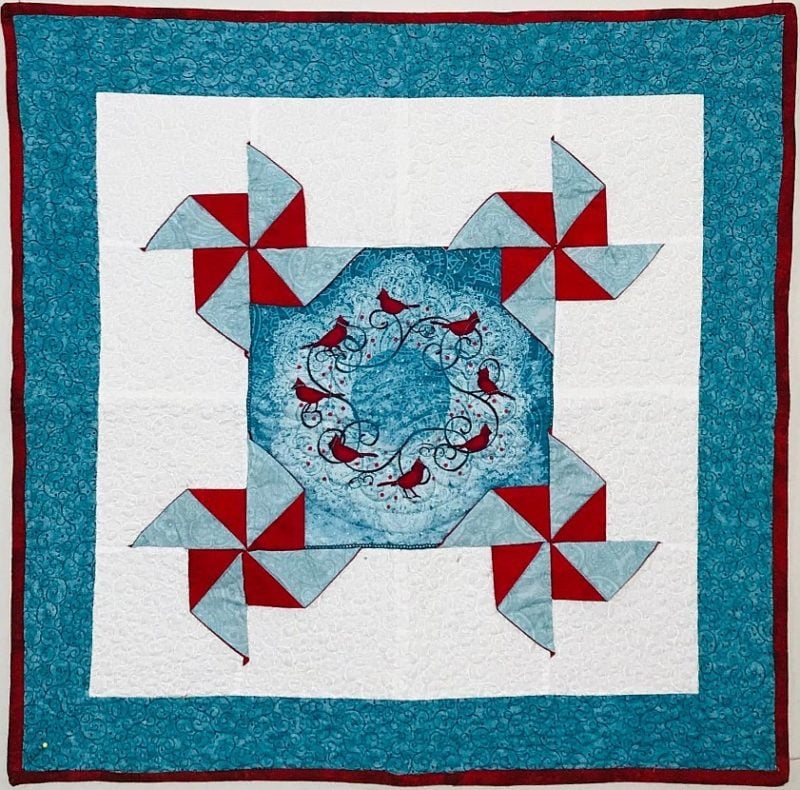
The pattern calls for an 11-1/2″ center square, but that is because it was the size of the block I had fussy cut. You can add these pinwheel accents to any size center square – like all the ones you have been making all year!
Please add moc.hsadparcs@sirk to your contacts list to make sure you get the confirmation message. Drag the confirmation message from the Promotion tab to the Primary tab if you use Gmail.
If you are already a subscriber, it’s okay to fill out this form. You won’t be put on the mailing list twice.
Don’t forget to sign up for the newsletter! Once a week, I send updates on quilt-related information I have found while wandering the web. This might be an inspiring article, a tip or tutorial I have discovered (or written), and occasionally exclusive offers & discounts as well as immediate access to the secret page of free patterns, guides, and printables. You can follow my page on Facebook, or join the Make Believe Quilters group, too.


Hmm, it never occurred to me to use two different fabrics. I love this!
This is a great tutorial on the 3D pinwheels. I could have used this when I was making mine! I love the two color look and how you put them in the corners. Great whirly project!
Thank you for the tutorial. I do like the two color 3D pinwheels. Awesome!
Great idea to make the pinwheels two colors. Will have to remember this!
A very sweet quilt. Thanks for the mini tutorial.