Ten-Speed Mystery Quilt Final Clue
Note: This post may contain affiliate links. That means we may earn a commission at no additional cost to you if you purchase via our links. Not all links are affiliate links. I only recommend products I use and trust. As an Amazon Associate, I earn from qualifying purchases.
Adding the Borders
Assemble:
- (15) First Border 2-1/2″ wide strips
- (9) Outer Border 5-1/2″ wide strips (binding)
Working with each group of strips individually, sew these strips end to end to make a LONG strip. If you prefer to miter the joins, sew the two strips right sides together at an angle. Trim seams to 1/4″ and press open.
Assemble:
- The long 2-1/2″ wide Inner Border strip, cut into (2) 60-1/2″ lengths and (2) 70-1/2″ lengths
- The long 5-1/2″ wide Outer Border strip, cut into (2) 70-1/2″ lengths and (2) 74-1/2″ lengths
When adding borders, it’s always a temptation to simply sew on a strip and then cut off the excess. Don’t do that. Forcing your quilt to match identically cut borders will force it to remain flat.

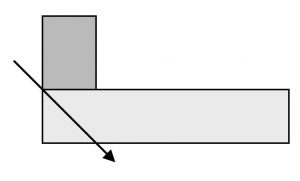
If one side of the quilt is just the tiniest bit larger than the border, place the larger side down on the bed of your sewing machine when sewing on the border. Your feed dogs will try to pull the bottom fabric through the machine just slightly faster than the fabric on the top, thus taking up the slack. A walking foot will prevent this. If you don’t have one, pin carefully and ease to fit if necessary.
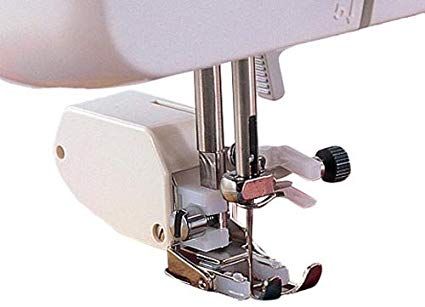
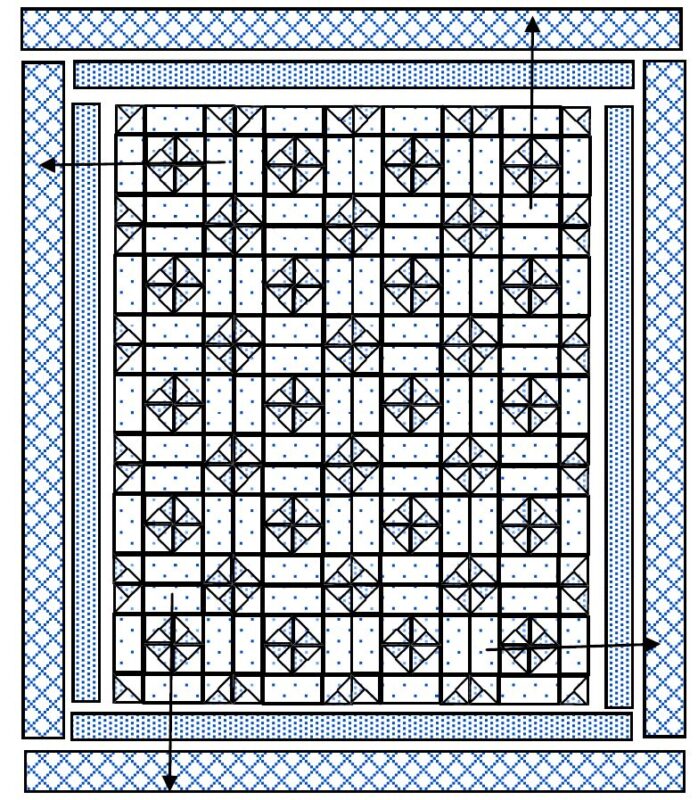
Using a walking foot, sew the (2) 70-1/2″ long Inner Border strips to either side of the quilt top, taking care to match the center of the strip with the center of the quilt top. Press to the border.
Again using a walking foot and matching centers, sew the (2) 60-1/2″ long Inner Border strips to the top and bottom of the quilt top. Press to the border.
Using a walking foot, sew the (2) 74-1/2″ long Outer Border strips to either side of the quilt top, taking care to match the center of the strip with the center of the quilt top. Press to the border.
Again using a walking foot and matching centers, sew the (2) 70-1/2″ long Outer Border strips to the top and bottom of the quilt top. Press to the border.
You are done! Pin your top to the wall for a couple of days in an obvious place so you
can enjoy it and your family can praise you.
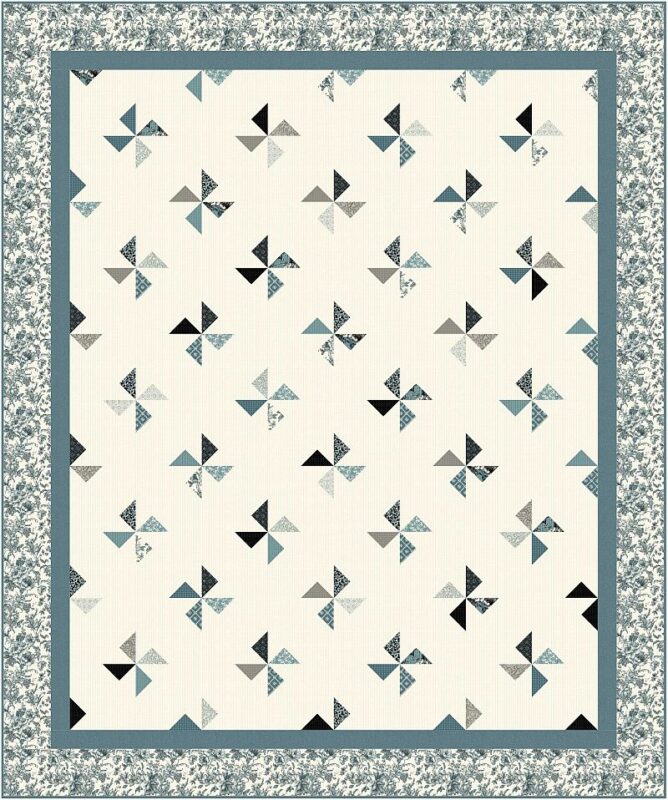
Be sure to make a label for it. Preserve your place in history—sign and date your quilts!
Don’t forget to send me your pictures! Anyone who sends me a picture of their fabric or blocks during or just after the mystery will receive a free copy of the final pattern as a thank-you. My email address is moc.liamg@sngisednoomebeohp.
Clues will become live at the times shown. All times are EST.


Almost finished with clue 6 hopefully will be completed tomorrow, as always I enjoy your mystery. 😊
I’ve been sick with the flu since Super Bowl Sunday and was looking forward to this mystery as I love all of your mystery sewalongs. I’m still not at 100% but I’ve got the clues now and as soon as I’m feeling better I’ll be sewing this lovely quilt! Thank you so much for all that you share! You’re a generous soul! Blessings from West Virginia!