The Sea Stars Quilt Block for #QuiltBlockMania
Note: This post may contain affiliate links. That means we may earn a commission at no additional cost to you if you purchase via our links. Not all links are affiliate links. I only recommend products I use and trust. As an Amazon Associate, I earn from qualifying purchases.
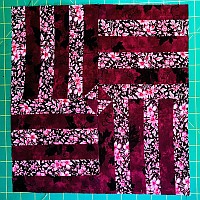
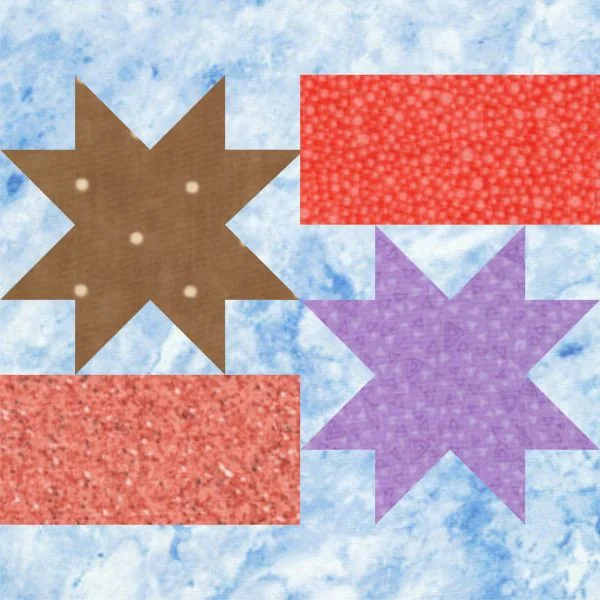
Here’s the Quilt Block for the #QuiltBlockMania Blog Hop. The theme of this months block is “water”. I wanted to do something other than waves or waterfalls, so I thought of what might be in or on water. How about Sea Stars floating through the coral? Be sure to check out the full list of designers at the bottom of the page.
The pattern is available for free to subscribers at the bottom of the page. If you’d rather just print, click the green Print Friendly button under the designer list. If that doesn’t work, try Ctrl + P (or Flower + P) to bring up the printer dialog box.
In 2020, I taught a 3rd grade Zoom class on Ocean Animals to my grandson. One of the animals was a Starfish, now known as a Sea Star. Did you know that Sea Stars are actually quite colorful? Look for brilliant colors for them. Here is my 3rd grade tutorial on Sea Stars, in case you were curious.
To make this block, you will need:
- (1) 3-1/2″ Brown square for the center of one star.
- (1) 3-1/2″ Purple square for the center of one star.
- (8) 2″ × 3-1/2″ Background rectangles.
- (8) 2″ Brown squares.
- (8) 2″ Purple squares.
- (8) 2″ Background squares.
- (2) 3-1/2″ x 6-1/2″ Coral rectangles.
- (2) 9-1/2″ × 12-1/2″ Background rectangles
Let’s start with the Flying Geese to make the side of the stars. Here is the method:
A Flip-n-Sew Method of Making a Flying Goose Block
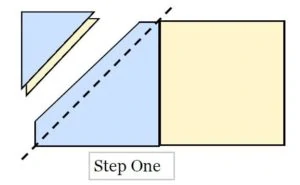
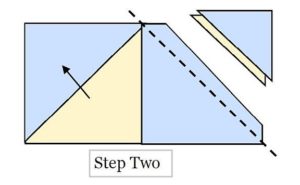
This is a traditional method of making Flying Geese Blocks. In this method, you sew a square on one side of a rectangle using a diagonal seam, then flip it over to create one side of the Flying Goose block. Press to the square. After you have double-checked to make sure everything lines up properly, cut off the excess underneath that square. Then repeat the process for the other side.
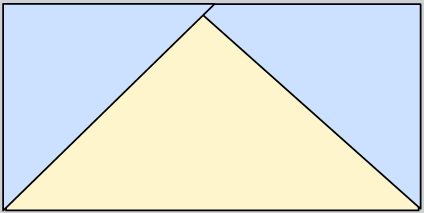
To use this method, cut a rectangle for the goose (shown in yellow) and two squares for the sky (shown in blue.) Cut the squares for the sky the same size as the height of the unfinished rectangle. Remember that the finished size will be 1/4″ smaller all the way around the rectangle due to the seam allowance. In other words, a 2-1/2″ x 4-1/2″ rectangle and (2) 2-1/2″ squares will be needed to make a 2″ x 4″ finished goose.
Draw a line on the diagonal on the wrong side of the sky square (shown in blue below.) Lining up the corners of the square with the edges of the goose rectangle (shown in yellow below), pin carefully and sew on the drawn line as shown. Cut off the excess and press. Do the other side, overlapping the first square. Press and trim all dog ears.
Make a test block first. If you are comfortable with the procedure, you can chain stitch these by doing the first step of all the blocks before going on to the second step.
Making the Flying Geese for this block
Start with a 2″ × 3-1/2″ Background rectangle and (2) 2″ Brown squares. Draw a diagonal line on the back of a these squares and place it on one corner of the Background rectangle.
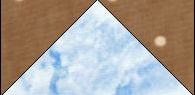
Sew on the diagonal line and flip the square over the seam. If you like what you see, trim the seam to 1/4″ and press. Repeat for the other side. Make (4) Flying Geese units using this method.
.
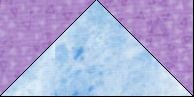
Repeat this process with the Purple. Make (4) Flying Geese units.
.
.
Making the Star
The star is made in (3) rows. Sew a 2″ Background square to both sides of (2) of the Purple Flying Geese units. Press to the Background. These will be the top and bottom rows of the star block. Repeat with the Brown Flying Geese units.

Sew a Purple Flying Goose unit to both sides of the 3-1/2″ square. Press toward the center.
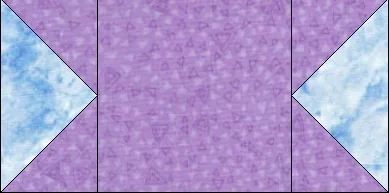
Sew the rows to the top and bottom of this unit, reversing the direction of one of the rows so it matches the graphic at the top of this page. Give it one final press and square it up to 6-1/2″ if necessary.
Repeat this process with the Brown Flying Geese units and the Brown 3-1/2″ squares.
Floating through the coral
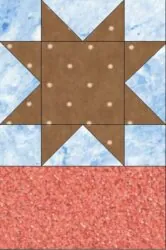
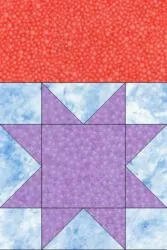
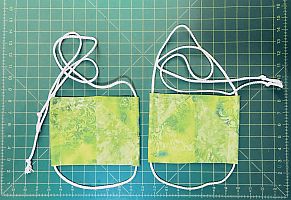
Sew a 3-1/2″ x 6-1/2″ Coral rectangle to one side of the stars you just made. I used two different colored corals in my sample, but you can use the same fabric if you prefer. Press to the rectangle. Make (2). It will measure 6-1/2″ × 9-1/2″.
.
.
.
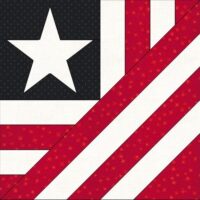
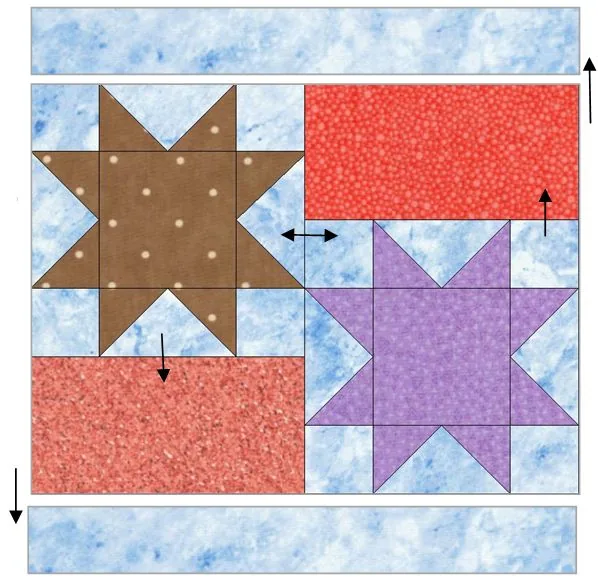
Turning one of them upside down, sew the two units together to make a 9-1/2″ × 12-1/2″ unit as shown below. Press the seam open. Sew a 2″ × 12-1/2″ Background rectangle to both the top and bottom of the unit you just made. Press to the rectangle. Square up to 12-1/2″ if necessary.
You are done!
Now, what will you do with your block?
Be Sure to Visit These Designers!
Bottled Water Quilt Block by Carolina Moore
Sea Star by Scrapdash
Dolphins by Inquiring Quilter
Stream by Memory Barn Studio
Water Bottles by QuiltFabrication
Water Lily by The Quilted Diary
Waves By Studio B Quilting
Splash! by Patti’s Patchwork
Planet Earth by Patchwork Breeze
Surfing USA by Appliques Quilts and More