Tooth Fairy Quilt Block – Block of the Month
Note: This post may contain affiliate links. That means we may earn a commission at no additional cost to you if you purchase via our links. Not all links are affiliate links. I only recommend products I use and trust. As an Amazon Associate, I earn from qualifying purchases.
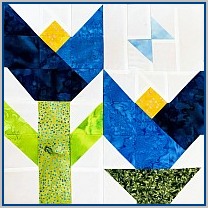
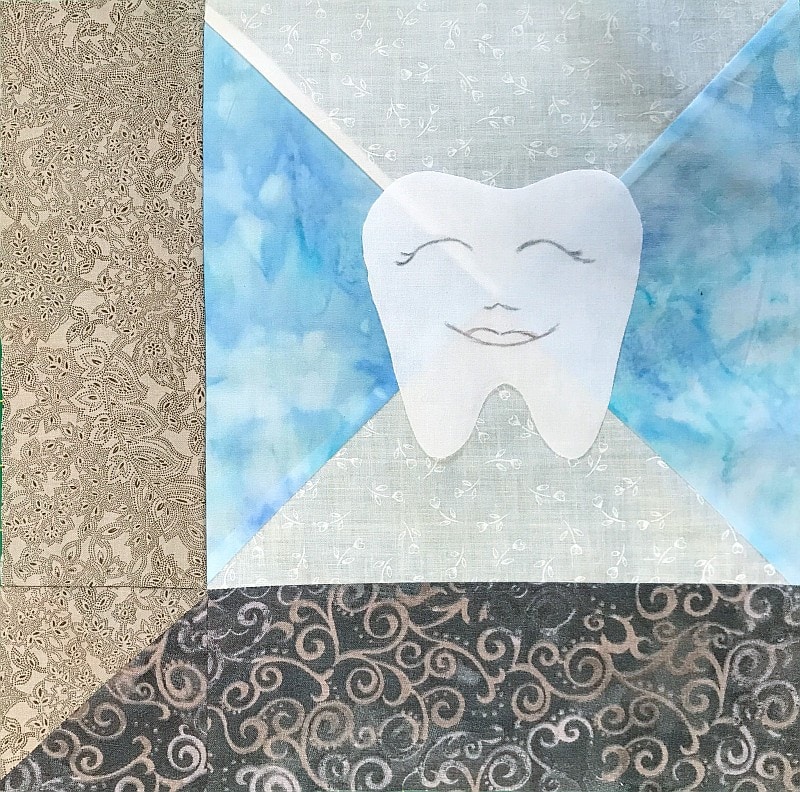
Tooth Fairy Quilt Block
Thi block is meant to represent the fairy as flies her way to a child’s home and appears in the window.
Fabric Requirements
- (1) 10-3/4″ background square
- (1) 10-3/4″ fabric-for-wings square
- (1) 3-1/2″ x 9-1/2″ light brown rectangle
- (1) 3-1/2 x 9-1/2″ dark brown rectangle
- (1) 4″ light brown square
- (1) 4″ dark brown square
How to Create and Square Up a Half Square Triangle (HST) Quilt Block
The Traditional Method of making Half Square Triangle Blocks (HSTs) is to place two identical squares right sides together. These squares should be 7/8″ larger than the finished size of the final HST. Draw a diagonal line on the back of one square. Sew 1/4″ on both sides of the line. Cut on the line and press to the dark.

You will have made two identical Half Square Triangle (HST) blocks. My personal preference is to cut squares 1″ larger than the finished size of the final HST and square it up to the correct size after pressing.
There are two ways you can square up your block.
You can place a square ruler so the diagonal line is directly over the seam and just cut two sides. Quilt-in-a-Day has a Square Up Ruler that uses this method.
Or you can press open the block (pressing to the dark) and square it up using a ruler the same size as the block you are making. A fussy-cut ruler with lines on both diagonals will be very helpful with this.
For this block
You will need two HSTs.
Following the above directions, make the first one using the (1) 4″ light brown square
(1) 4″ dark brown square. You will actually make two, but you only need one for this project. Square it up to 3-1/2″.
Following the above directions, make the second one using the (1) 10-3/4″ background square
(1) 10-3/4″ fabric-for-wings square. Don’t square this up just yet. It’s going to go on to become a QST.
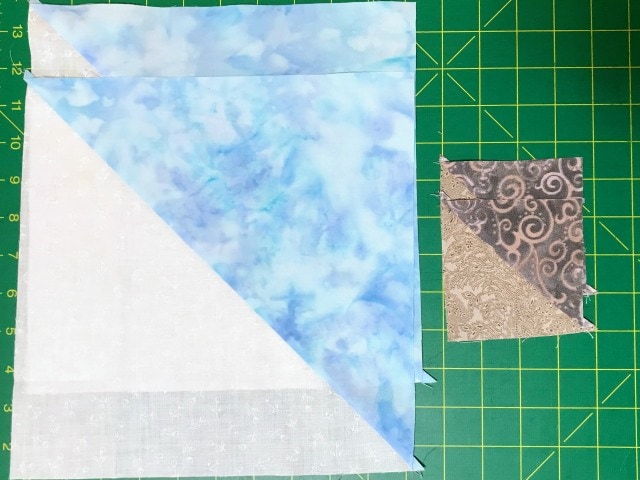
Place the two HSTs you just made right sides together, alternating color. Draw a diagonal line on the back of one, through the seam. Sew 1/4″ on either side of the line. Cut it apart on the line. You will actually make two, but you only need one for this project. Press and square it up to 9-1/2″.
Making the block
Taking care to match colors, sew the 3-1/2″ HST to the right of the 3-1/2″ x 9-1/2″ dark brown rectangle. Sew the 3-1/2″ x 9-1/2″ light brown rectangle to the right of the wings in the QST block.
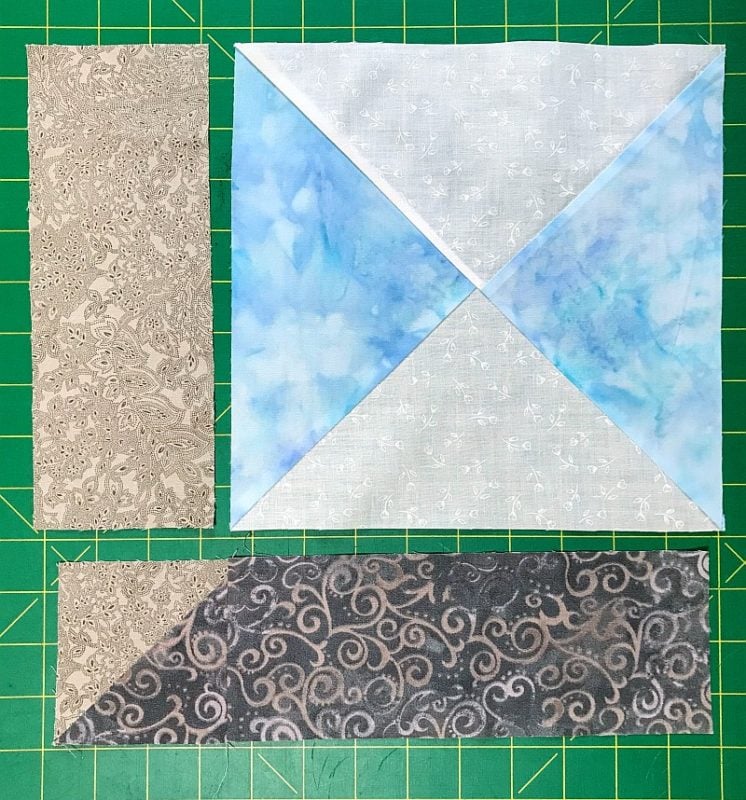
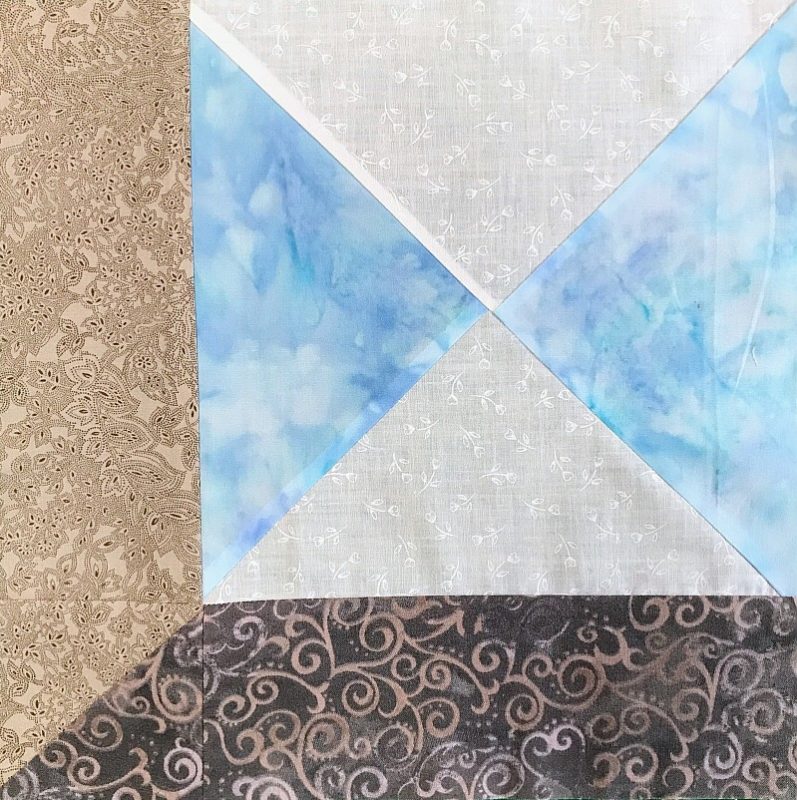
Sew the two units together to create an attic windows block
Appliqueing the tooth fairy
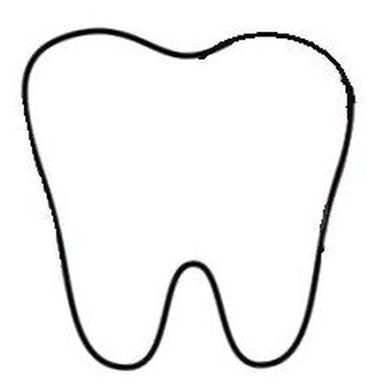
Print out the tooth outline above. It should be about 4″ square, but it doesn’t really matter that much. Maybe print out a couple of copies so you can practice drawing faces on the paper. Here are some ideas from Etsy.
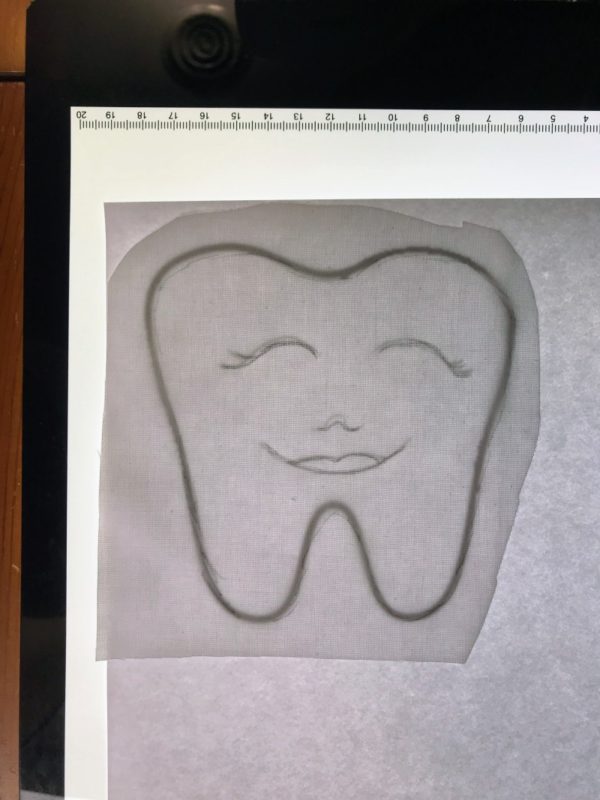
Once you are happy with your design, cut it out and use it as a applique template. I suggest drawing the face on the fabric first before appliqueing to make sure you like it. Attach it to the window using your favorite method of applique. There is an article on freezer paper applique here, and one on fusible web applique here.
You are done! Finish this block or make a whole bunch of them. They will cheer up any child mourning the loss of their first tooth.
Would you like to make this block a different size? Here is a HST/QST Technique Sheet with a size chart.
Please add moc.hsadparcs@sirk to your contacts list to make sure you get the confirmation message. Drag the confirmation message from the Promotion tab to the Primary tab if you use Gmail.
If you are already a subscriber, it’s okay to fill out this form. You won’t be put on the mailing list twice.