Wagon Wheel Quilt Block
Note: This post may contain affiliate links. That means we may earn a commission at no additional cost to you if you purchase via our links. Not all links are affiliate links. I only recommend products I use and trust. As an Amazon Associate, I earn from qualifying purchases.
The pattern is available for free to subscribers at the bottom of the page. If you’d rather just print, click the green Print Friendly button under the tutorial. If that doesn’t work, try Ctrl + P (or Flower + P) to bring up the printer dialog box.
.
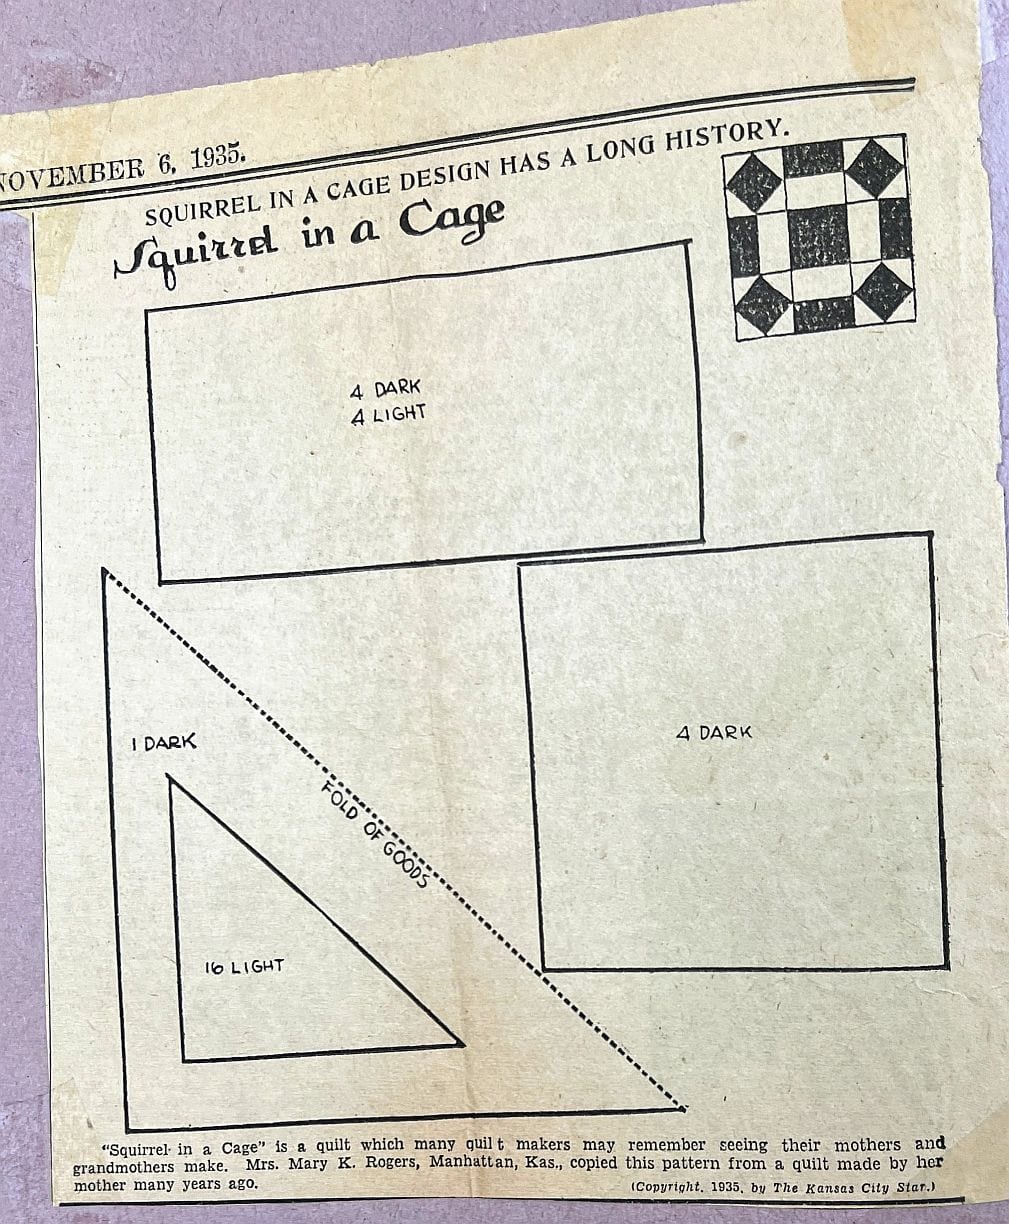
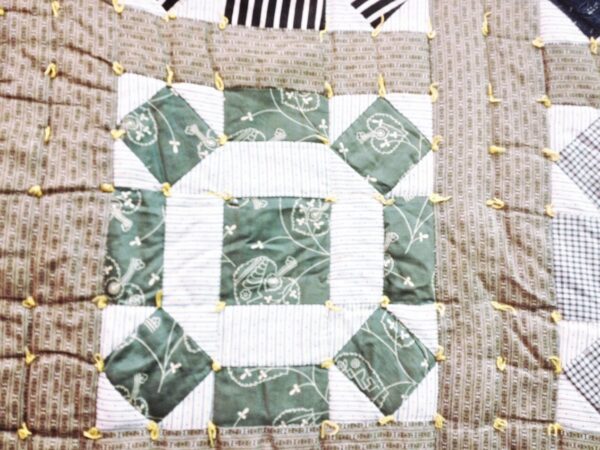
And, no, it wasn’t always called the Wagon Wheel! Here it is in 1935. The Quilt Block to the right is probably c1900, but I don’t know what the maker called it.
The Wagon Wheel Quilt Block
Before starting this project, I recommend that you press your fabric with spray sizing. It will make it easier to cut small pieces. Take the time to clean your machine, put in a new needle, and fill a few bobbins. When pressing, just hold the iron over a spot for a moment or two. This pattern assumes a perfect 1/4” seam.
To make this block, you will need:
- (8) background 3″ squares, (2) 2-1/2″ squares, and (4) 2-1/2″ x 4-1/2″ rectangles
- (4) dk blue 3-3/8″ squares, and (4) 2-1/2″ x 4-1/2″ rectangles
- (2) green 2-1/2″ squares
.
Make the center four-patch by sewing the 2-1/2″ green and the 2-1/2″ background squares in (2) rows of two each. Press to the dark. Sew the rows together and press the seam open. Square this up to 4-1/2″. In the picture below, I pressed the center seam open but in retrospect, I should have swirled it.
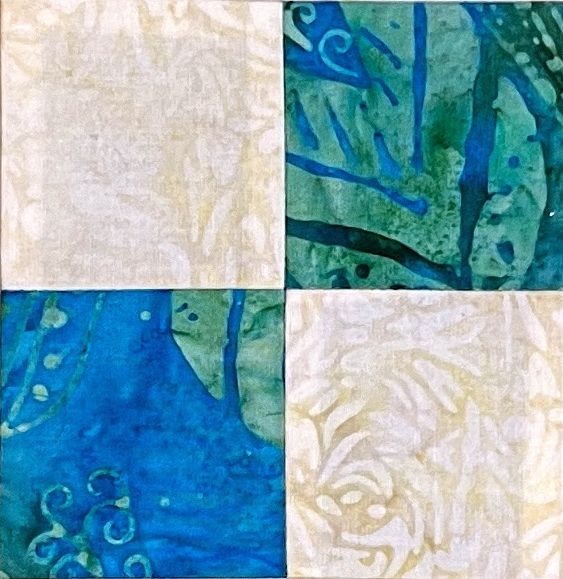
To twirl your seams on the back finger press them so they go around in a circle. You will need to pick out a couple of stitches at the intersection to get these twirled seams to lay flat. You know you have done it right if you see a teeny tiny four patch made by the right side of the fabric at the intersection.
.
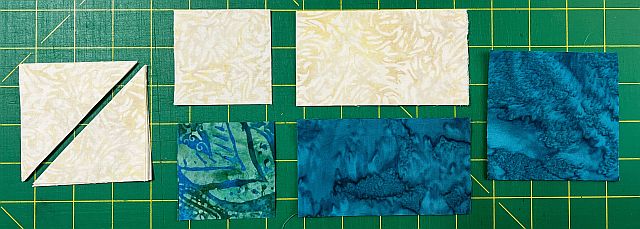
To make the square-in-a-square corners, cut the (8) background 3″ squares on the diagonal to make (16) triangles. Sew a triangle to opposite sides of the (4) dk blue 3-3/8″ squares. Press.
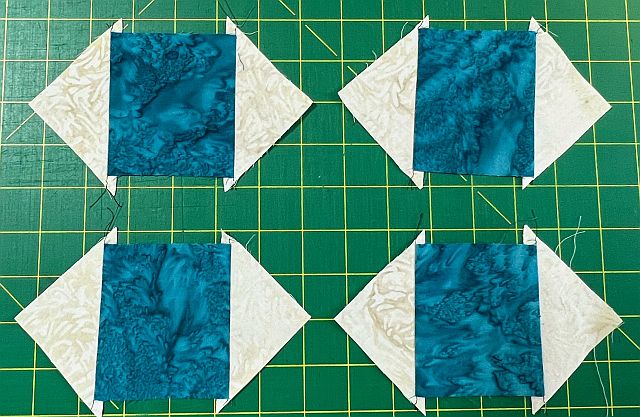
Sew a triangle to the remaining sides of the squares.
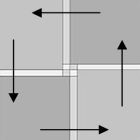
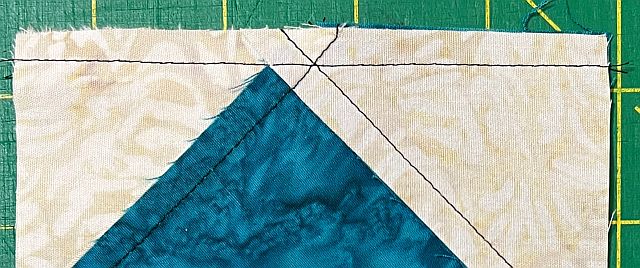
To keep your points sharp, aim for the X when sewing a seam.
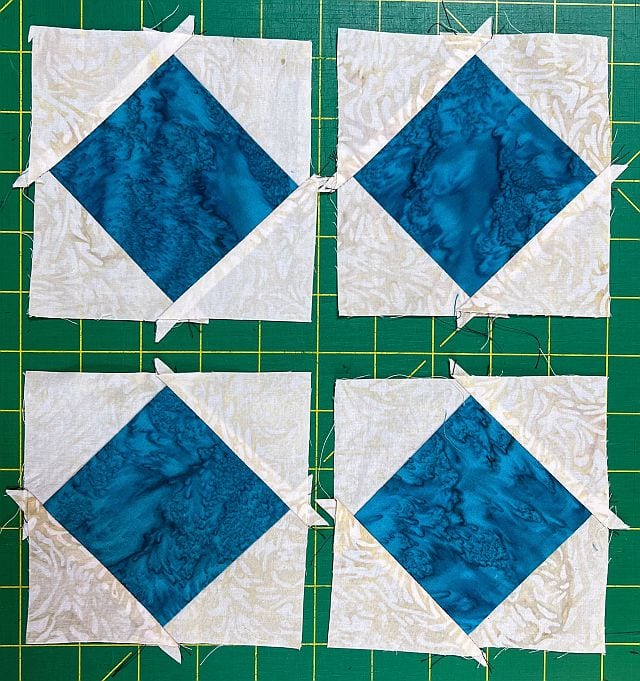
Press and square up to 4-1/2″.

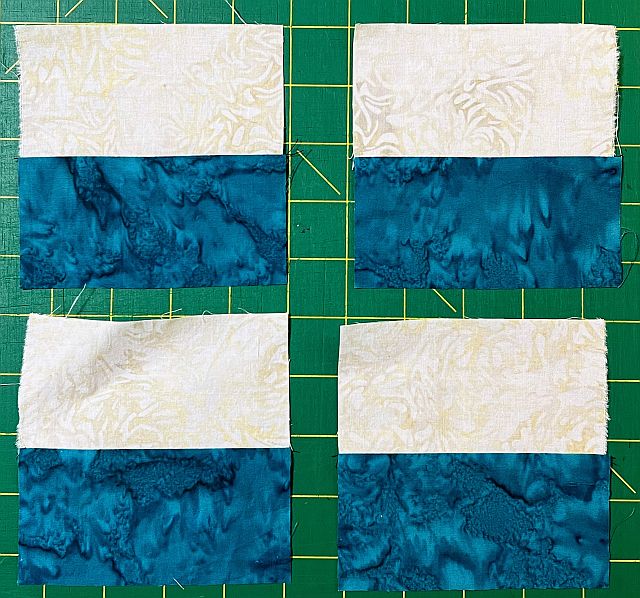
Sew a dk blue 2-1/2″ x 4-1/2″ rectangle to a background 2-1/2″ x 4-1/2″ rectangle the long way. Make (4) sets and press to the dark.
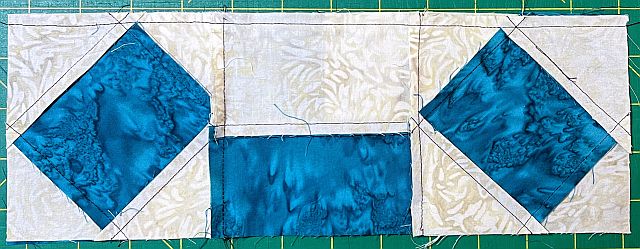
Sew these between (2) square-in-a-square blocks as shown below to make the top and bottom row of the block. Press. Sew the remaining (2) to both sides of the four-patch block. Press.
Sew the three rows together, taking care not to overlap the seams at the intersection. Give your block one final press and square it up to 12-1/2″.
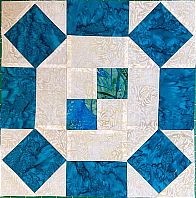
You are done! Use your block in a quilt, or set it on point and make it into a mini-quilt. Enjoy!
Please add moc.hsadparcs@sirk to your contacts list to make sure you get the confirmation message. Drag the confirmation message from the Promotion tab to the Primary tab if you use Gmail.
If you are already a subscriber, it’s okay to fill out this form. You won’t be put on the mailing list twice.
thank you. this looks like a lot of fun to make