Binding Basics
Note: This post may contain affiliate links. That means we may earn a commission at no additional cost to you if you purchase via our links. Not all links are affiliate links. I only recommend products I use and trust. As an Amazon Associate, I earn from qualifying purchases.
This friendly tutorial explains quilt binding simply—straight‑grain, cross‑grain, and bias binding techniques—helping you finish quilt edges beautifully and confidently, even if you’re new to binding.
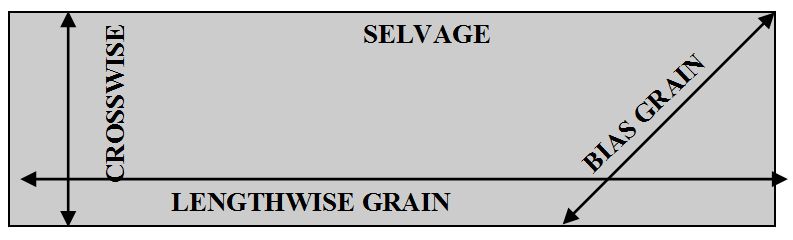
Binding Basics. There are two basic types of binding, straight grain binding (which includes cross-grain binding) and bias binding. Straight grain binding is binding that is cut in strips along the grain of a piece of fabric parallel to the selvage. Cross-grain binding is also cut in strips along the grain but is cut from selvage to selvage. Bias binding is binding that is cut at a 45-degree angle from the selvage. (See Rotary Cutting Tips for more details.)
How to Attach Binding
To prepare your binding for sewing it on the quilt, fold it in half wrong sides together but do not press. You will need to be able to roll the fold a tiny bit. Some quilters prefer to sew their binding on the top through the batting and backing first and then cut the edge even. Some prefer to square up the quilt first and sew the binding on the cut edge. Use the method that is most comfortable for you.
Use a walking foot if you have one to keep all the layers together as you sew. Sew the binding on the edge of the quilt top with a 1/4″ seam allowance. Leave a 10″ tail of binding before you start sewing so you can join the binding strip ends when you are done.
Place your quilt label in the lower right hand corner of the quilt before sewing on the binding. The same stitch that secures your binding will secure the label. Consider doing the same thing with your hanging sleeve. You will still need to do a bit of hand-stitching to secure the other side.
Making the Corner
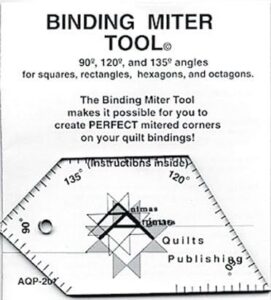
To make a mitered corner, sew to 1/4″ away from the corner, stop and take a couple of backstitches. Take the quilt out of the sewing machine and fold the binding up at a 45-degree angle, then back down again so you can start sewing along the next side. Continue all the way around the quilt, stopping 12″ from your starting point. This will give you enough room to join the two ends with a mitered seam. Once you have joined the two binding ends, continue attaching the binding. You might find the Binding Miter Tool to be very helpful.
If you have not yet cut off the backing and batting even with the quilt top and binding, do so now leaving a 1/4″ seam allowance. Press the seam between the binding and the quilt top from the front. This will help you obtain a more even binding when you fold it over.
Secure the folded binding to the back using binding hem clips, patchwork pins, or water-soluble glue. Be careful not to distort the binding with the fastening method you chose. Sew the binding to the back of the quilt by hand or with a blind hem stitch. Take an extra stitch or two in the corners to secure the miter.
A more detailed tutorial with illustrations is available at https://scrapdash.com/binding-basics/