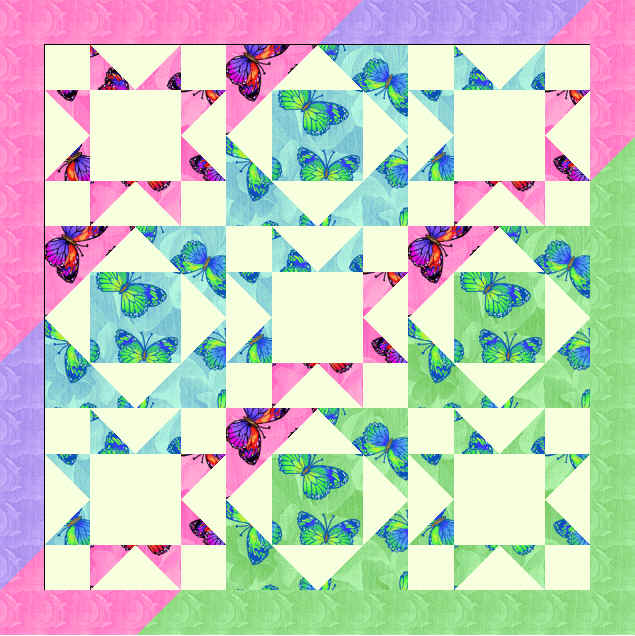
Fly Away Home – the lost mystery
Note: This post may contain affiliate links. That means we may earn a commission at no additional cost to you if you purchase via our links. Not all links are affiliate links. I only recommend products I use and trust. As an Amazon Associate, I earn from qualifying purchases.
Blast from the Past!
I admit that when the #QuiltBlockMania was postponed last week, it threw me for a loop. I had something Mardi Gras related ready to go for March 1, so I couldn’t exactly postpone that post! My only choice was to turn that into a regular post called Mardi Gras Geese and come up with something new for today.
I was wracking my brains for something when I suddenly remembered that I had done a mystery in November 2003 called “Fly Away Home”. Since the theme of this month’s mania block was “birds”, I thought that I would present that. That means no block this month.
After searching two computers, I discovered that I had never kept a copy of that mystery. Oh, no, what to do! Fortunately, the Wayback machine came to my rescue. So without further ado, I present to you the lost mystery which found its way home. (Complete with text and graphics from 2003.)
Side Note: I don’t write mysteries like this anymore. I use more explanations and I try to remember to refer to strips as “by the width of fabric”. I put my comments in [brackets]. There is no pattern for this mystery – use the green Print Friendly button at the bottom of this page to make a copy.
Fly Away Home Mystery Quilt
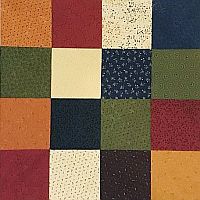
This is a nice little mystery that won’t take much time. It’s called Fly Away Home because the way the 3D blocks are placed makes you think of flying. And I used Fly Away fabric for the sample:-)) It makes a small wallhanging (28″ x 28″) which you will easily finish for the holidays.
There are four steps to this mystery, all on this page.
Don’t feel obligated to make this quilt in the fabrics or colors shown. This is YOUR quilt, make it YOUR way. For example, if you substitute black for white and used batiks in 3 different colorways, this quilt becomes very dramatic.
You will need:
- 3/4 yd white, muslin or neutral
- 1/2 yard pink
- 1/4 yard green
- 1/4 yard blue
Here are the cutting directions. You will have leftover fabric – save it to use on the back.
White
- (4) 2 1/2″ strips [I think I meant “by the width of fabric] of white, cross cut (20)
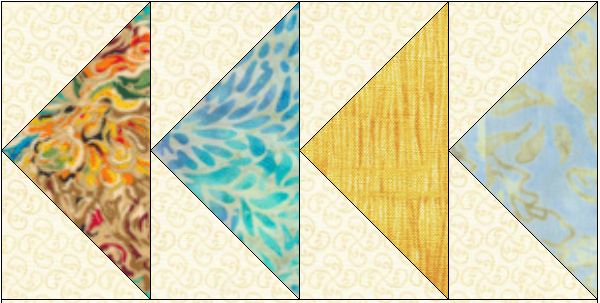
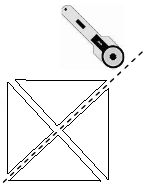
2 1/2″ squares and (20) 4 1/2″ x 2 1/2″ pieces - (1) 5 1/4″ strip, cross-cut into 8 squares. Cut these squares on the diagonal twice (an X) making quarter square triangles. (see diagram to the right) You will get 32 triangles.
- (1) 4 1/2″ strip, cut into squares. You will need 5
Pink
- Cut (1) 5-inch strip of pink. From this, cut seven 5 inch squares. Crosscut two on the diagonal to make half-square triangles. Cut five in half twice to make twenty 2 1/2″ squares.
- Cut (2) 2 1/2″ strips for the border.
Green
Cut (1) one 5 inch strip of green. From this, cut five 5 inch squares; cross-cut three [of those squares] on the diagonal to make half-square triangles. Cut two [of the squares] in half twice to make eight 2 1/2″ squares; cut the remaining strip down to 4 1/2″ wide, then cut two 4 1/2″ x 4 1/2″ squares.
Cut (1) 2 1/2″ strip for the border. [Fabric was wider then. If you are making this, cut (2) strips]
Blue
Cut (1) one 5 inch strip of blue. From this, cut six 5 inch squares. Crosscut three [of those squares]on the diagonal to make half-square triangles. Cut three [the remaining squares] in half twice to make twelve 2 1/2″ squares. Cut the remaining strip down to 4 1/2″ wide, then cut two 4 1/2″ x 4 1/2″ squares.
Cut (1) 2 1/2″ strip for the border.
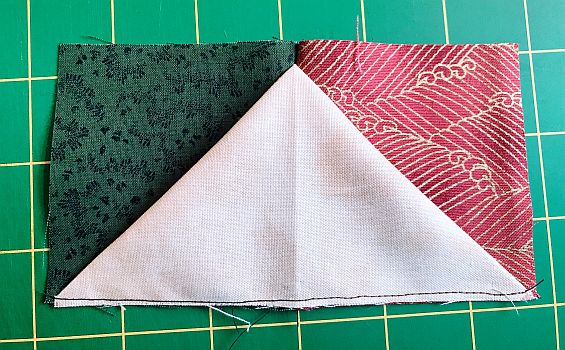
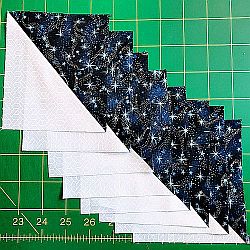
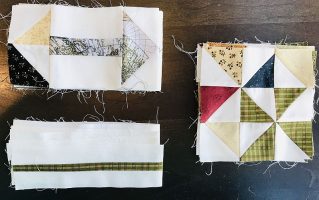
Block Number One: A 3D star.
Fold your colored 2 1/2″ squares in half along the diagonal. Pin or stay stitch to both sides of all twenty 2 1/2″ x 4 1/2″ white pieces you cut. They will overlap slightly in the middle. That’s okay – they are supposed to. Try not to squish these folded blocks too much or you will lose the 3D effect. Experienced quilters – I know it is a temptation to skip this step. Don’t do it. Careful pinning will make your life SO much easier. You will make:
| 10 of these: | 6 of these | 4 of these: |
Using the blocks you just pinned and the five 4 1/2″ white blocks, sew:
three of these blocks | one of these | and one of these |
Now, get out the twenty white 2 1/2″ fabric squares and sew them to either side of the blocks you made in the first step. You should make:
| three of these | five of these | two of these |
And put them all together! You will make:
three of these | one of these | and one of these |
Press lightly from the back, holding the iron over the block but not pushing down. Try to keep those 3D squares from folding flat. Square up if you need to. This block should be 8 1/2″ square.
Block Number Two: A Square in a Square
Now let’s make a square in a square.


Sew a quarter square triangle of white to each side of the four colored 4 1/2″ blocks. Square up your blocks from the wrong side by laying the 1/4″ mark on your ruler on the X made by the seams where the white triangles meet the point of the square center. If you rotary cut this edge, you should get a perfect quarter-inch seam allowance. These blocks will be exactly six inches square.
Now add the half-square triangles as shown below. When you sew this seam, do so with the block face down so you can make sure your seam intersects the X mentioned above. That will keep your point sharp. Now, square up these blocks as you did in the previous step.
Make two of these | and three of these |
Using the blocks you made last week, sew them into rows as shown, then sew them into a top. [This was apparently a weekly mystery.]
 |
 |
 |
Press gently and square up. It should measure 24 1/2″.
The borders:
This is the trickiest step, but it does make the quilt! The hard part is getting the angle going in the right direction.
From your 2 1/2″ wide strips, cut the following:
Pink:
- (2) 8 1/2″ long pieces
- 2 1/2″ square.
- 14 1/2″ long piece.
- 16 1/2″ long piece.
- 4 1/2″ long piece.
- 8 1/2″ long piece.
Blue:
- (2) 12 1/2″ long pieces.
Green:
- (2) 22 1/2″ long pieces.
Sewing the Bottom border

Sew the 8 1/2″ pink strip to the 22 1/2″ green strip on the diagonal as shown. Open and press. It should look like this:

Sew to the bottom of the quilt, matching the placement of the point to the bottom of the lower left-hand block.
Top border
Working with the 12 1/2″ long blue strip, add a 2 1/2″ pink square to one end and sew on the diagonal from upper right to lower left. Cut off the excess and press. Your piece will look like this:

Now sew a 14 1/2″ long pink strip to the left side, again on the diagonal. Make sure to get your angle going in the right direction! It will look like this:

Sew to the top of the quilt, matching the points as shown in the picture.
Left side border

Sew a 4 1/2″ strip of pink to a 12 1/2″ strip of blue. Add the 16″ strip of pink as shown. Sew to the left side, matching points.
Right side border

Sew the 22 1/2″ green strip to the 8 1/2″ pink strip as shown. Sew to the right side of the quilt, matching points.
Press, square up if necessary, and take a deep breath. You are done! Now send me a picture of your quilt, and I will post it here. [Kris’s note: I remember getting pictures but apparently I didn’t save them. Here are the ones I found.]
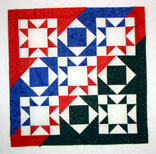 Made by Jeanne Henry of Hilham TN | 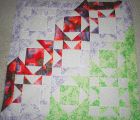 Made by Birdie | 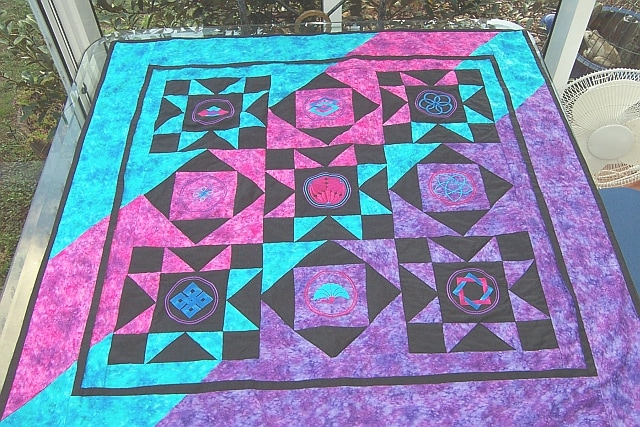 Made by Vicki Purnell of Devonport,Tasmania, Australia |
Don’t forget to sign up for the newsletter! Once a week, I send updates on quilt-related information I have found while wandering the web. This might be an inspiring article, a tip or tutorial I have discovered (or written), and occasionally exclusive offers & discounts as well as immediate access to the secret page of free patterns, guides, and printables. You can follow my page on Facebook, or join the Make Believe Quilters group, too.