Mashed Potatoes and Gravy – a perfect quilt block for #QuiltBlockMania
Note: This post may contain affiliate links. That means we may earn a commission at no additional cost to you if you purchase via our links. Not all links are affiliate links. I only recommend products I use and trust. As an Amazon Associate, I earn from qualifying purchases.
The theme of this month’s #QuiltBlockMania is Dinner. Be sure to see the list of designers at the bottom of the page. Use the Print Friendly button under that list to print this page. If that doesn’t work, try Ctrl-P or Flower-P.
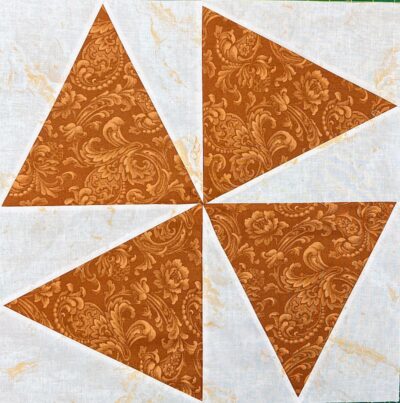
It’s actually a triangle in a square quilt block
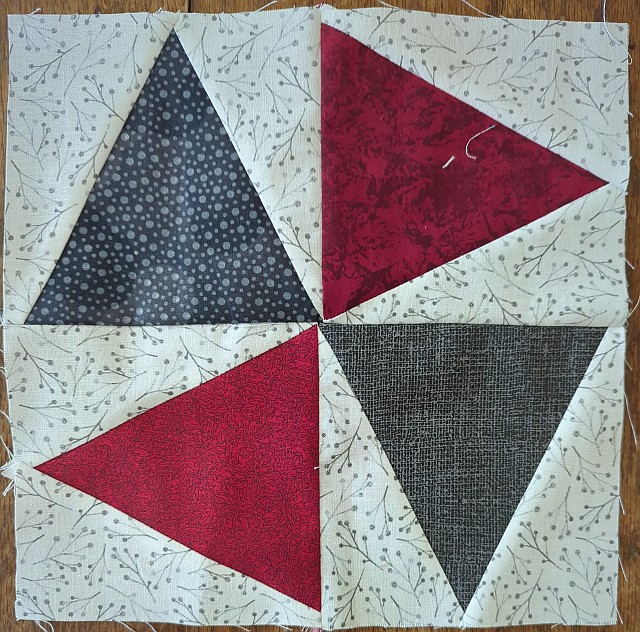
This is not a difficult block once you get the hang of it. But like anything else, it takes a bit of practice. This is the unit we are making. It’s sometimes called a Triangle in a Square. If you turn it upside down, it looks like a V, so you may hear it called a V Block.

Here is how to make it using a Studio 180 V Block Ruler.
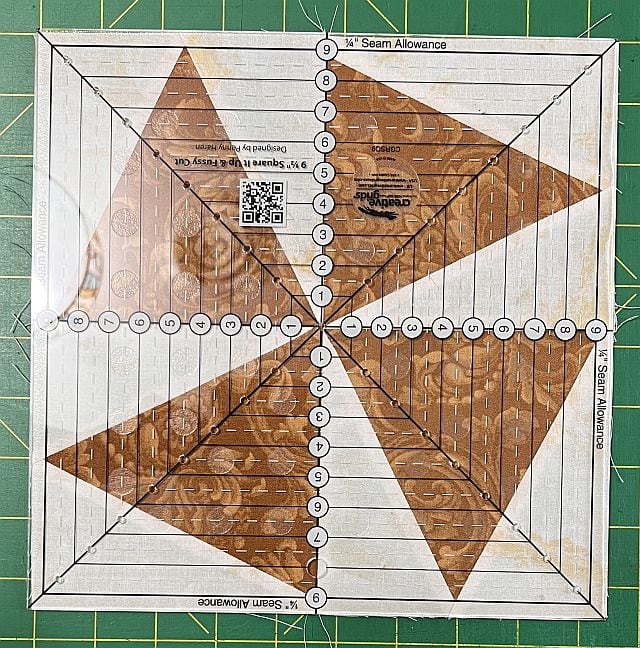
With this ruler, you cut strips that are slightly larger than the final block, then you square it up. The block at the top of the page is 9-1/2″ unfinished (9″ finished), so the four blocks that are in it will be 5″ unfinished (4-1/2″ finished.)
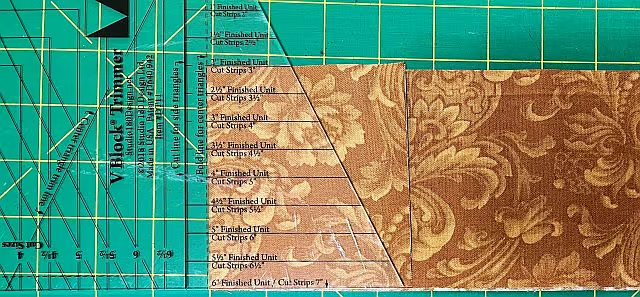
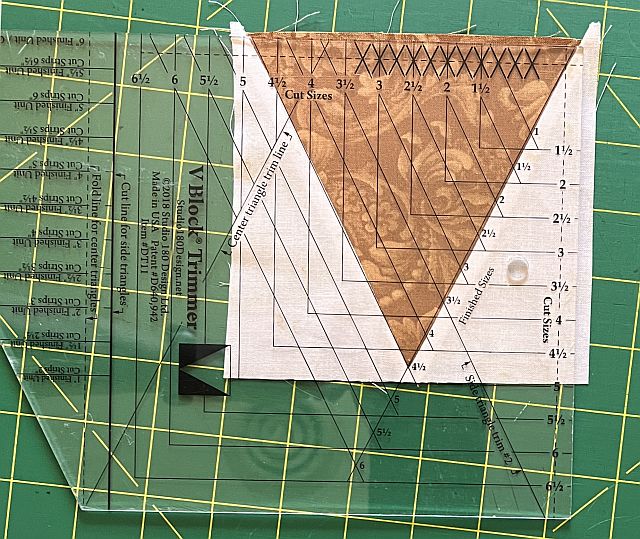
To make the center triangle, place a 5-1/2″ background strip horizontally on the cutting mat, right sides together. Make a small fold at the cut end. Place the ruler so that the dotted line that says “Fold line for center triangles” is along the fold. The bottom of the strip should match up with the 4-1/2″ finished unit line on the ruler. Cut along the slanted edge of the ruler. You will be cutting through four layers of fabric to make (2) center triangles.
Assuming you are right handed, your next step is to flip the fabric so the angle you just cut is in the opposite direction. Align the angled cutting line on the ruler with that angle and cut along the angled edge of the ruler. If you are left-handed, you will use the same method but you will start with the strip vertically on the mat. Make a total of (4) triangles for the block above.
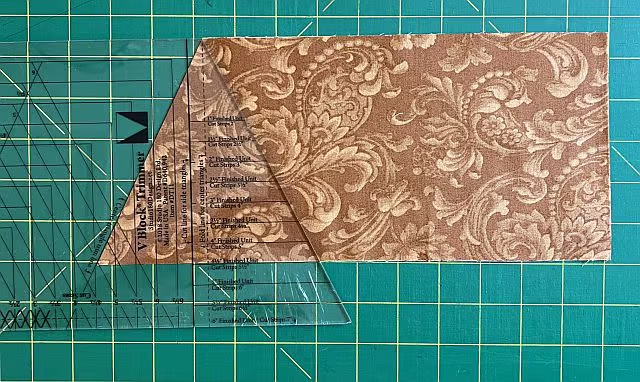
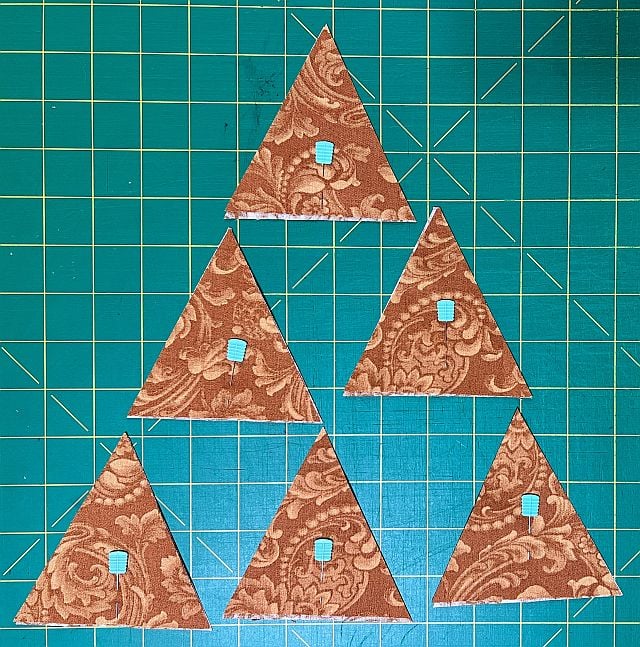
This is NOT an 60 degree triangle. It’s actually 63-1/2 degrees. It’s a good idea to mark the bottom of the triangle in some way, perhaps with pins or stickers.
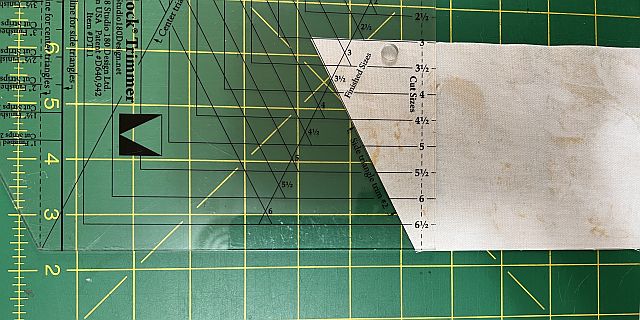
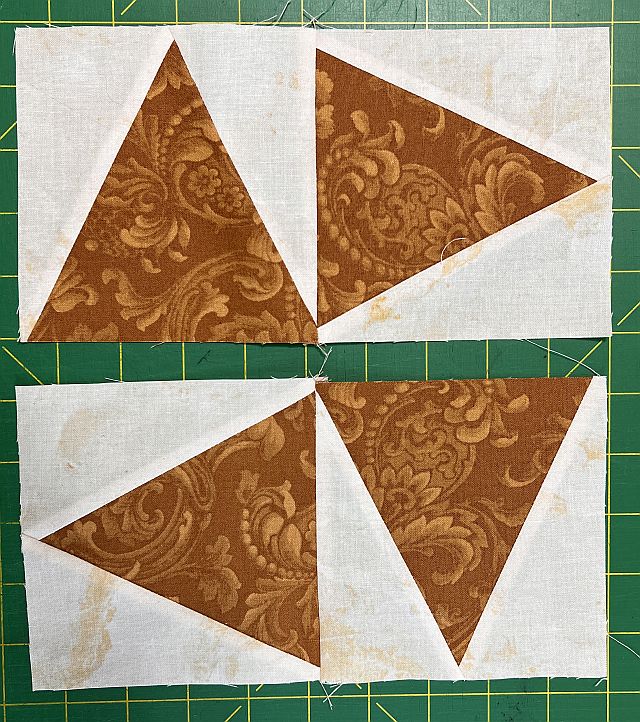
Making the side triangles is a little trickier. Straighten the edge of the strip, removing the selvedge, and place the two strips wrong sides together horizontally on the cutting mat. When you make a cut, you will be cutting both the right and left side of the block.
Assuming you are right handed, place the angled side of the ruler on top of a strip, lining up the dark line labeled “Cut line for side triangles” with the cut edge of the strip. The bottom of the strip should be along the “4-1/2″ Finished Unit” line. Most of the ruler will be off to the left side. Cut the angle. You have just cut your first pair of side rectangles for your block. Pin them together so they don’t lose each other.

Don’t move the strip! Rotate the ruler instead, aligning the cut angle with the line that says “Side Triangle Trim #2”. Slide the ruler along the strip so the flat tip is along the bottom. This time the lines don’t matter. You just want to get the correct angle. Make a straight cut along the side of the ruler. You have just cut your second pair of side rectangles for your block. Pin them together so they don’t lose each other.
Keep cutting the side triangles in this manner for the rest of the strip. You will need (4) pairs of side triangles. If you are left-handed, you will use the same method, but you will start with the strip vertically on the mat.
Assemble
- (4) center triangles
- (4) pairs of side triangles
Lay out your units the way you are going to sew them. I suggest sewing all the left sides first, then pressing to the side unit, then sewing on all the right units and pressing again. Square up to 4-1/2″ if necessary. You can use the Studio 180 V Block Ruler for this as well.

- It’s easy to get confused the bottom of the triangle confused with the sides. If you have marked the bottom of the triangle, you won’t get your left and your right mixed up.
- But you might get your pieces mixed up. If you decide to sew all the left sides first, hide the right sides from yourself so you don’t use them accidentally.
- Press from the back so you can keep the seams smooth.
- Don’t skip the square-up step.
Make (4) V-Blocks and sew them in two groups of two. Sew the groups together, reversing the direction of the bottom set of blocks. Press from the back again and square up the block to 9-1/2″.
Other #QuiltBlockMania Designers
Plate full of Love by Carolina Moore
Dinner Plate by Crafty Staci
Honey Butter Quilt Block by Ashli Montgomery
Mashed potatoes by Scrapdash
Ballpark Dinne
Warm Glow by QuiltFabrication
Dresden Turkey by Inquiring Quilter
Milk Bottle by Memory Barn Studio
Woven Hearts by Sarah Marcina
Texas Barbecue by Emerald Falls Quilts
Vase of Flowers by Due North Handmade
Dinner Themed Quilt Blocks
Pumpkin Pie Slice by Appliques Quilts and More