Arctic Mountains – the Polar Bear Plunge Blog Hop
Note: This post may contain affiliate links. That means we may earn a commission at no additional cost to you if you purchase via our links. Not all links are affiliate links. I only recommend products I use and trust. As an Amazon Associate, I earn from qualifying purchases.
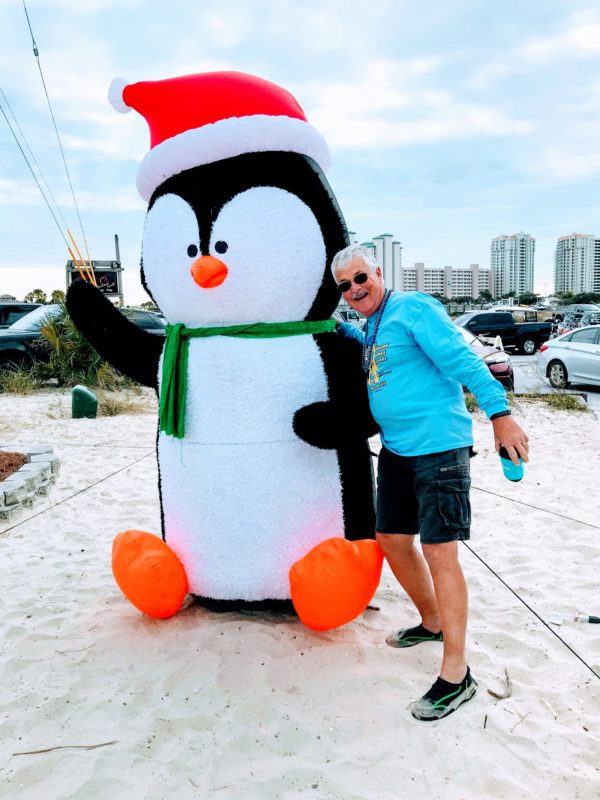
When Joan first announced the Polar Bear Plunge Blog Hop, I was so excited! I had a perfect idea, since hubby and I had participated in a Polar Bear Plunge for New Years Day 2020. The water was exceptionally warm because we were in Florida at the time. Here’s a picture I took:
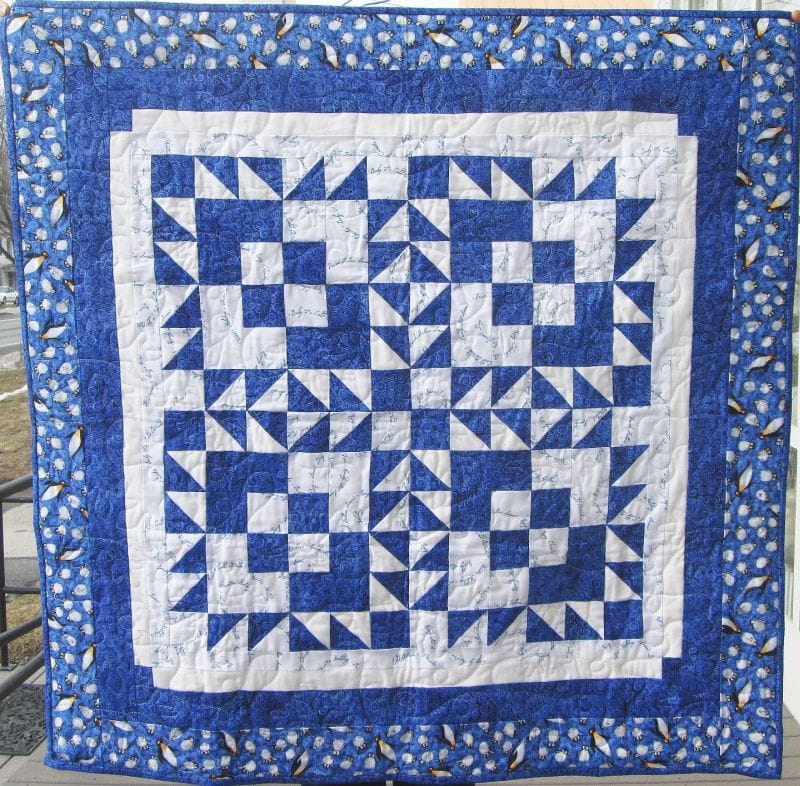
So, of course, I thought I would do a penguin block. But no matter how I worked at it, it seemed to copy other people’s blocks or patterns. That won’t do. So then I thought I would show my quilt, Winters Day, which has a penguin border.
That won’t work either, because I have already used it as a free pattern in a blog post.
So I thought about where polar bears live and decided to come up with an Arctic Mountains Quilt Block.
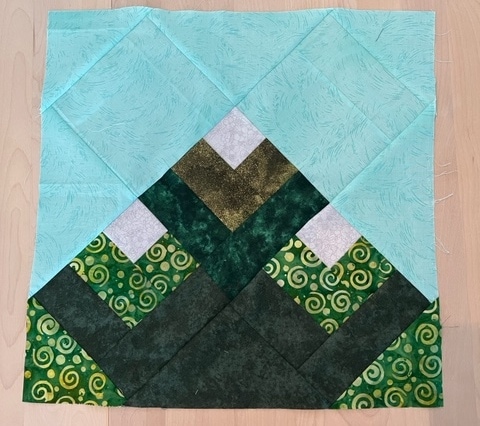
How to Make the Arctic Mountains Quilt Block
Fabric and Cutting
- Snowcap: (3) 2-1/2″ squares;
- Snow Green: (1) 2-1/2″ square; (1) 2-1/2″ × 4-1/2″ rectangle
- Mottled Green: (2) 2-1/2″ squares; (2) 2-1/2″ × 4-1/2″ rectangles; (1) 5-1/4″ square
- Green: (1) 2-1/2″ × 4-1/2″ rectangle; (1) 2-1/2″ × 6-1/2″ rectangle
- Deep Green: (2) 2-1/2″ × 4-1/2″ rectangles; (2) 2-1/2″ × 6-1/2″ rectangles; (1) 6-3/4″ square
- Blue Sky: (1) 9-3/4″ square; (1) 5-1/4″ square; (2) 6-1/2″ squares.
Before starting this project, I recommend that you press your fabric with spray sizing. It will make it easier to cut small pieces. Take the time to clean your machine, put in a new needle, and fill a few bobbins. When pressing, just hold the iron over a spot for a moment or two. This pattern assumes a perfect 1/4” seam.
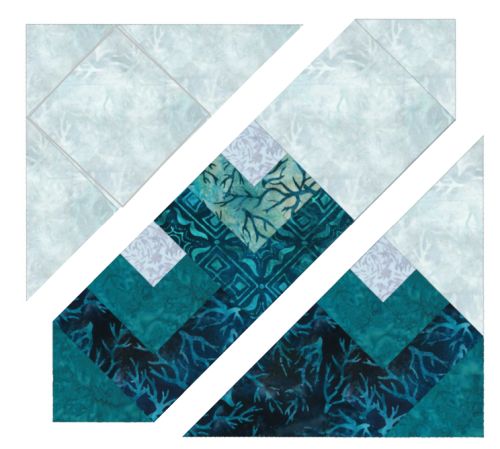
This block is made of 2 smaller blocks, Block A and Block B. They are then set on point to create a 17″ block. I suppose you could add a border after that and make it a mini-quilt if you wanted.
To Make Block A
Assemble:
(2) 2-1/2″ squares of Snowcap
(2) 2-1/2″ Mottled Green squares and (2) 2-1/2″ × 4-1/2″ Mottled Green rectangles
(2) 2-1/2″ × 4-1/2″ Deep Green rectangles (2) 2-1/2″ × 6-1/2″ Deep Green rectangles
Sew a 2-1/2″ Snowcap square to a 2-1/2″ Mottled Green Square. Make (2) sets and press to the dark.
Sew a 2-1/2″ × 4-1/2″ Mottled Green rectangle to the bottom of this set, pressing to the dark. Make (2) sets.
Sew a 2-1/2″ × 4-1/2″ Deep Green rectangle to the bottom of the set you just made, pressing to the dark. Make (2).
Sew a 2-1/2″ × 6-1/2″ Deep Green rectangle to the right of the set you just made, pressing to the long rectangle as shown.
Make (2) blocks. Press as shown and square up to 6-1/2″ if necessary.
To Make Block B
Assemble:
(1) 2-1/2″ square of Snowcap
(1) 2-1/2″ Snow Green square and (1) 2-1/2″ × 4-1/2″ Snow Green rectangle
(1) 2-1/2″ × 4-1/2″ Green rectangle and (1) 2-1/2″ × 6-1/2″ Green rectangle
Just as you did with Block A, make Block B using the fabrics above. Press as shown and square up to 6-1/2″ if necessary.
To Set the Block On Point
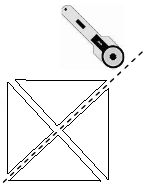
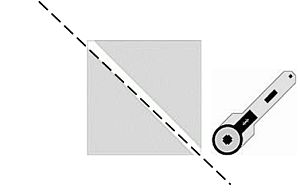
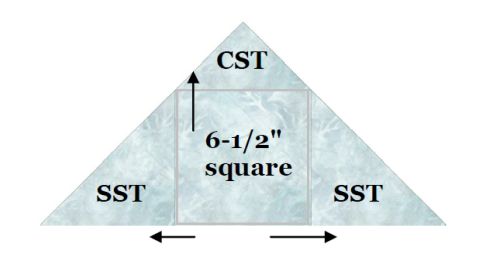
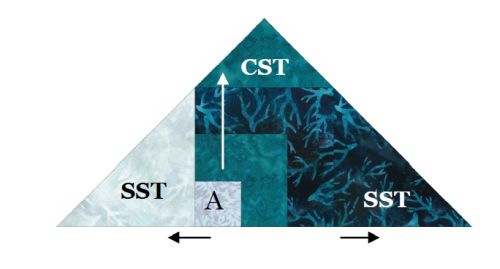
These blocks will be set on point. A block that is set on point is almost always more interesting than one done with a straight-set. But it can be tricky to piece. Although you are working in rows, each row has a triangle at both ends so you can piece the rows diagonally as shown below. But first, you need to know – how big do you cut the Side Setting Triangles (SST) and the Corner Setting Triangles (CST)?
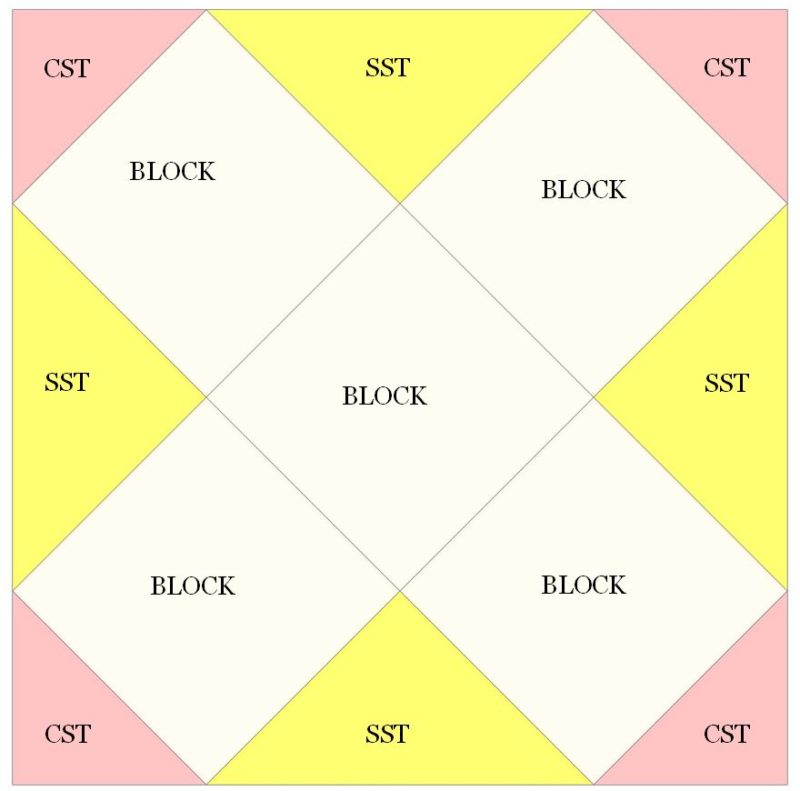
There is an actual formula for this, but rather than make this pattern too long, I will refer you to the How to Set a Quilt on Point tutorial.
Assemble:
(1) 9-3/4″ Blue Sky square.
(1) 5-1/4″ Blue Sky square
(1) 5-1/4″ Mottled Green square
(1) 6-3/4″ Deep Green square.
(1) 6-1/2″ Blue Sky Square.
(1) “A” Block
Cut the 9-3/4″ Blue Sky square on both diagonals. You will make (4) triangles. These are the Side Setting Triangles, (SSTs), shown in yellow above. You will only need (3) of the Blue Sky triangles. The fourth one (on the bottom) will be made by cutting the 6-3/4″ Deep Green triangle along the diagonal.
For those of you who are pointing out that this puts the bias edge on the edge of the block, I know. The alternative is to cut (2) 9-3/4 squares on the diagonal, a blue sky one for the three edges and a deep green one for the bottom. You can do that if you like.
Cut both 5-1/4″ squares on one diagonal. These are the Corner Setting Triangles, (CSTs), shown in pink above.
You will make (2) that are Blue Sky and (2) that are Mottled Green.
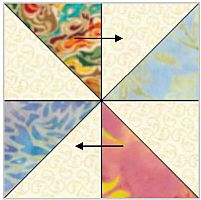
Sew a Blue Sky SST to both sides of a 6-1/2″ Blue Sky square. Press to the SST. Press as shown below. Sew a Blue Sky CST to the top of this unit. If necessary, square up that edge. Don’t cut off the seam allowance! This is the upper left-hand side of your block.
To make the lower right-hand side, sew a Blue Sky SST to the left side of an “A” Block, rotated as shown below. Sew the Deep Green half to the other side. Press as shown. Sew the Mottled Green CST on top. If necessary, square up that edge. Don’t cut off the seam allowance!
Assemble:
(1) 6-1/2″ Blue Sky Square.
(1) “A” Blocks
(1) “B” Block
(1) Mottled Green CST
(1) Blue Sky CST
Sew this row in the configuration shown. Press as directed by the arrows.
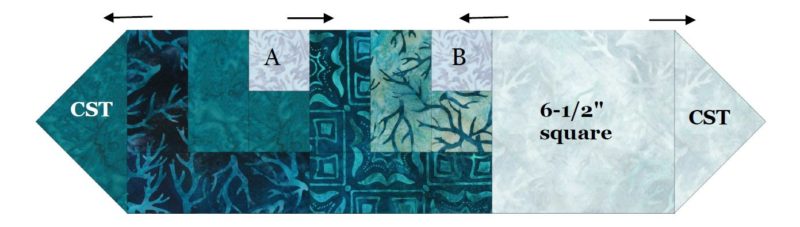
Sew this row between the corners you just made. Press and square up if necessary. You have made the Arctic Mtns Block!
Please add moc.hsadparcs@sirk to your contacts list to make sure you get the confirmation message. Drag the confirmation message from the Promotion tab to the Primary tab if you use Gmail.
If you are already a subscriber, it’s okay to fill out this form. You won’t be put on the mailing list twice.