Bean There, Week Ten
Note: This post may contain affiliate links. That means we may earn a commission at no additional cost to you if you purchase via our links. Not all links are affiliate links. I only recommend products I use and trust. As an Amazon Associate, I earn from qualifying purchases.
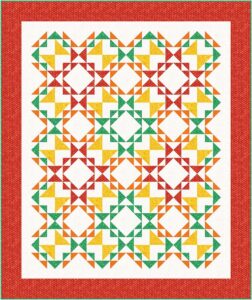
Bean There final
You have probably guessed that this week you would be putting the blocks together. Sew them in rows following the layout in Week Eight, pressing the block seams of the even rows to the right and the odd rows to the left. That will encourage them not to overlap when you sew the rows into the top.
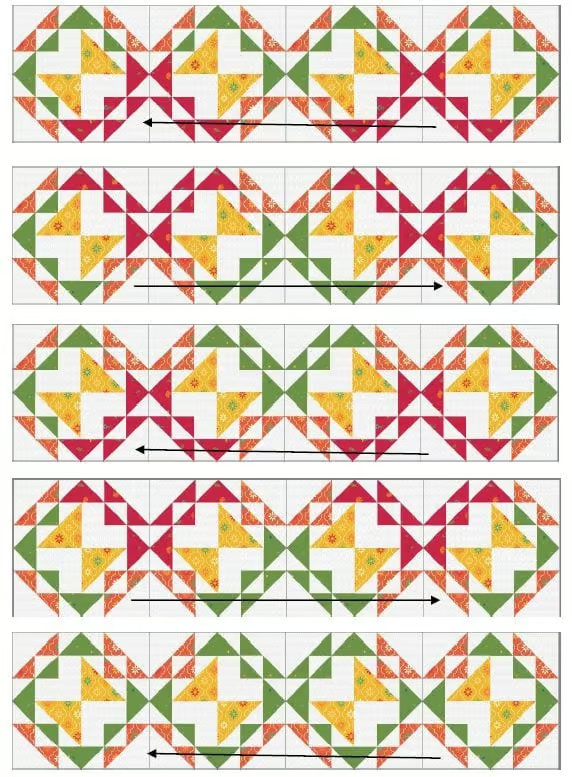
Sew the rows into a quilt top. Press from the back so you can fix any twisted seams.
Your quilt top should measure 48-1/2″ × 60-1/2″.
Adding the Borders
Assemble:
- The long 2-1/2″ wide first border strip, cut into (2) 60-1/2″ lengths and (2) 52-1/2″ lengths
- The long 5″ wide outer border strip, cut into (2) 64-1/2″ lengths and (2) 61-1/2″ lengths
- You made these in Week Five.
When adding borders, it’s always a temptation to simply sew on a strip and then cut off the excess. Don’t do that. Forcing your quilt to match identically cut borders will force it to remain flat.
If one side of the quilt is just the tiniest bit larger than the border, place the larger side down on the bed of your sewing machine when sewing on the border. Your feed dogs will try to pull the bottom fabric through the machine just slightly faster than the fabric on the top, thus taking up the slack. A walking foot will prevent this. If you don’t have one, pin carefully and ease to fit if necessary.
Using a walking foot, sew the (2) 60-1/2″ long first border strips to each side of the quilt top, taking care to match the center of the strip with the center of the quilt top. Press to the border.
Again using a walking foot and matching centers, sew the (2) 52-1/2″ long first border strips to the top and bottom of the quilt top. Press to the border.
Using a walking foot, sew the (2) 64-1/2″ long outer border strips to each side of the quilt top, taking care to match the center of the strip with the center of the quilt top. Press to the border.
Again using a walking foot and matching centers, sew the (2) 61-1/2″ long outer border strips to the top and bottom of the quilt top. Press to the border.
You are done! Pin your top to the wall for a couple of days in an obvious place so you
can enjoy it and your family can praise you.
Be sure to make a label for it. Preserve your place in history—sign and date your quilts!
Sewalong Schedule
- Introduction
- Week One: 5/10/25. Making HSTs with Magic
- Week Two: 5/17/25. Three Methods of Making the Cat’s Cradle block.
- Week Three: 5/24/25. Making the Cat’s Cradle Red Blocks
- Week Four: 5/31/25. Making the Cat’s Cradle Green Blocks
- Week Five: 6/7/25. Catchup and Cutting Ahead
- Week Six: 6/14/25. Ten Methods of Making Flying Geese Blocks
- Week Seven: 6/21/25. Making More Flying Geese
- Week Eight: 6/28/25. Catchup and Sewing Ahead
- Week Nine: 7/5/25. Finally putting the blocks together
- Week Ten: 7/12/25. Adding the borders and finishing. Whew!
If you would prefer to work from a pattern, it is available here.
Don’t forget to sign up for the newsletter! Once a week, I send updates on quilt-related information I have found while wandering the web. This might be an inspiring article, a tip or tutorial I have discovered (or written), and occasionally exclusive offers & discounts as well as immediate access to the secret page of free patterns, guides, and printables. You can follow my page on Facebook, or join the Make Believe Quilters group, too.