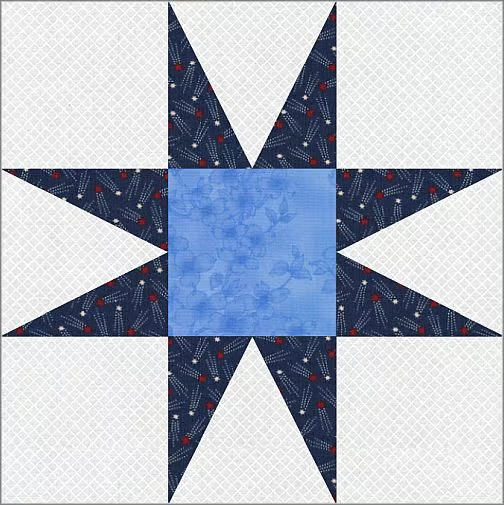
Making the Glowing Star Quilt Block with the V-Block Ruler
Note: This post may contain affiliate links. That means we may earn a commission at no additional cost to you if you purchase via our links. Not all links are affiliate links. I only recommend products I use and trust. As an Amazon Associate, I earn from qualifying purchases.
Do you struggle with Triangle-in-a-Square quilt blocks? They do make wonderful patterns, like Storm at Sea, but it can be tricky to make them in different sizes and square them up. Sewing those angles has always seemed to be a problem for me. Then I discovered the V Block Ruler.
How to use the v-block ruler
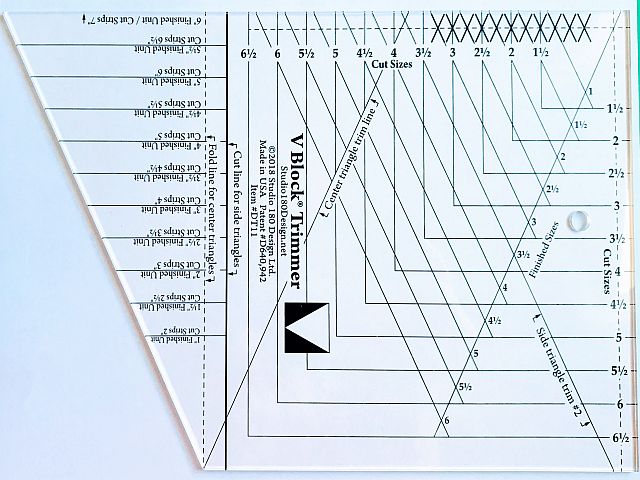
This block has (4) V-Blocks that make the points on the stars. I am going to use the V-Block Trimmer Ruler #DT11 to make these points but you can substitute the Tri-Recs ruler or any other Triangle-in-a-square ruler if you prefer. This is a 3-1/2″ unfinished unit, which will be 3″ finished.
Assemble:
- (1) 4″ wide strips of Deep Blue
- (1) 4″ wide strips of Background
- (4) 3-1/2″ Background Squares
- (1) 3-1/2″ Medium Blue Squares
- V-Block Trimmer Ruler #DT11
I need (4) 3-1/2″ square Triangle-in-a-Square blocks to make a 9″ (finished) Glowing Star. To make them using the V Block Ruler from Studio 180, I needed to cut:
- (1) 4″ wide strip of dark blue fabric by the WOF (Width of Fabric) and
- (1) 4″ wide strip of background fabric by the WOF (Width of Fabric)
To make this block, start with a strip of fabric 1″ wider than the finished size of the block you are making. In this case, I am making a 3″ finished block, so my strips are 4″ wide.
Making the Center Triangle
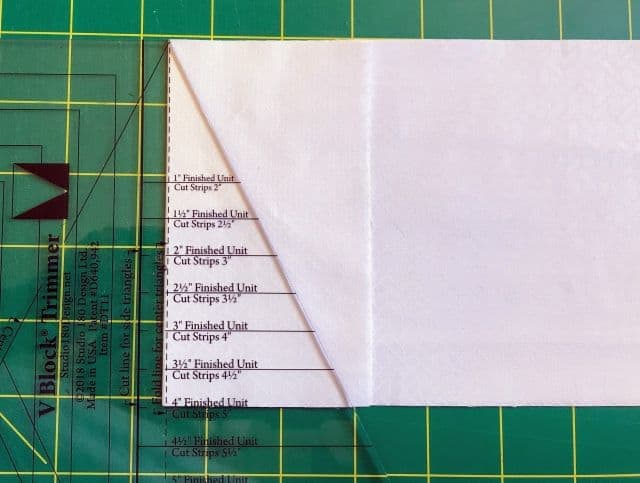
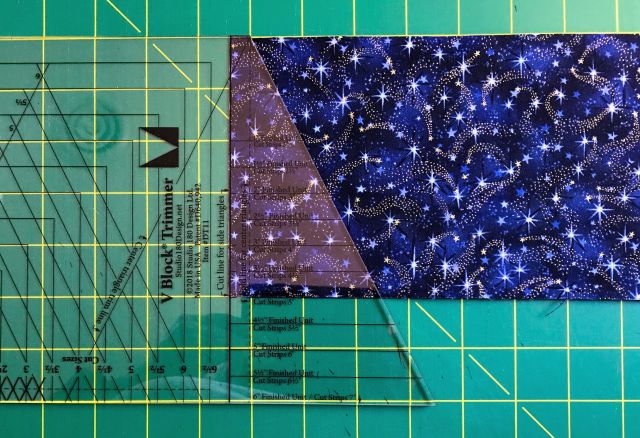
To make the center triangle, you start with part of the strip folded over on itself. Place the ruler so that the dotted line that says “Fold line for center triangles” along the straight edge of the fabric. If you use the solid line, the triangle will be too large. (Ask me how I know.) The bottom of the strip should match up with the line on the ruler that represents the finished size of the eventual block. Cut on the slanted edge of the fabric.
Please note: in the picture below, I am making 4″ finished blocks.
Flip the fabric so the angle you just cut is in the opposite direction. This gives you one cut side of the triangle. Cut along the other side. You now have two triangles! Continue this process until you have made 8 triangles.
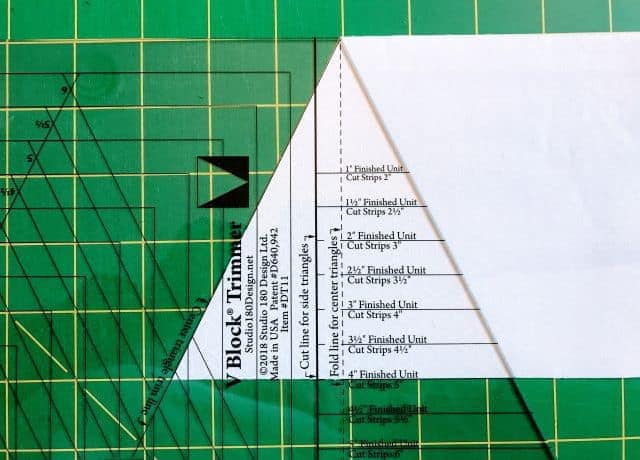
Making the Side Triangles
Making the side triangles is a little trickier. Straighten the edge of the strip, removing the selvage, and place the two strips wrong sides together. That way you will be cutting both the right side of the block and the left side of the block at the same time.
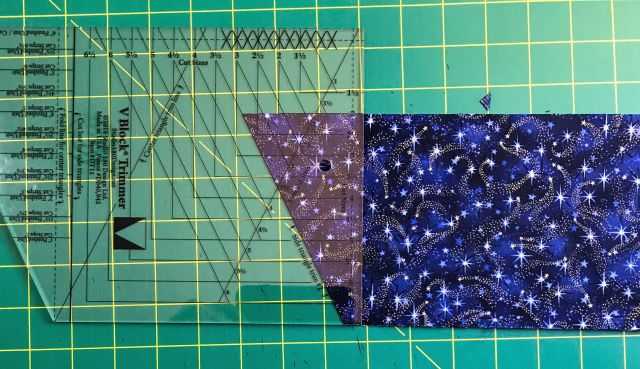
Place the flat tip of the ruler along the top of the strip, the solid line along the cut side edge, and the 4″ line along the bottom. Cut along the angled edge.
Leaving the strip in place, turn the ruler upside down, aligning the cut angle with the line that says “Side Triangle Trim #2”. Slide the ruler so the flat tip is along the bottom. Make a straight cut along the side of the ruler.
You are back at the beginning again. Continue this process until you have made all the side triangles that you need for your project.
Putting the Triangle-in-a-Square Block together
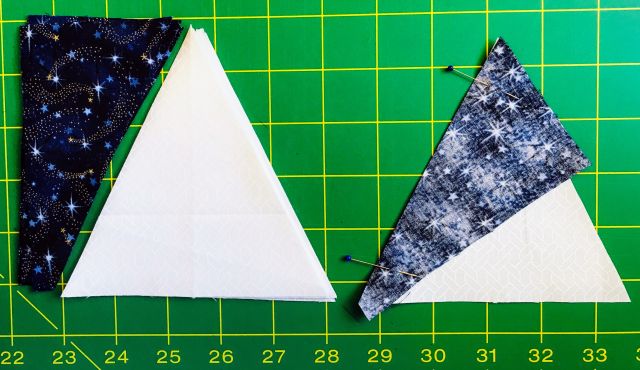
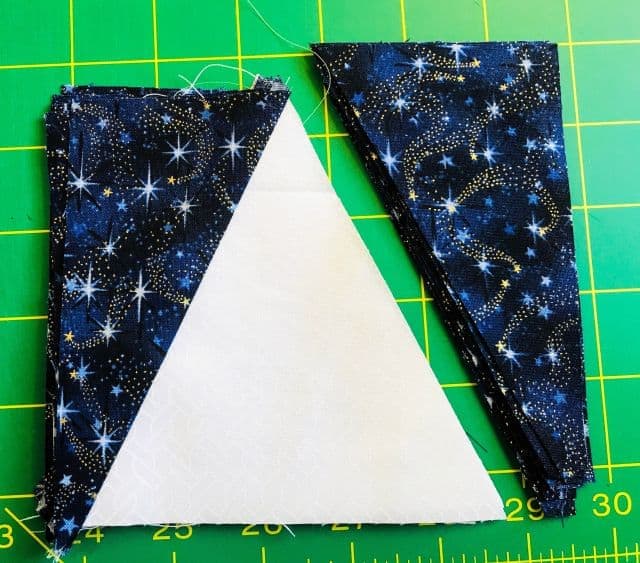
Separate your left and right side triangles and lay them on either side of your center triangle, right sides up.

Matching the cut edges, chain stitch all the left-hand triangles to the center triangle.
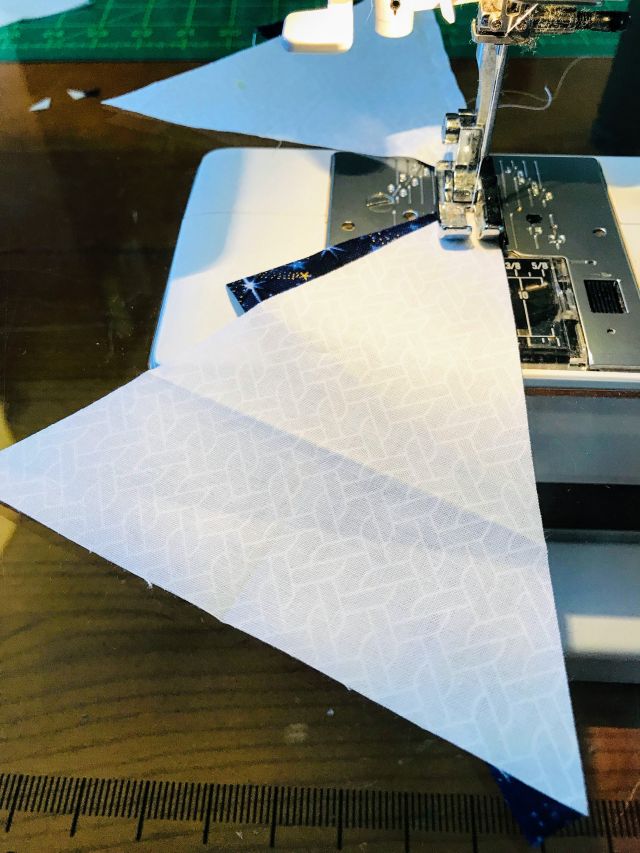
Press to the dark and repeat for the other side.
Press.
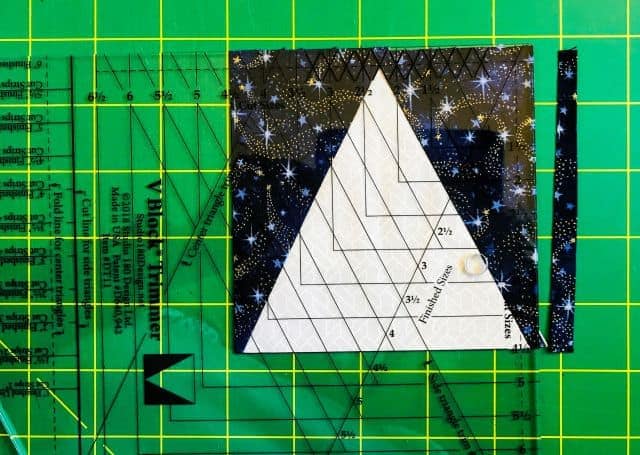
Now it is time to square up your blocks!
Place the ruler on top of your block so the lines of the 4″ V align with the seam of the center triangle.
Trim along the side and top.
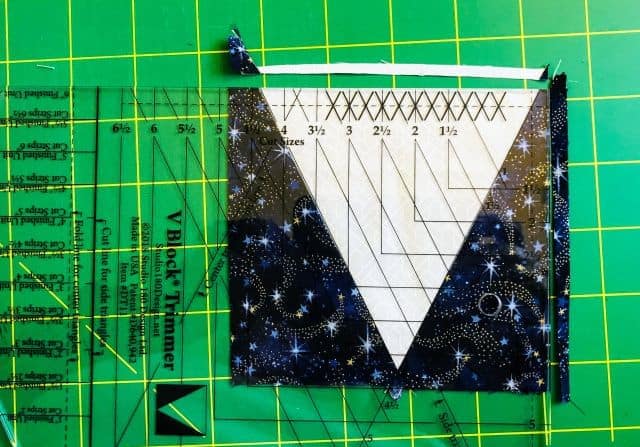
Now turn the block over and match up the 4-1/2″ line along the bottom and the X along the top. The X should match up with your point. Trim along the side and top.
Your block is now square!
Don’t forget to sign up for the newsletter! Once a week, I send updates on quilt-related information I have found while wandering the web. This might be an inspiring article, a tip or tutorial I have discovered (or written), and occasionally exclusive offers & discounts as well as immediate access to the secret page of free patterns, guides, and printables. You can follow my page on Facebook, or join the Make Believe Quilters group, too.