Making the Octopus Arms Quilt Block for World Octopus Day
Note: This post may contain affiliate links. That means we may earn a commission at no additional cost to you if you purchase via our links. Not all links are affiliate links. I only recommend products I use and trust. As an Amazon Associate, I earn from qualifying purchases.
Because the World Octopus Day is October 8, I thought that might be a nice thing to celebrate this fall!
The pattern is available for free to subscribers at the bottom of the page. If you’d rather just print, click the green Print Friendly button under the designer list. If that doesn’t work, try Ctrl + P (or Flower + P) to bring up the printer dialog box.

The Octopus Arms Block is the block I used to create the border in the Inky pattern. If you put four of these blocks together, you can make your own octopus! (If you prefer applique, read the Octopus Garden tutorial.) Here is how to make two at a time.
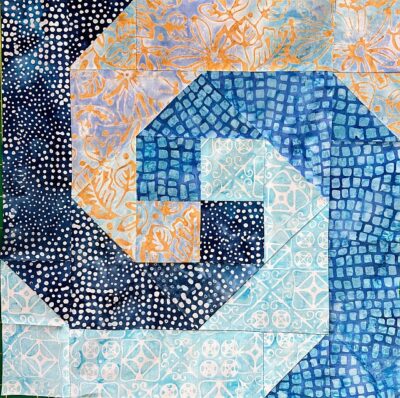
The Octopus Arms Quilt Block
This block is a variation of the snail trail quilt block. It starts out the same, but then veers off to become its very own Cephalopod. I used fabric from the Icy Embers batik collection at Connecting Threads, but you don’t have to make it in blue. The octopus is a master of disguise. What would this look like in red?
Fabric Requirements
- (12) 2-1/2″ squares, (4) Light, (4) Medium Light, (2) Medium Dark, and (2) Dark.
- (8) 3″ squares, (2) Light, (2) Medium Light, (2) Medium Dark, and (2) Dark.
- (4) 3-7/8″ squares, a Light, a Medium Light, a Medium Dark, and a Dark. Cut all the 3-7/8″ squares on the diagonal, creating 8 triangles in total. (2 of each color)
- (4) 5″ squares, a Light, a Medium Light, a Medium Dark and a Dark. Cut all the 5″ squares on the diagonal, creating 8 triangles in total. (2 of each color)
- (2) 2-1/2″ × 6-1/2″ Medium Light rectangles
- (2) 2-1/2″ × 6-1/2″ Light rectangles
- (2) 2-1/2″ × 8-1/2″ Dark Medium rectangles
- (2) 2-1/2″ × 8-1/2″ Dark rectangles
Making The Center of the Block
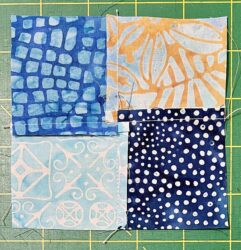
This block starts with a Four-Patch.
To make it, sew a 2-1/2″ medium light square to a 2-1/2″ medium dark square as shown to the left. That will be the top part of the block. To make the bottom part, sew the 2-1/2″ dark square to the 2-1/2″ light square. Sew the two rows together as shown.
Press to the dark, or twirl your center seam so the block lays flat. Your blocks should measure 4-1/2″ square. Make (2) blocks.
Using the (4) 3-7/8″ squares that have been cut on the diagonal, sew a Light triangle to the side of both of the four-patch blocks that you just made, orienting the darkest side of the four-patch block to the right. Tip: Fold the triangle in half and pinch the fold with your fingers before sewing. That will help you mark the center of the triangle so you can match it up with the center of the four-patch.
See the picture below. Sew a Medium Light triangle to the bottom of the blocks. Press to the triangle.
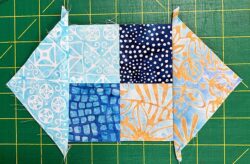
Sew a Dark triangle to the right side of both blocks and press to the triangle. Sew a Medium Dark triangle to the left side of both blocks and press to the triangle. Square up your blocks to 6-1/4″. Tip: When you square up your blocks, take care to maintain the seam allowance 1/4″ from the point of the inside block. Make 2 blocks.
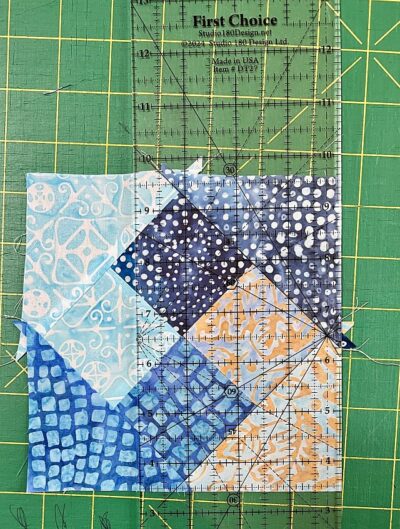
The ruler above is the First Choice ruler from Studio 180. This is a handy ruler to have when you are squaring up odd sizes. As you can see, all you have to do is lay the angled lines on the ruler on the block. They converge 1/4″ inside the ruler so if you cut along the side of the ruler, you automatically create the 1/4″ seam allowance. Tip: If it doesn’t, it’s probably due to your seams. Even a few threads off can make a difference. But in this block, it doesn’t matter, as you will be adding another set of triangles and squaring up the new block.
Using the (4) 5″ squares that have been cut on a diagonal, sew a Light triangle to the top right of the blocks you just made, taking care to orient the darkest side of the four-patch block below it. Press to the triangle. Tip: As you are sewing on the triangle, aim for the X made by the seams of the four-patch. If you sew through that, you will not accidentally blunt the tips of the four-patch where it intersects with the triangle.
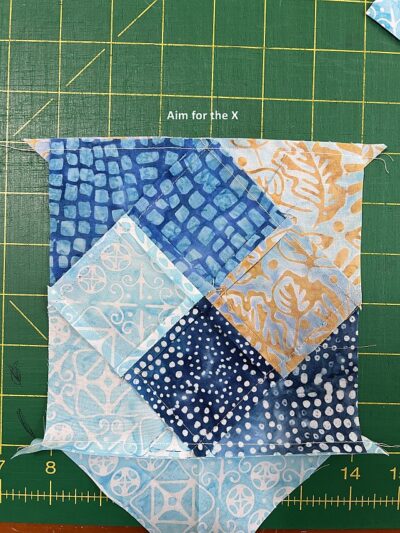
Sew a Medium Light triangle to the bottom left of both blocks. Press to the triangle.
Sew a Dark triangle to the bottom right of both blocks and press to the triangle.
Sew a Medium Dark triangle to the top left side of both blocks and press to the triangle.
Square up your blocks to 8-1/2″ × 8-1/2″. Make 2 blocks.
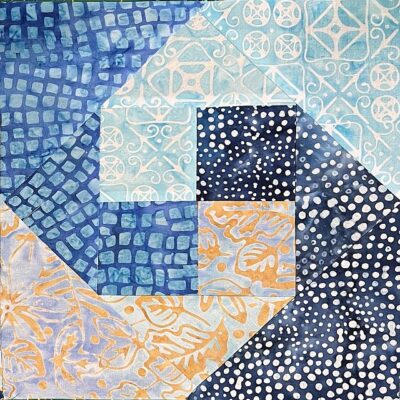
Adding the Borders
The borders are what transforms this block from a Snail Trail Quilt Block to an Octopus Arms Quilt Block.
Using the 3″ squares, make (8) Half-Square-Triangle blocks (HSTs.)
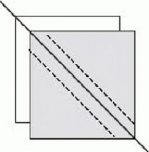
The Traditional Method of making Half Square Triangle Blocks (HSTs) is to place a 2-7/8″ dark square right sides together with a 2-7/8″ light square. Draw a diagonal line on the back of one square. Sew 1/4″ on both sides of the line.
Cut on the line and press to the dark. You will have made two blocks which measure exactly 2-1/2″ square.
My personal preference is to cut the original squares slightly too large (3″) and square up the HST to 2-1/2″ later on. For these blocks, you will need to make (8) HSTs. Make (2) Light /Dark HSTs; (2) Medium Light/Dark HSTs; (2) Medium Light /Dark Medium HSTs and (2) Light /Dark Medium HSTs.
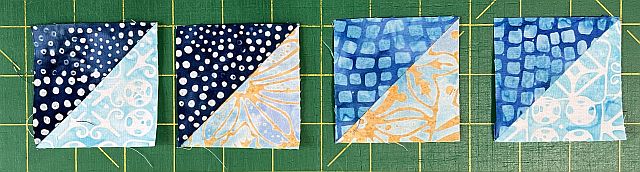
I experimented a little bit with 2-1/2″ square rulers here. Which one do YOU like the best?
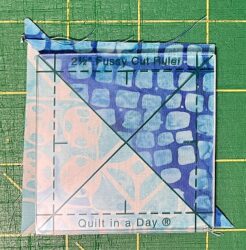
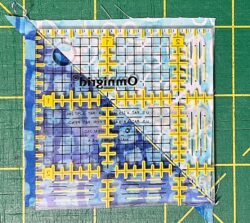
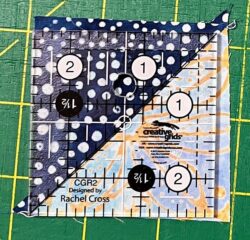
Border A: Sew a 2-1/2″ × 6-1/2″ Light rectangle to the left side of a Light/Dark Medium HST, matching the colors and HST angle as shown below. Make (2) and press to the HST. They should measure 2-1/2″ × 8-1/2″.
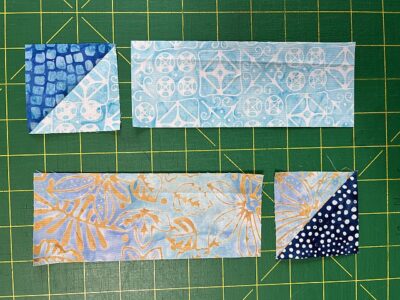
Border B: Sew a 2-1/2″ × 6-1/2″ Medium Light rectangle to the right side of a Light Medium/Dark HST, matching the colors and HST angle as shown above. Make (2) and press to the HST. They should measure 2-1/2″ × 8-1/2″. Sew these to the sides of the blocks you just made, matching colors and design as shown.
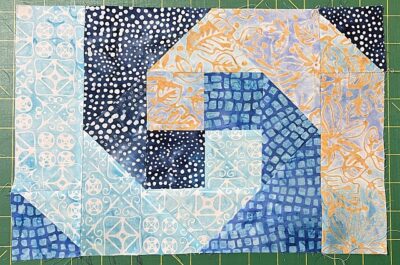
Border C: Sew a 2-1/2″ × 8-1/2″ Dark Medium rectangle to the left side of a Light Medium /Dark Medium HST, matching the colors and HST angle as shown below. Make (2) and press to the HST. They should measure 2-1/2″ × 10-1/2″. Then sew a 2-1/2″ Medium Light square to the right side of the border. Make (2) and press to the HST. They should measure 2-1/2″ × 12-1/2″.
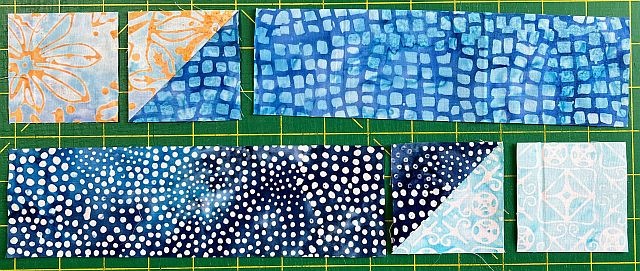
Border D: Sew a 2-1/2″ × 8-1/2″ Dark rectangle to the right side of a Light/Dark HST, matching the colors and HST angle as shown above. Make (2) and press to the HST. They should measure 2-1/2″ × 10-1/2″. Then sew a 2-1/2″ Light square to the left side of the border . Make (2) and press to the HST. They should measure 2-1/2″ × 12-1/2″.
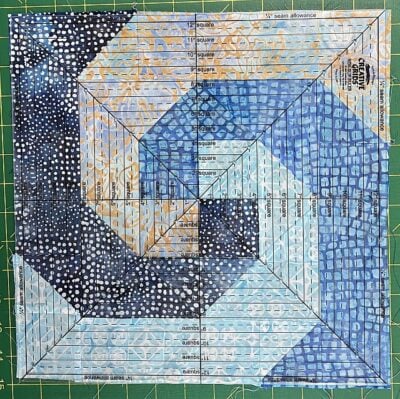
Sew these Borders to the (2) blocks you just made. Press to the center and square up to 12-1/2″ if necessary. The ruler in the picture is the CGRS12 Square it Up or Fussy Cut ruler. You are done! Now you only have to decide what to do with your Octopus Arms blocks.
An Octopus Arms Mini-Quilt
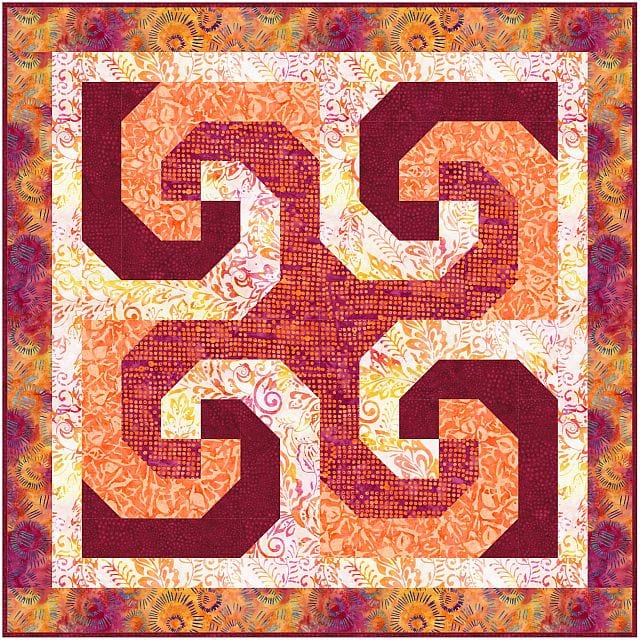
Here it is in the red fabric from the Icy Embers batik collection at Connecting Threads.
Please add moc.hsadparcs@sirk to your contacts list to make sure you get the confirmation message. Drag the confirmation message from the Promotion tab to the Primary tab if you use Gmail.
If you are already a subscriber, it’s okay to fill out this form. You won’t be put on the mailing list twice.