Rising Star Quilt Block – #QuiltBlockMania
Note: This post may contain affiliate links. That means we may earn a commission at no additional cost to you if you purchase via our links. Not all links are affiliate links. I only recommend products I use and trust. As an Amazon Associate, I earn from qualifying purchases.
Here’s the Rising Star Quilt Block for July’s #QuiltBlockMania. The theme was “movie” – well, who is in movies if not movie stars? But since this is the 250th anniversary of the United States, I decided to make my movie stars patriotic. Be sure to check out the full list of designers at the bottom of the page.
The QST chart handout is available for free to subscribers at the bottom of the page. If you’d rather print just the tutorial, click the green Print Friendly button under the designer list. If that doesn’t work, try Ctrl + P (or Flower + P) to bring up the printer dialog box.
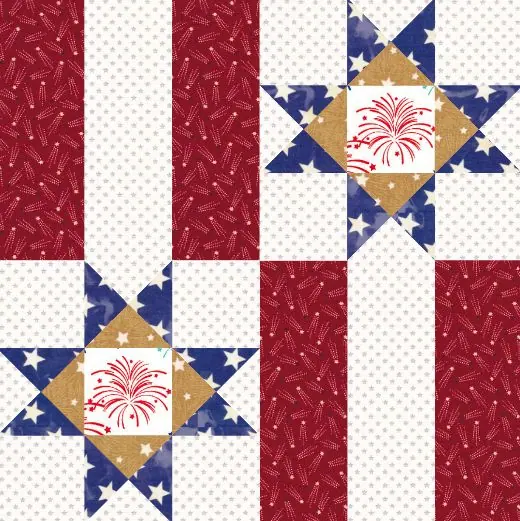
This is a fun block, but I didn’t like it too much in a quilt. I tried rotating every other block, but the layout created an unfortunate symbol. Ouch! I know that design had a long history as a good luck symbol, but today it carries a very different meaning. So I virtually made this table runner instead. Click on the image below to see it up close.

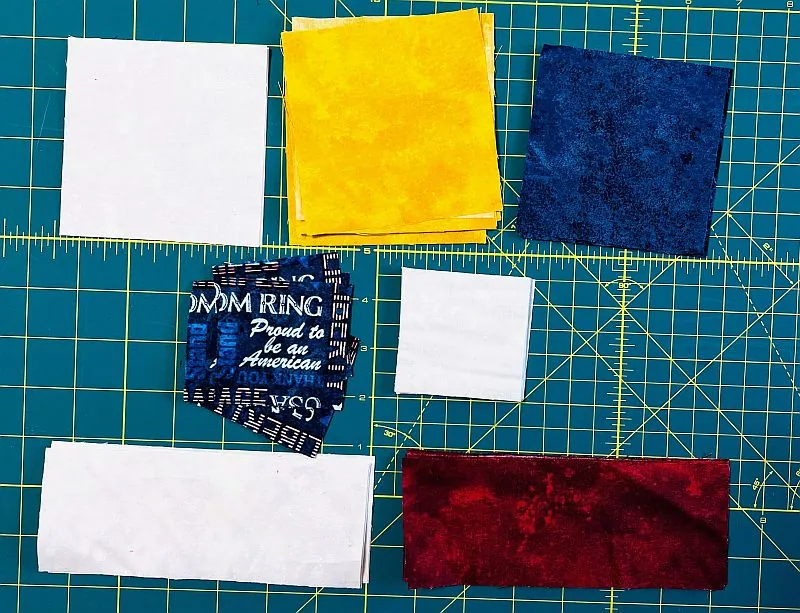
For the block, you will need:
Blue:
(4) 3-1/2″ Blue Squares
Gold:
(2) 3-1/2″ Gold Squares
White:
(2) 3-1/2″ White Squares
(8) 2-1/2″ White Squares
(2) 2-1/2″ × 6-1/2″ White Rectangles
Star Center:
(6) 2-1/2″ Fussy Cut star center
Red:
(4) 2-1/2″ × 6-1/2″ Red Rectangles
To Make the Rail Fence
Let’s start with something easy. Just sew a 2-1/2″ × 6-1/2″ White Rectangle between (2) 2-1/2″ × 6-1/2″ Red Rectangles. Press to the dark. Square up to 6-1/2″ if necessary. Make 2.

Here’s something you probably shouldn’t do. I didn’t have any starry fabric, so I used a fabric that was a little shiny. I didn’t figure out WHY it was shiny until I turned off the lights and realized it glowed in the dark. Ooops.
To Make the Stars
The Stars are made of 3-Color-Quarter-Square-Triangles (QSTs), highlighting a fussy cut center. I had a fabric with a lot of patriotic sayings so I fussy cut that. I find it is easiest to work from the back. I pick the motif I want, then draw a line around a ruler the same size as what I am fussy cutting. In this case, it’s 2-1/2″. If you have a 2-1/2″ ruler, you will be very happy with yourself.
To make the QSTs, I started with Half-Square-Triangles (HSTs) 1-1/2 times bigger than the FINISHED square. Since the finished square is 2″, I started with 3-1/2″ squares. You don’t have to memorize that formula. It’s in the chart handout at the bottom of this page.
I take pictures like the one below so I can remind myself how this unit is made. Place the 3-1/2″ squares right sides together, draw a line on the diagonal, sew 1/4″ on either side of the diagonal, cut apart and press. (These instructions are also in the chart handout.) Four squares make four HSTs. As you can see, two will be Blue and White and the other two will be Blue and Gold. Press to the dark but don’t bother to square up. There is one more step.
Place the HSTs right sides together, draw a line on the diagonal, sew 1/4″ on either side of the diagonal, cut apart and press. NOW you can square up to 2-1/2″. Remember that 2-1/2″ ruler? If you don’t have one, let me suggest that you buy the whole square-up set. It’s a little on the pricey side, but you will reach for those rulers again and again.
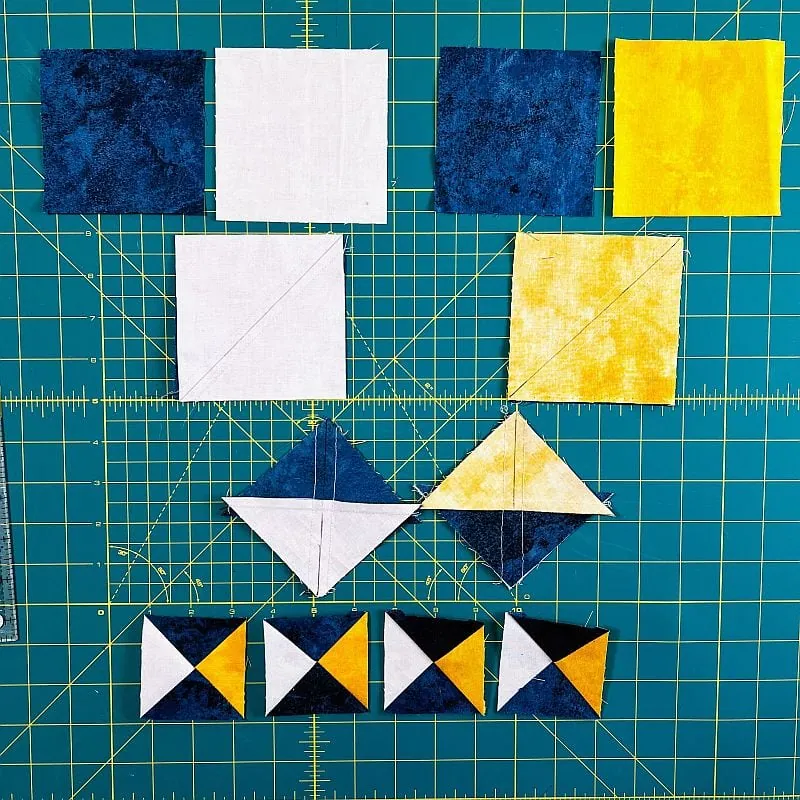
Making the Star Block
You are in the home stretch now! Just sew your blocks in rows, pressing the center row to the fussy cut block and the top and bottom rows to the corner blocks. That will help your seams nest when you sew the rows together. The seams should not overlap. Use pins if you need to! I am a big fan of Clover Patchwork Pins.
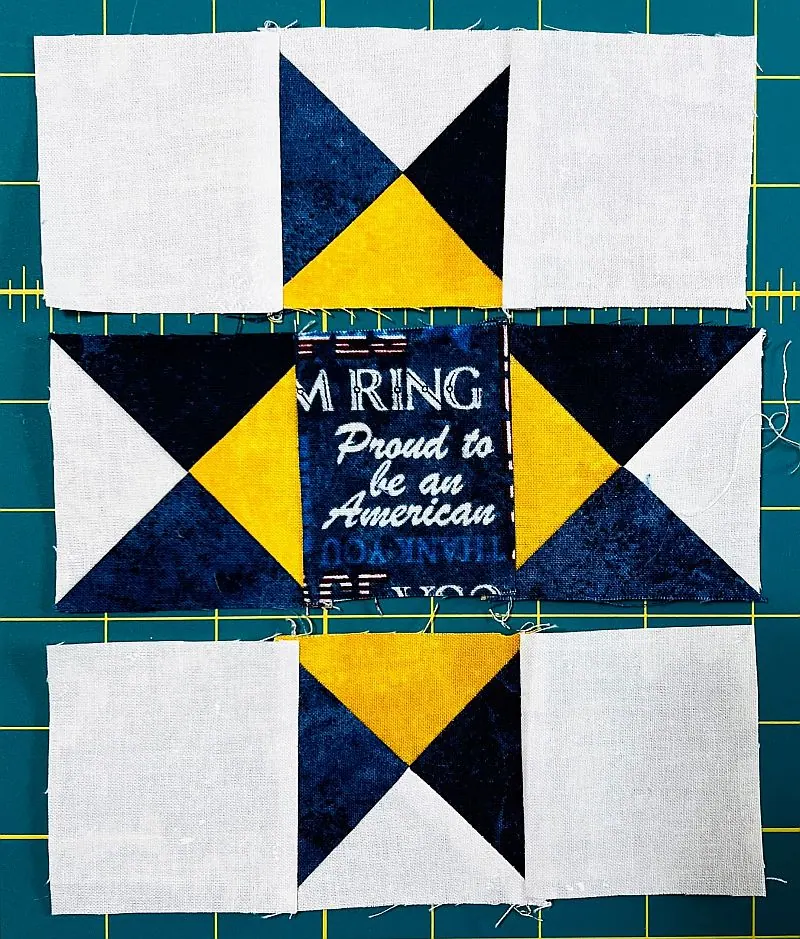
Here is the final star block. Sew a red and white Rail Fence block to the top of one block and the bottom of another. You want to make sure you can read the fussy cut saying when you put it all together.
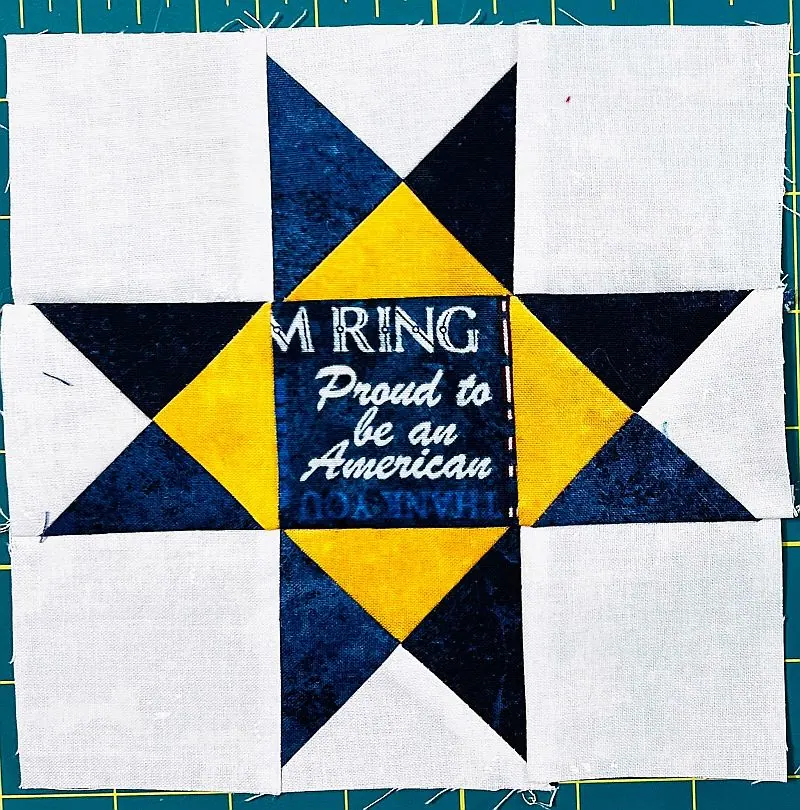
You are done! Isn’t it pretty? Make it into a mug rug, or make (3) for a table runner. It also might make a nice label for a Quilt of Valor. There is plenty of white space to write your sentiment.
The last sentence in almost all my patterns is: “Reserve Your Place in History: Sign and Date Your Quilts.” In other words, make a label.
Be Sure to Visit These Designers
Director’s Chair by Carolina Moore
Rising Star by Scrapdash
Movie Projector by Inquiring Quilter
Popcorn
Movie Camera by QuiltFabrication
Black and White by Studio B Quilt
Action! by Patti’s Patchwork
Movie Marquee
Scene 1 Take 2 Movie Clapper
Drive in Movie by Appliques Quilts and More
Red Carpet by The Kitschy Creative