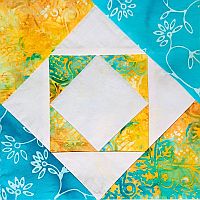
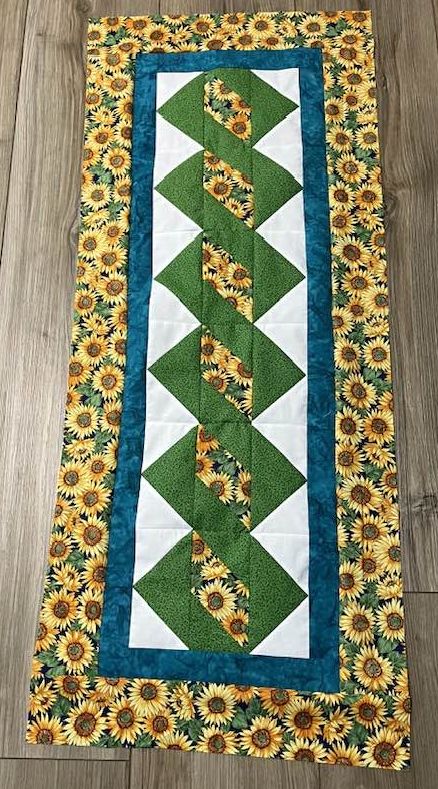
Sunflower Table Runner – Free Fall Quilt Pattern
Note: This post may contain affiliate links. That means we may earn a commission at no additional cost to you if you purchase via our links. Not all links are affiliate links. I only recommend products I use and trust. As an Amazon Associate, I earn from qualifying purchases.

There is a free pattern for newsletter subscribers at the bottom of the page. If you don’t want to sign up for the newsletter, you can use the Print Friendly button under the subscription box to print this page. If that doesn’t work, try Ctrl-P or Flower-P.
Sunflower Table Runner Quilt Pattern
Before starting this project, I recommend that you press your fabric with spray sizing. It will make it easier to cut small pieces. Take the time to clean your machine, put in a new needle, and fill a few bobbins. When pressing, just hold the iron over a spot for a moment or two. This pattern assumes a perfect 1/4” seam.
Fabric Requirements
- 1/4 yard white fabric, cut into (3) 9″ x 9″ squares.
- 1/2 yard green fabric, cut into (1) strip 7-1/2″ wide by the width of fabric. Cut that strip into (3) x 7-1/2″ x 7-1/2″ squares and
(12) 3-1/2″ x 3-1/2″ squares. You will also need (4) strips 2-1/2″ wide by the width of fabric for the binding. - 1/4 yard stripe for the first border, cut into (3) strips 2″ wide by the width of fabric. Cut these strips into (2) 36-1/2″ x 2″ rectangles and (2) 12-1/2″ x 2″ rectangles.
- 1/2 yard sunflower fabric for the outer border, cut into 4 strips 3-1/2″ wide by the width of fabric. From these strips, cut (6) 6-1/2″ x 3-1/2″ rectangles. Cut these strips into (2) 39-1/2″ x 3-1/2″ rectangles and (2) 18-1/2″ x 3-1/2″ rectangles.
- A Quilt-in-a-day Small Flying Geese Ruler ruler # 2006CC. If you aren’t sure how to use that ruler, read the overview below.
- Free Pattern at the bottom of this page.
How to Make 4 Flying Geese Quilt Blocks at once using the Quilt-in-a-Day Ruler
There are many, many ways to make a Flying Goose quilt block. This is just one of them. The overview below shows the Quilt-in-a-Day ruler #CC2007 but it comes in many different sizes.
Instructions are also included with the ruler. Note that you work with much larger pieces until the flying goose unit is completed and then you trim it with a Quilt in a Day Flying Geese ruler.
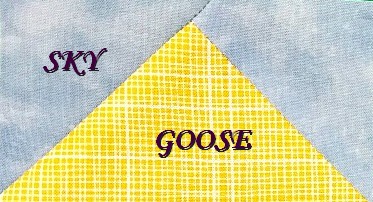
Start with a square of sky blue fabric 3″ larger than the length of your finished unit. Lay on top of that a square of goose fabric 1 ½” larger than the length of your finished unit, right sides together and roughly centered on the larger square.
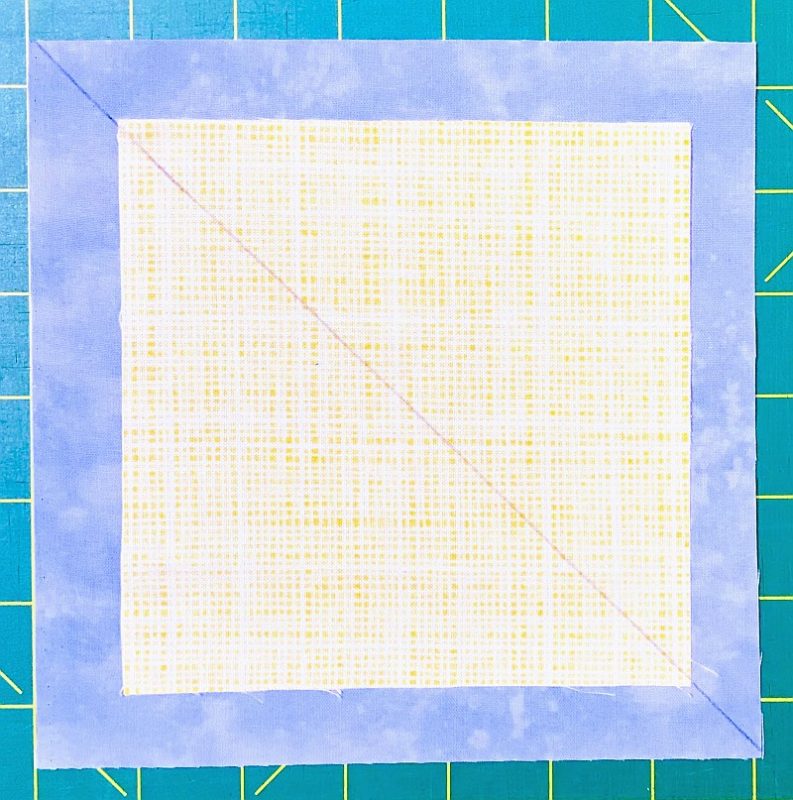
Draw a line through the diagonal of both squares. Pin carefully, then sew 1/4″ on either side of the diagonal. Cut on the line.
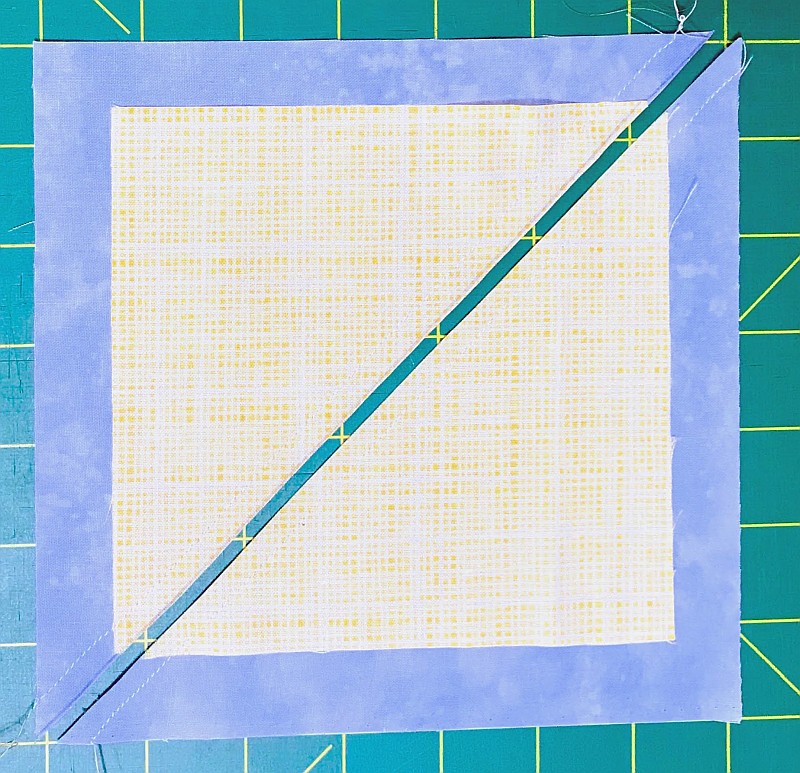
It’s going to look a little odd. Press to the larger triangle.
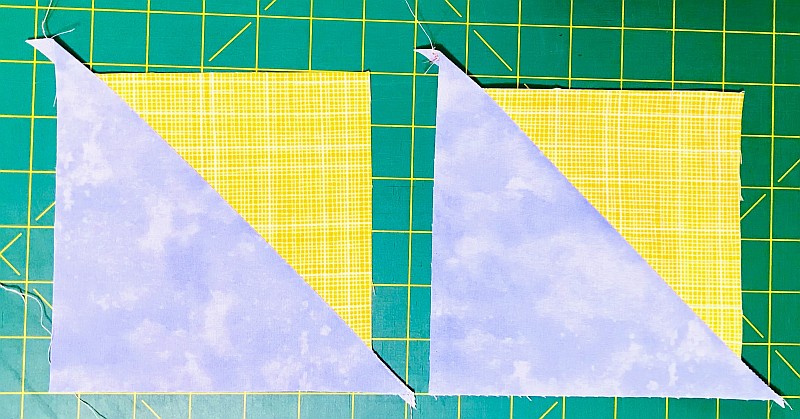
Lay your two odd shaped squares on top of each other, right sides together, matching the corners of the smaller triangle with the corners of the larger one. The seams WILL NOT touch each other. It’s okay, really.
Once again, draw a line on the diagonal (crossing the center seam), pin carefully, and sew 1/4″ on either side of the line. Cut on the line.
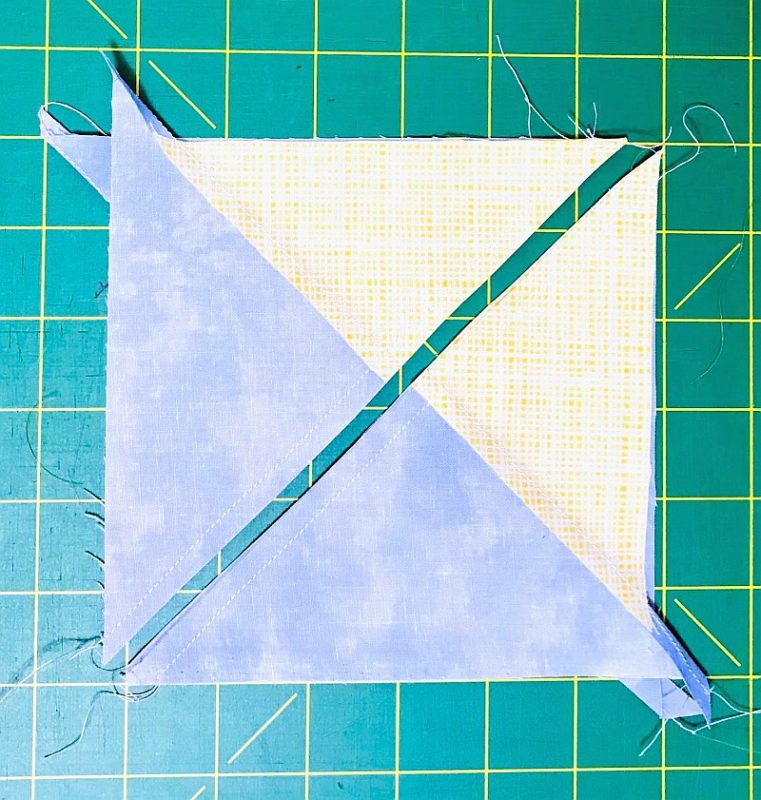
You should end up with a unit that looks like the one below. Make a small clip in the center of the seam so you can press both sides away from the goose.
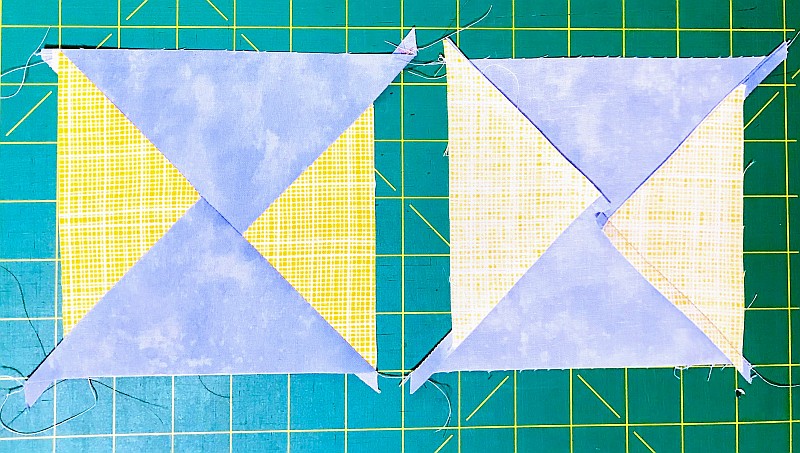
Now just cut this unit in half and square it up using the Flying Geese ruler.
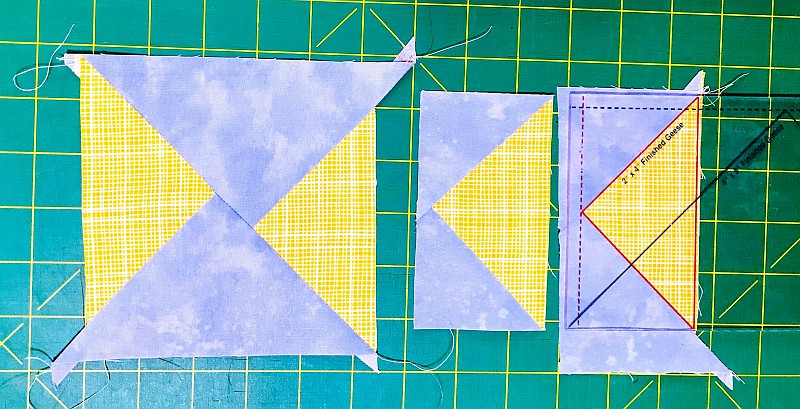
You have 4 perfect Flying Geese Blocks!
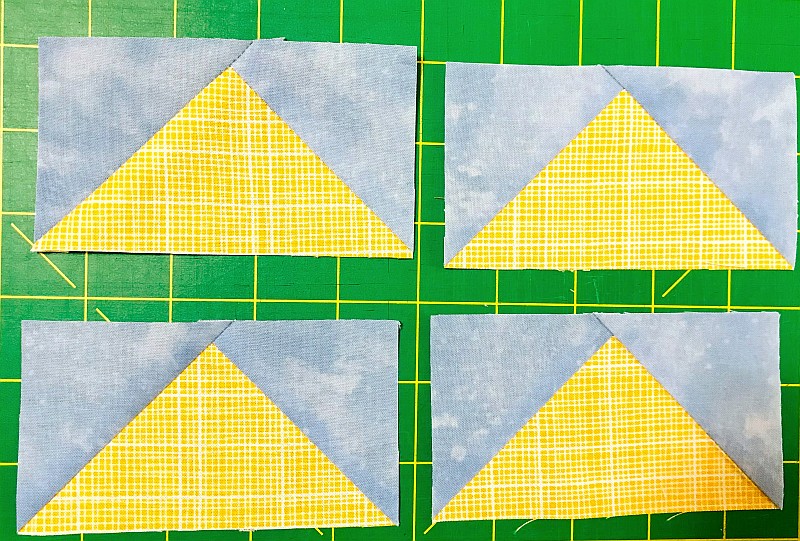
Make those Flying Geese Quilt Blocks!
Place a 7-1/2″ square of the green right sides together with a 9″ square of the white, roughly centered on the larger square. Draw a line through the diagonal of both squares. Pin carefully, then sew 1/4″ on either side of the diagonal and cut on the line. Refer to the pictures above.
Lay your two odd-shaped squares on top of each other, right sides together, matching the corners of the smaller triangle with the corners of the larger one.
Once again, draw a line on the diagonal (crossing the center seam), pin carefully, and sew 1/4″ on either side of the line. Cut on the line. Make a small clip in the center of the seam so you can press both sides away from the goose.
Press and cut this unit in half. Square it up to 3-1/2″ x 6-1/2″ using the Flying Geese ruler.
Using the (3) 9″ x 9″ white squares and the (3) 7-1/2″ x 7-1/2″ green squares, make (12) Flying Geese units.
Make the Diagonal Center Quilt Block
Draw a diagonal line on the back of all the 3-1/2″ × 3-1/2″ green squares. Place one of these squares right sides together with a 6-1/2″ × 3-1/2″ sunflower rectangle so that the diagonal line goes from the upper left corner to the right side. (diagram 1)
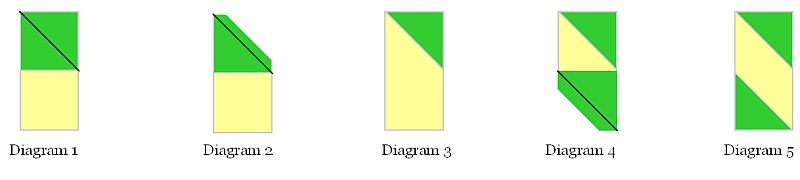
Sew on this line and trim 1/4″ to the right as shown in diagram 2. Press the triangle to the upper right, making the block a rectangle again. (diagram 3) Repeat this process in the lower half of the rectangle, as shown in diagram 4 and 5. Make 6 of these blocks and press to the center.
Creating the Quilt Block and Top
Sew a Flying Goose block to both sides of these blocks. Make 6 groups.
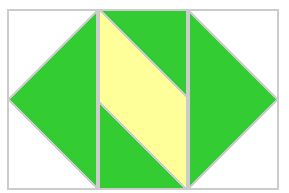
Sew these groups end to end, finger pressing the seams in alternate directions. Press from the back, taking care not to twist any seams. Your beanstalk should measure 36-1/2″ × 9-1/2″.
Adding the Borders
Sew the (2) 36-1/2″ × 2″ first border stripe rectangles to both sides of your beanstalk. Press to the stripe. Sew the (2) 12-1/2″ × 2″ first border stripe rectangles to the top and bottom. Press to the stripe.
Sew the (2) 39-1/2″ × 3-1/2″ outer border sunflower rectangles to both sides of your beanstalk. Press to the sunflowers. Sew the (2) 18-1/2″ × 3-1/2″ outer border sunflower rectangles to the top and bottom of your beanstalk. Press to the sunflowers.
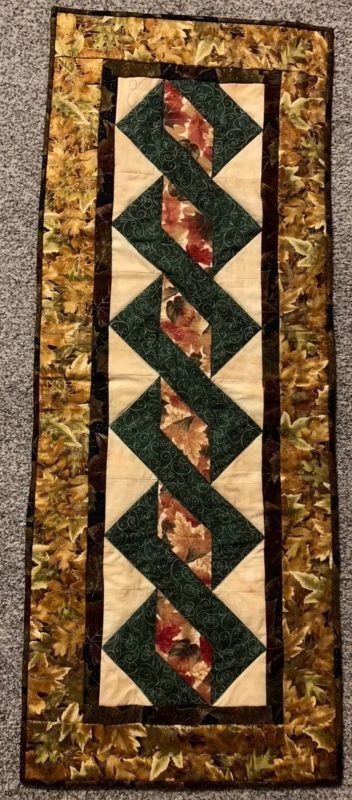
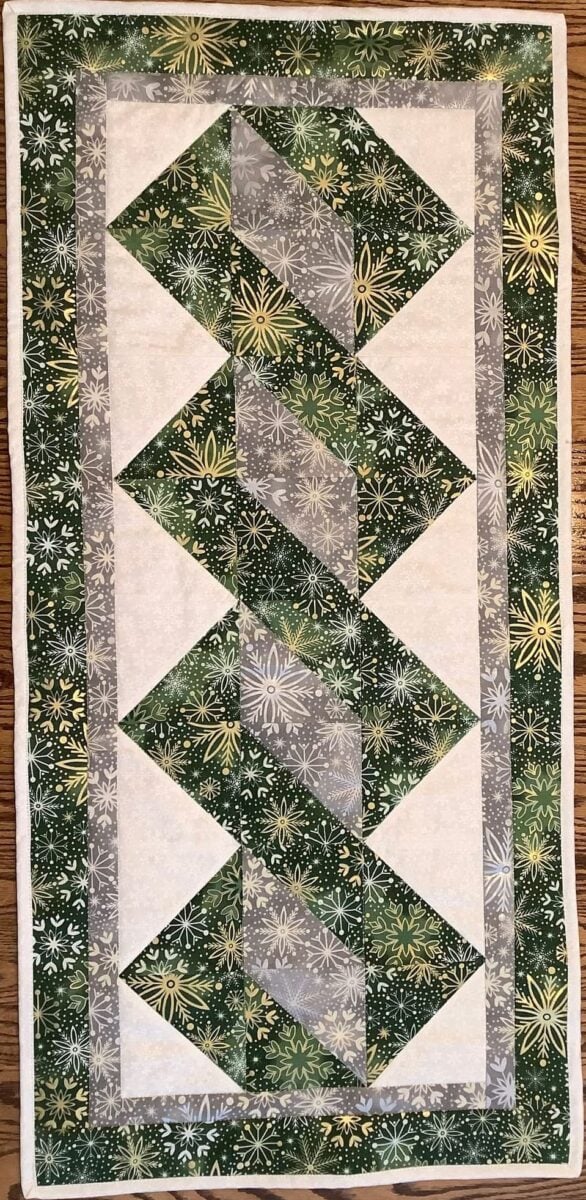
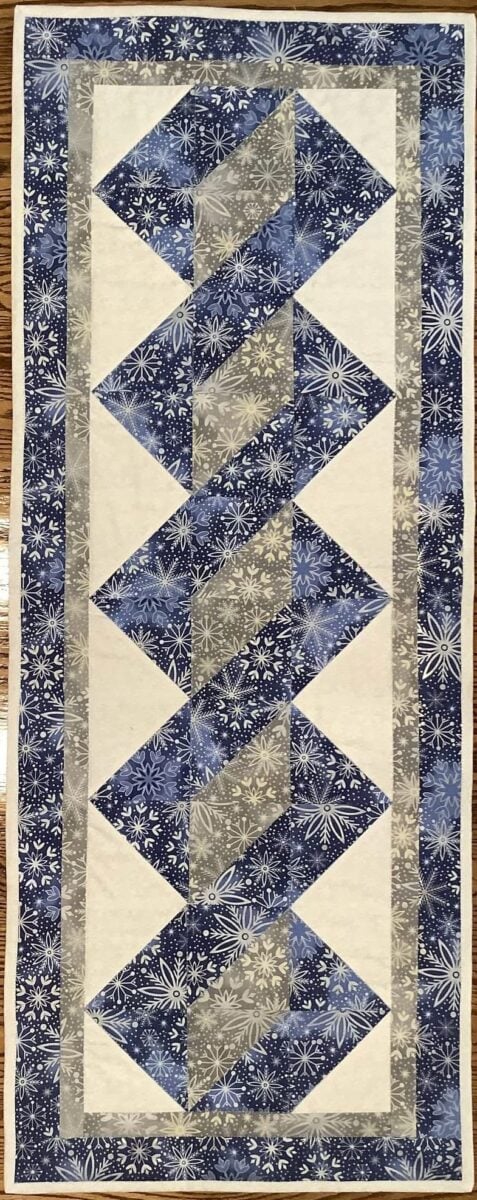
You are done! Press your entire table runner top, and pin it to the wall for a few days so you can enjoy it and your family can praise you. Quilt as desired, then bind with the green fabric. Don’t forget to label your quilt by signing and dating your work on the back.
Please add moc.hsadparcs@sirk to your contacts list to make sure you get the confirmation message. Drag the confirmation message from the Promotion tab to the Primary tab if you use Gmail.
If you are already a subscriber, it’s okay to fill out this form. You won’t be put on the mailing list twice.