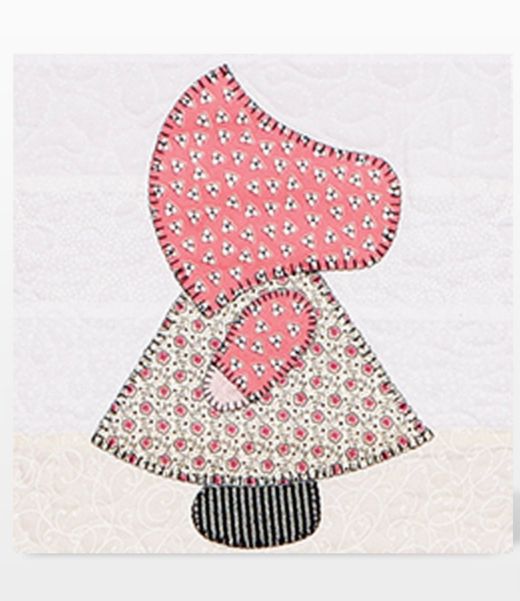
Quilt Labels – Time in a Bottle
Note: This post may contain affiliate links. That means we may earn a commission at no additional cost to you if you purchase via our links. Not all links are affiliate links. I only recommend products I use and trust. As an Amazon Associate, I earn from qualifying purchases.
When Carol of Just Let Me Quilt announced this blog hop, I couldn’t help but think of the song by Jim Croce:
If I could save time in a bottle
The first thing that I’d like to do
Is to save every day ’til eternity passes away
Just to spend them with you
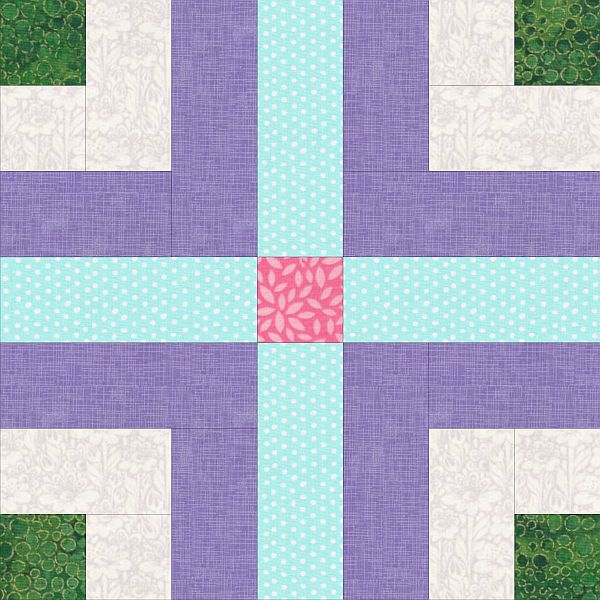
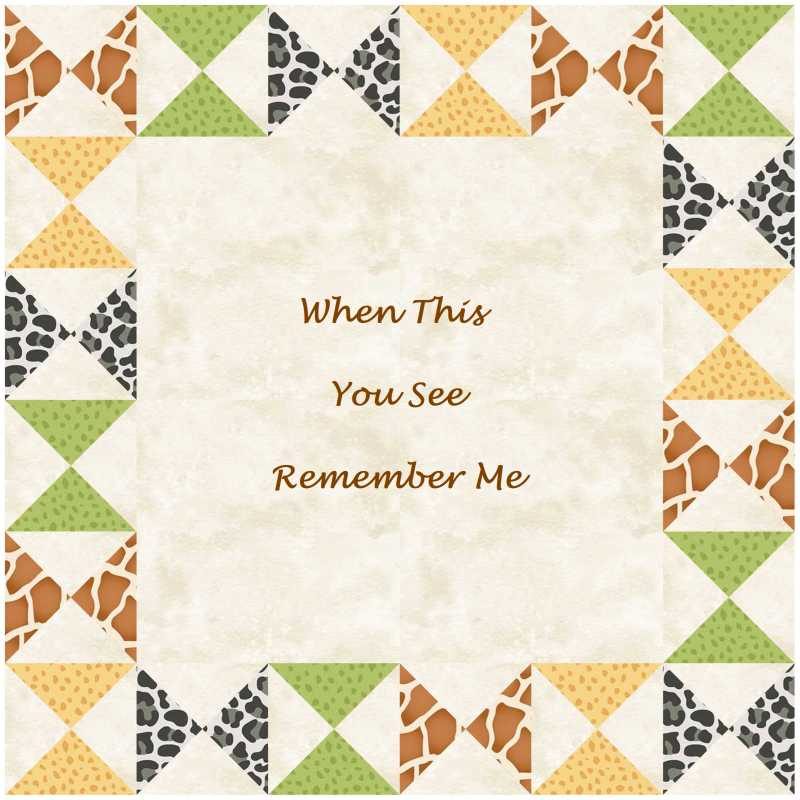
I was working on a pattern at the time that had extra QST blocks. I had decided to suggest that the quilter use those blocks to make a frame around a label when I realized a label was the perfect way to save Time in a Bottle.
Why should you add a label to your quilt?
A label will tell generations to come the story of this quilt: Who, What, When, Where, and Why. It will help identify the quilt should it become lost and will increase the value of the quilt at appraisal time.
A quilt label can be as simple as a signature on the back or as elaborate as a heavily decorated two-page story. If you only have time for a quick label, just sign and date the back of the quilt with archival ink (acid-free) quality pen. Or you could embroider, cross-stitch, or stamp your name and date on the front of the quilt as part of the design.
Preserve your place in history—sign and date your quilt.
For more information on Creating Quilt Labels, read the article here.
The Traditional Method of Making
Quarter Square Triangle (QST) Blocks
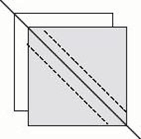
To make QSTs, you start with Half Square Triangle quilt blocks. The Traditional Method of making Half Square Triangle Blocks (HSTs) is to place a dark square 7/8″ larger than the desired finished size right sides together with a light square of the same size. Draw a diagonal line on the back of one square. Sew 1/4″ on both sides of the line. Cut on the line and press to the dark.
My personal preference is to cut the original squares slightly too large and square up the HST later on. However, you are making Quarter Square Triangles (QSTs) using these HSTs so you may prefer to skip this step. Make a test block using both methods to see which gives you the best results.
To make a QST, lay (2) HSTs right sides together with opposite colors touching. Draw a diagonal line on the back of the top HST going through the seam. Sew 1/4″ on either side of this seam. Set your seam by pressing the sewn block, then cut it apart on the diagonal line.
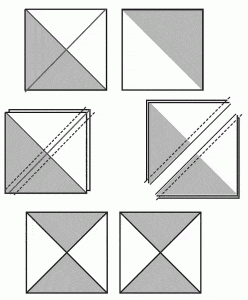
Here’s a Tip: Don’t take each piece out of the machine after you sew it. Start the next piece immediately without cutting the thread. This is called chain piecing and it makes continuous sewing much easier.
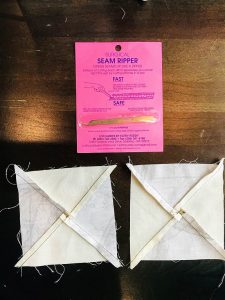
After you have made the QST block, you will have to square up the block. Before you do that, here is a trick that will help you reduce bulk anywhere you have an intersection.
Finger press open the center seam, then pick a couple of stitches out of the center. I am a big fan of the Surgical Seam Ripper, but be careful! It is SHARP. The seam won’t ravel because the second seam will hold it. Push two of the seams in opposite directions so each seam covers one patch. You know you have done it right if the seam twirls around the intersection giving you a tiny four-patch in the middle.
There are two ways you can square up your block. You can place a square ruler so the diagonal line is directly over the seam and just cut two sides. Quilt-in-a-Day has a Square Up Ruler that uses this method.
Or you can press open the block (pressing to the dark) and square it up using a ruler the same size as the block you are making. A fussy-cut ruler with lines on both diagonals will be very helpful with this.
Please add moc.hsadparcs@sirk to your contacts list to make sure you get the confirmation message. Drag the confirmation message from the Promotion tab to the Primary tab if you use Gmail.
If you are already a subscriber, it’s okay to fill out this form. You won’t be put on the mailing list twice.