Sweet & Simple Scrappy Free Block Pattern
Note: This post may contain affiliate links. That means we may earn a commission at no additional cost to you if you purchase via our links. Not all links are affiliate links. I only recommend products I use and trust. As an Amazon Associate, I earn from qualifying purchases.
Give your fabric scraps a new life! This Super Simple Scrappy block will make a cute little Spring wallhanging or table topper. Make as many blocks as your heart desires!
This is a free pattern for subscribers. The form is at the bottom of the tutorial. If you don’t want to subscribe, just click on the large green Print Friendly button at the bottom of this page above the comments.
Before starting this project, I recommend that you press your fabric with spray sizing. It will make it easier to cut small pieces. Take the time to clean your machine, put in a new needle, and fill a few bobbins. When pressing, just hold the iron over a spot for a moment or two. This pattern assumes a perfect 1/4” seam.
Super Simple Scrappy Quilt Block
Cutting Instructions – Choose your own colors. I only show these colors so they would match the sample.
Background
Cut (2) strips 3-1/2″ wide by the WOF. From those strips, cut (16) 3-1/2″ squares.
Dark Green
Cut (2) 2-1/2″ squares.
Stem Green
Cut (2) 2-1/2″ squares
Blue # 2
Cut (2) 2-1/2″ squares.
Blue # 3
Cut (2) 2-1/2″ squares.
Yellow
Cut (2) 2-1/2″ squares.
Making the Units
Assemble:
- (16) 3-1/2″ Background Squares
- (10) 2-1/2″ x 2-1/2″ squares: (2) Blue # 2; (2) Blue # 3; (2) Yellow; (2) Stem Green; and (2) Dark Green
Draw a diagonal line in pencil on the back of the 2-1/2″ colored squares. Place the colored square right sides together in one corner of a Background square so that the pencil line connects the two sides as shown. Stitch on the line.
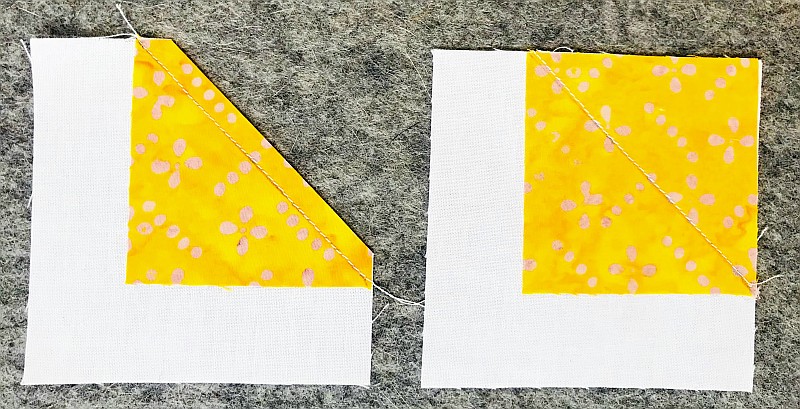
Create (10), 2 from each color. Flip the small square over the seam and press to the corner. If the edges match, you can trim the excess on the underside.
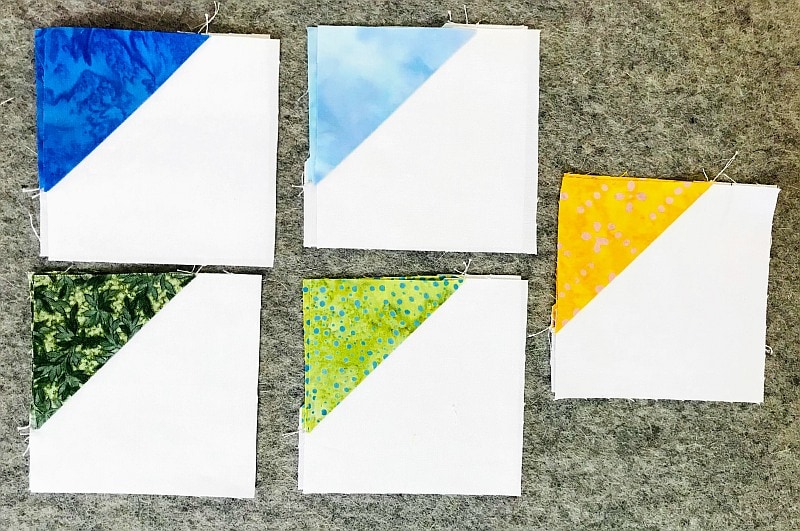
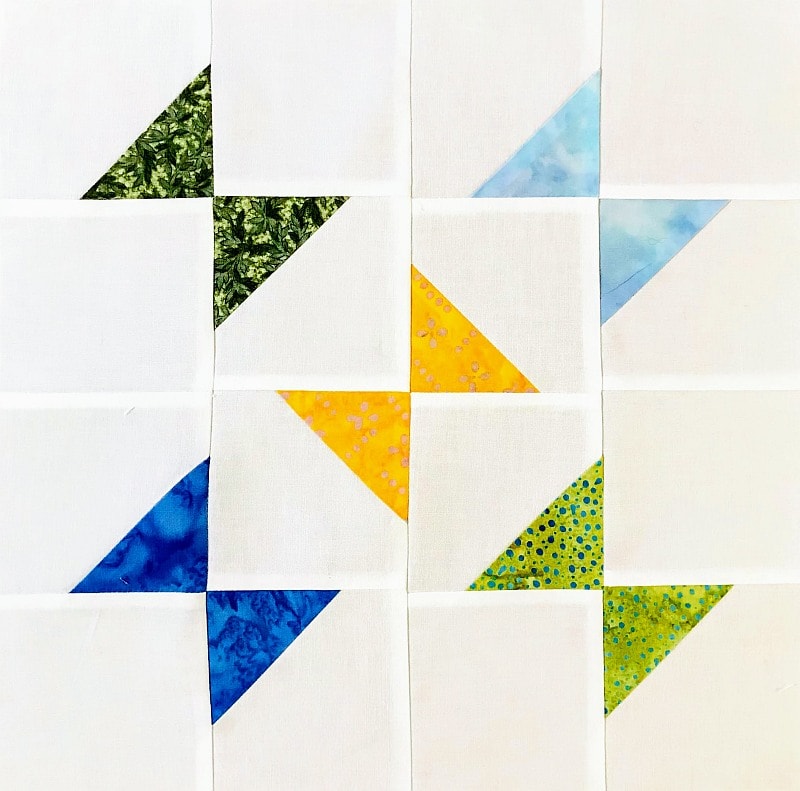
Using those blocks and the remaining (6) Background squares, create the design shown. Remember to press the seams of the odd rows to the right and the seams of the even rows to the left. This will help you keep your seams facing opposite directions when you sew the rows together.
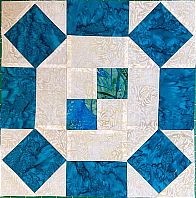
Here is the Super Simple Scrappy Quilt Block
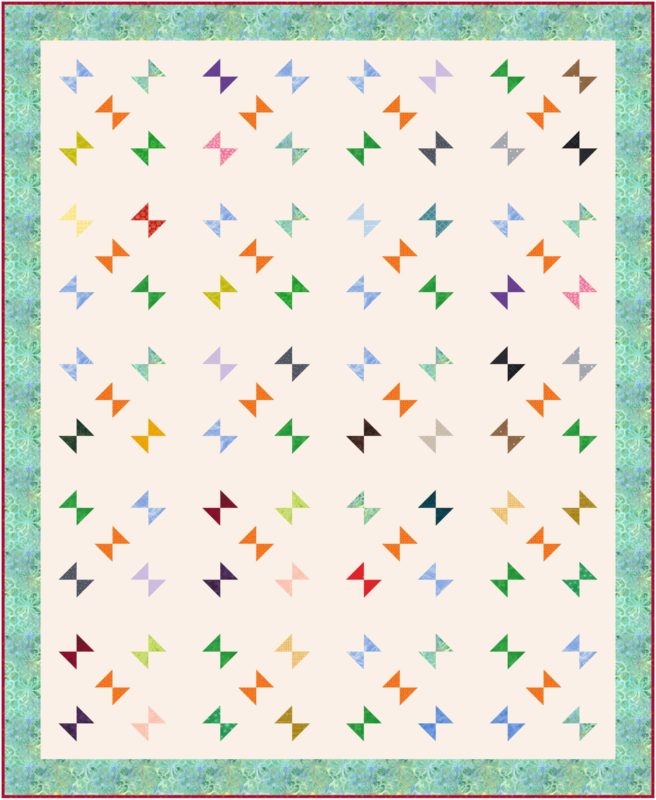
You are done! That was an easy block, wasn’t it? The graphic below shows how 20 blocks would look if you used lots of different fabrics. It is laid out in 5 rows of 4 blocks each, with a 6″ border, so it finishes 60″ x 72″.
If you are going to make multiple blocks, I would recommend chain stitching them.
Please add moc.hsadparcs@sirk to your contacts list to make sure you get the confirmation message. If you use Gmail, please drag the confirmation message from the Promotion tab to the Primary tab.
If you are already a subscriber, it’s okay to fill out this form. You won’t be put on the mailing list twice.
Don’t forget to sign up for the newsletter! Once a week, I send updates on quilt-related information I have found while wandering the web. This might be an inspiring article, a tip or tutorial I have discovered (or written), and occasionally exclusive offers & discounts as well as immediate access to the secret page of free patterns, guides, and printables. You can follow my page on Facebook, or join the Make Believe Quilters group, too.


What a sweet block Kris. It looks like something I might be able to make these days with all that life has dished up.
I’ve always liked this pattern. It embodies cheerfulness. Thanks for sharing it. I am always looking for ways to use up scraps.