Quilt Block Tutorial – The Bigfoot Bear Claw Block
Note: This post may contain affiliate links. That means we may earn a commission at no additional cost to you if you purchase via our links. Not all links are affiliate links. I only recommend products I use and trust. As an Amazon Associate, I earn from qualifying purchases.
The Bigfoot Legend
In August 1958, a bored bulldozer operator decided to stomp giant black bear prints in the mud where he was working with loggers in Northern California. He excitedly rushed back to camp to report these prints. Fueled by the myth of a giant Sasquatch in British Columbia and the Yeti of the Himalayans, a legend was born.

Today’s extra-large block expands on the traditional Bear Paw block, although as you can see a Bear Paw Print looks nothing like a bear paw block! Oh, well, it’s still a fun block.
Creating the Bigfoot Quilt Block
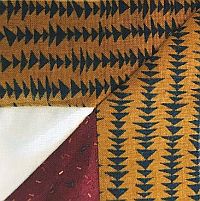
Here are the fabrics I am using:
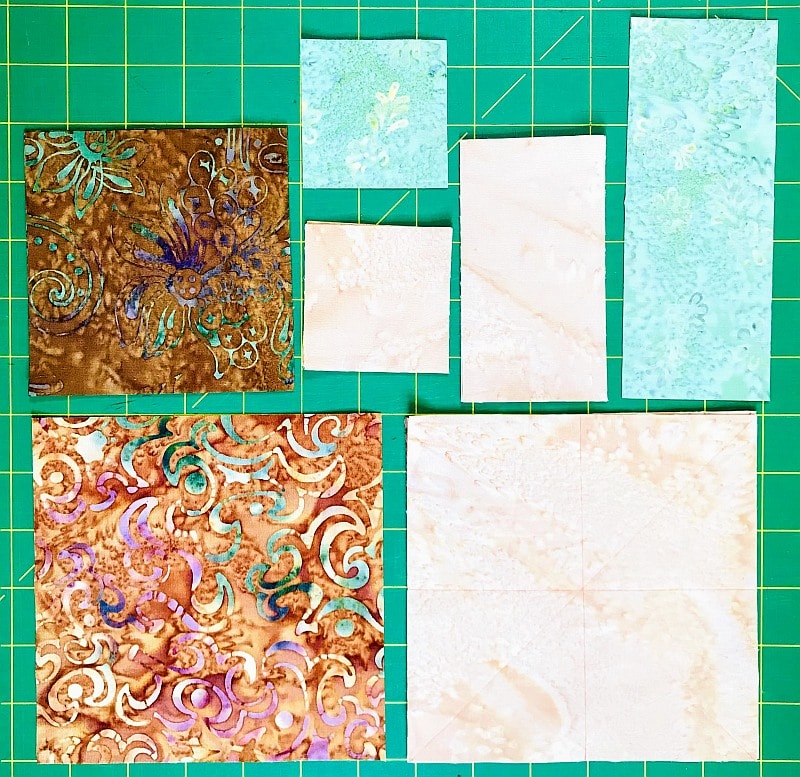
Background Fabric:
(4) 2-1/2″ squares.
(2) 6″ squares
(4) 2-1/2″ × 4-1/2″ rectangles
Claws
(2) 6″ squares
Bigfoot Brown:
(4) 4-1/2″ squares
Center Color
(2) 2-1/2″ squares.
(1) 2-1/2″ × 6-1/2″ rectangle
Before starting this project, I recommend that you press your fabric with spray sizing. It will make it easier to cut small pieces. Take the time to clean your machine, put in a new needle, and fill a few bobbins. When pressing, just hold the iron over a spot for a moment or two. This pattern assumes a perfect 1/4” seam.
Making Magic
This method works well when you need to make a lot of identically colored HST blocks. Here is an overview of the method. Make a test block first. (My personal preference is to cut the squares slightly too large so that I can square up the HST blocks later on. If you are sure of your 1/4″ seam, you can use 5-3/4″ blocks. )
Assemble:
- (2) 6″× 6″ Background Squares
- (2) 6″× 6″ Claw color Squares
On the back of the Background squares, draw 4 lines: one vertically through the center; one horizontally through the center, and one on both diagonals. These will be your cutting lines.
Place the Background square and the Claw color square right sides together. Sew 1/4″ on both sides of the diagonal lines. You will probably find it easier to chain stitch these. Sew all the squares diagonally first, going from one block to the next without snipping the thread in between the blocks. When that is done, you can do the other side.
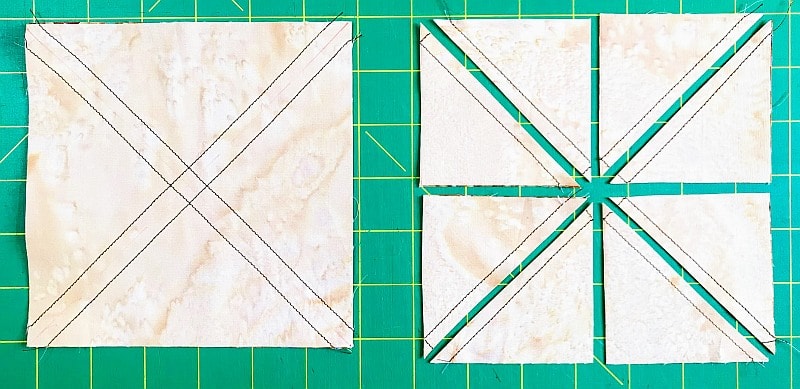
Press your sewn block and cut it apart on the drawn lines. If you cut it apart using a rotary cutter, take care not to move the squares with each cut. A rotating cutting mat will come in very handy. When you have all the blocks cut, you will need to square them up to 2-1/2″× 2-1/2″. Make (16).
Piecing the Block
Assemble:
- (16) 2-1/2″ HSTs
- (4) 2-1/2″ Background squares
- (4) 2-1/2″ × 4-1/2″ Background rectangles
- (4) 4-1/2″ Bigfoot Brown squares
- (2) 2-1/2″ Center Color squares.
- (1) 2-1/2″ × 6-1/2″ Center Color rectangle
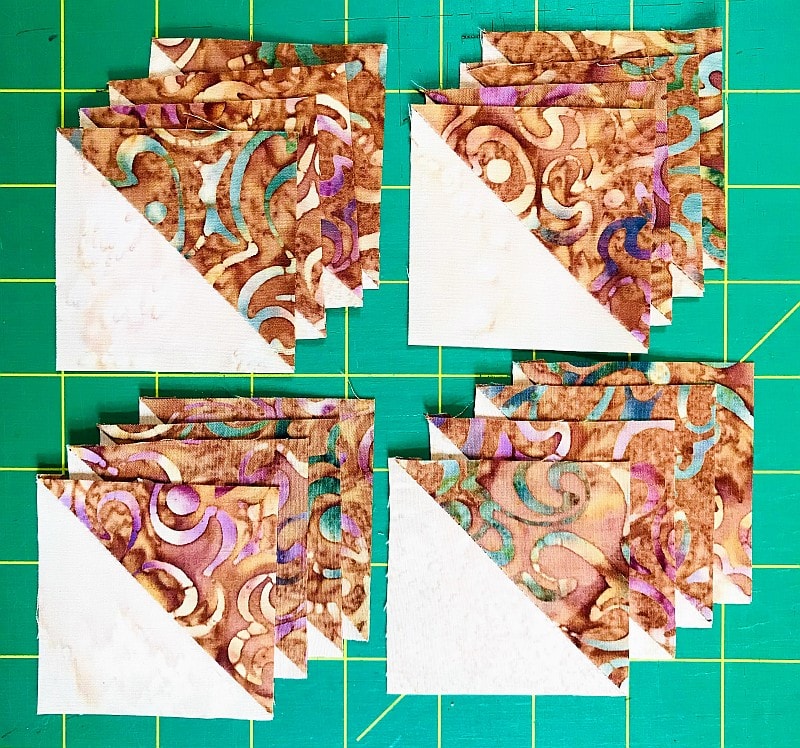
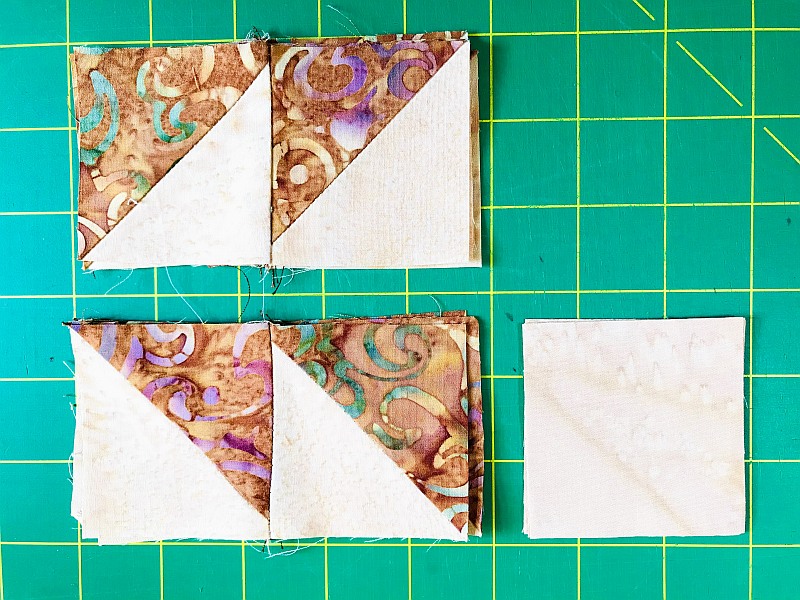
Sew the HSTs in (4) sets of two with the HSTs facing different directions. Pressto the dark.
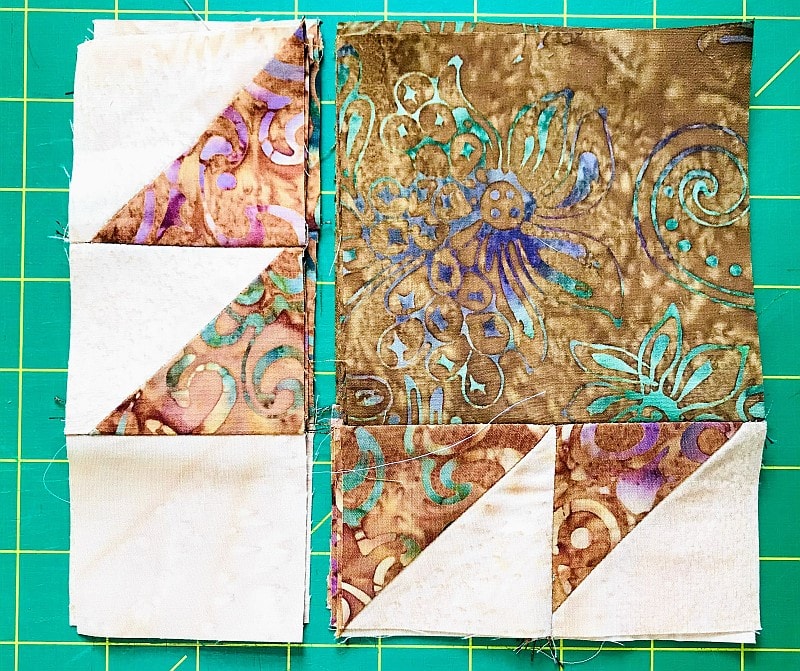
Sew a square to one side of the A group (the bottom group in the picture below) and press as shown. Make 4.
Sew the B units (the top group in the picture above) to the side of the 4-1/2″ Bigfoot Brown Square. Press. Make 4.
Now sew the block together and press. It should measure 6-1/2″ square. Make 4.
The Sashing
These claws are set in a sashing. Sew a 2-1/2″ Center Color rectangle to the end of a 2-1/2″ × 4-1/2″ Background rectangle. It should measure 6-1/2″ long. Make 2. Press to the dark.
Sew the 2-1/2″ × 6-1/2″ Center Color rectangle between two 2-1/2″ × 4-1/2″ Background rectangles. Make 1. It should measure 14-1/2″ long. Press to the dark.
Sew the 6-1/2″ long sashing between two blocks and press as shown. Make 2.
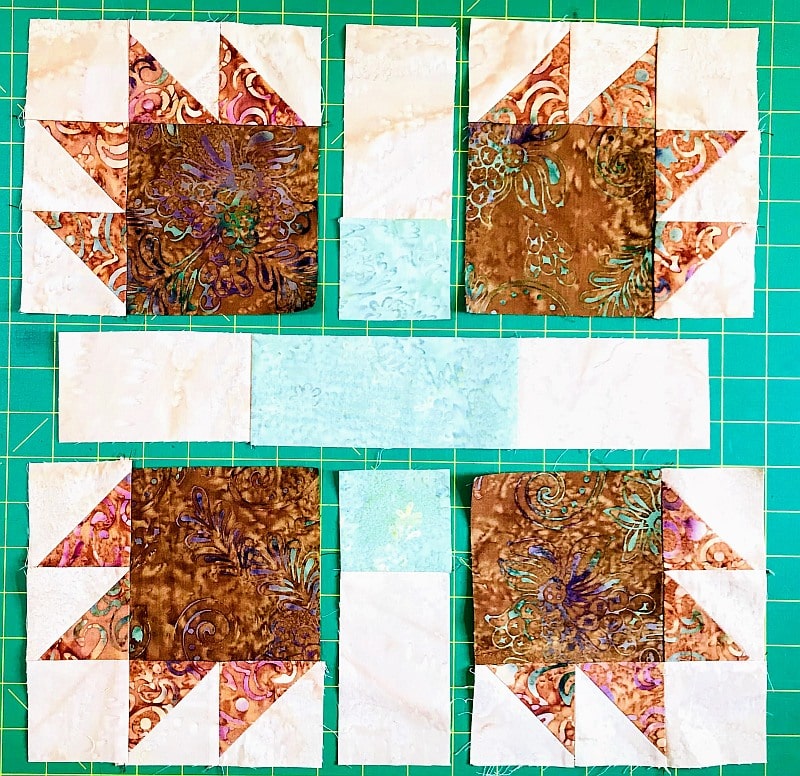
Sew the 14-1/2″ long sashing between the two sets and press to the sashing.
You made a Bigfoot Quilt Block! Enjoy!
Please add moc.hsadparcs@sirk to your contacts list to make sure you get the confirmation message. Drag the confirmation message from the Promotion tab to the Primary tab if you use Gmail.
If you are already a subscriber, it’s okay to fill out this form. You won’t be put on the mailing list twice.


Lovely paw block!
Great block and wonderful tutorial! Thank you for sharing!
Thanks for the mini tutorial done with such wonderful fabric choices. Big Foot fits right into the fairy tale category.
I love “Bigfoot” paws blocks and have a friend who is a bigfoot maniac. LOL!! This would surely make his day! Thanks for sharing your great tutorial so everyone can write their own fairy tale while stitching this block.
Thanks for the big foot history and the tutorial! I really like the block.
What a great adaptation of a favorite pattern. I like your color/fabric choices, and appreciate the tutorial information, too.
That was a cute idea! I am really amazed that every blog on this hop has an entirely different spin on a fairytale. Thanks for sharing.
Bear’s Paw is a great quilt block and I like your large one.
Thanks for sharing your Big Foot block!
Big Foot is definitely and interesting subject and makes for a good fairy tale. I love your block and your directions are perfect…thank you!
Big Foot is a great choice for the hop. So fun!
I so enjoy reading about Bigfoot and loved your tutorial for a fun block! Thank you 😉
This is wonderful! You are so talented. I love the legend of Big Foot and he certainly is worthy of a quilt block in his honor. The tutorial is a great bonus for everyone looking to make their own legendary quilt!!
Great tutorial, thanks so much!
Good old Bigfoot! I see you’ve had a sighting and he’s left a print for you to make this adorable pattern. Thanks for sharing! -Andrea
Great instructions!
Love the block, Kris! He/she is an interesting subject to think about! Thanks for sharing!
Fun block! Thanks for sharing your process!
The paw block is perfect for a Big Foot tale.
Big foot it is for the fairy tale blog hop – love it. It is a great block and your tutorial is appreciated!
Great tutorial and fairy tale! Thanks for sharing! xx