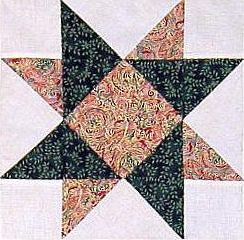
Spinning Stars Table Runner
This 23″ x 46″ table runner was inspired by a class on the various ways to make Flying Geese blocks. All you need is a 6-1/2″ square ruler!
Please note that the rectangles are cut slightly oversize in the pattern below. That’s to give you a chance to experiment and make mistakes without ruining the block. You are welcome to cut them smaller (or use strips) if you prefer.
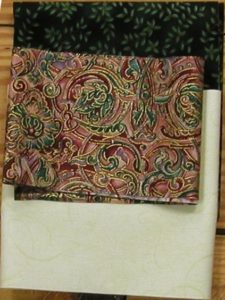
Fabric requirements (cross off my colors and write in yours)
1/2 yard Background
(1) 5-1/4″ wide strip by the WOF (width of fabric) cut into (6) 5-1/4″ x 5-1/4″ squares and ( 1) 4-3/4″ x 4-3/4″ square.
(3) 2-1/2″ x WOF strips for the floating border.
(1) 3-1/2” wide strip by the WOF, cut into (12) 3-1/2” x 3-1/2” squares
3/4 yard Red
(3) 5-1/4″ strips, cut into (16) 3″ x 5-1/4″ rectangles and (3) 4-3/4″ x 4-3/4″ squares. Cut down any leftover strip to 3-1/2″ wide so you can use it in the border.
(3) 3-1/2″ x WOF (width of fabric) for the borders
1/3 yard Green
(2) 5-1/4″ wide strips, cut into (24) 3″ x 5-1/4″ rectangles
Step One: Making the center of the stars:
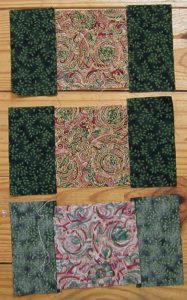
Sew a 3″ x 5-1/4″ green rectangle to either side of the three red squares. (picture to the left) You can chain stitch these if you like. Press out toward the rectangle.
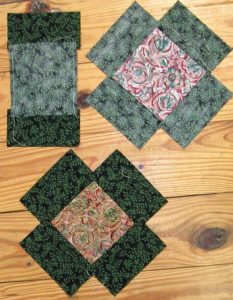
Then sew a green rectangle to the other sides of the block. Note that it doesn’t reach all the way to both sides. It doesn’t have to! (picture to the left)
Lay the block on your cutting board face up. Center a 6-1/2″ square ruler on the block so the point of the seam is 1/4″ inside the ruler as shown in the graphic below.
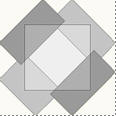
Make your cuts on opposite sides of the block, then rotate the mat (or walk around to the other side of the table) and cut the other two sides. If you have a rotating mat you will find this a very helpful thing:-))
Step Two: Making the HSTs (half square triangles)
Just as you did in Step One, center a 6-1/2″ ruler on the block. This time you don’t need to worry about the seam allowance – in fact, you WANT to cut it off. Make your cuts on opposite sides of the block, then rotate the mat (or walk around to the other side of the table) and cut the other two sides.
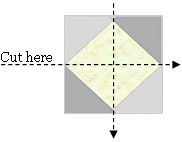
Cut all four sides with no seam allowance, then cut the resulting block into quarters. (below) You should have four perfect 2 1/2″ square HSTs. These will be used in the first border of the table runner, to make the inside corners.
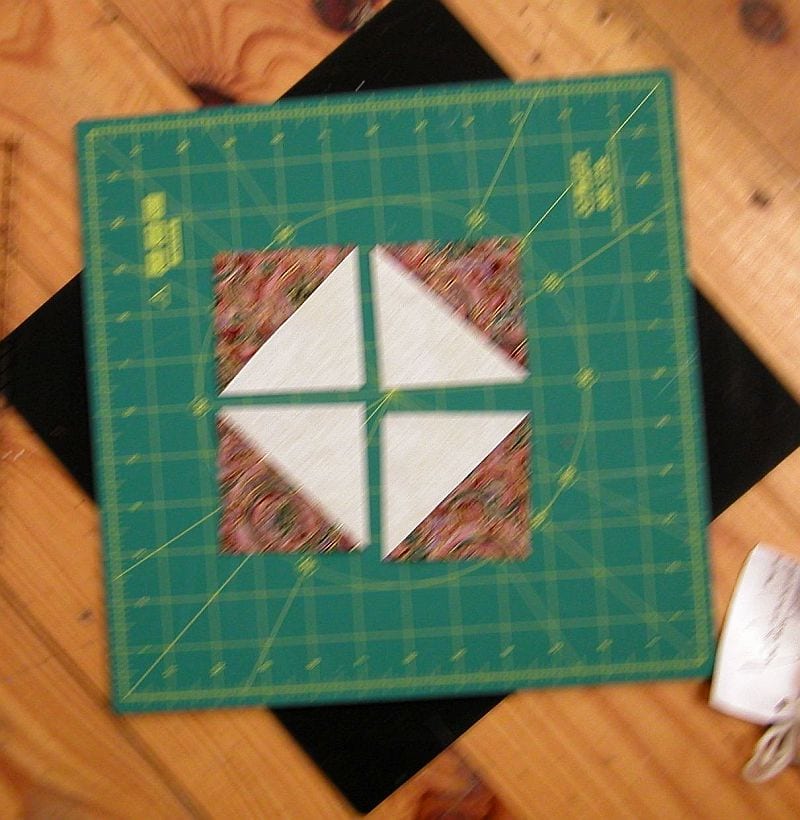
Step Three: Making the Flying Geese
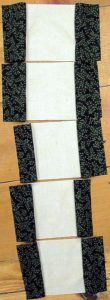
Start by sewing a green rectangle to either side of the
(6) 5-1/4″ background squares. (Picture to the left shows the chain stitching) This time, instead of sewing on another green rectangle as you did above, you will be sewing on a red rectangle.
Make 6 blocks like the ones at the top of the picture to the right. This time, when you cut them, you will be cutting two sides with a 1/4″ seam allowance (like you did in step one) and two without (like you did in step two.) Cut these blocks in half through the center that has no seam allowance. You will get two flying geese blocks from each square in a square block.
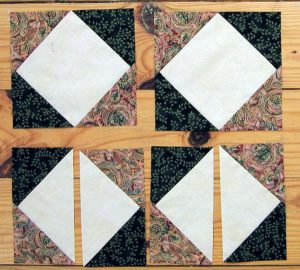
Do you notice something odd about the picture? Yes, I was careless when I positioned the ruler to cut off the seam allowance. I should have been careful and always kept the green to the right. Because I didn’t, I now have four flying geese blocks with the green side on the left and eight flying geese blocks with the green on the right. Bummer, dude. I guess I will just have to make one block with the stars spinning in the other direction. I will put it in the middle so it looks like I meant to do that.
Step Four: Putting the blocks together
I didn’t take a picture of this step, but you can see from the final step that I sewed a flying goose block to both sides of the square in a square block. (Press to the goose.) Then I sewed a 3-1/2″ background square to both sides of the flying goose blocks that matched the two sides (press to the goose again) and sewed that unit to the top and bottom of the block. Because of the way you pressed your block, those seams should just nestle together, giving you a perfect intersection. Use pins and encouragement if it doesn’t work out perfectly. Your block should measure 12-1/2″ unfinished.
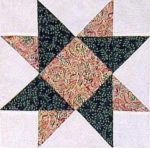
Now sew the blocks in a line of three as shown in the final picture. Remember I made a mistake in my sample – I put the “wrong” one in the center. It looks kinda nice, doesn’t it? If I hadn’t told you, you wouldn’t have known.
Step Five: The borders
If all has gone well, you should have a strip of three stars that measures
36-1/2″ unfinished. Cut two of the 2-1/2″ background strips to this length and sew them to the top and bottom of the block. Press to the border.
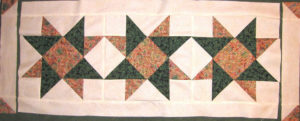
Cut two more of the 2-1/2″ wide background strips 12-1/2″ long. Sew a HST to both sides of this strip, matching the picture above. Press to the border again. Sew this strip to both ends of the tablerunner.
Measure your new quilt top horizontally through the center. It should be 40 1/2″, but if it is not, use YOUR measurement. Cut two of the 3 1/2″ wide border strips to this length and sew to the top and bottom. Press to the border. Measure again, this time vertically. It should be 16 1/2″ but again, use your measurement. Cut two strips to this length, and sew to the two sides. Press to the border – and – you are done!
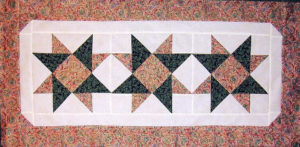
Here’s what it was supposed to look like:
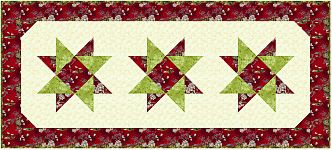
If you make a Spinning Stars Tablerunner, please send a picture to moc.liamg@sngiseDnooMebeohP! I would love to brag about you.
Have another tip to offer? Send it to me or reply below and I will add it here.
Don’t forget to sign up for the newsletter! Once a week, I send updates on quilt-related information I have found while wandering the web. This might be an inspiring article, a tip or tutorial I have discovered (or written), and occasionally exclusive offers & discounts as well as immediate access to the secret page of free patterns, guides, and printables. You can follow my page on Facebook, or join the Make Believe Quilters group, too.


