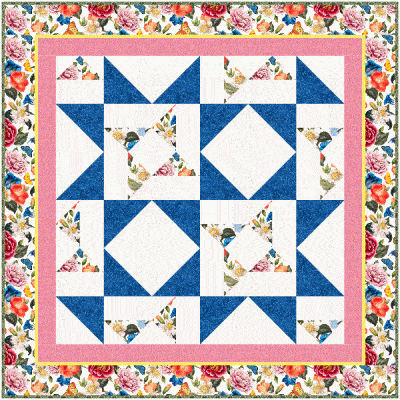
Here is a little gift for you to celebrate Mother’s Day. Or perhaps I should say Motherhood day. Not all quilters have children, but I would venture to guess that all quilters have a nurturing instinct. When was the last time you made a quilt for yourself?

This is a pretty little 34″ x 34″ table topper that uses the floral fabric I hope someone gave you. Adorn your table with the quilt of flowers, just in time for Spring!
It makes up pretty quickly if you use the large Quilt-in-a-day Flying Geese ruler (2007CC). A 4-1/2″ square ruler will be helpful but is not required.
Quilt Tutorial: Making a Flying Goose quilt block using the Quilt-in-a-day Ruler
This technique uses two different size squares. The smaller, center square will become the goose. The larger, outer square will become the sky corners. The size of the squares is determined by the size of your final block and will be given in the pattern and in the instructions that come with the ruler. Always make a test block first.
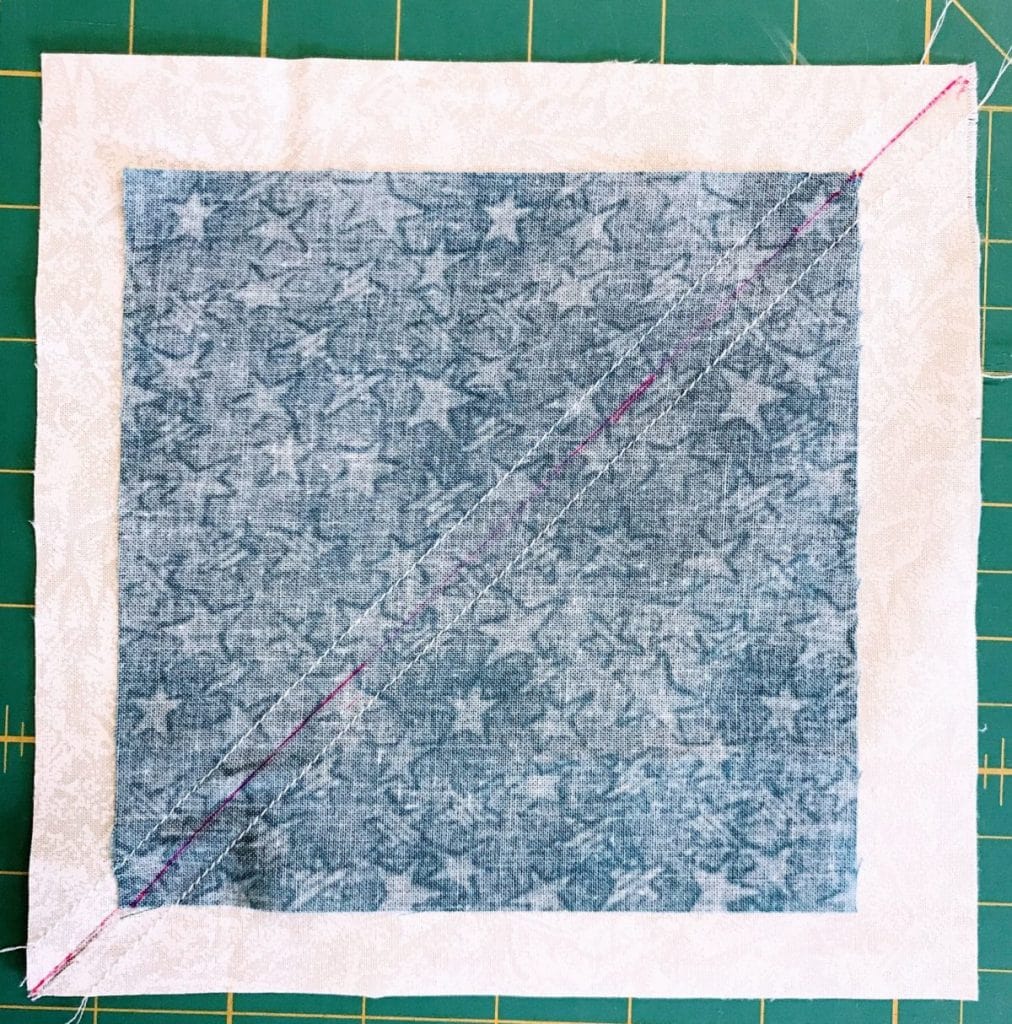
Place the goose square right sides together in the middle of the background block. It doesn’t have to be exact. Draw a diagonal line on the back of that fabric packet. Sew a scant 1/4″ seam from both sides of that line. Cut on the line.
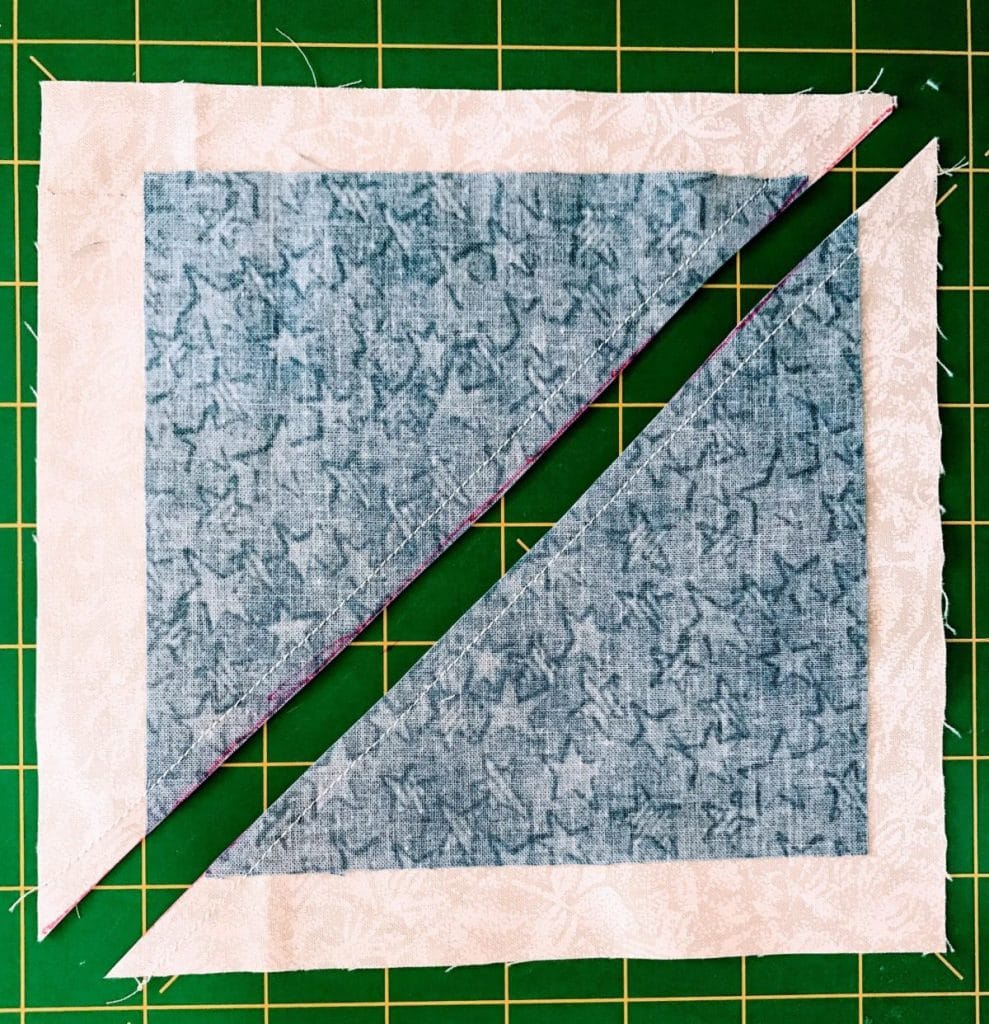
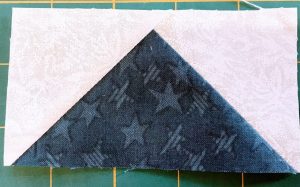
Press the two halves open from the front. It will look like a very strange half square triangle unit.
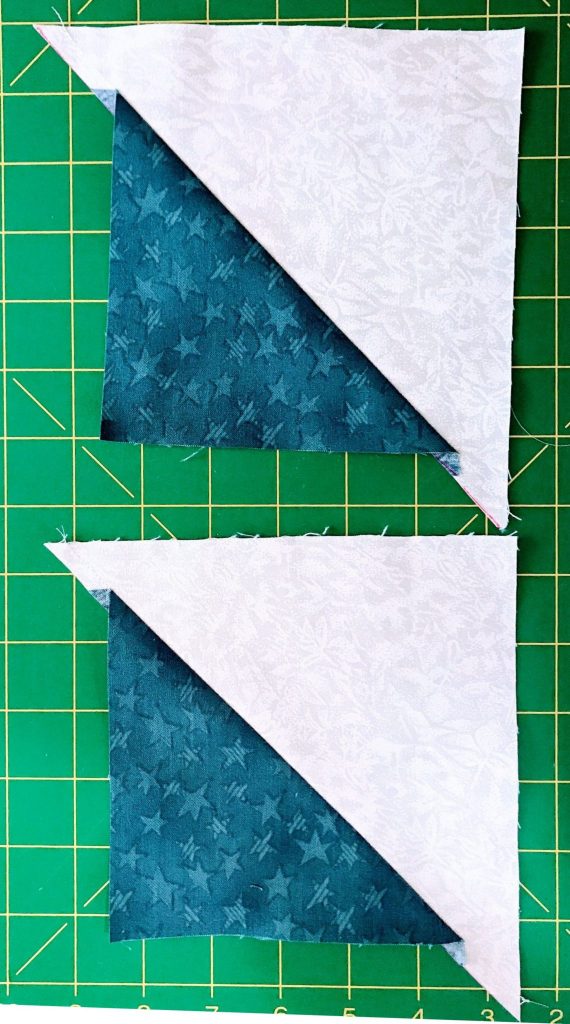
Put the two units together so that the two edges meet. The seams should not meet in the middle. Look for the Batman Ears on two sides. Draw a diagonal line bisecting the seam as shown below.
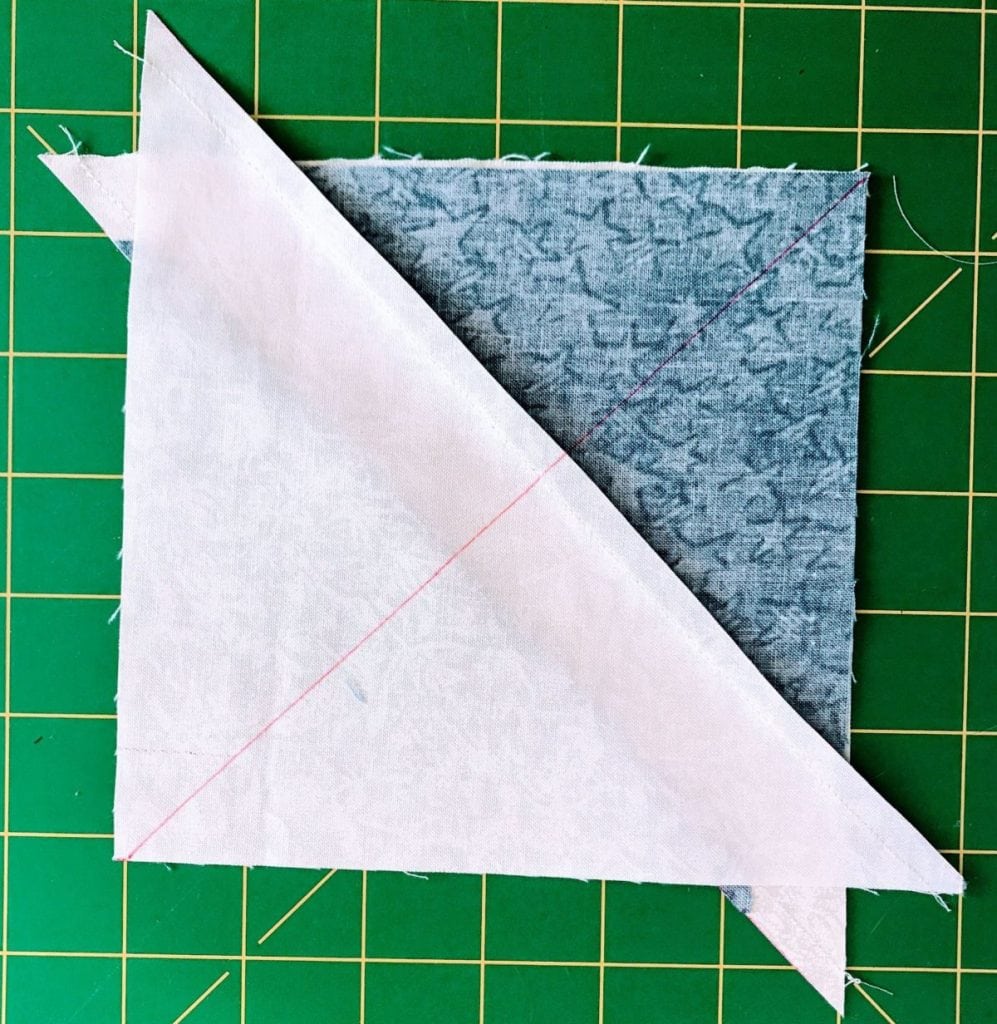
Sew a scant 1/4″ seam on both sides of the center line. Cut the unit apart.
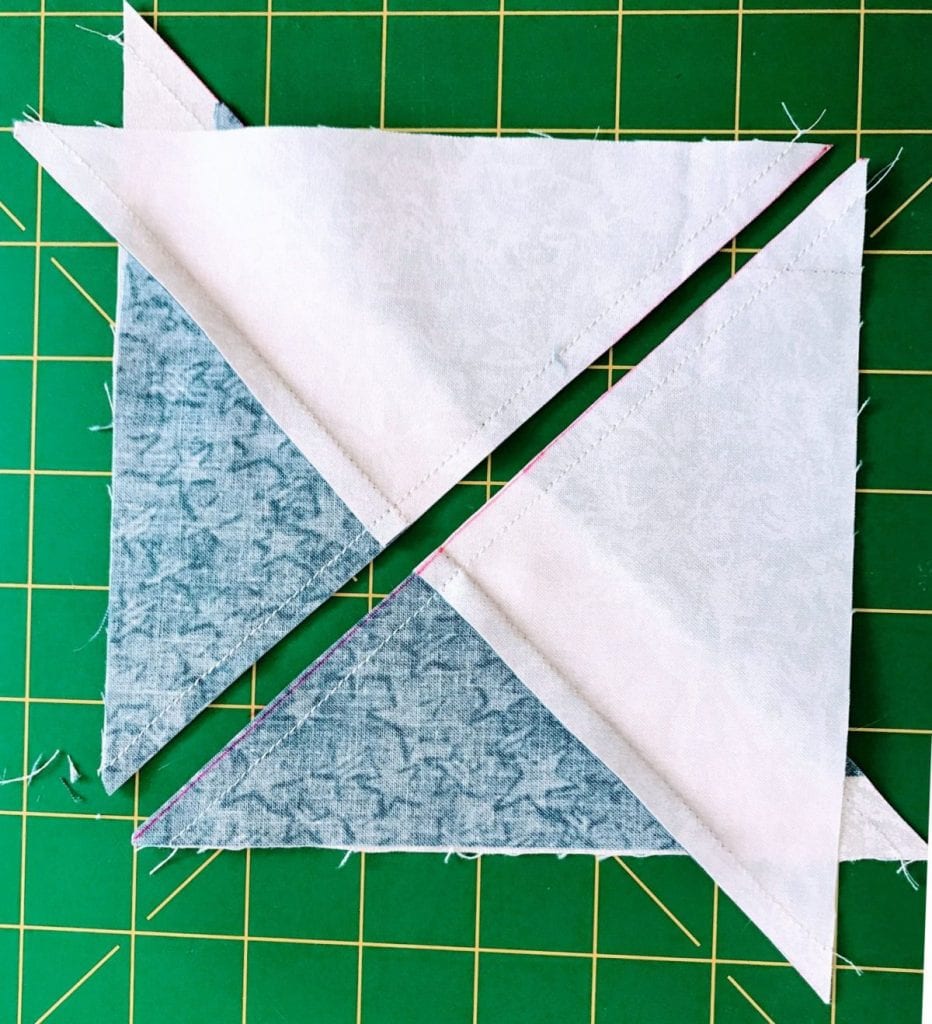
and press. Looks pretty silly, doesn’t it?
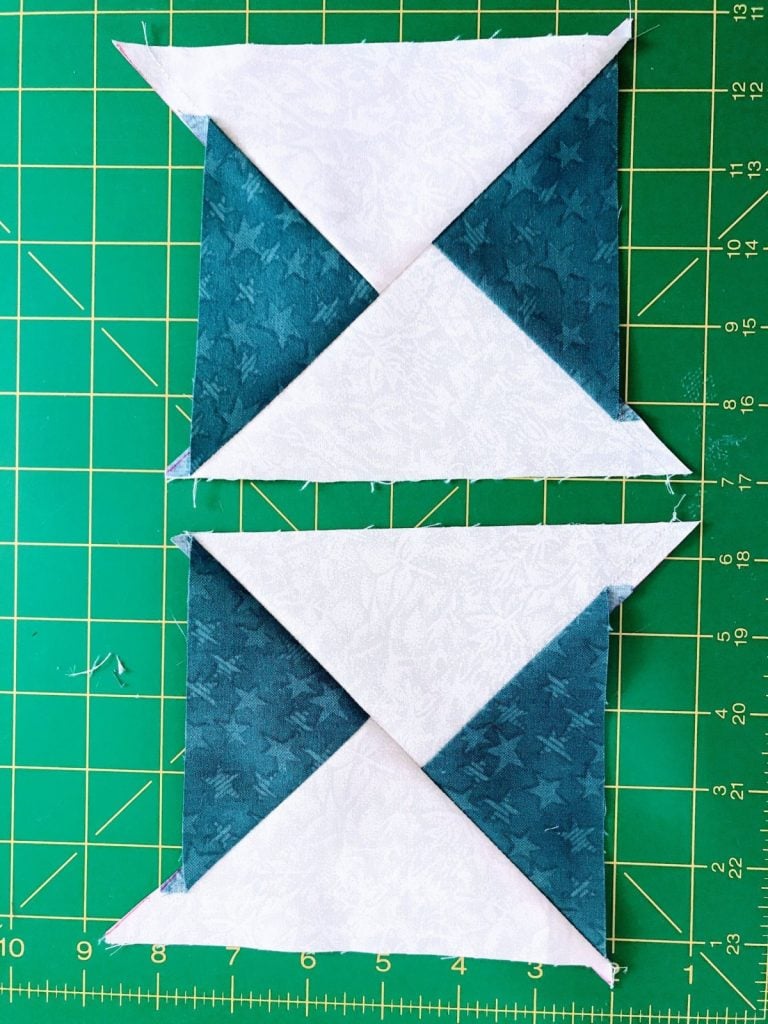
Place the Quilt in a day ruler on the block, matching the lines on the ruler with the angles of the block. If you have a rotating mat, you will find it very helpful here.
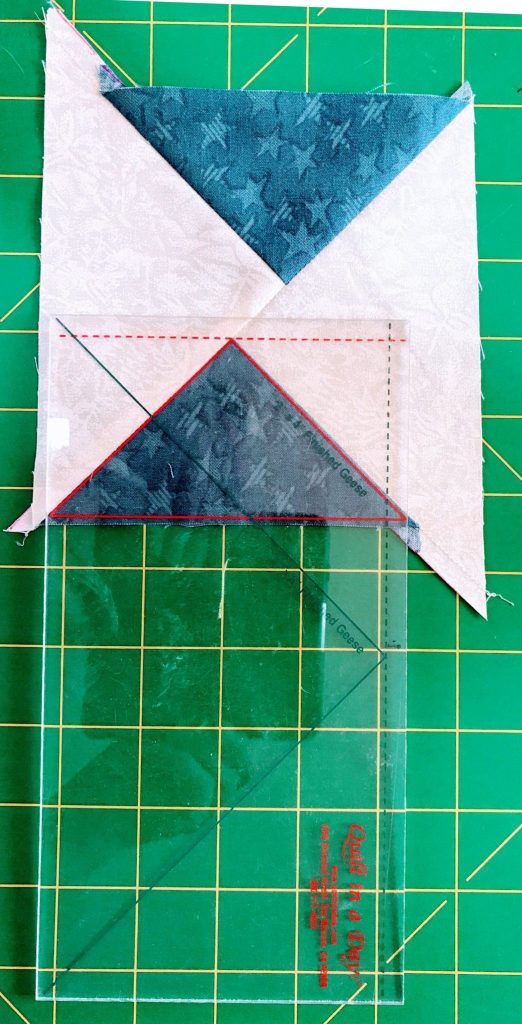
Ta-da! Each set of fabric makes (4) Flying Geese blocks, and they are all perfectly sized.
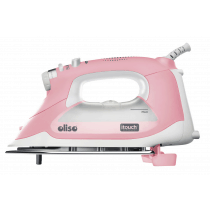
I use and recommend the Oliso Smart Iron for its no-scorch and ergonomic friendliness. Just touch the iron handle and it lowers, ready to press. Take your hand off and it lifts off the board. No need to lift that heavy iron up on its heel, no worrying about tipping, and it actually saves up to 30% of pressing time. Plus it has a 30-minute shut-off, a 12-foot cord, a flat pressing core, and an easy-to-fill tank you can refill while you work. It’s expensive, but it is worth it for the self-lifting feature alone.
If you make one, would you send me a picture? I love basking in reflected glory:-))
Please add moc.hsadparcs@sirk to your contacts list to make sure you get the confirmation message. Drag the confirmation message from the Promotion tab to the Primary tab if you use Gmail.
If you are already a subscriber, it’s okay to fill out this form. You won’t be put on the mailing list twice.
Have another tip to offer? Send it to me or reply below and I will add it here.
Don’t forget to sign up for the newsletter! Once a week, I send updates on quilt-related information I have found while wandering the web. This might be an inspiring article, a tip or tutorial I have discovered (or written), and occasionally exclusive offers & discounts as well as immediate access to the secret page of free patterns, guides, and printables. You can follow my page on Facebook, or join the Make Believe Quilters group, too.
Just a quick picture
I don’t remember when I took this picture – Mother’s Day 2019 maybe? I’m showing it because it is an interesting picture. It’s 80 degrees out there today! But my forsythia didn’t bloom this year because of the odd winter we had. You can’t win.


