Chain Link Quilt Block
Note: This post may contain affiliate links. That means we may earn a commission at no additional cost to you if you purchase via our links. Not all links are affiliate links. I only recommend products I use and trust. As an Amazon Associate, I earn from qualifying purchases.
Use the Print Friendly button under that list to print this page. If that doesn’t work, try Ctrl-P or Flower-P.
The internet is the most technical thing I know. A simple way to picture how the internet works is to compare it to a chain link fence. Just like a chain link fence is made up of metal wires, all connected at little twisty points, the internet is made up of computers and cables all connected at little twisty points too.

Only instead of wires, it uses data. Each point where the wires cross in a chain link fence adds strength and structure to the whole. Each connection reinforces the system and allows data to flow across it. That’s what http:// stands for – Hop To The Place.
No it doesn’t
Ok, not really. But when you click on a quilt video, your request zooms through these internet connections, hopping from one to the next like a squirrel on a fence. Eventually, it finds the right computer that has the video and brings it back to you the same way. If part of a chain link fence is damaged, the rest still stands. If one route or server goes down, the data can usually find another path to its destination.
So next time you send an email or stream a video, think of it as a digital chain link fence connecting the world, one link at a time.
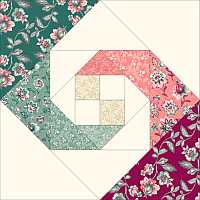
Here is my chain link block

To make this 12″ block, you will need:
- (4) 3-1/2″ Dark/Medium HSTs (see The Magic Eight Method for Making HSTs)
- (4) 3-1/2″ QSTs with Dark in the Corner (see How to Make a 3-Part QST)
To make these, you will need (2) 4-1/2″ White/Medium HSTs (see The Traditional Method for Making HSTs) and (2) 4-1/2″ Dark squares. - (4) 3-1/2″ QSTs with Medium in the Corner
To make these, you will need (2) 4-1/2″ White/Dark HSTs (see The Traditional Method for Making HSTs) and (2) 4-1/2″ Medium squares - (4) 3-1/2″ Light Squares
I used the Magic Eight method of making the Dark/Medium HSTs.
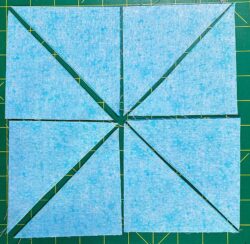
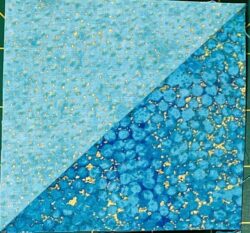
To make the 3-part QSTs, you need to start with larger HSTs. I used 5″ squares to make HSTs using the Traditional Method for the White/Medium and the White/Dark ones. I squared those up to 4-1/2″. I placed them right sides together with a 4-1/2″ square, drew a line on the diagonal bisecting the seam, then sewed 1/4″ on both sides of the diagonal.
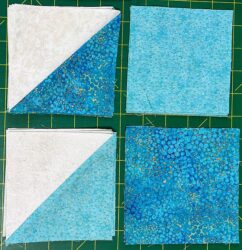
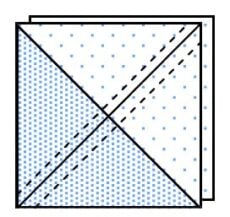
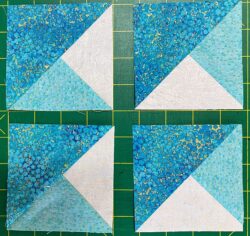
Remember, this gives you 3-part QSTs that are opposites of each other. Square these up to 3-1/2″. You will probably find it easier to use a 3-1/2″ square up ruler.
Now you just need to put it all together! This is actually harder than it looks. I spent some time with Jack the Ripper getting this right. Here is the layout and the final block. Whew!


Sew what will you make with this block?
Don’t forget to sign up for the newsletter! Once a week, I send updates on quilt-related information I have found while wandering the web. This might be an inspiring article, a tip or tutorial I have discovered (or written), and occasionally exclusive offers & discounts as well as immediate access to the secret page of free patterns, guides, and printables. You can follow my page on Facebook, or join the Make Believe Quilters group, too.