This is a Quilt-Block-of-the-Month Mystery series. It starts today! Clues will be presented every Sunday from now until Labor Day. It is a two color (plus background) quilt that finishes about 90″ x 90″. Look for a list of clues at the bottom of this page. To print this clue, use the green Print Friendly button below those clues. If that doesn’t work, try pressing down the CNTRL button and the P button at the same time. Or the COMMAND button and the P button if you are on a Mac. That should bring up the printer dialog.
Just a reminder: Anyone who sends me a picture of their quilt in progress or finished, gets a free copy of the professional pattern after the mystery is over. Offer expires 10/1/23. Send your pictures to phoebemoondesigns@gmail.com.
Clue Two: The Moats
Here’s a clue to give you time to finish the Flying Geese and sew ahead a little bit.
Assemble:
- (9) 3-1/2″ wide Pink strips for the first border moat
- (9) 6-1/2″ wide Chocolate Brown strips for the second border moat
- (10) 2-1/2″ wide Fudge (Espresso) strips for the binding path around the moat
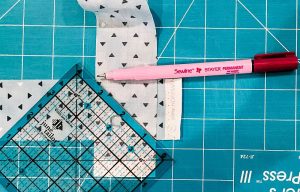
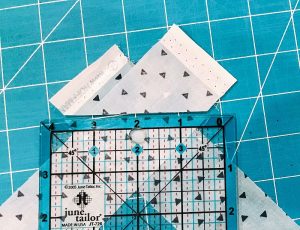
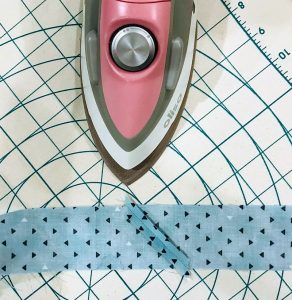
Create (3) groups of LONG strips by sewing each set of strips end to end. Miter the joins if you prefer by sewing the two strips right sides together at an angle as shown below. Trim the seams to 1/4″ and press open.
Creating LONG strips ahead of time saves you time when adding borders and binding. If you miter the join of a long quilt strip, the seam is less likely to show. Here is a tutorial on how to miter the joins of borders and binding in advance.
Note: this tutorial is from the Dragonfly Dance mystery. It does not reflect the fabric I am using in the Castle Secrets mystery.
 |  |
 |  |
Just as an FYI, that’s a Sewline Stayer Permanent Marking Pen in the picture above. It’s great for signing quilts, but a permanent marker is not necessary when drawing seam lines. Also, you can see my little mini-Oliso in the final picture. I like it for the small jobs – it gets very hot, and has a long cord – but I would prefer a full-size iron for the blocks and the top.
Clues:
- June 4: Introduction
- June 11: Birds
- June 18: An Easy Clue
- June 25: More Birds
- July 2: An Easy Clue
- July 9: Castle Turret
- July 16: X marks the spot
- July 23: More Turrets
- July 30: Secrets
- August 6: The Fort
- August 13: The Castle (a quick clue)
- August 20: Home at Last
- August 27: The Moats and a Secret Reveal
- PICTURE PAGE!
Don’t forget to sign up for the newsletter. Once a week, I send updates on quilt-related information I have found while wandering the web. This might be an inspiring article, a tip or tutorial I have discovered (or written), and occasionally exclusive offers & discounts as well as immediate access to the page of free patterns, guides, and printables. You can follow my page on Facebook, or join the Make Believe Quilters group, too.

