When Pigs Fly – Rounding the Corners of Your Quilt
Note: This post may contain affiliate links. That means we may earn a commission at no additional cost to you if you purchase via our links. Not all links are affiliate links. I only recommend products I use and trust. As an Amazon Associate, I earn from qualifying purchases.
It’s time to make those PIGS fly! What are PIGS? Why, they are PhDs or PIPS. They might even be WHIMs, WIPs or WHISPS. Either way, don’t let FOB scare you! Here is how to say, “TGIF!”
Bias Binding
I started this tutorial last year, meaning to plan for a series of posts on bias bindings. It quickly became a WWIT. When a blog hop was announced, with the theme of “finish it”, I decided I would at least finish my sample. And maybe give you a sneak preview of the series I still want to do someday.
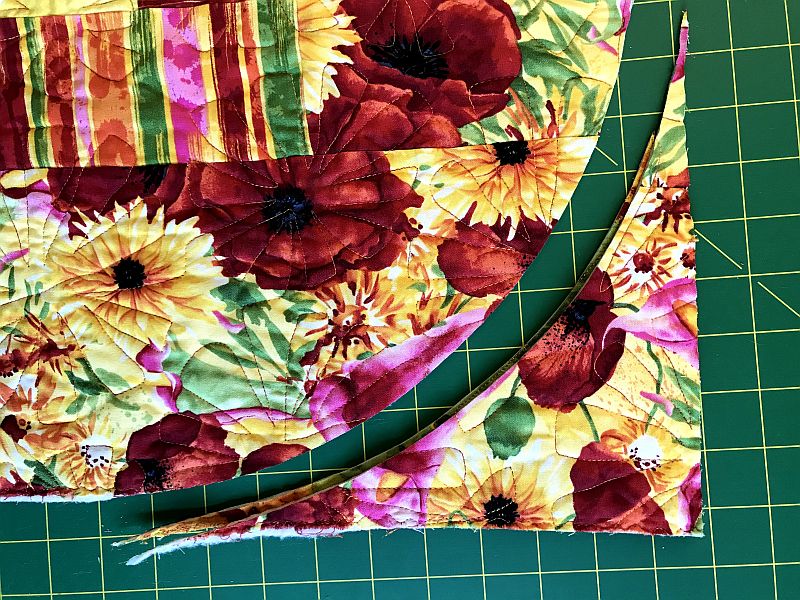
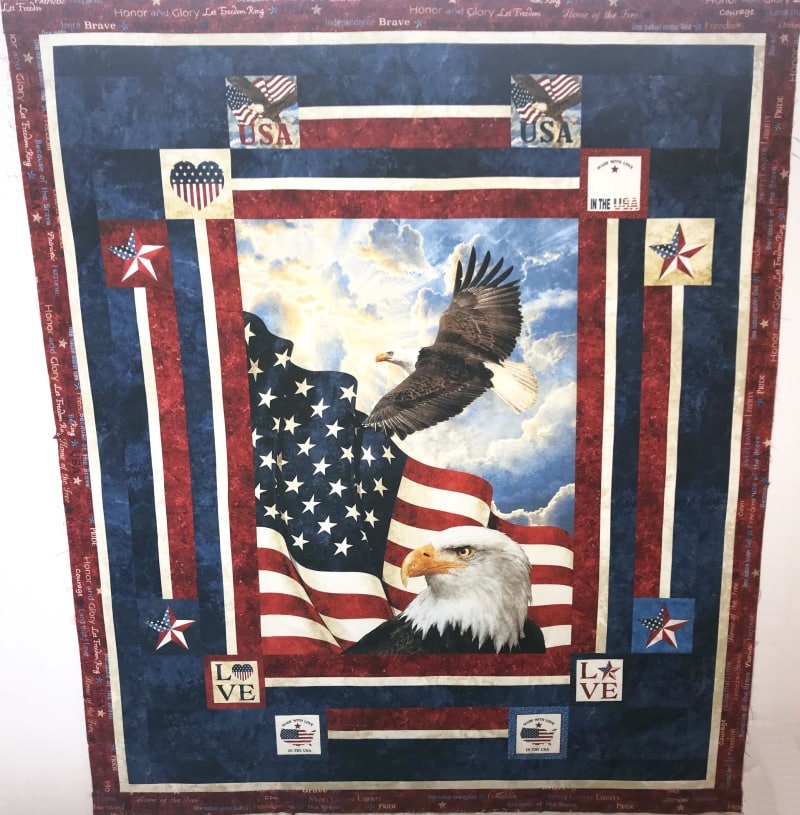
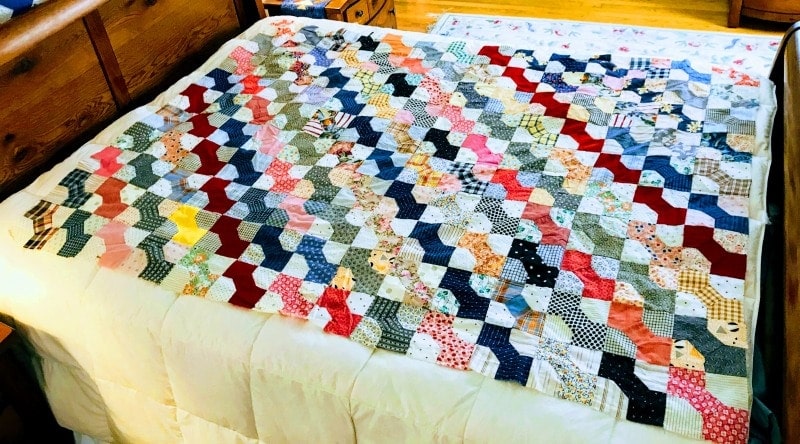
Here is the UFO
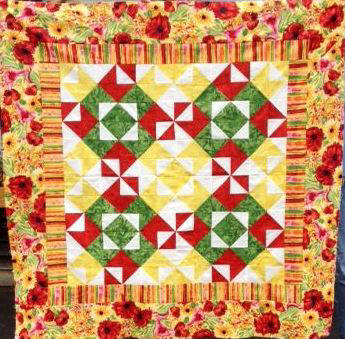
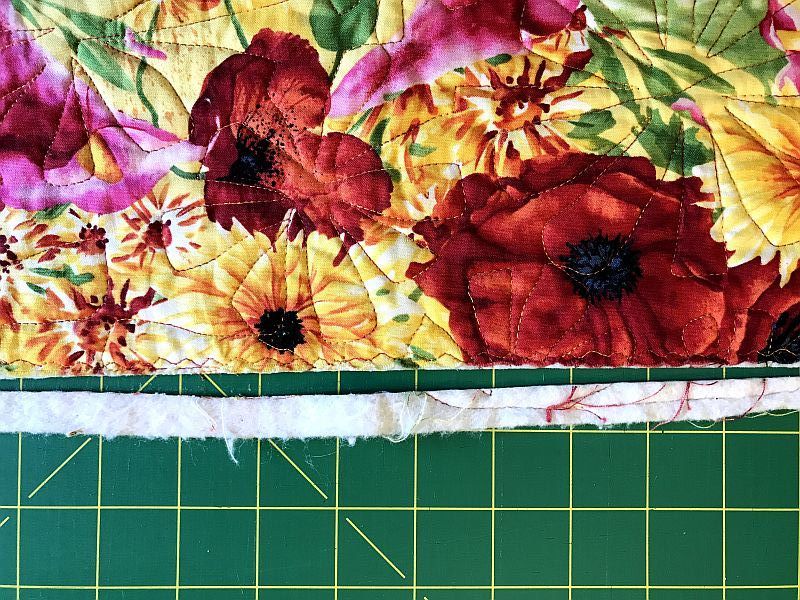
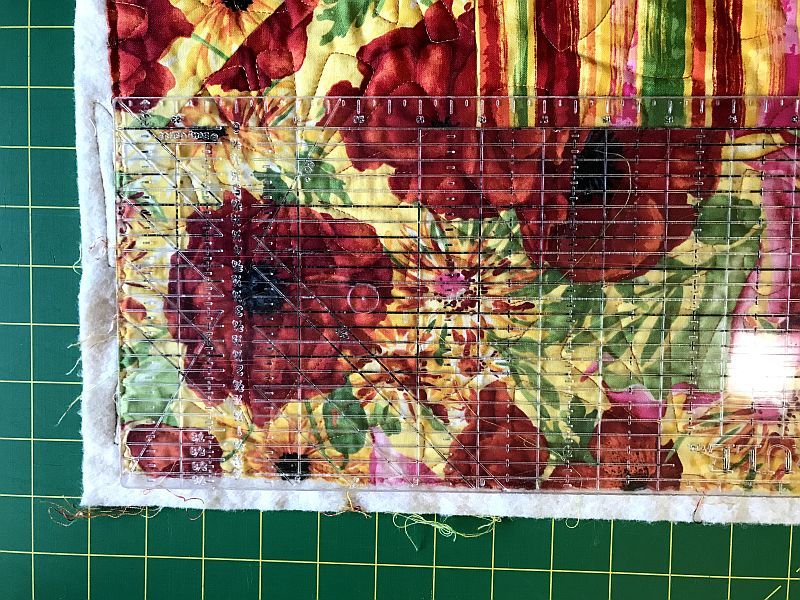
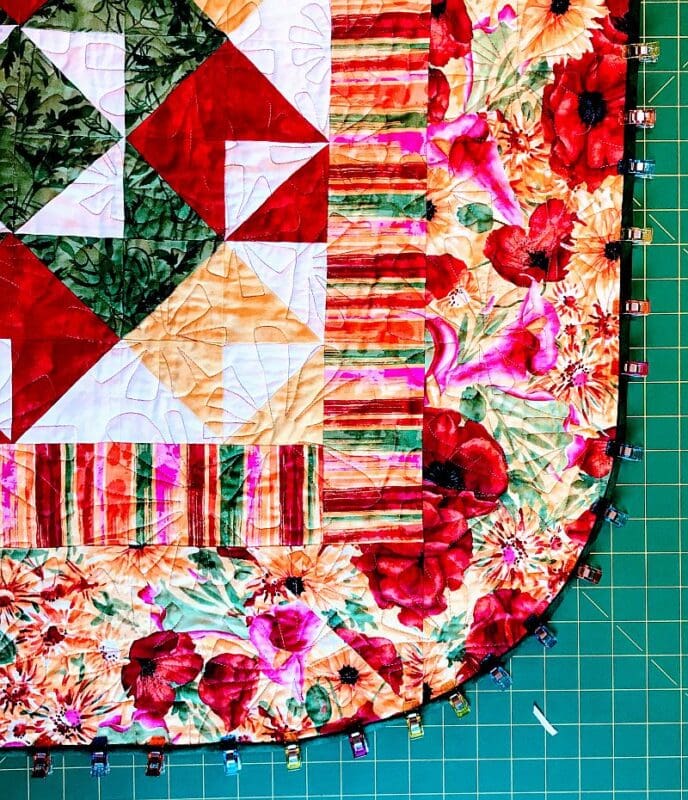
I decided this quilt was a little boxy, so I would add rounded corners after it was quilted. The first thing I needed to do, of course, was square up the edge. I did that using a long, large ruler so I could match up the edge of the ruler with the edge of the quilt as accurately as possible.
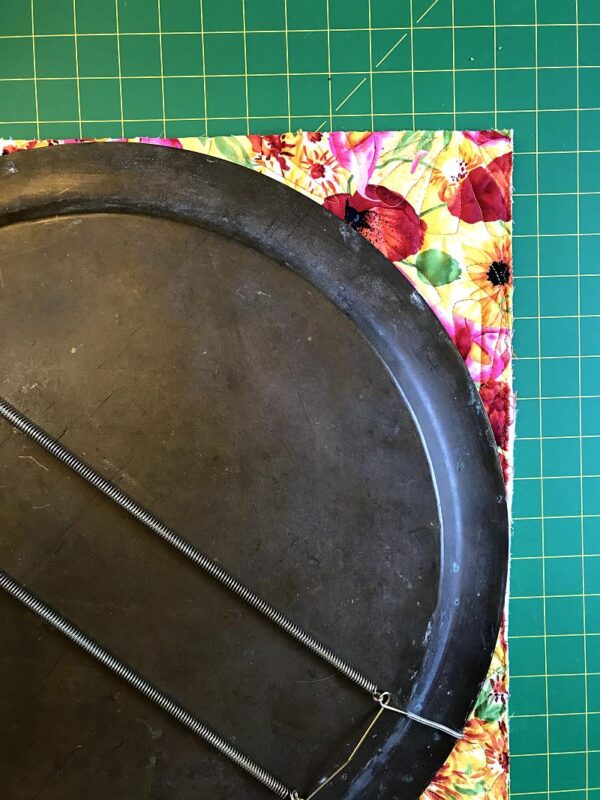
Then I needed to find something round that I could use to make a round corner. I took a large plate right off the wall and that worked.
Now I needed to make the binding that would wrap around this corner and finish the quilt. Enter…
Bias Binding
There are many, many ways of making bias binding. I am just going to show one. There are two additional methods, including continuous bias binding, in the handout below.
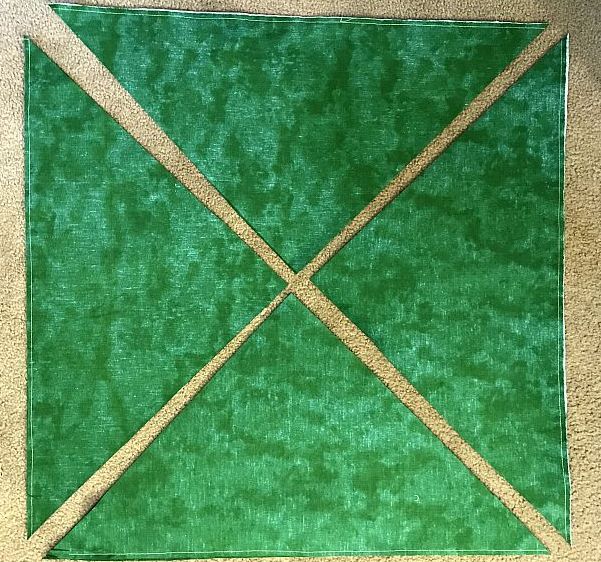
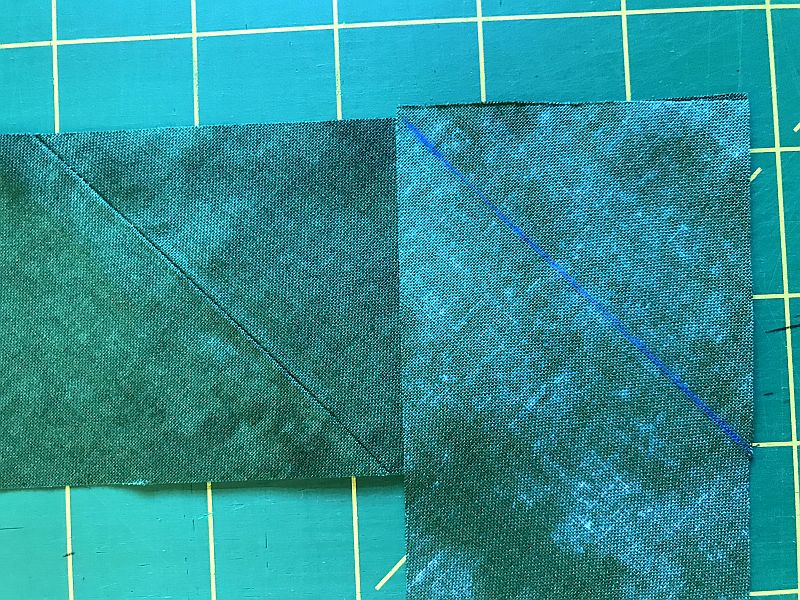
Start with two large squares of fabrics. (My sample is 10″ square.) Place them right sides together and sew all the way around the outside. Pretend you are making a pillow with no way to get to the inside. Cut this square on both diagonals. You will have just made two Half-Square-Triangle Quilt Blocks with the eges on the diagonal. Press them open but don’t bother to square them up.

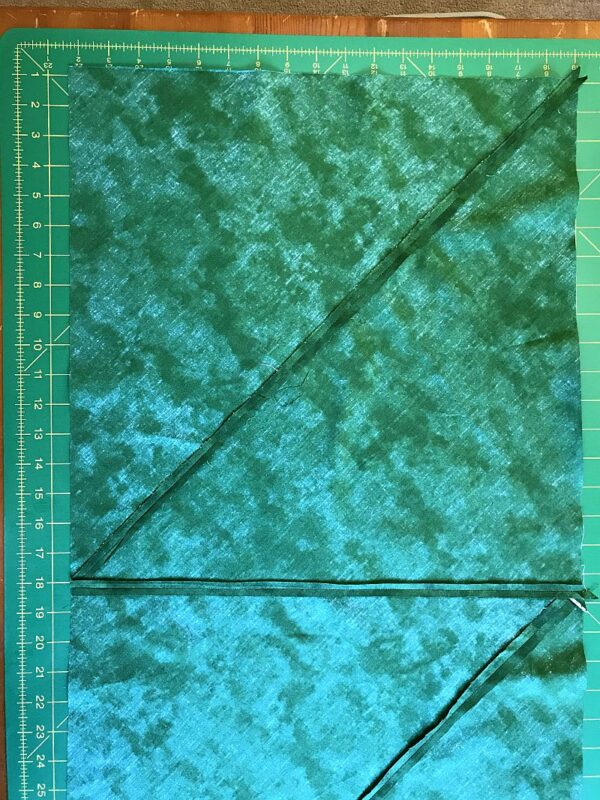
Sew the HSTs side by side and press the seam open.
Here is a picture of the back. Can you see the angle of the grain of fabric?
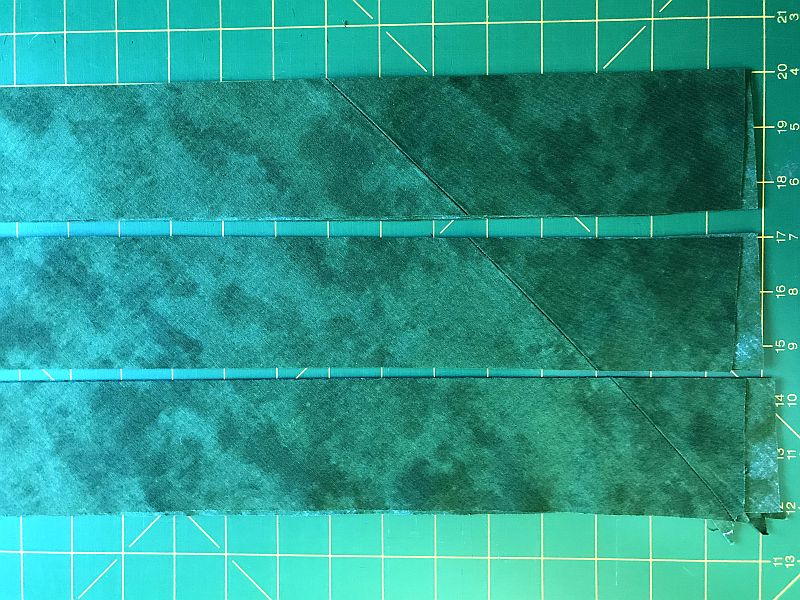
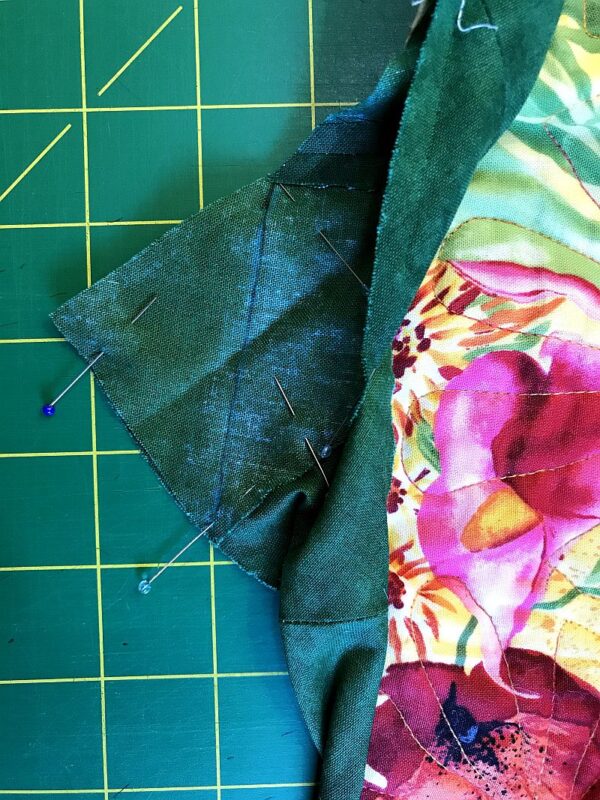
Cut this strip every 2-1/2″ inches and sew the strips together, mitering the join.
Sew the binding to the edge of the quilt. Because of the stretch in the bias binding, it should go around the curve without a problem. Hand-stitch the edges and join the binding at an angle.
And you are done! Enjoy!
Please add moc.hsadparcs@sirk to your contacts list to make sure you get the confirmation message. Drag the confirmation message from the Promotion tab to the Primary tab if you use Gmail.
If you are already a subscriber, it’s okay to fill out this form. You won’t be put on the mailing list twice.


Pretty quilt and thanks for the binding tips!
What a great idea to finish a tutorial! I love the finished look – never thought about how pretty a rounded corner could be. Using the plate off the wall – lol it’s genius! Thanks for the tutorial.
Your rounded corners will look very nice on this quilt! Thanks for sharing!
Such a pretty finish! Thanks for sharing your binding tips!
What a great way to spiff up a UFO by rounding the corners. Love it! Thanks for sharing!
Great project! Thanks for sharing your binding technique.
Love the tutorial on the making of bias binding. The photos sure help. Great idea to round the corners of the quilt.
Beautiful finish! I too made a bias binding for my project.
What a great project (UFO); adding the bias binding was necessary with those rounded corners. BTW, the corners make the quilt. Thanks for the tips.
Congratulations on your finish! The rounded corners look perfect.
Wonderful project and finish. Thanks so much for sharing the process.
Great quilt! Love the rounded corners. Thank you for the tips.
Rounded corners look just right on this quilt. Good tips, too. Thanks!
I love rounded quilts but I don’t like making bias binding, lol! I will need to look at your tutorial next time I attempt it! Thanks for sharing! It turned out just beautiful! xx
Well done on your finish, the rounded corners look great! I haven’t seen bias binding made quite like that before – thanks for sharing your technique!