I am delighted to present My Happy Place row in the Seams to Be Sew Row Along Blog Hop. It is my garden! It might be dormant this winter but those three-dimensional flowers will bob and smile until the new season begins.
I hope you have been reading the tutorials this past month because this row is going to use most of them! If you need help, go back to the first tutorial and just keep reading. I do have a video, but I did it in 2008 so it doesn’t specifically reference this pattern. But you might find it helpful.
This row finishes 12″ x 30″. It is made in three sections, each section having a three-dimensional element. Read through the directions before you begin, and practice on scrap fabric if you don’t understand something. Like any new technique, you probably won’t do it perfectly the first time. A 1/4″ seam allowance is assumed.
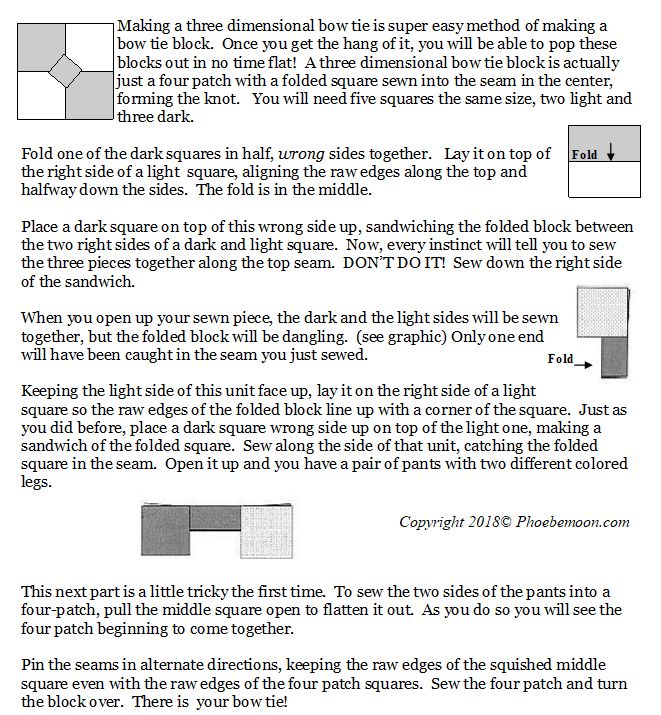
Three-Dimensional Element: the Bow Tie
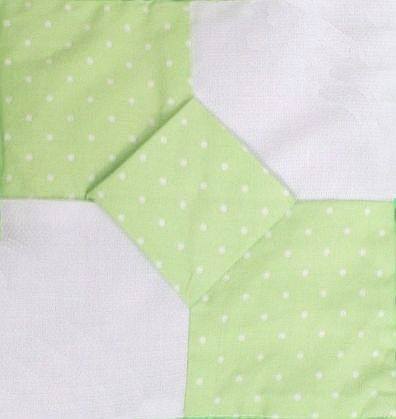
When I started the tutorials, I started with the three-dimensional bow tie above because it really is the easiest to understand. Can you see how the knot in the center of the block above is actually a dimensional element? It’s a square block, folded and inserted into the seam of a four-patch.
A three-dimensional square-in-a-square is made using the same method as a three-dimensional bow tie with the exception of the size of the center square, which is much larger. You will use this in the Long Tall Sally block below. I demonstrated this technique in a video in 2008, so it might help to watch it first at https://www.youtube.com/watch?v=DvXUvKIzYZY&t=51s
The size of the center square (the one squished in the middle) is cut to the same size as the unfinished size of the final block. In other words, if you are using 1-1/2″ squares for your four-patch, your unfinished block would measure 2-1/2″ square so your square-that-will-be-squished should be cut 2-1/2″.
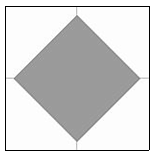
When you sew your four-patch together, the center square will NOT reach to the end of the block. It stops 1/4″ from the edge, giving you a perfect seam allowance.
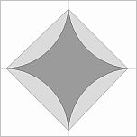
Did you notice that when you made your square-in-a-square block, the edges of the center square were on the bias? Roll them in toward the center to create a curved effect. The Big Flower, which is the first block we are making, uses this technique in the center of the block. I also used it in the Pumpkin Spice Latte Mystery.
So, let’s get started!
The Big Flower
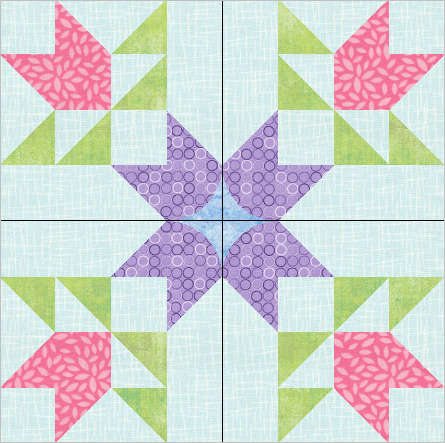
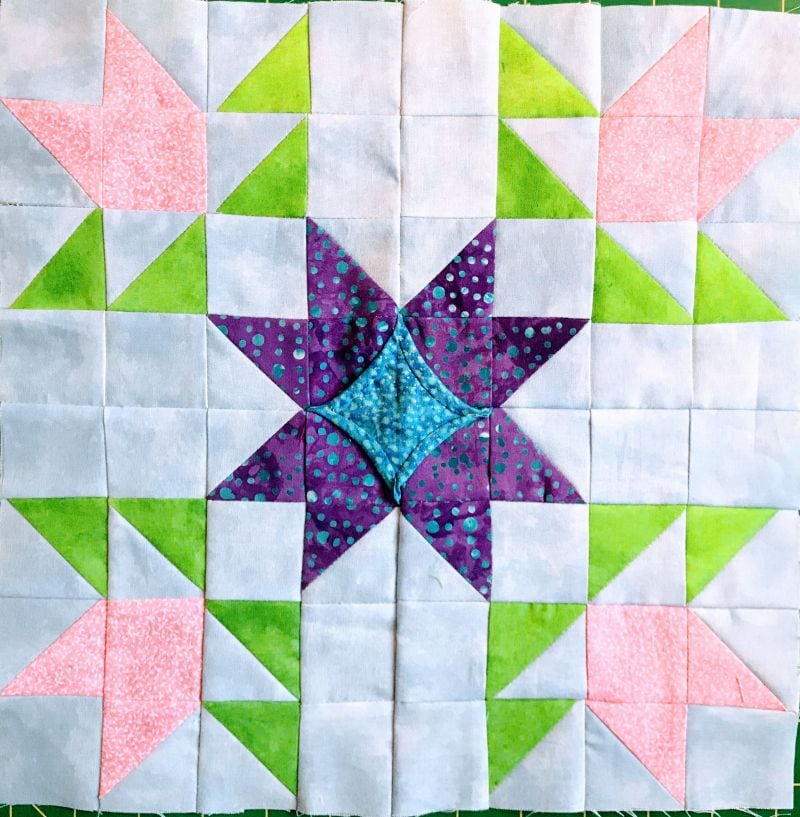
The big flower is actually made of four blocks with a three-dimensional element in the center.
Assemble:
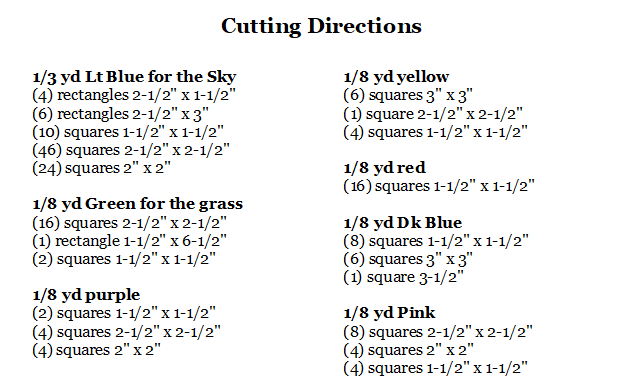
(24) lt blue 2″ x 2″ squares
(16) lt blue 2-1/2″ x 2-1/2″ squares
(4) pink 2-1/2″ x 2-1/2″ squares
(4) pink 2″ x 2″ squares
(4) purple 2-1/2″ x 2-1/2″ squares
(4) purple 2″ x 2″ squares
(8) green 2-1/2″ x 2-1/2″ squares
(1) dark blue 3-1/2″ square
I’m sure you noticed the Half Square Triangle blocks in these squares. Here is the method I use to make them, but if you prefer another method, use that one!
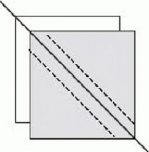
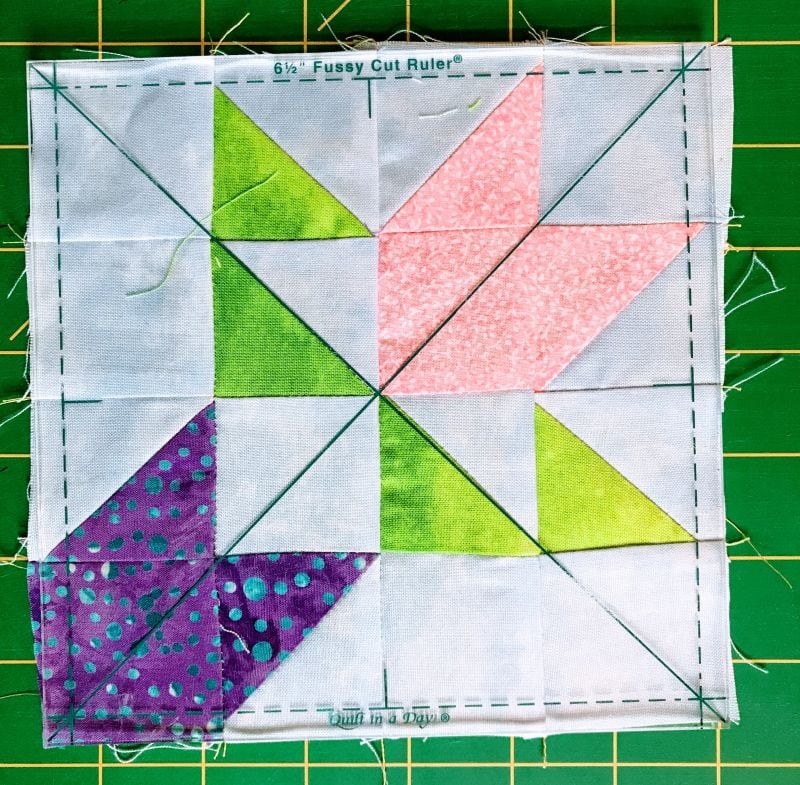
Place a 2-1/2″ dark square right sides together with a 2-1/2″ light square. Draw a diagonal line on the back of the top square. Sew 1/4″ on both sides of that diagonal line. Cut on the line and press the seam allowance to the dark. Square up the block to 2″. Don’t skip this step!
Using this method, create:
(8) pink and blue HSTs
(8) purple and blue HSTs
(16) green and blue HSTs
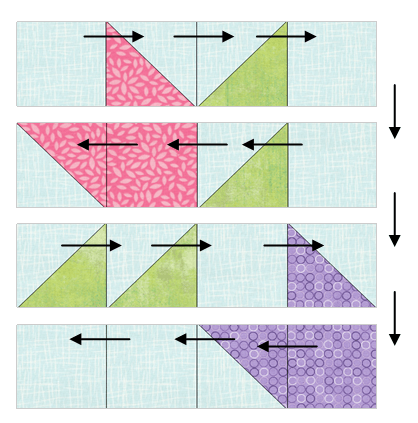
Use these HST blocks and the squares you cut previously to make (4) rows of each row as shown. Press as directed by the arrows. This will help you keep your seams facing opposite directions when you sew the rows together. Create four blocks as shown above. Press and square up to 6-1/2″ if necessary.
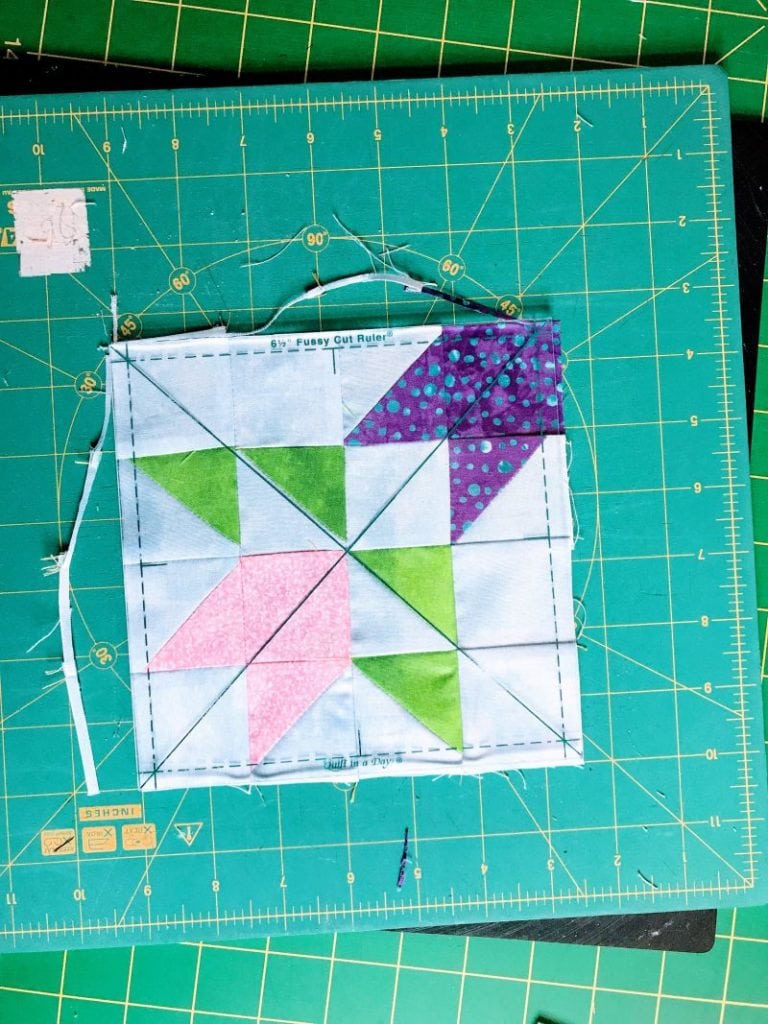
I am a fan of the Quilt in a Day Fussy Cut Ruler Set. As you can see below, it fits perfectly on the block, and there are lines marking both diagonals as well as the seam allowance.
If you have a Rotating Mat, you will be quite pleased with yourself. It makes squaring up a block much easier when you can just rotate the mat instead of picking up the block, turning and repositioning it.
To create the three-dimensional effect of the center, you need to pretend that the four blocks you just made are the four squares used to make a bow tie block.
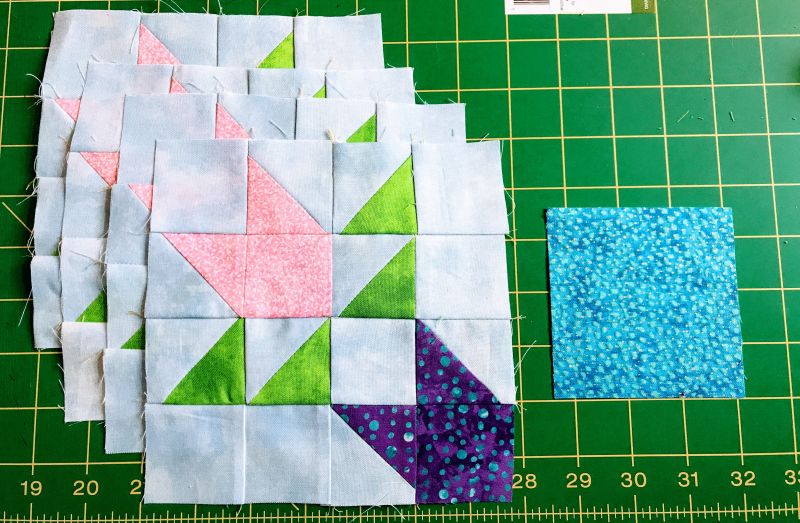
Lay the blocks out with all the purple squares in the middle so you can properly position the 3-1/2″ dark blue square. Sew the four blocks into a pair of pants…
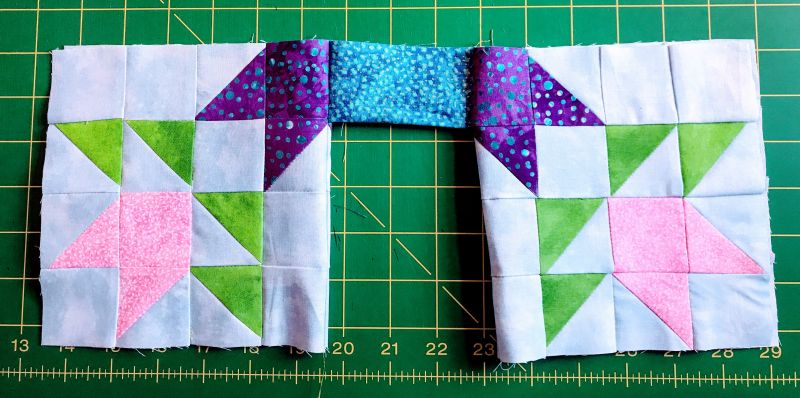
then open them up and sew the center seam, just like you did with the bow tie block. Take your time and use pins to keep everything straight. If you get a wedgie…
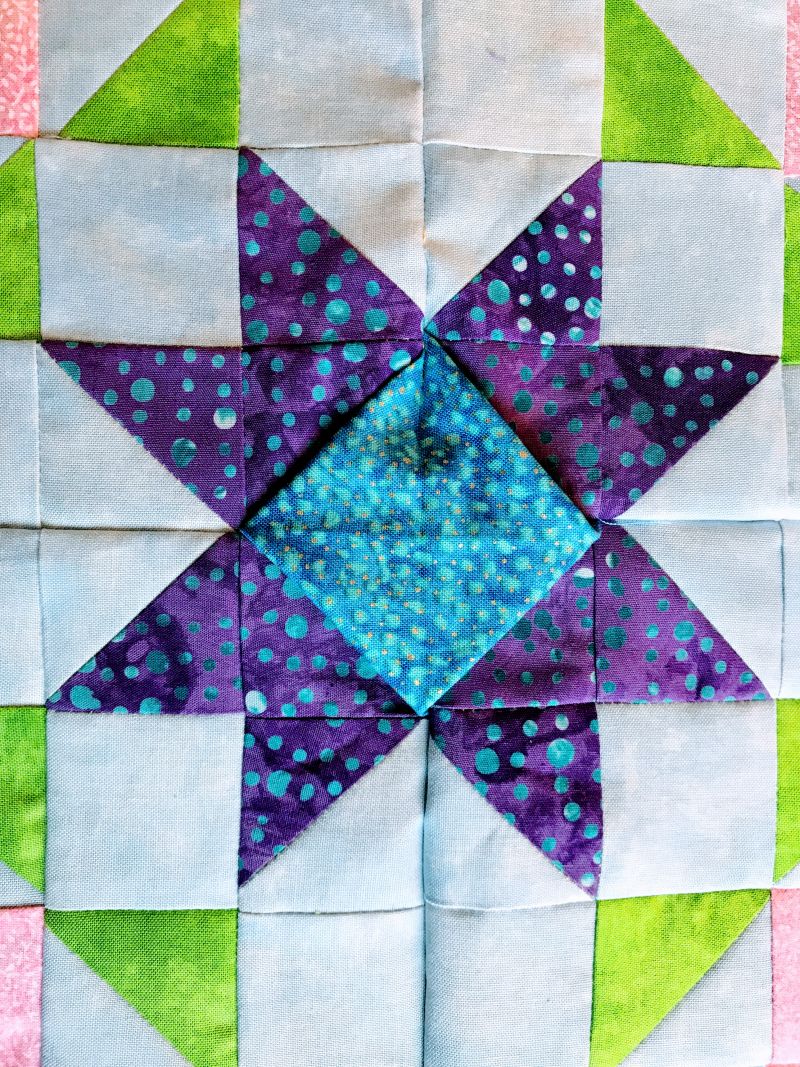
pick it out and reposition it, just like you would do in real life:-))
Roll the bias edges into the center to create the curve and hand sew them in place to keep the dimensional element.
The Butterflies
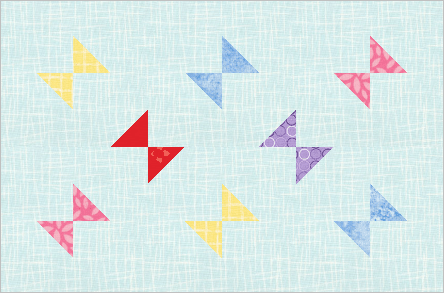
This is NOT a three-dimensional element. The bigger block is made from smaller pieced blocks.
Assemble:
(24) lt blue squares, 2-1/2″ x 2-1/2″
(16) 1-1/2″ x 1-1/2″ squares: (4) pink, (2) red, (4) yellow, (4) dark blue and (2) purple
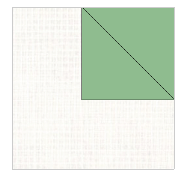
Draw a diagonal line in pencil on the back of the small colored squares. Place a colored square right sides together in one corner of a light blue square so that the pencil line connects the two sides as shown to the left. Stitch using a scant 1/4″ or a 3/16″ seam. Make (16.)
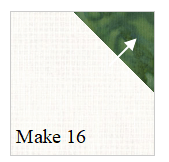
Flip the small square over the seam and press to the corner. The edges should match. Trim the excess on the underside.
In the picture below, I am using the edge of the Fussy Cut Ruler to cut off the excess, leaving a 1/4″ seam. That tiny center line makes it easy to position the ruler properly.
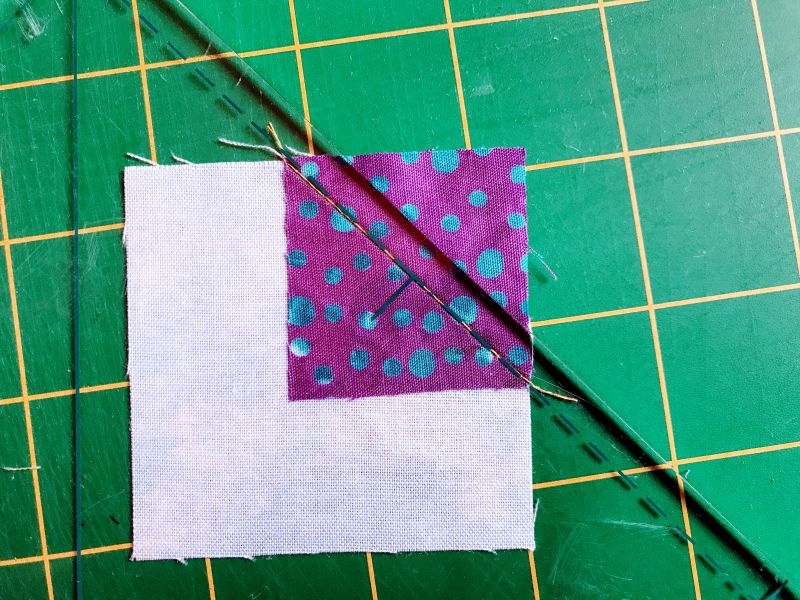
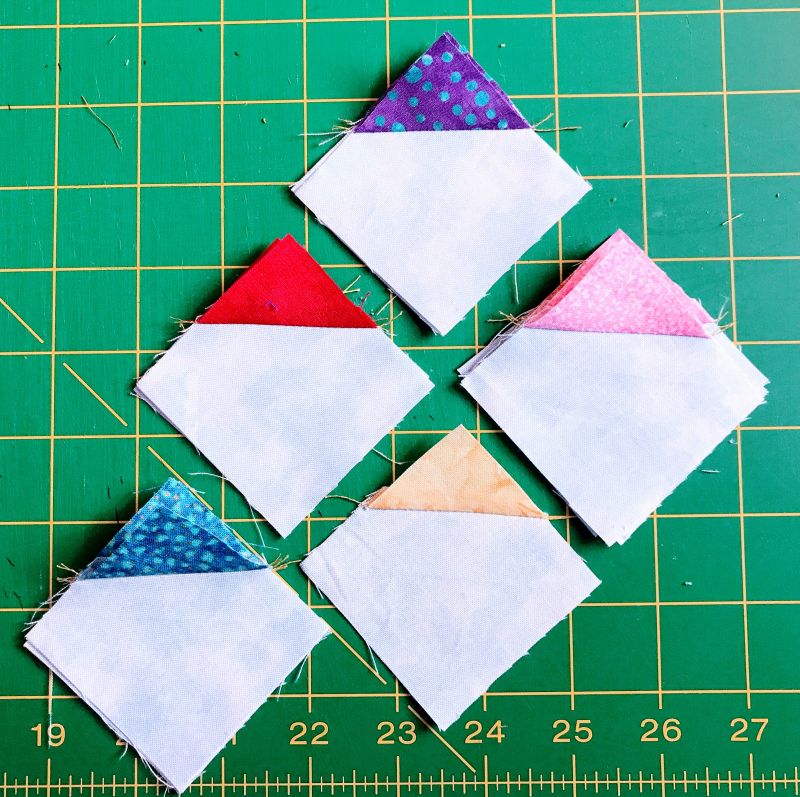
Using those blocks and the remaining (8) light blue 2-1/2″ x 2-1/2″ squares, create the butterfly design shown above. Remember to press the seams of the odd rows to the right and the seams of the even rows to the left. This will help you keep your seams facing opposite directions when you sew the rows together. Press the seam rows down toward the bottom of the block.
The 3D Pinwheel Flowers
Assemble:
(6) yellow 3″ x 3″ squares
(6) green 2-1/2″ x 2-1/2″ squares
(6) lt blue 2-1/2″ x 2-1/2″ squares
Using the same method of making HST blocks as above, make (12) dk blue and yellow Half Square Triangle blocks.
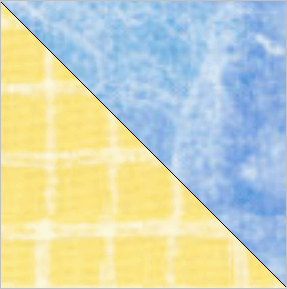
Press them in half along the seam.
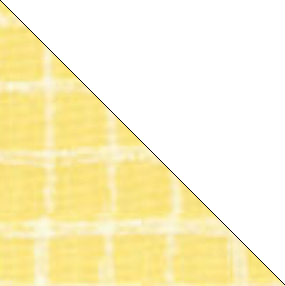
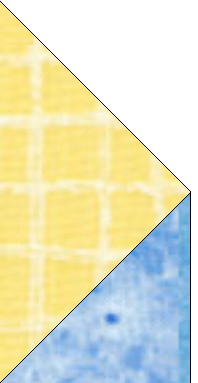
Fold back one corner …and place them on top of either a lt blue or a green 2-1/2″ x 2-1/2″ square, aligning the raw edges. Stay stitch the edges.
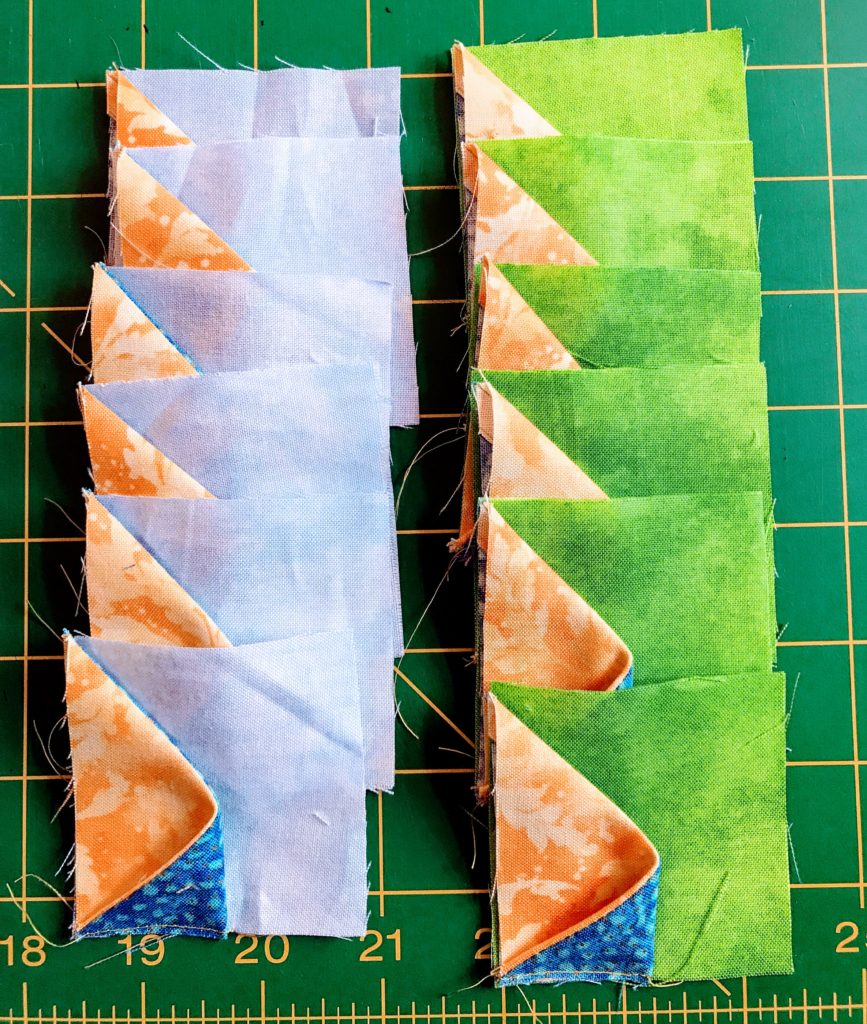
Create four pinwheel blocks. Press the top seams to the right and the bottom seams to the left. Press the block seams down to the bottom of the block. Be gentle, you don’t want to squish the three-dimensional elements.
Sew this row to the bottom of the butterfly row.

The Long Tall Sally Flower
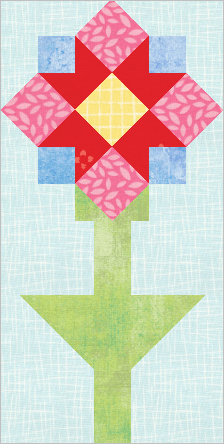
Assemble:
(4) lt blue rectangles 2-1/2″ x 1-1/2″
(10) lt blue squares 1-1/2″ x 1-1/2″
(1) yellow square 2-1/2″ x 2-1/2″
(4) dk blue squares 1-1/2″ x 1-1/2″
(2) green squares 1-1/2″ x 1-1/2″
(12) red squares 1-1/2″ x 1-1/2″
(4) pink squares 2-1/2″ x 2-1/2″
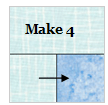
Using the (4) lt blue 1-1/2″ x 2-1/2″ rectangles, (4) lt blue 1-1/2″ x 1-1/2″ squares and (4) dk blue 1-1/2″ squares, create (4) blocks like this one. Press to the dark. These are the 2-1/2″ square corners of the flower.
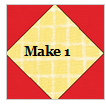
The flower part of the Long Tall Sally block is created from square-in-a-square blocks as shown in the directions on Page 3. Using the (1) 2-1/2″ yellow square and (4) of the
1-1/2″ red squares, make (1) block with the yellow in the center as shown.
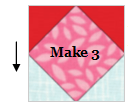
Using (3) 2-1/2″ pink squares, (6) 1-1/2″ red squares and (6) 1-1/2″ light blue squares, make (3) blocks with the pink in the center as shown.
Notice that when you make the “pair of pants”, one leg will be blue squares and the other will be red squares.
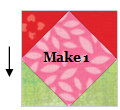
Using (1) 2-1/2″ pink square, (2) 1-1/2″ red squares and (2) 1-1/2″ green squares, make (1) block with the pink in the center as shown.
Notice that when you make the “pair of pants”, one leg will be green squares and the other will be red squares.
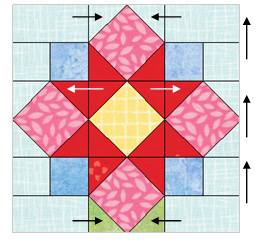
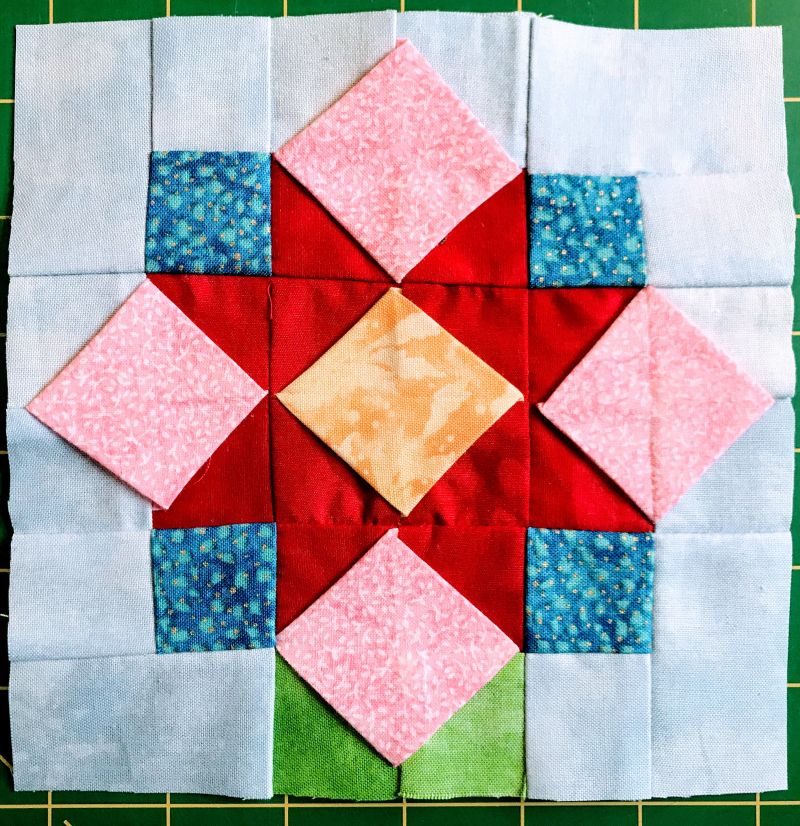
You now have the pieces to put the head of the flower together as shown. Sew the rows first, then sew the rows into the block shown. Use pins to keep the intersections straight. Press gently and try to keep the squares dimensional. It should measure 6-1/2″ square.
Long Tall Sally Stem
Assemble:
(6) lt blue rectangles 2-1/2″ x 3″
(2) green squares 2-1/2″ x 2-1/2″
(1) green rectangle 6-1/2″ x 1-1/2″
Just like you did with the butterflies, draw a diagonal line in pencil on the back of the 2-1/2″ green squares. Place it right sides together in one corner of a light blue square so that the pencil line connects the two sides as shown. Notice that one diagonal line is drawn right to left and the other is drawn left to right.

Stitch on the line. Flip the square over the seam and press to the corner. The edges should match. Trim the excess on the underside. Press to the green.
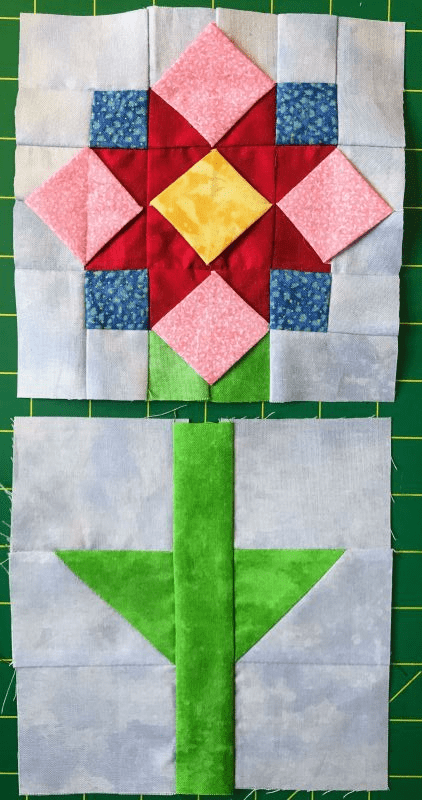
Sew this block between two 2-1/2″ x 3″ lt blue rectangles as shown. Make (2) sets. Sew the 6-1/2″ x 1-1/2″ green rectangle between these two blocks and you have made a stem. Square up to 6-1/2″ x 6-1/2″ if necessary.

Sew the stem to the bottom of the flower you made above.
Putting it all together
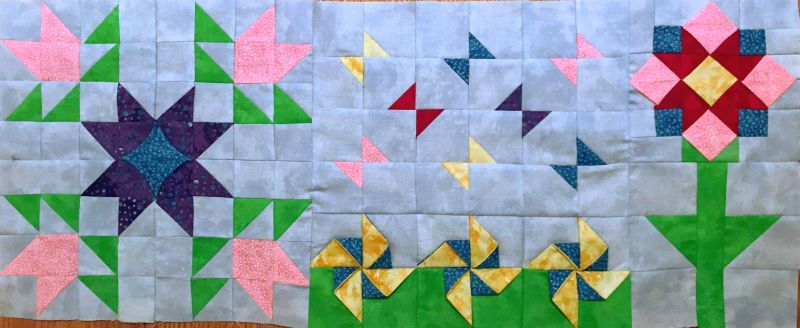
You are in the home stretch now. All you have to do is gather the three blocks that you made and sew them in a row! Press gently. Your row should measure 12″ x 30″.
Please add kris@scrapdash.com to your contacts list to make sure you get the confirmation message. Drag the confirmation message from the Promotion tab to the Primary tab if you use Gmail.
If you are already a subscriber, it’s okay to fill out this form. You won’t be put on the mailing list twice.
Have another tip to offer? Send it to me or reply below and I will add it here.
Don’t forget to sign up for the newsletter! Once a week, I send updates on quilt-related information I have found while wandering the web. This might be an inspiring article, a tip or tutorial I have discovered (or written), and occasionally exclusive offers & discounts as well as immediate access to the secret page of free patterns, guides, and printables. You can follow my page on Facebook, or join the Make Believe Quilters group, too.


